Monday, August 25, 2014
Applesauce Oatmeal Bars (Secret Recipe Club)
Yay, Secret Recipe Club time! This month I was assigned A Kitchen Hoor's Adventures by Christie and I spent many hours perusing her blog trying to narrow down what to make. Christie pretty much grew up in the kitchen and describes it as her zen place. Her recipes are fun and creative with a healthy twist, which suits me perfectly!
I was in the mood for something sweet this month, and luckily Christie's blog didn't disappoint. She has tons of amazing recipes including some seriously impressive macarons with classic flavour combinations like Pistachio and Salted Caramel as well as some a little more out there. Anyone for a Pepperoni Pizza Macaron?!
In the end I was really tempted by her Cranberry Pumpkin Breakfast Cookies (and I have bookmarked them to try later), but I went with the Applesauce Oatmeal Bars. I love a good apple slice and have made something similar before using apple pieces. This version intrigued me because it used pureed apples instead and even better, I had everything on hand to make it immediately.
I made a few small changes like making my own apple sauce, replacing the butter with coconut oil to make it dairy free and using dextrose and rice malt syrup to lower the fructose content.
And how did they taste? Delicious! Like all the best bits of an apple crumble but in bar form.They disappeared in record time, and in fact I was lucky to get a photo! My boys loved it for afternoon tea and then breakfast the next morning, but it would actually work beautifully as a dessert, served warm with lots of custard.
Applesauce Oatmeal Bars
Slightly adapted from A Kitchen Hoor's Adventures
3 cups apple puree (see note)
2 cups old-fashioned oats
2 cups wholemeal plain flour
170 g liquid coconut oil
1/2 cup dextrose
2 tbs rice malt syrup
1 teaspoon vanilla extract
1 teaspoon ground cinnamon
1/2 teaspoon ground ginger
1/4 teaspoon ground allspice
1/4 teaspoon ground cloves
1/2 teaspoon bicarb soda
1/4 teaspoon salt
1/2 cup walnuts, chopped
Preheat oven to 190 degrees Celsius. Line the base and sides of a 9 x 13 inch baking dish with baking paper and set aside.
Combine oats, flour, rice malt syrup, vanilla extract, spices, bicarb soda, salt and butter. Use a fork to combine the mixture until it resembles coarse breadcrumbs. It will appear quite dry but it should clump together when sqeezed.
Press 2/3 of the mix unto the bottom of the prepared tray. Spread on the apple puree then sprinkle the walnuts and top with the remaining 1/3 oat mixture.
Bake for 30 to 35 minutes or until golden brown on top. Remove from the oven and leave to cool in the tin for 20 minutes before carefully lifting out of the tin using the baking paper. It will be easier to slice when completely cool.
* Note - Christie used bought apple sauce in her recipe and includes instructions for draining it. I made my own apple puree by peeling, coring and slicing 6 large granny smith apples, and steaming them until tender. Then puree in a blender or food processor until smooth and allow to cool before using.
Monday, August 11, 2014
Health(ier) Chocolate Brownies
I don't know if there's such a thing as a healthy brownie. But there definitely some brownies that are healthier than others. I got this recipe from my friend Alison and they are in her words 'to die for.'
They have that rich chocolate flavour, fudgy interior and slightly crackly top. They also have no grains, no refined sugar, no dairy and if you leave the nuts off the top, are nut-free and therefore the perfect lunch-box treat.
Keep in mind though that although there is no refined sugar they are packed with fructose from the dates. We eat low fructose around here so this will be a very occasional treat but they were so very good.
I made mine in the Thermomix but any food processor will do.
If you start now you could be enjoying these for afternoon tea! :)
Health(ier) Chocolate Brownies
Slightly adapted from Paging Fun Mums
200 g dark chocolate (85% cocoa)
1/2 ts bicarbonate of soda
200 g pitted medjool dates
3 eggs
1/4 cup coconut oil, melted
1 tbs of vanilla extract
200 g raw almonds, roughly chopped
Preheat oven to 180 degrees Celsius / 160 degrees fan-forced. Line a square baking dish (20cm x 20cm is good) with baking paper and set aside.
Place the chocolate and bicarb soda into a food processor and pulse until they have the texture of coarse sand. Add in the dates and pulse until combined.
Add the eggs, coconut oil and vanilla extract and process until smooth.
Pour the mixture into the prepared tin and bake at 180 degrees Celsius for 15 minutes.
Open the oven and quickly scatter the chopped almonds over the top of the brownie and push in a little with the back of a spoon. Bake for a further 15 minutes.
Remove from the oven and leave to cool for one hour.
Slice into at least 16 squares.
Saturday, August 9, 2014
Dark Chocolate Gelato (Dairy free, Coconut free, Nut free)
I just sat my first exam in 13 years yesterday. It was for anatomy and physiology and seeing I have no background in science it has been a little out of my comfort zone. I actually feel really confident that I have passed but the perfectionist in me keeps going over and over what I could have done better. So annoying!
In saying that though I am a perfectionist about most things and have been known to throw a bit of a hissy fit when things don't work out the way I want them to. Take this blog for example, I almost didn't post this recipe because I couldn't get 'the perfect photo.'
But this one really is too good not to share. I mean how often do you find an ice cream recipe that not only tastes amazing but is dairy free, coconut free and nut free?
Noah is now 9 months old which means I have been dairy free for almost 9 months as well!
If you'd asked me previously whether I ever thought I could give up dairy I would have laughed. I LOVE my dairy ... butter, cheese and especially ice cream. But it has been surprisingly easy and I don't really miss it all that much. Probably it was easier to start with because I was doing it for Noah (no one wants their baby crying with pain and reflux) but I actually feel really well and have lost the baby weight so much faster than before. Win-win.
I make a brilliant dairy-free white sauce which means we can still enjoy lasagne and tuna mornay. I've been happily drinking rice milk and now that I have the Thermomix I am making lots of different milks. But I haven't had as much luck with dairy free ice cream. Most of the ones I've seen and tried are based around coconut cream. I don't mind them but most of the time I don't want my ice cream to taste like coconut!
That's why I was so excited to see this gelato recipe from The Paleo Mom. It is dairy free but without the usual coconut or almond milks to take away from the flavour of the chocolate. I tweaked the recipe a little by adding some rice malt syrup (which makes it no longer paleo seeing rice is a grain) but I wanted the kids to enjoy it and it would have been very intensely chocolatey otherwise. I also did the first few steps in the Thermomix in order to cook the egg yolks and will include those instructions as well.
This makes the most delicious, darkly intense chocolate gelato. My kids loved it too but it's not your typical chocolate ice cream!
Dark Chocolate Gelato
Adapted from The Paleo Mom
300g dark chocolate (I used half each of Lindt 70% and 85%)
200ml hot water
50g rice malt syrup
1 ½ cups ice water
6 egg yolks
2 tsp vanilla extract
pinch of salt
Roughly chop the chocolate, add the rice malt syrup and pour over the 1 cup of hot water. Stir gently until completely combined.
Mix the egg yolks together in a small bowl. To temper the yolks add a small ladle of the hot chocolate mixture to the yolks and stir continuously. Keep stirring and add a second ladle. Pour the egg and chocolate mixture back into the rest of the chocolate and mix thoroughly.
Place the chocolate mixture in a blender. Add the vanilla and salt. With the blender on low speed, add the 1 1/2 cups ice water a little at a time, blending between each addition, or just drizzle the ice water through lid by removing the insert.
Place the chocolate mixture in an ice cream maker and churn according to the manufacturer’s instructions. Once it’s soft-serve consistency, place the gelato into a freezer-safe container and freezer for about 2 hours to get a perfect scoopable consistency.
If freezing for longer than that, remove from the freezer and place in the fridge for about an hour before you serve, or 20 minutes on the bench.
Thermomix instructions - break the chocolate into pieces, pour over the hot water and melt for 2-3 minutes/50 degrees/speed 3. Scrape down the sides as needed. Add the rice malt syrup, vanilla and salt and mix 3 sec/speed 4. Break up the egg yolks then add to the mixing bowl and cook for 3 minutes/90 degrees/speed 3. Leave to cool for 10 minutes. While running at speed 4, remove the measuring cup and drizzle in the ice water until well combined. Pour the mixture into a bowl and place in the fridge until completely chilled then follow instructions above to churn and freeze.
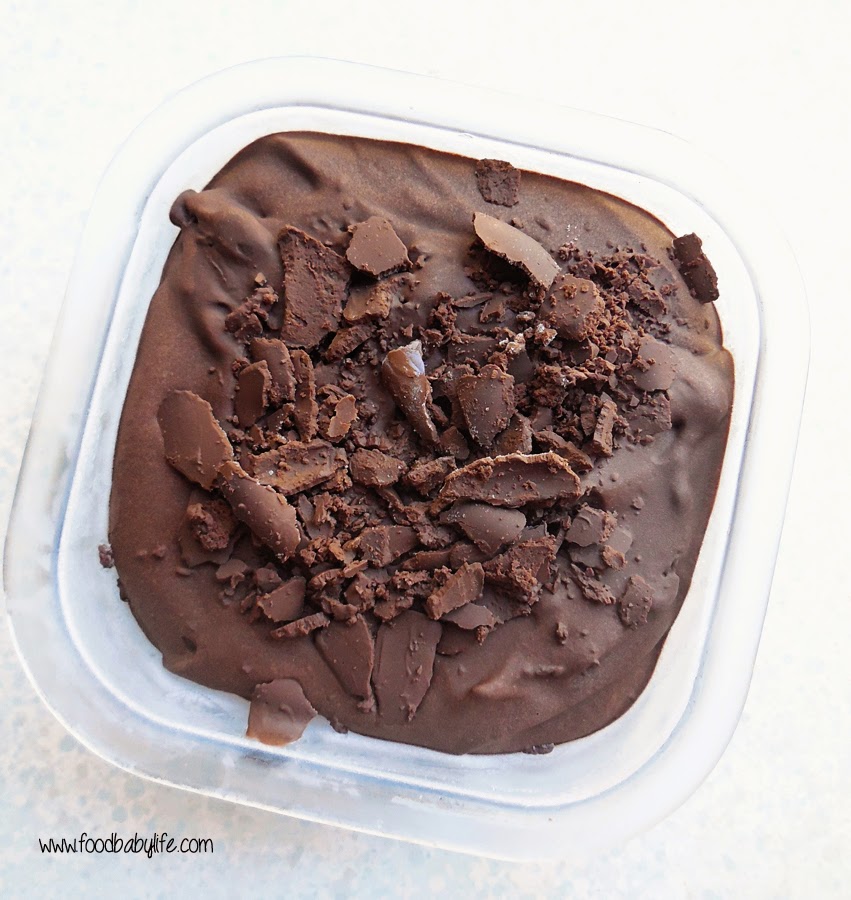
You'll notice in the top photo there are lots of yummy looking chocolate flakes on top of the gelato. This was just some of the mixture that set hard in the ice cream maker and got scraped off into shards after pouring out the gelato. Not sure why that happened but it gave a lovely texture.
Like most homemade ice creams this really is best served pretty much straight away. So if you can serve it after the 2 hours in the freezer that would be ideal.
Friday, August 1, 2014
Spelt Cinnamon Scrolls (Thermomix)
So after much (much, much) discussion we finally invested in a Thermomix! And I do say invested because they cost A LOT. We've only had it for a couple of weeks and I am seriously wishing I had bought one years ago.
I already make most of what we eat from scratch but even with all the kitchen appliances I have I still couldn't make a decent risotto, non-dairy milk, nut butter, ground almonds or rice flour. The plan with the Thermomix is to make virtually everything from scratch, meaning we not only save on our grocery bill but we eat even more healthily than we do now.
In these few short weeks I have made vegetable stock, oat milk, rice/almond milk, pasta sauce, multiple batches of baby food, soups, custard, sorbet, risottos, nut butter, rice pudding, porridge and much more. On an average day I would use it at least 4 times and at the end of the day the kitchen is clean, no more pots and pans piled up on the bench because they don't fit in the dishwasher.
I will be posting lots of thermomix recipes as time goes on but I will always post non-thermomix instructions as well. I know these machines aren't for everyone. And one thing I have made clear is that I will still be teaching my boys to cook the old-fashioned way as much as possible!
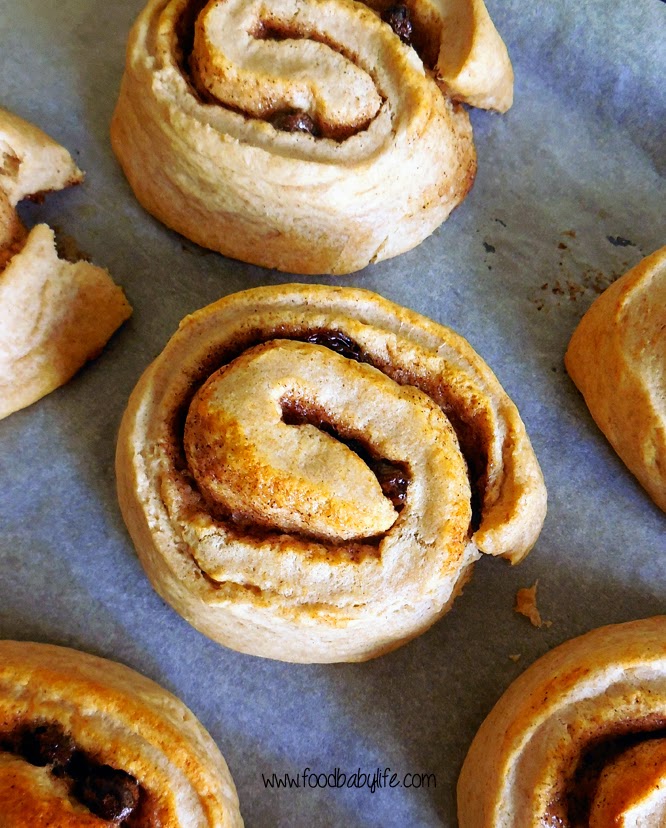
So for the very first thermie recipe for the blog I have chosen these delicious Spelt Cinnamon Scrolls. They were SO quick to whip up that I was able to make them on a study day (when I normally don't cook at all during the day) so they were ready for the big boys straight after school and kindy. They were a big hit with my kids. And looking at the picture above I've just realised someone's sneaky little fingers had gone and pinched the edge of one of them while I wasn't looking! Can you spot it?
Spelt Cinnamon Scrolls
Adapted from Be a Fun Mum
Dough:
300g white spelt flour (2 1/3 cups)
1tbs baking powder
60g butter, cut into chunks
30g coconut oil, solid
150g milk (2/3 cup) (I used homemade oat milk)
Filling:
30g butter
30g coconut oil, solid
40g dextrose (or 1/4 cup sugar)
1 tsp cinnamon
¼ cup sultanas (optional)
To make the dough:
Pre-heat the oven to 200°C and line a baking tray with baking paper.
Set the scale to 0 then add the baking powder and enough flour to make up 300g, then the butter and coconut oil and mix for 5 sec on speed 5 until it resembles fine breadcrumbs.
Place a small jug or bowl on the top of the Thermomix. Set the scale to 0 and then pour in 150 grams of milk. Remove the jug. Set Thermomix to locked position and knead for 1.5 minutes on interval setting. While it is kneading, gradually pour milk through the MC hole until a dough is formed. (mine took an extra 30 seconds or so to come together.
Tip the dough onto to a lightly floured bench, ThermoMat or baking paper. Roll out the dough into a rectangle approximately 25 x 40cm and ½ cm thick or about as big as your tray.
To make the filling:
Place butter, coconut oil, dextrose and cinnamon into the mixing bowl and mix for 10 seconds on speed 4.
Spread the mixture evenly over the dough rectangle and sprinkle over the sultanas if you’re using them.
Roll up the dough from either the long side or the short side of the rectangle (short side makes fewer but more scrolly scrolls and long side makes lots of smaller scrolls).
Using a sharp knife, cut rolled dough into pieces approximately 3cm wide. Place the dough pieces on your prepared tray.
Bake for around 12-15 minutes or until golden brown. Remove from the oven and allow to cool slightly before eating.
If you don’t have a Thermomix, make the dough in a large bowl. Rub the butter into the flour and baking powder until it forms breadcrumbs. Pour in the milk and use a butter knife to gradually bring the ingredients together and form a dough. Follow above instructions to roll out the dough. Beat together the filling ingredients in small bowl and again, follow the instructions above for rolling, slicing and baking.
Subscribe to:
Posts (Atom)