Showing posts with label Afternoon Tea. Show all posts

Tuesday, September 11, 2018

Gluten-free Banana Muffins with Cinnamon and Ginger

gluten free dairy free banana muffins with doTERRA cinnamon and ginger essential oils from www.mywholefoodfamily.com

Anyone for afternoon tea? 


We love bananas at our place and always buy in bulk when we can.

Last week my hubby grabbed a 10kg box and of course, they all got ripe at once!

So I've been baking over the past few days and the rest are peeled and stashed in the freezer ready for smoothies or homemade ice cream.

And just FYI the same essential oils in this recipe whizzed up with frozen bananas and some coconut cream makes the most DIVINE ice cream!

GLUTEN FREE BANANA MUFFINS
with Cinnamon and Ginger essential oils

4 very ripe bananas (mine weighed 320g peeled)
2 large eggs
3 tbs liquid coconut oil
2 tbs coconut sugar
1 ts vanilla extract
1 cup gluten-free self-raising flour
1 drop Cinnamon Bark essential oil
2 drops Ginger essential oil

Preheat the oven to 160 degrees fan-forced.

Line a 12 cup muffin tray with paper liners or lay out some silicone muffin cases on a baking tray.

In a blender or Thermomix beat together the bananas, eggs, coconut sugar, coconut oil, vanilla and essential oils until smooth.

Fold through the flour until just combined.

Spoon mixture into prepared tin and bake for 15-18 minutes or until cooked through (the top will spring back when pressed lightly with your finger).

Cool on a wire rack. Makes 12-15. Great frozen for lunchboxes.

There are an incredible 37 doTERRA essential oils that can be used to flavour your food. I've used Cinnamon and Ginger here but the only limit is your imagination!


*I only use and recommend doTERRA essential oils. Click here for a quick guide to essential oils, doTERRA and how you can get your own (no matter where you are in the world!)


Friday, March 16, 2018

Ginger Oat Slice


I've come home from doTERRA's Australia/NZ Convention in Sydney this past weekend with a full heart, a mind bursting with possibilities and ... a chopping board! 

There was a lot of merchandise on offer but as a foodie, I couldn't pass this up, especially as it's the perfect prop for all my oil-infused treats.

This was a super easy slice I made for the kids' afternoon tea yesterday. Basic pantry ingredients with a gorgeous ginger flavour from the ginger essential oil. I love using my oils like this - no need to worry about that bottle of ginger powder in the pantry that's long expired, or the fresh piece of ginger going soft in the fridge. #cookingwithoils

If you'd like to learn more about using essential oils in your food make sure you download the free cheat at the bottom of this post!

Ginger Oat Slice


100g melted butter
100g dried dates
1 cup rolled oats
1 cup desiccated coconut
1ts vanilla extract
Pinch salt
3 drops Ginger essential oil

Place all ingredients in the Thermomix or food processor and blitz until well combined. TMX - melt butter with dates 5 mins / 100 deg / SP 1. Add remaining ingredients and mix 10 secs / SP 8.

Press into a lined 8inch square brownie pan and place in the fridge to set. Slice into squares.

My kids LOVED this but full disclosure, I haven’t tasted it because of the gluten! (insert sad face here).


I will have to whip up a dairy and gluten free version for myself because this smelled amazing and was devoured in about 5 minutes. 

Happy cooking! 
Susan xx

Friday, February 2, 2018

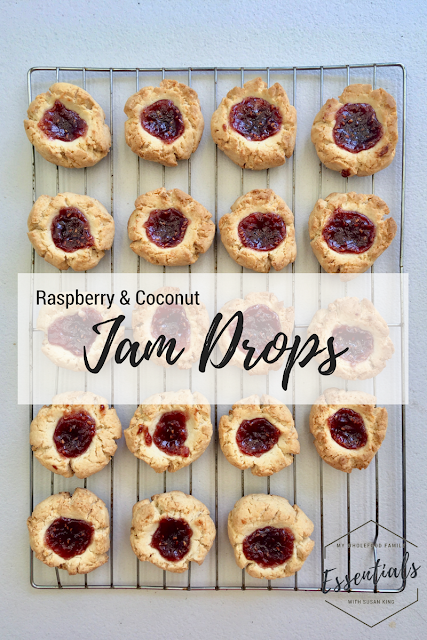
Jam Drops (free from Gluten, Dairy, Nuts and Refined Sugar)


raspberry and coconut jam drop cookies - free from gluten, nuts, dairy and refined sugar - from www.mywholefoodfamily.com

Do you have a picky eater?

I feel your pain.

My picky eater has recently gone from picky to downright ridiculous and we are left with very few foods that he finds acceptable.

He's started rejecting a few favourite recipes that I have healthified so for these, I kept it really simple.

A 'white' dough with homemade raspberry jam (that I blitzed the chia seeds for by the way so they wouldn't get spotted and rejected). The things we do!

These freeze beautifully and being nut-free they are perfect for school lunches or a quick after-school treat.

I hope your kids enjoy them as much as mine!

raspberry and coconut jam drop cookies - free from gluten, nuts, dairy and refined sugar - from www.mywholefoodfamily.com

Jam Drops
Free from gluten, dairy, nuts and refined sugar

2 cups gluten-free flour (I used Orgran brand)
1/2 cup desiccated coconut
1 ts gluten-free baking powder
pinch salt
1/3 cup rice malt syrup
1/3 cup + 1 tbs coconut oil
1 ts vanilla paste
1 egg

Jam to top (I adapted my strawberry chia jam recipe found here - note that I blitzed 1/2 cup chia seeds in the Thermomix first to make a powder and used some of that to make the jam)

Preheat oven to 180 degrees C. Line 2 baking trays with baking paper and set aside.

In a medium bowl, stir together the flour, coconut, baking powder and salt. Add all remaining ingredients (except jam) and mix until well combined. You should have a stiff dough that can be easily rolled into balls.

Roll spoonfuls of mixture into balls and place on the prepared tray (I got 20 from this batch). Use your thumb or the end of a wooden spoon to make an indent for the jam.

Place a small amount of jam on each biscuit, 1/2 ts or so.

Bake for 15 minutes or until golden brown. I rotated the trays halfway through.

All to cool on the tray for 5 minutes before placing on a wire rack to cool completely.

Makes approx 20

Jam drops are such a nostalgic treat for me. And these ones even more so because they remind of an Iced Vovo which I loved as a child! What's your favourite childhood bikkie? xx


Tuesday, November 21, 2017

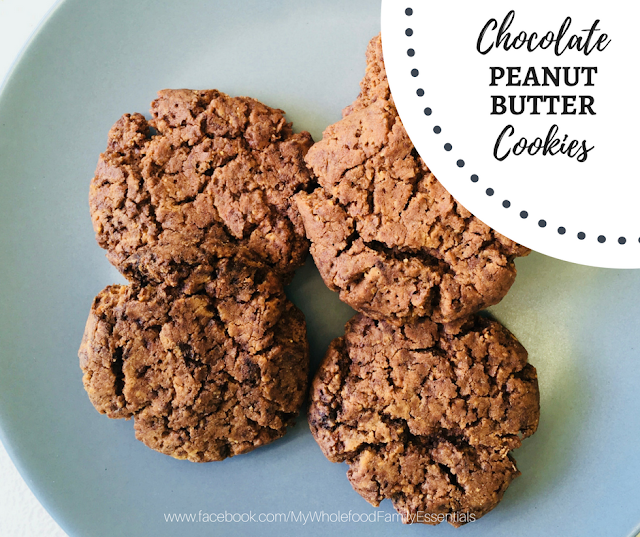
Chocolate Peanut Butter Cookies

gluten free - dairy free - sugar free - chocolate peanut butter cookies - www.mywholefoodfamily.com

Hello dear reader!

I'm back and with a delightfully simple and seriously delicious recipe to share.

As we approach the end of the term, the kids have been really running out of energy. Tempers are short and patience even shorter.

I've learnt that the best way to guarantee a peaceful time after school is to feed them well the INSTANT they walk in the door.

Such a cliche but a few of these cookies and a glass of milk (1 x cows milk, 1 x rice milk, 1 x coconut milk) and there were 3 happy little campers.

I made these yesterday and saved a couple for myself to have today, and I'm so glad I did because they were even better today! More flavour and better texture. When they're fresh they are verrrry soft and likely to fall apart. Next day, they have a good bite to them and are absolutely perfect with a cup of tea.

I've been doing a bit of experimentation with xylitol as a sweetener lately and so far I'm really impressed. Most peanut butter cookies call for equal amounts of peanut butter and sugar, which would be WAY too sweet for us. Even the 1/2 cup of xylitol was a little much and I would cut it back to 1/3 or even 1/4 cup next time.

Xylitol is a sugar alcohol made from birch with a low GI. As with all sweeteners, I use it sparingly and rotate between different types so we are not having the same thing all the time.

If you have dogs, I would suggest using an alternative sweetener as it is DEADLY for them and you wouldn't want to risk your fur-babies eating the crumbs of these cookies.

Chocolate Peanut Butter Cookies

1 cup natural peanut butter
1/2 cup xylitol
1 heaped tbs raw cacao
1 egg
1/2 ts salt
3/4 ts bicarb soda

Mix together until well combined. Roll teaspoons of mixture into balls and place on a baking tray.

Flatten the tops with a fork and bake for 10 minutes, rotating the trays halfway.

Makes 24

Have you tried xylitol? What's your favourite non-refined sugar sweetener? xx

Friday, May 26, 2017

No-bake Popcorn Slice

no bake popcorn slice - gluten free, dairy free - www.mywholefoodfamily.com

As much as I enjoy baking, when life get busy often the LAST thing I feel like doing is turning on the oven and cooking!

That's when no-bake treats are perfect and let me tell you, I'm building quite the repertoire.

Popcorn is a regular afternoon tea at our place. Air-popped popcorn + melted butter = happy kids!

I wanted to mix it up a little this week though so I decided to turn their popcorn into something a bit more special.

This is such a flexible recipe. You could replace the tahini and rice malt syrup with peanut butter and honey, or almond butter and maple syrup (I would use a less honey or maple syrup though as it would be very sweet). Use different dried fruit, replace with dark chocolate chips or just leave it out. So good!

no bake popcorn slice - gluten free, dairy free - www.mywholefoodfamily.com

No-bake Popcorn Slice

1/4 cup tahini
1/4 cup rice malt syrup
pinch salt
40g natural dried apricots or dates, roughly chopped
5 cups popped corn (around 2 tbs unpopped)

Line a square brownie pan with baking paper and set aside.

Mix tahini, syrup, salt and dates together in a large bowl.

Add the popcorn and mix well to coat.

Pour into prepared pan and press down well with your hands.

Place into the fridge to firm up a little.

Cut or tear into 16 squares.

Enjoy!

Tuesday, February 21, 2017

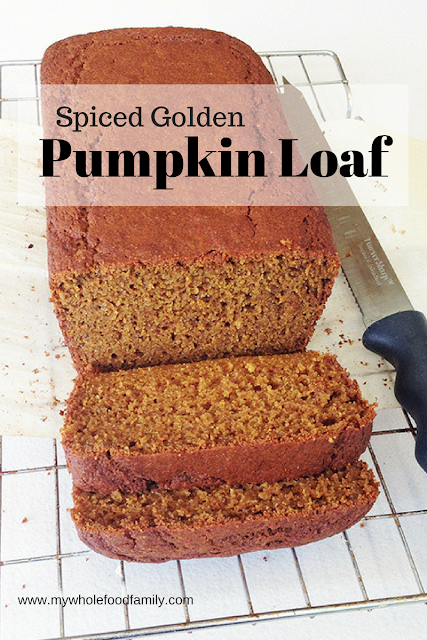
Pumpkin Loaf aka Spicy Golden Loaf

Spiced Golden Pumpkin Loaf - www.mywholefoodfamily.com

Having a child who is fussy about food is incredibly frustrating at the best of times.

And at the worst of times? It's a bit of a nightmare.

My now 6-year-old hasn't eaten a good dinner since before he was 2.

Let that fact sink in a little.

That's approximately 1500 nutritious dinners prepared lovingly by me that have NOT BEEN TOUCHED.

If we can get him to the table, he will eat plain pasta with extra virgin olive oil, homemade pizza (no sauce and topped only with cheese, olives and tinned pineapple) and takeaway fish and chips.

The list of foods he will eat is incredibly small and shrinking by the week.

We've done feeding therapy sessions with an occupational therapist and speech pathologist, and seen a GP, naturopath, dietician and psychologist.

So where does that leave us?

Well, it leaves us trying to pack in nutrition wherever and whenever we can.

At the moment breakfast is the only decent meal he will consume in a day.

It is usually a smoothie which I cram to the brim with good stuff like avocado, chia seeds, oats, yoghurt, protein powder, nut butters, berries, greens and more. Something like My Favourite Green Smoothie but with organic full cream milk.

Lunch usually comes home completely untouched so needless to say he is STARVING when he gets home.

So that leaves afternoon tea.

I try to make it a good one!

Hiding vegetables in cakes and muffins etc is not new, but it is definitely my favourite way to increase their nutrition. These have been some of favourites:

'Apple' Crumble Slice (without any apple!)
Chocolate Beetroot Cake
Pumpkin Fruit Cake
Chocolate and Zucchini Muffins
Sweet Potato Brownies

Pumpkin, zucchini, carrot, sweet potato and beetroot all work beautifully in baked goods. Add in a good unrefined sweetener and some sweet spices like cinnamon, nutmeg and vanilla and you have a delicious sweet treat that will fill them up and give them some much need veggies.

Today I had a lot of pumpkin to use up so I whipped up this pumpkin loaf cake which I am calling a 'Spicy Golden Loaf'. It is beautifully moist with lovely warm flavours of cinnamon, nutmeg, clove, ginger, orange and molasses.

A slice of this with a glass of milk will happily fill up even the fussiest tummy.

Spiced Golden Pumpkin Loaf - www.mywholefoodfamily.com


Spicy Golden Loaf

100g butter, at room temperature
100g coconut sugar
2 large eggs
1 ts vanilla extract
1 ts blackstrap molasses
zest of 1/2 orange
1 cup mashed pumpkin
1 2/3 cups wholemeal spelt flour
1 tbs baking powder
1/2 ts bicarb soda
1 ts cinnamon
1/2 ts nutmeg
1/2 ts ginger
1/4 ts cloves

Beat together the butter and coconut sugar until light and fluffy.

Add the eggs one at a time beating until smooth.

Add the pumpkin, vanilla, molasses and orange zest and mix until well combined.

Add the dry ingredients and fold through until just combined.

Pour mixture into prepared loaf pan and bake for 45-55 minutes, or until golden brown and the middle springs back when pressed gently.

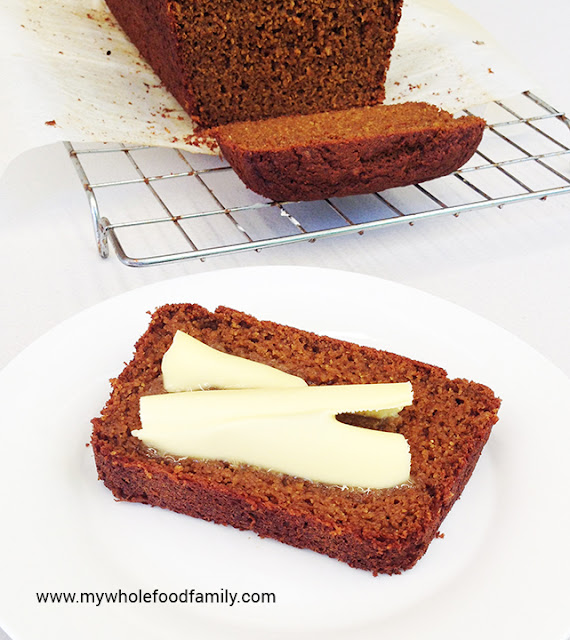
Turn out onto a wire rack to cool. Delicious warm from the oven or at room temperature. Serve with butter.

Do you have a fussy eater?

What are your strategies? Let me know below!

Susan

Friday, July 15, 2016

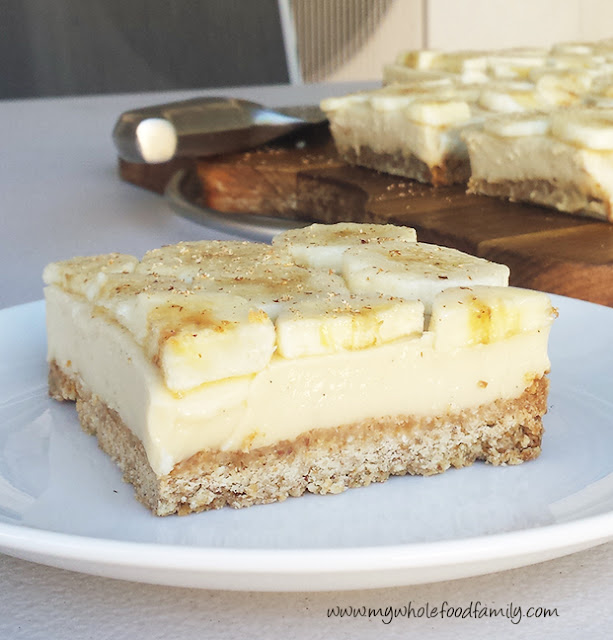
Wholefood Banana Custard Slice (Gluten and Dairy Free)


Baking desserts has always been one of my favourite things - not only because I get to eat what I make, but also because bringing out a special dessert to the table always lights people up. I love it when people love my food!

Not too many years ago I was baking regularly and going through a staggering amount of sugar. Rather than beat myself up about that I choose to see that just by making it myself I was avoiding all the artificial additives you find in processed versions of desserts.

After quitting sugar and when food intolerances became an issue for the boys and me, I was worried  I wouldn't be able to bake anymore, or at least not anything that other people would enjoy. While I've had quite a few flops I am now at a point where I can quite easily convert a recipe to be free of wheat or gluten, dairy and refined sugar without any drama.

And the results can be spectacular!

You know how you always have a soft spot for the sweets from your childhood? For me it's custard - think vanilla slice, custard tart or just plain custard with sliced bananas. So with that in mind I decided to create my own version - something that would be free of gluten, dairy and refined sugar, something that would be sweet and luscious and feel a bit special.

I had the opportunity to bake it when we had family over for morning tea during the school holidays and I had some time to play in the kitchen. I find a slice is always a crowd-pleaser and it's certainly easy to do a big tray of something and slice it up to feed everyone.


We all LOVED this slice. Perfect for morning or afternoon tea, but special enough for dessert.


Banana custard slice - gluten, dairy and refined sugar free - www.mywholefoodfamily.com

Wholefood Banana Custard Slice (Gluten and Dairy Free)

Base:

1 cup buckwheat flour
1 cup desiccated coconut
1/2 cup almond meal
2 tbs coconut sugar
150g coconut oil

Custard:

400ml coconut cream
300ml rice milk
4 egg yolks
2 tbs arrowroot flour
125g rice malt syrup
1 vanilla bean, split and scraped (save the bean for something else)
2 tbs gelatine (I use Great Lakes - the red one)

Topping:

3 bananas, thinly sliced
1/2 lemon, juiced
fresh nutmeg

Preheat the oven to 180 degrees Celsius. Grease and line a 20 x 30 cm slice tray with baking paper and set aside.

To make the base, mix all ingredients together (TMX - 6 secs / SP 4), then tip into the prepared tin and press in firmly with your hands or the back of a large spoon.

Bake for 15-20 minutes - when done it will be  evenly golden brown and still a little soft, it will firm up as it cools.

Remove from the oven and place the tin on a wire rack to cool completely.

While the base is cooking, start to prepare the custard.

If you're using the Thermomix, place all custard ingredients into the bowl and cook for 9 minutes / 90 degrees / SP 4.

No thermomix? Place the coconut cream, milk and vanilla into a medium pan over medium heat until it starts to steam. Meanwhile, use a whisk to beat together the egg yolks, arrowroot and syrup until smooth. When the milk is steaming pour it over the egg mixture and whisk together. Place a few tablespoons of the mixture into a small bowl, sprinkle over the gelatine and stir to dissolve. Pour all the custard mixture back into the pan, add the gelatine mixture and cook over low heat until it starts to thicken, stirring constantly with a large spoon or spatula. This could take 20 minutes so be patient!

Leave the custard to cool for 10 minutes before pouring over the cooked base, then place in the fridge to chill until set (at least 4-6 hours or overnight).

Just before serving, slice the bananas into thin rounds and place in a large bowl. Sprinkle over the lemon juice and toss gently to combine, making sure all the banana gets the juice. The lemon stops the banana going brown but also adds a lovely flavour.

Using the baking paper on each side as a handle, carefully lift the slice out of the tin and place onto a serving board. Gently slide the paper off and discard.

Layer on the banana pieces and dust the top generously with nutmeg.

Cut into 12-16 pieces and enjoy!

What was your favourite childhood sweet treat?

Thursday, June 9, 2016

One-bowl Banana Bread


When I first got into cooking again as an adult I was all about trying new things, sourcing new ingredients and making every meal spectacular. I now have 3 young children and while I still want delicious food, my priorities have definitely changed!

What I look for now is - how long is this going to take me to make when I have a dozen other things I need to do right now? how many ingredients do I need to search for in the supermarket when I have a fussy, whingy toddler in the trolley trying to grab everything off the shelves? will my kids actually eat this or am I wasting my time?

One-pot dinners and one-bowl bakes - those words are music to my ears!

While I have made a hundred different banana breads this one is my simplest yet. Real ingredients, nothing fancy and just one bowl. Hallelujah.

I did this in the Thermomix (which to me is the epitome of one-bowl cooking) but a large bowl, a fork and a spoon will do the job just as well.

My husband scored a 15kg box of bananas for just $7 on the weekend so we have bananas coming out our ears at the moment. Most of these have been peeled and frozen so I am down to the last couple of bunches which are getting nice and brown and spotty, perfect for banana bread.

So here you go, the simplest wholefood banana bread around. This recipe is a keeper!

One-Bowl Banana Bread

3 ripe bananas (250g peeled)
2 extra large eggs
1/3 cup oil (coconut, macadamia or olive oil)
1/3 cup sweetener (rice malt syrup, honey or maple syrup)
1/4 cup milk (rice, almond or coconut)
1 1/2 cups wholemeal spelt flour
3 ts baking powder
1 ts cinnamon
pinch salt

Preheat oven to 170 degrees Celsius / 150 degrees fan-forced. Grease a loaf pan and line with baking paper.

In a large bowl mash the bananas, then add the eggs, oil and sweetener and beat together until smooth (TMX - 10 secs / SP 6).

Add the remaining ingredients and fold together until just combined (TMX - 10 secs / SP 3 - scrape down the sides and repeat if you need to).

Pour mixture into prepared pan and bake for 40-45 minutes or until it is golden brown and the tops springs back when you press lightly.

Remove from the oven and leave in pan for 5 minutes before turning out onto a wire rack to cool completely.

Delicious still warm from the oven or cold in lunchboxes.

Have you scored any amazing fruit and veg bargains lately?

What would you do with 15kg of bananas??

~ Susan

Tuesday, March 22, 2016

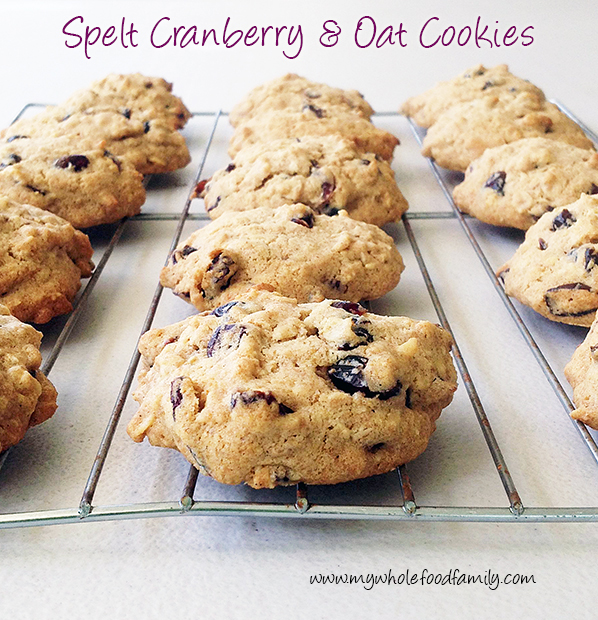
My Spelt, Cranberry and Oat Cookies (Thermomix)

Spelt Cranberry and Oat Cookies for Thermomix from www.mywholefoodfamily.com

I'm never quite sure where I stand in the cookies v biscuit debate. Being Australian I have always called them biscuits but now cookies seems to be more universally accepted. Especially if they have chocolate chips, or in this case cranberries.

Lately I've been baking up a storm but it's been weeks since I made any cookies. If you've been following me on Facebook you will have seen loaf after loaf of bread and several batches of hot cross buns recently and not much else!

Ever since I bought the Well Nourished Lunchbox (not an affiliate link - I'm just a huge fan), my go-to take-a-plate dish has been Georgia's Gruffalo Crumble Cake which is a banana cake with a spiced crumble topping. I encourage you to check out the book if you haven't already because this cake is a standout and I've had rave reviews from kids and adults alike for everything I've made from it. However we were completely out of bananas so instead I thought I would whip up some cookies to take to a play date last week.

Spelt Cranberry and Oat Cookies Thermomix from www.mywholefoodfamily.com

The cookies were delightful. Tender, buttery and studded with tart and chewy cranberries. They are not overly sweet (which I liked) but if you are used to sweet things you could add a few tablespoons of your preferred sweetener. If you have coconut sugar it's caramel notes would work perfectly.

Spelt Cranberry and Oat Cookies Thermomix from www.mywholefoodfamily.com

Spelt Cranberry and Oat Cookies (Thermomix)

120g butter, at room temperature
60g rice malt syrup
1 egg
1 ts vanilla extract
60g rolled oats
150g wholemeal spelt flour
100g dried cranberries
1/2 ts bicarb soda

Preheat oven to 170 degrees Celsius / 150 degrees fan-forced. Line 2 trays with baking paper.

Place butter, syrup and vanilla into bowl and beat 10 secs / SP 5. Add all other ingredients (except cranberries) and mix for 10 secs / SP 4. Add cranberries and mix for 10 secs / SP 2 / REVERSE.

Place spoonfuls of mixture onto prepared tray leaving room to spread.

Bake for 10 minutes or until golden brown. Leave to cool on the trays for 10 minutes before turning out onto wire racks to cool completely. They will firm up as they cool.

Makes 18

I think this will become a regular on our rotation as it is just so easy and also very adaptable. Use sultanas and add a teaspoon of cinnamon instead of the vanilla or add chocolate chips instead of fruit for a wholefood choc chip cookie. Yum.

Do you have a dish you are famous for? Or do you panic when asked to bring a plate?

Monday, March 14, 2016

My top 5 No-Bake Snacks for Kids


So you may have noticed that I like to bake. A lot! But in reality we're not eating baked goods all the time. I always make big batches and stash at least half in the freezer for another time. Things like muffins and biscuits and slices are brilliant to have on hand to pop into lunchboxes or to grab out when we have a playdate.

But there are also plenty of times when to be honest, I just don't feel like baking. Or we're too busy or it's too hot ... you get the idea. I also want to mix things up a bit so we're not eating the same things all the time and if the kids have had a muffin in their lunchbox they are certainly not getting cake for afternoon tea.

It's a good idea to have a range of no-bake options that you can whip up quickly as soon as the hungry horde descends after school.

Smoothies

This is a no-brainer! A smoothie can be a meal in a glass if you pack it full of nutrient dense (and delicious) ingredients. I personally have been down the green smoothie road and can say with certainty that they don't agree with me. I just don't feel good drinking them even when they taste good. But there are other ways to get in some goodness. This is my go-to smoothie formula for the kids:

Per child:
1 cup milk (we use rice, almond or coconut)
1/2 frozen banana or handful berries
1/4 avocado
1 ts chia seeds
1 ts mixed ground seeds (sunflower, pepita and linseed)
cinnamon, vanilla or cacao
probiotic powder

Place all ingredients into a high powered blender and process until smooth (TMX 1 minute / SP 9).

Bliss balls

So these require a little more planning but once they are made they can be stored in the freezer and will keep for ages. There are loads of bliss ball recipes out there but as most of them are packed full of dried fruit they are very high in sugar. Two of my family favourites are my Almond and Chia Bliss Balls which are fruit-free and my Chocolate Bliss Balls which are nut and coconut free but do contain some dates. You can really let your imagination run wild here though - you can swap the nuts, the sweetener, the fruit to whatever you happen to have on hand. Just taste as you go and when the mixture sticks together they are ready to roll!

Popcorn

An oldie but a goodie. Is there anything better than popcorn? I'm talking the homemade stuff here not anything with synthetic 'butter flavour' that is artificially coloured yellow. There are 2 easy ways to make popcorn. First you can heat up some oil in a large pot (coconut oil or ghee are brilliant), toss in the kernels, cover and wait for them to stop popping. Or you can buy an air-popper really cheaply from places like Kmart. We have had an air popper for years and it gets used at least once a week. Simply throw in the kernels, turn it on and voila, popcorn!

We always have lots of butter and a sprinkle of sea salt on our popcorn and the kids love it. We recently switched to Honest 2 Goodness brand organic popping corn and have been amazed by how fresh and tasty it is compared with the stuff you can buy from the supermarket. And it is GMO free unlike most of the corn products you buy at the shops.

Here's an extra tip, if you start noticing that you are left with heaps of unpopped kernels in the bottom of the bowl it means that they have dried out and are stale. The kernels only pop because the water inside them turns to steam and they basically explode from the inside. No moisture inside means they can't pop. So always store your popping corn in an airtight container to keep it fresh!

Apple slices with peanut butter

Ok this one sounds like a cop-out but the kids love it! It's as easy as slicing up an apple and spreading some peanut butter on each piece. That's it. Adding the peanut butter means they are getting some good fat and protein and it keeps them fuller far longer than just an apple on it's own.

Can't have peanuts? Use cashew or almond butter or even tahini instead. Make sure you choose a good quality nut butter than is 100% nuts with no oils, salt, sugar or preservatives.

Crackers, veggie sticks and cheese

I do make homemade crackers on occasion but they can be fiddly and time consuming to roll out and slice and I'm not doing that every day (or even every week). When I buy crackers there are 2 types I choose, either brown rice crackers like the Eat Rite brand or an organic rice cake (Pure Harvest brand is good). Throw some crackers on a plate with whatever veg your kids like to eat raw - think carrot sticks, cucumber, cherry tomatoes and some cheese and that's afternoon tea sorted. My fussy Mr 5 LOVES soft cheese like brie or camembert so if there happens to be some on special I might surprise him with some. Easy as.

So that's it, my top 5 no-bake snacks for kids. Do you have a favourite afternoon tea for your kids? Do you bake for afternoon tea or only for special occasions?

Thursday, March 3, 2016

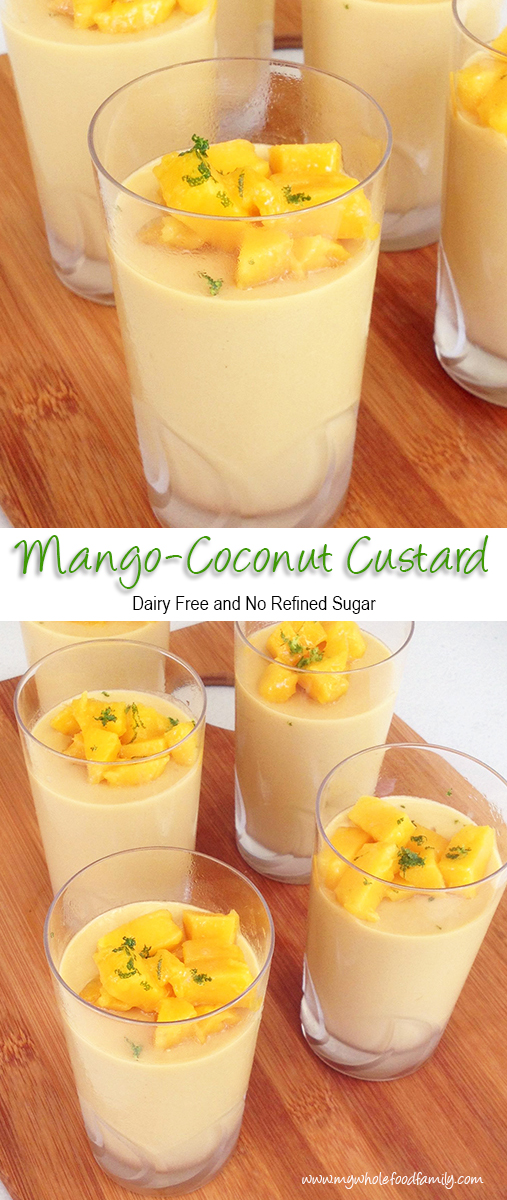
My Mango Coconut Custard

Mango Coconut Custard - dairy free - no refined sugar - from www.mywholefoodfamily.com

We may be officially in Autumn now but it hasn't cooled down one bit and we are still blessed with an abundance of summer fruit.

We've eaten our fair share of mangoes over the past few months - the kids always argue over who gets the seed and there are now lots of t-shirts with faint orange stains down the front. The last few mangoes in the fruit bowl were calling my name this week and I was determined to make something with them rather then just watch them get gobbled up.

Mango and coconut are a match made in heaven. Being dairy-free we use a lot of coconut milk and cream in this house, sometimes as a substitution for dairy but other times like this you really want that creamy lusciousness. My first thought was to make ice cream but our freezer has been a little unreliable lately and I wasn't sure the ice cream bowl would be frozen enough for it to work.


Anyone with a Thermomix will tell you it makes great custard, so that's what I decided to do.  And the result? Well this mango coconut custard went down a treat on a hot Autumn-but-feels-like-Summer afternoon.

My kids had theirs for afternoon tea but it would be the perfect dessert to serve after a Asian or Indian meal. Cool, sweet, fragrant and just delicious.

Enjoy!

My Mango Coconut Custard

2 ripe mangoes
500g coconut milk
3 eggs
40g arrowroot
75g rice malt syrup
20g coconut oil

Reserve half a mango and set aside.

Add the flesh of 1 1/2 mangoes and the coconut milk to the mixing bowl and process for 10 seconds / SP 8 or until completely smooth. Scrape down the sides of the bowl and add all remaining ingredients.

Cook for 8 minutes / 90 degrees / SP 4.

Pour into heatproof glasses and place in the fridge to chill completely

To serve, top with reserved mango (finely diced) and garnish with mint leaves or lime zest (optional).

Serves 5

Tuesday, March 1, 2016

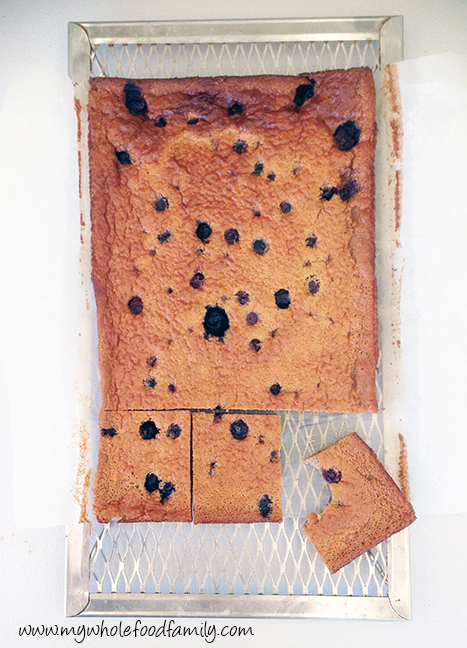
Baked Banana and Blueberry Pancake


So baked pancakes. Did you know that was a thing? We love pancakes and pikelets in this house. I love that you can pack them full of good stuff and the kids still eat them. The kids love them just because they taste good.

Most days though we just don't have time to stand at the stove and cook pancakes 4 at a time in a pan. Enter baked pancakes. You mix up all the same ingredients, pour them into a preheated pan and cook in the oven for 20 minutes or so while you go and do something else. Brilliant!

My version uses lots of eggs, wholemeal spelt flour and the sweetness of banana, blueberries and a small amount of coconut sugar. I took it out of the oven just before I left for school pick up so it was ready to eat as soon as we all got home.

This was a delicious afternoon tea for my boys but it would be a perfect weekend brunch as well.

Happy baking!

Baked Banana and Blueberry Pancake
Adapted from All Recipes

3 eggs
1 large very ripe banana
1 tbs coconut sugar
1 ts vanilla extract
1 cup wholemeal spelt flour
1 ts baking powder
pinch salt
1/2 cup blueberries
4 tbs butter or coconut oil

Preheat the oven to 200 degrees celsius / 180 degrees fan-forced. Add the butter or coconut oil to a 20 x 30cm baking dish and place the baking dish into the oven to preheat as well.

Place the eggs, banana, coconut sugar and vanilla into a food processor or blender and blitz until smooth. Add the remaining ingredients (except the blueberries) and process for a few seconds until well combined, scraping down the sides if you need to.

Carefully remove the hot pan from the oven and swirl it to coat the bottom evenly with the melted butter or coconut oil. Pour in the batter, scatter the blueberries over the top and return to the oven to bake for 20-25 minutes. It will be golden brown, puffed up and smell amazing.

Leave to cool in the tin for 10 minutes before slicing or leave to cool completely and serve at room temperature.

melt butter or coconut oil in pan

bake for 20 -25 minutes

Sunday, February 14, 2016

Chocolate Bliss Balls (Nut free, Coconut free)

Chocolate Bliss Ball nut free coconut free www.mywholefoodfamily.com

Well love it or loathe it, today is Valentine's Day!

We don't really celebrate it as such but do tend to have something a bit more special for dinner and I will often bake something chocolate-y for us all to enjoy. This year, being determined to keep some treats in the freezer at all times for school lunches and afternoon tea, I decided to just make a batch of chocolate bliss balls.

Yep another bliss ball recipe. I love them! They really are perfect little morsels of deliciousness.

Our school doesn't have any nut restrictions so I don't really need to make things nut free but I think it's good to mix things up a bit so we're not eating the same things all the time. I tend to avoid dates as they are so high in fructose but as a treat now and then (and especially on Valentine's Day) I'm not going to worry about it, especially as they are also a great source of fibre and oh yeah, they're delicious!

The only reason these are coconut free is that we were almost completely out of coconut! Totally unheard of in this house as there is usually coconut in all forms - coconut milk, coconut cream, coconut oil, coconut water, shredded coconut and desiccated coconut #coconutaddict.

So whether you are celebrating Valentine's Day or not, I hope you had a wonderful day!

My (Nut free, Coconut free) Chocolate Bliss Balls

3/4 cup sunflower seeds
3/4 cup pumpkin seeds
2 tbs chia seeds
2 tbs raw cacao
1 ts vanilla extract
1/4 ts sea salt
1/2 cup dried dates
2 tbs coconut oil

Place all ingredients into a food processor and blend until the mixture is sticky and clumping together (TMX 10 secs / SP 8).  Using wet hands, roll the mixture into balls and store in the fridge or freezer.

Make approximately 16

Monday, January 11, 2016

Pumpkin Boiled Fruit Cake


We're going old school with this one - and it doesn't get much more retro than a boiled fruit cake!

I know not everyone is a fan of fruit cake but we love them. They are very much a treat in this house though as being full of dried fruit they are also packed with sugar. I still had half a bag of mixed dried fruit leftover from making Christmas cakes and a visitor coming for morning tea so it seemed like to the perfect opportunity to make this again.

It is adapted from an old family recipe that I can remember my mum making in the 80s (yep I'm that old!). It is has no sweetener apart from the dried fruit (tick), wholemeal flour (tick) and mashed pumpkin (big tick for hidden veggies).

The pumpkin gives it a lovely warm colour and helps keep it moist, although unlike other fruitcakes this one is best eaten on the day or the day after baking but no longer. Even my pumpkin-hating husband and super fussy Mr 5 loved this and the entire cake was demolished between 6 of us.

I didn't do it this time around but I have been extra sneaky in the past and added a grated zucchini into the fruit mixture and it virtually disappears once boiled. Love those hidden veggies :)


Boiled Pumpkin Fruit Cake

450g organic mixed dried fruit (I used sultanas, raisins and currants)
125g butter
1 cup water
2 ts mixed spice (cinnamon, nutmeg and allspice)
2 cups wholemeal spelt flour
2 ts baking powder
1 cup cold mashed pumpkin
2 large eggs

Place the fruit, butter, water and spice into a large pot and bring to the boil over medium high heat. Let bubble for 5-10 minutes or until most of the liquid is gone and the fruit is plump and sticky. Allow to cool completely.

Preheat the oven to 170 degrees C / 150 degrees fan-forced. Grease and line a deep 8 inch cake pan and set aside.

Add the beaten egg and pumpkin and mix well.

Fold through the flour and baking powder (I never bother sifting but you can whisk them together in a bowl before adding if you like).

Pour the mixture into the prepared tin and bake for approximately 1 1/2 hours. Watch the top and cover with foil if it is getting too dark.

Cool in the tin and serve sliced with butter and a cup of tea.


Monday, November 23, 2015

Cardamom Pear Muffins (SRC)


It's Secret Recipe Club time again! Each month a dedicated group of bloggers are assigned a blog in secret to peruse and cook from, and then we all post on the same day. Today is reveal day for group D.

This month I was assigned Nicole's blog Hapatite and wow was I in for a treat. Hapatite ("hapa" meaning half or of mixed racial heritage and "tite" meaning appetite) is an absolute treasure-trove of amazing recipes, all drawing upon her family's Chinese, Cherokee, German and Hawaiian American background. As you can imagine this makes for some fabulous food!

One dish that really caught my eye was Nicole's take on char siu chow fun which is served for Chinese New Year.  But then I also loved her Baked Onion Rings and homemade Filet-o-Fish which was my go-to late night meal back in my uni days!

Nicole is also something of a tea connoisseur and has reviewed some really interesting tea blends. My favourite was the Candied Chestnut Tea and I wish it was available here! I really love tea and have an ever-growing collection of herbal teas so this made for some great reading.

As usual though I was on the hunt for kid-friendly snack ideas and you can't beat a muffin. Enter these Cardamom Spiced Pear Muffins.

Cardamom is one of those spices that seems to get overlooked. I remember making a cardamom cake years ago that I absolutely loved but I haven't really used it since, apart from in curries.

These muffins were absolutely delicious. The cardamom added a complexity of flavour that I wasn't expecting yet it wasn't overpowering, probably because it was paired with cinnamon and nutmeg (and the clove that I added because I love it). My boys loved these and as usual I wished I'd made a double batch because they disappeared way too quickly.


Cardamom Pear Muffins
Slightly adapted from Hapatite

2 cups self raising flour (or 2 cups plain flour + 1 tbs baking powder)
1/2 cup coconut sugar
85g softened butter
2 large eggs
1 ts vanilla extract
1 ts ground cardamom
1 ts cinnamon
1/2 ts nutmeg
1/4 ts ground cloves
1/2 cup buttermilk (I used 1/2 cup rice milk soured with 1 ts apple cider vinegar)
1 large pear, just ripe, cut into small dice

Line a 12 cup muffin tray with paper liners. Preheat the oven to 170 degrees Celsius fan-forced.

Cream together the butter and sugar until light and fluffy. Add the vanilla and the eggs, one at a time, beating well between each addition. Add the spices and mix well.

Fold through 1/2 the flour followed by 1/2 the buttermilk, then repeat with the remainder.

Fold through the pear pieces.

Spoon the mixture into the prepared tray and bake for 15-18 minutes or until golden brown and a skewer comes out clean.

Cool in the tin for 5 minutes before turning out onto a wire rack to cool completely (or just eat warm as they are amazing straight from the oven!!).

Thanks for a great month and a delicious recipe Nicole!

Tuesday, September 8, 2015

Easy Pear Tea Cake

Easy Pear Teacake - wholefood - wheat and refined sugar free - dairy free variation - from www.mywholefoodfamily.com

This cake has been a lifesaver recently when I've been asked to bring something to share for morning tea and have had very few ingredients to choose from. This is a really simple tea cake and while it might not be fancy it is absolutely delicious!

I have made it with pears, apples and blueberries and each one was sensational. Pears are in season right now though and their flavour really shines in this simple cake.

I'm hoping it freezes well as I will be making another one this week and freezing it to have for afternoon tea on moving day (7 days and counting - aaahhh!)

Easy Pear Tea Cake

1 1/2 cups wholemeal spelt flour
2 ts aluminium free baking powder
1/3 cup rice malt syrup
1 egg
125g unsalted butter, melted and cooled*
1 ts vanilla extract
pinch salt
400g just ripe pears, peeled cored and diced
a squeeze of lemon
1 tbs coconut sugar
1 ts cinnamon

Preheat the oven to 180 degrees Celsius. Grease and line the base of a 20cm (8 inch) round sping-form cake tin.

Peel, core and dice the pears and squeeze of some lemon juice, tossing to coat the pieces and prevent them from going brown.

In a large bowl, mix together the flour, baking powder and salt, then add the syrup, egg, butter and vanilla and mix to combine. It will form a dough rather than a batter. Press 3/4 of the mixture into the base of the tin and then scatter over the pears. Scatter the remaining dough over the top of the pears, like a crumble topping.

Combine the coconut sugar and cinnamon in a small bowl and sprinkle liberally over the top of the cake.

Bake for approx 40 minutes until it is golden brown, pulling away from the edges and a skewer comes out clean.

Allow to cool in the tin for 15 minutes before removing the sides of pan and sliding onto your serving plate. It is very delicate when warm but would be delicious warm for dessert with cream.

*Dairy-free version - use coconut or macadamia oil in place of the melted butter.

Monday, August 17, 2015

Gluten-free Orange Shortbread Cookies

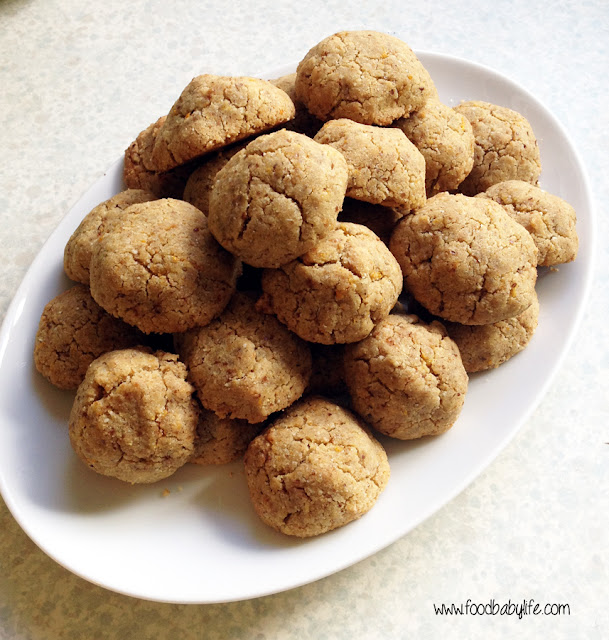
gluten free orange shortbread cookies © www.foodbabylife.com

With citrus so abundant and so delicious at the moment I've been looking for different ways to use it. One of my favourite things is a whole orange and almond cake which I've been meaning to blog about for ages. Today though I felt like making biscuits and came up with these little gems.

I've been doing lots of experimenting with different flours for baking lately and while none of us have coeliac, I know I at least feel so much better when I limit the amount of gluten that I eat. You can buy some great gluten free flours these days but I prefer to make my own as it lets me choose the recipe that best suits what I am baking.

My top 2 gluten free flour recipes are from The Holistic Ingredient and Gluten-free-Girl.

For these shortbread cookies I used the Gluten-free-Girl recipe which gives a light, crisp and slightly crumbly result, perfect for shortbread. This one doesn't contain xanthan gum so I added a tablespoon of linseed meal which has similar properties.

You will notice there is a lot (a LOT) of butter in these cookies and as you mix them up you will probably see butter beginning to ooze out of the mixture. When I first made them I wondered whether I'd made a huge mistake but actually the end result is amazing and there is no extra butter to be seen - just perfect little shortbread cookies which are crisp, short and crumbly and beautifully fragrant from the orange zest. The house smelt spectacular while they were baking and made for a delicious afternoon snack with a cup of ginger tea.

Whether you need to be gluten free or not, with treats like these you certainly won't feel like you are missing out!

Gluten free Orange Shortbread Cookies

2 1/4 cups gluten-free plain flour
1 tbs linseed meal
1 ts baking powder
1/2 cup coconut sugar
zest of 1 large orange
1 ts vanilla extract
250g salted butter, melted and cooled
1 egg

Preheat the oven to 170 degrees Celsius. Line 2 trays with baking paper and set aside.

Place the dry ingredients into a large bowl and add the orange zest. Use your fingers to rub the zest into the flour mix until well combined. Add the wet ingredients and mix well.

Roll into small balls and place on the prepared trays. They don't spread very much so they can be placed quite closely together.

Bake at 170 degrees Celsius for approx 12 minutes. They will be golden brown and firm to touch. Leave to cool on the trays for 5 minutes before placing on wire racks to cool completely.

Makes approximately 30 cookies.


Monday, June 22, 2015

Saffron and Cardamom Sweet Buns (SRC)

St Lucia Saffron and Cardamom Buns © www.foodbabylife.com

It's Secret Recipe Club time! We are now officially halfway through the year, can you believe it??

This month for SRC I was assigned the fabulous Lavender and Lovage by Karen. Karen is truly living the dream, dividing her time between the UK and the South West of France where she runs her own cookery school! I've long had a love-affair with France, learning the language in high school and enjoying a 3 month homestay with a family in Brittany when I was 17. So as you can imagine I had a great time on Karen's blog this month, reveling in some truly delicious food and stunning photography.

Being the middle of Winter here I was drawn to some hearty and traditional dishes like her Provence Beef Casserole and Chicken, Sausage and Vegetable Hotpot, and I have bookmarked her Victorian Epiphany Tart with 9 different types of jams and preserves to make at Christmas time. I was also really tempted by her Cauliflower Pizza Crust as it is the nicest looking version that I've seen.

In the end though I simply couldn't go past her Saffron and Cardamom sweet buns, which are baked in Sweden (and Scandinavia) to celebrate St Lucy's day and the Winter Solstice on the 13th December. Now before you wonder why I would choose to make this recipe when it is nowhere near December, it actually makes perfect sense: here in Australia our Winter Solstice is in June and this year it coincidentally falls today on reveal day (at 2.39am to be exact!).

Clearly it was meant to be!

I baked these just yesterday and it was a perfect Winter weekend baking project as they take a few hours to make. If you've made any sort of bread you would have no problems making these. And just look at that gorgeous sunny colour! The saffron was a real splurge - my tiny 1 gram container cost $11!! but I didn't use all of it and now need to think of something suitably special to make with what's left.

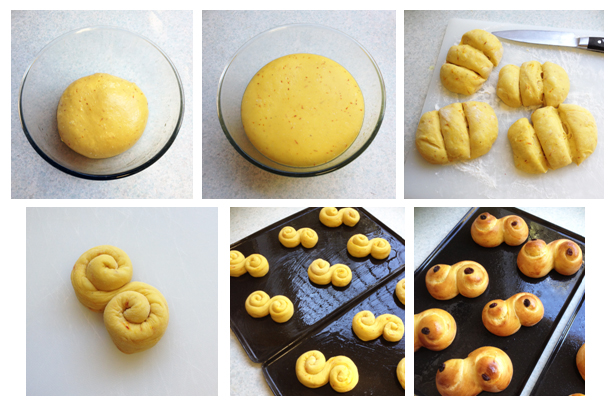
shaping Saffron and Cardamom Buns © www.foodbabylife.com

And the verdict? We LOVED these! So delicious, not too sweet and with that beautiful fragrance from the saffron and cardamom. My 6yo declared that I was 'a chef and should work in a bakery.' High praise indeed. In all seriousness these were sensational and I will definitely be baking them again, although perhaps saving them for the festive season as they are a bit of a luxury.

St Lucia Saffron and Cardamom Buns © www.foodbabylife.com

Lussakatter - St Lucia Saffron and Cardamom Sweet Buns
Recipe from Lavender and Lovage

300mls milk (I used rice milk)
1 ts saffron threads
500g strong white bread flour
7g sachet dried yeast
1/2 teaspoon salt
100g golden caster sugar
10 cardamom pods (seeds removed and crushed in a mortar and pestle)
75g butter, melted
1 large free-range egg
1 small free-range egg (extra, for the glaze)
24 raisins

Grease 2 large baking sheets and set aside. Place the saffron threads and the milk in a small pot and warm gently over low heat. Remove from the heat and cool to tepid.

In a large bowl, combine the flour, yeast, sugar, salt and cardamom seeds. Make a well in the middle and add the saffron milk, beaten egg and melted butter.

Stir together before turning it out onto a floured surface and kneading for 10 to 15 minutes, until the dough is smooth and elastic.

Grease the bowl you already used before returning the dough, covering it with a clean tea towel and leaving it to prove in a warm place for about an hour, or until doubled in size.

Knock the dough back and turn out onto a floured surface and divide into 12 equal pieces. Take each piece in turn and roll it out into a long sausage shape before twisting it tightly into an ‘S’ shape.

Place the shaped dough onto the prepared trays, cover with a tea towel and leave them to prove in a warm place for approximately 45 minutes. Preheat the oven to 200 degrees C / 400 degrees F during this time.

Once risen, brush the tops with the extra beaten egg and then push a raisin into the middle of the scroll on each end – 2 raisins per bun (see photos).

Bake for 15 to 20 minutes until dark golden brown and sound hollow when tapped from underneath.

Cool on a wire rack before serving. Best eaten the same day.

Makes 12 buns.

Thank you Karen for a truly special recipe and a wonderful month!
 

Monday, June 8, 2015

Winter Spice Biscuits

Winter Spice Biscuits © www.foodbabylife.com

After making these biscuits twice in as many days I have decided they must be worth sharing! I'm not sure if its just the cold weather but my boys have all been ravenous this past week and I've been searching for something tasty and healthy to fill them up.

Apart from warming soups and stews, my other favourite things to have in Winter are spices. With ginger, cinnamon, cloves and molasses these smell quite Christmassy to me but really why wait until Christmas to enjoy something so delicious!

My kids absolutely devoured these biscuits. They have a texture quite like brandy snaps - being thin, crisp and lacy around the edges and a little chewier in the middle. They are also gluten and dairy free (and virtually grain-free as well apart from the small amount of rice syrup) and very low in fructose.

Winter Spice Biscuits
Recipe by me

150g almond meal
25g chia seeds
20g molasses
50g rice malt syrup
50g coconut oil
1 ts vanilla extract
1 ts cinnamon
1 ts ginger
1/4 ts ground cloves
pinch salt

Preheat oven to 150 degrees Celsius. Line 2 trays with baking paper and set aside.

Combine all ingredients in a large bowl until well mixed.

Roll mixture into balls and place onto prepared trays, allowing room to spread.

Bake for approximately 15 minutes or until golden brown (they will be very soft but will firm as they cool). Remove from the oven and allow to cool on the trays for 10 minutes before transferring onto a wire rack to cool completely.

Makes approx 18.

Thursday, May 21, 2015

Chocolate Chickpea Biscuits

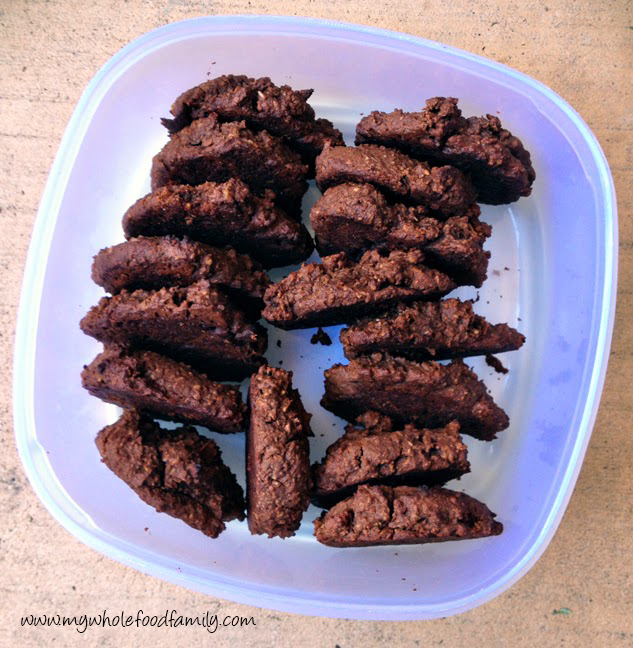
Chocolate Chickpea Cookies - free from gluten, dairy and fructose - from www.mywholefoodfamily.c

I know they don't look like much but these Chocolate Chickpea Biscuits are one of the best things I've baked in ages. Seriously! I've made a Magic Bean Chocolate Cake before which we all loved and these biscuits are just as good with their fudgy chocolate middles surrounded by raggedy, crinkly, crispy edges that make it incredibly hard to stop at 1 (or 2).

My kids are always ravenous at the end of the day and afternoon tea often turns into one big grazing session (and yes they still eat a big dinner!). We had an after school function to go to the day I made these so I packed them up and hoped it would be enough to keep them going until we got home. Well, they each ate 3 biscuits and were set. They absolutely loved them but 3 was enough and I didn't get a single 'I'm hungry' the whole afternoon! The chickpeas and oats in these are packed with protein and fibre and they are really satisfying. Next time I will be doubling the recipe and stashing some in the freezer. 

Even straight from the oven there was absolutely no discernible taste or smell of the chickpeas so if you've been on the fence about the whole beans-in-cakes thing give these a go!

Chocolate Chickpea Biscuits - Gluten, Dairy and Fructose Free
Recipe adapted from The Road to Loving My Thermomixer

45g quinoa flakes
80g rice malt syrup*
zest of 1 orange (optional but delicious!) 
400g tin chickpeas
40g raw cacao powder
1 ts vanilla extract
1 ts gluten-free baking powder
100g coconut oil

Preheat oven to 180 degrees C / 160 degrees fan-forced. Line 2 trays with baking paper and set aside.

Place quinoa flakes into a food processor and blitz for 20 seconds (TMX 20 secs / SP 7). Add all remaining ingredients and process for 30 seconds (TMX 30 secs / SP 5).

Dollop small spoonfuls of mixture onto the prepared trays, allowing some room to spread, and flatten slightly (I often forget to do this).

Bake for 15 minutes. Remove from the oven and allow to cool for 5 minutes before placing the biscuits on a wire rack to cool completely (or not, they are absolutely delicious warm from the oven!).

* Using RMS is what makes these fructose free but they are definitely not as sweet as the original - if you're not worried about fructose you could use raw honey instead or half-and-half. 

Makes approx 20

Related Posts Plugin for WordPress, Blogger...