Showing posts with label Biscuits. Show all posts

Friday, February 2, 2018

Jam Drops (free from Gluten, Dairy, Nuts and Refined Sugar)


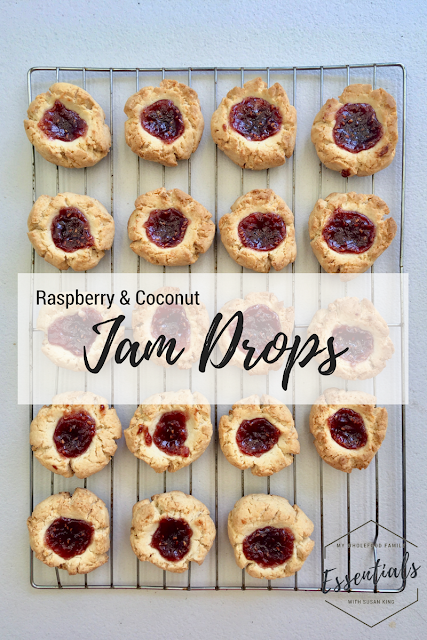
raspberry and coconut jam drop cookies - free from gluten, nuts, dairy and refined sugar - from www.mywholefoodfamily.com

Do you have a picky eater?

I feel your pain.

My picky eater has recently gone from picky to downright ridiculous and we are left with very few foods that he finds acceptable.

He's started rejecting a few favourite recipes that I have healthified so for these, I kept it really simple.

A 'white' dough with homemade raspberry jam (that I blitzed the chia seeds for by the way so they wouldn't get spotted and rejected). The things we do!

These freeze beautifully and being nut-free they are perfect for school lunches or a quick after-school treat.

I hope your kids enjoy them as much as mine!

raspberry and coconut jam drop cookies - free from gluten, nuts, dairy and refined sugar - from www.mywholefoodfamily.com

Jam Drops
Free from gluten, dairy, nuts and refined sugar

2 cups gluten-free flour (I used Orgran brand)
1/2 cup desiccated coconut
1 ts gluten-free baking powder
pinch salt
1/3 cup rice malt syrup
1/3 cup + 1 tbs coconut oil
1 ts vanilla paste
1 egg

Jam to top (I adapted my strawberry chia jam recipe found here - note that I blitzed 1/2 cup chia seeds in the Thermomix first to make a powder and used some of that to make the jam)

Preheat oven to 180 degrees C. Line 2 baking trays with baking paper and set aside.

In a medium bowl, stir together the flour, coconut, baking powder and salt. Add all remaining ingredients (except jam) and mix until well combined. You should have a stiff dough that can be easily rolled into balls.

Roll spoonfuls of mixture into balls and place on the prepared tray (I got 20 from this batch). Use your thumb or the end of a wooden spoon to make an indent for the jam.

Place a small amount of jam on each biscuit, 1/2 ts or so.

Bake for 15 minutes or until golden brown. I rotated the trays halfway through.

All to cool on the tray for 5 minutes before placing on a wire rack to cool completely.

Makes approx 20

Jam drops are such a nostalgic treat for me. And these ones even more so because they remind of an Iced Vovo which I loved as a child! What's your favourite childhood bikkie? xx


Monday, November 21, 2016

Salted Peanut Butter Honey Cookies (SRC)

Salted Peanut Butter and Honey Cookies - gluten-free, dairy-free, no refined sugar - from www.mywholefoodfamily.com


Well, this is it. The final ever reveal for the Secret Recipe Club!

My first post for SRC was back in February 2013 when I made a delicious Chicken Tikka Masala. We love Indian food but it was the first time I'd ever made that recipe myself. And it was amazing!

I've loved getting a peek inside other people's kitchens, trying out recipes that I would otherwise have never even heard of, let alone tried.

And I think that has been the beauty of SRC. We all come from different parts of the world, have different tastes, different families and yet, we have all been brought together by our love of food.

For this final month, I was assigned Savory Moments by Amy, a stay at home mum of twins from Western NY and passionate foodie, and I knew immediately I would find some great food.

Her blog's header reads that she is 'trying to learn skills that have been lost along the way by many people of my generation: cooking, baking, growing food, preserving, and appreciating a healthy, home-cooked meal.'

Yes!

This is exactly why I cook and blog too.

I think so many of us are time-poor and have been seduced by the ease of convenience foods, which in reality are chemical-laden, nutrient-deficient filler foods, setting us up for a lifetime of ill-health.

To grow your own food, even if it's just having a few pots of herbs on your windowsill, to buy what is seasonally available and then cook it from scratch is so rewarding and the best way of setting up a culture of good food in your family.

We are a predominantly gluten, dairy and refined sugar-free household these days, and I found loads of recipes on Amy's blog that fit the bill, or that could be easily adapted.

Some of my favourites were the Turmeric and Honey Roasted Chickpeas, Avocado Chocolate Pudding, Lemony Raw Kale Salad, Roasted Sweet Potatoes with Spinach and Cranberries and Bog salad with maple vinaigrette to name just a few.

When it came down to it though, I decided to make something just for my boys.

I've been in a bit of  a baking rut recently, so wanted to try something new. So it had to be Amy's Salted Peanut Butter-Honey Cookies!

Salted peanut butter honey cookies - gluten-free, dairy-free, refined sugar-free - from www.mywholefoodfamily.com

My only change to the recipe was to use buckwheat flour instead of the wholemeal, to make them gluten free.

I also made them smaller than stated, getting 20 cookies out of the batch instead of the 14-16 Amy suggested. I baked them for just 10 minutes but even that was too much, so if you make them small I would suggest just 8-9 minutes!

This is a great recipe to make with kids - just 5 ingredients, mix, roll and flatten with a fork. Mr 3 was my very willing helper with these and he was hovering close to taste the first one.

Salted peanut butter honey cookies - gluten-free, dairy-free, refined sugar-free - from www.mywholefoodfamily.com

My boys absolutely loved these and the entire batch went in one afternoon tea. For the record I had just 2, and the other 18 were devoured by the 3 of them, along with a glass of cold milk each.

I think that makes them a winner!

Salted Peanut Butter-Honey Cookies
Adapted from Savoury Moments

3/4 cup buckwheat flour
1/2 cup natural peanut butter
1/2 cup raw honey
1/2 ts bicarb soda
1/4 ts sea salt, plus extra for sprinkling

Preheat oven to 180 degrees Celsius / 160 degrees fan-forced.

Line a tray with baking paper and set aside.

In a small bowl whisk together the flour, bicarb and salt.

In a large bowl beat together the peanut butter and honey until smooth.

Add the dry ingredients into the peanut butter mixture and stir until well combined.

Roll tablespoons of mixture into balls and place on the prepared trays. Gently press down with the tines of a fork to make a criss-cross pattern. Sprinkle with a little extra sea salt.

Bake for approximately 8-10 minutes, until they just begin to turn golden brown.

Makes 20 cookies.

Thank you Amy for a great recipe, we will definitely be making them again!

And thank you Sarah E for all your hard work in keeping SRC running for us these past few years. It's been great! :)

Monday, August 17, 2015

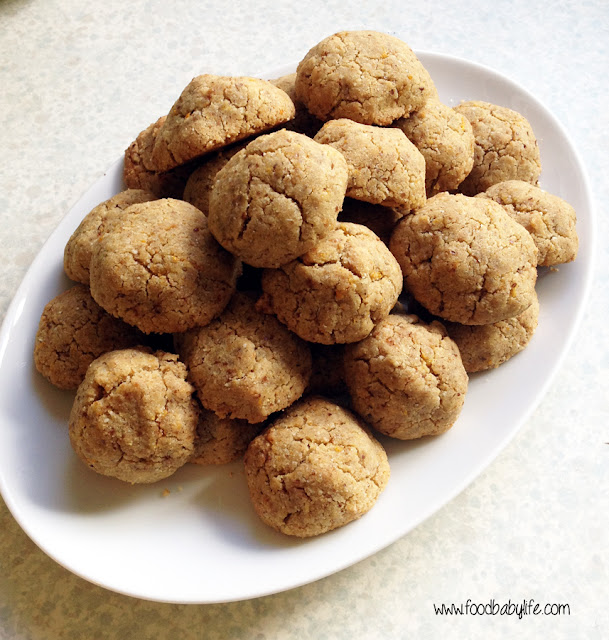
Gluten-free Orange Shortbread Cookies

gluten free orange shortbread cookies © www.foodbabylife.com

With citrus so abundant and so delicious at the moment I've been looking for different ways to use it. One of my favourite things is a whole orange and almond cake which I've been meaning to blog about for ages. Today though I felt like making biscuits and came up with these little gems.

I've been doing lots of experimenting with different flours for baking lately and while none of us have coeliac, I know I at least feel so much better when I limit the amount of gluten that I eat. You can buy some great gluten free flours these days but I prefer to make my own as it lets me choose the recipe that best suits what I am baking.

My top 2 gluten free flour recipes are from The Holistic Ingredient and Gluten-free-Girl.

For these shortbread cookies I used the Gluten-free-Girl recipe which gives a light, crisp and slightly crumbly result, perfect for shortbread. This one doesn't contain xanthan gum so I added a tablespoon of linseed meal which has similar properties.

You will notice there is a lot (a LOT) of butter in these cookies and as you mix them up you will probably see butter beginning to ooze out of the mixture. When I first made them I wondered whether I'd made a huge mistake but actually the end result is amazing and there is no extra butter to be seen - just perfect little shortbread cookies which are crisp, short and crumbly and beautifully fragrant from the orange zest. The house smelt spectacular while they were baking and made for a delicious afternoon snack with a cup of ginger tea.

Whether you need to be gluten free or not, with treats like these you certainly won't feel like you are missing out!

Gluten free Orange Shortbread Cookies

2 1/4 cups gluten-free plain flour
1 tbs linseed meal
1 ts baking powder
1/2 cup coconut sugar
zest of 1 large orange
1 ts vanilla extract
250g salted butter, melted and cooled
1 egg

Preheat the oven to 170 degrees Celsius. Line 2 trays with baking paper and set aside.

Place the dry ingredients into a large bowl and add the orange zest. Use your fingers to rub the zest into the flour mix until well combined. Add the wet ingredients and mix well.

Roll into small balls and place on the prepared trays. They don't spread very much so they can be placed quite closely together.

Bake at 170 degrees Celsius for approx 12 minutes. They will be golden brown and firm to touch. Leave to cool on the trays for 5 minutes before placing on wire racks to cool completely.

Makes approximately 30 cookies.


Monday, June 8, 2015

Winter Spice Biscuits

Winter Spice Biscuits © www.foodbabylife.com

After making these biscuits twice in as many days I have decided they must be worth sharing! I'm not sure if its just the cold weather but my boys have all been ravenous this past week and I've been searching for something tasty and healthy to fill them up.

Apart from warming soups and stews, my other favourite things to have in Winter are spices. With ginger, cinnamon, cloves and molasses these smell quite Christmassy to me but really why wait until Christmas to enjoy something so delicious!

My kids absolutely devoured these biscuits. They have a texture quite like brandy snaps - being thin, crisp and lacy around the edges and a little chewier in the middle. They are also gluten and dairy free (and virtually grain-free as well apart from the small amount of rice syrup) and very low in fructose.

Winter Spice Biscuits
Recipe by me

150g almond meal
25g chia seeds
20g molasses
50g rice malt syrup
50g coconut oil
1 ts vanilla extract
1 ts cinnamon
1 ts ginger
1/4 ts ground cloves
pinch salt

Preheat oven to 150 degrees Celsius. Line 2 trays with baking paper and set aside.

Combine all ingredients in a large bowl until well mixed.

Roll mixture into balls and place onto prepared trays, allowing room to spread.

Bake for approximately 15 minutes or until golden brown (they will be very soft but will firm as they cool). Remove from the oven and allow to cool on the trays for 10 minutes before transferring onto a wire rack to cool completely.

Makes approx 18.

Thursday, May 21, 2015

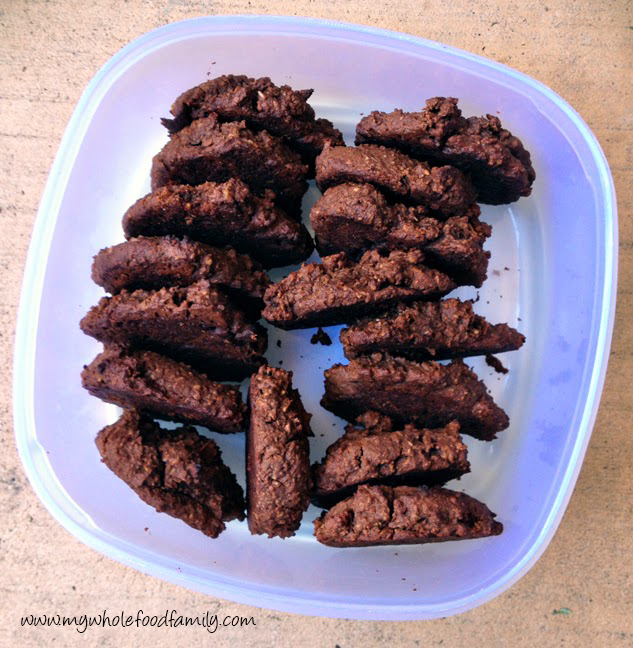
Chocolate Chickpea Biscuits

Chocolate Chickpea Cookies - free from gluten, dairy and fructose - from www.mywholefoodfamily.c

I know they don't look like much but these Chocolate Chickpea Biscuits are one of the best things I've baked in ages. Seriously! I've made a Magic Bean Chocolate Cake before which we all loved and these biscuits are just as good with their fudgy chocolate middles surrounded by raggedy, crinkly, crispy edges that make it incredibly hard to stop at 1 (or 2).

My kids are always ravenous at the end of the day and afternoon tea often turns into one big grazing session (and yes they still eat a big dinner!). We had an after school function to go to the day I made these so I packed them up and hoped it would be enough to keep them going until we got home. Well, they each ate 3 biscuits and were set. They absolutely loved them but 3 was enough and I didn't get a single 'I'm hungry' the whole afternoon! The chickpeas and oats in these are packed with protein and fibre and they are really satisfying. Next time I will be doubling the recipe and stashing some in the freezer. 

Even straight from the oven there was absolutely no discernible taste or smell of the chickpeas so if you've been on the fence about the whole beans-in-cakes thing give these a go!

Chocolate Chickpea Biscuits - Gluten, Dairy and Fructose Free
Recipe adapted from The Road to Loving My Thermomixer

45g quinoa flakes
80g rice malt syrup*
zest of 1 orange (optional but delicious!) 
400g tin chickpeas
40g raw cacao powder
1 ts vanilla extract
1 ts gluten-free baking powder
100g coconut oil

Preheat oven to 180 degrees C / 160 degrees fan-forced. Line 2 trays with baking paper and set aside.

Place quinoa flakes into a food processor and blitz for 20 seconds (TMX 20 secs / SP 7). Add all remaining ingredients and process for 30 seconds (TMX 30 secs / SP 5).

Dollop small spoonfuls of mixture onto the prepared trays, allowing some room to spread, and flatten slightly (I often forget to do this).

Bake for 15 minutes. Remove from the oven and allow to cool for 5 minutes before placing the biscuits on a wire rack to cool completely (or not, they are absolutely delicious warm from the oven!).

* Using RMS is what makes these fructose free but they are definitely not as sweet as the original - if you're not worried about fructose you could use raw honey instead or half-and-half. 

Makes approx 20

Thursday, November 20, 2014

Sweet and Salty Potato Chip Cookies


I am a sucker for the combination of sweet and salty, be it popcorn, pastry or salted caramel. When I saw these pop up on Laws of the Kitchen and I happened to have half a bag of potato chips sitting in the pantry their fate was sealed!

The little green pieces in my cookies are actually pumpkin seeds. I didn't have enough of any one type of nuts to make up the 1/2 cup needed for the recipe but I did have a bag of Lucky Smart Snax Recovery which has oven roasted peanuts, almonds, cashews and pepitas. It was perfect for these cookies and using a mixture of nuts made them especially tasty.

My cookies were no where near as chunky looking as the original so I think I overprocessed the nuts and chips but they were still packed with crunchy bits and were deliciously sweet and salty. They were a real hit with the kids and they disappeared in record time. Sorry for the blurry photo, I think someone's little sticky fingers have been playing with my camera!

Oh and there's only 1 day left to win the #luckysmartsnax hamper so if you're an Australian resident and want to win some nuts visit my post here to enter!

Sweet and Salt Potato Chip Cookies
Adapted from The Caker via Laws of the Kitchen

225g butter
1 cup dextrose (or 100g sugar)
1/2 cup nuts, finely chopped
250g plain flour
1/2 cup crushed salty potato chips
1 ts vanilla extract

Preheat oven to 180 degrees celsius. Line 2 baking trays with baking paper and set aside.

In a stand mixer cream together the butter and sugar until smooth and pale. Add the vanilla and beat to combine. Fold in the flour and when mostly combined add the nuts and potato chips and stir until well mixed through.

Roll the dough into balls and place on the prepared trays. Flatten with the bottom of a glass or your palm.

Bake for approximately 15 minutes or until just golden brown around the edges. Remove from the oven and allow to cool on the tray for 5 minutes before turning out onto a wire rack to cool completely.

Makes 24.


Tuesday, January 28, 2014

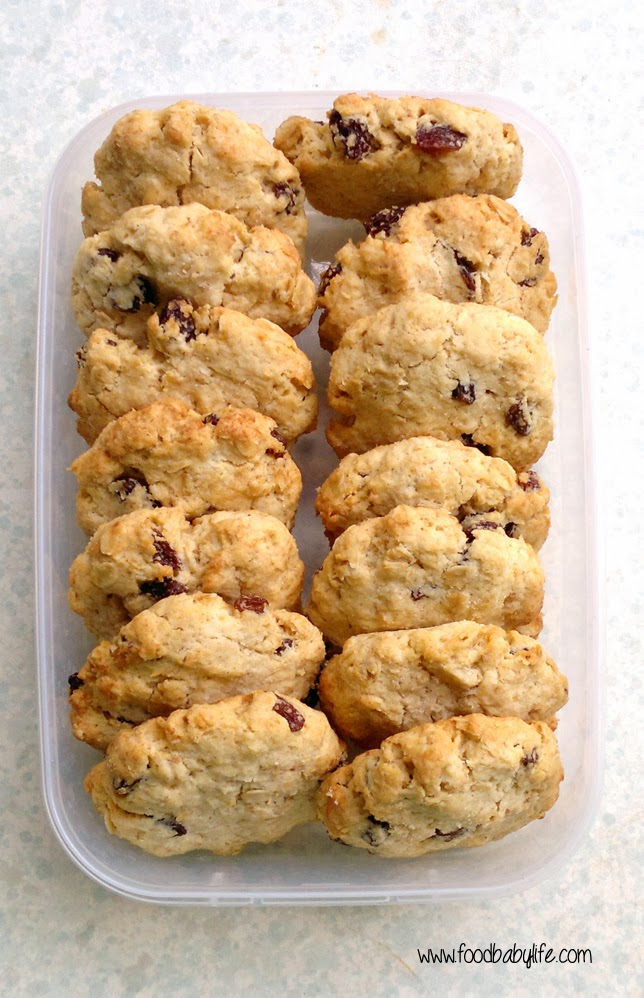
Starting School and Sultana Oat Biscuits

Sultana Oat Biscuits © www.foodbabylife.com
Today is a big day in our family as our eldest is starting school! While this year is called different things around the country here in Queensland this first year of school is called prep and is for kids who will turn 5 by the 30th of June.

Whatever you call it, it is the end of an era for us and the start of a new exciting chapter for Oscar!

We have been preparing for months getting school uniforms bought, washed and labelled, school books covered and the all-important lunch box chosen. After much deliberation I went with a medium size Fridge to Go lunch bag, a stainless steel lunchbots trio container and a 4 My Earth sandwich wrap and snack pocket. I bought all of these on Lime Tree Kids (my favourite online kids store) but they are available at other places. All of these should last him for years and I'm happy to be moving away from plastic to more environmentally friendly products.

At Oscar's school they eat 3 times in first term then twice a day after that. This means we need to send a piece of fruit for mini munch, lunch and a snack. For this first week I thought a yummy cookie would be perfect for his afternoon snack as it only has to keep him going for the hour or so until he gets home and I can bake and freeze ahead of time.

I came up with these Sultana Oat Biscuits using ingredients I had in the pantry. While I am baking without wheat and dairy most of the time these days, Oscar doesn't have any allergies and these are sugar free, contain wholemeal flour and will give him a good energy hit from the sultanas.

Good luck to all the preppies and their mums/dads today!

Sultana Oat Biscuits
Recipe by me

125g butter, softened
1 tbs stevia (I used Natvia)
1 ts vanilla extract
1 egg
1/2 cup wholemeal plain flour
1/2 cup plain flour
1 cup rolled oats
1 ts baking powder
pinch salt
1/2 cup dessicated coconut
1/2 cup sultanas

Preheat the oven to 180 degrees Celsius. Line 2 baking trays with baking paper and set aside.

Cream the butter and stevia together until pale, add the vanilla and egg and beat until thick and smooth. Fold through the dry ingredients until well combined. Roll spoonfuls of dough into 16 balls and place on 2 trays. Flatten each ball with damp fingers.

Bake for approx 10-12 minutes or until golden brown. They will be soft at first but will firm up when cool.

Saturday, July 27, 2013

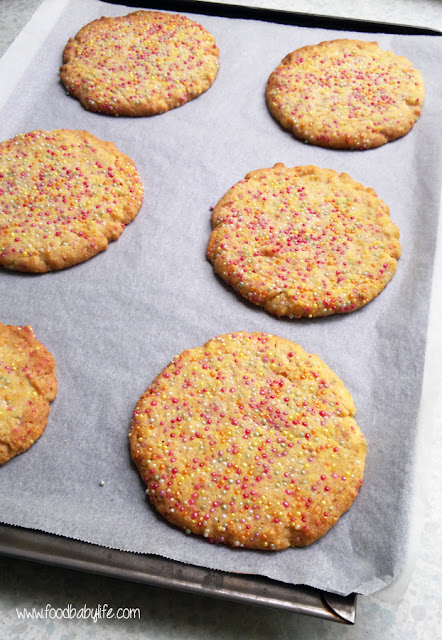
Sprinkles Biscuits

Sprinkles Biscuits Stack © www.foodbabylife.com
This is second of the yummy goodies I made for a cake stall at Oscar's kindy this weekend. You can see the Triple Chocolate Brownies here.

To me these biscuits/cookies just scream childhood. I mean, what kid doesn't love sprinkles??

These hundreds & thousands contained no artificial colours or flavours, and this is something I cam starting to notice more and more. Such a good thing although I know some kids (and adults) do react to natural colours and flavours as well.

I adapted the recipe for these beauties from Averie Cooks. Hers were for Chewy Sprinkles Cookies. They were much smaller and baked for less time so they come out of the oven very blond. However, my perfect biscuit is crispy on the outside and chewy in the middle so that's how I made them. I love the golden brown colour and their sweet buttery aroma was incredible.

I think I showed great restraint not tasting even one of these, but I gave one to my littlest taste tester Charlie and he gave it a huge thumbs up.

Why not make these this weekend? You won't be disappointed!

 
Sprinkles Biscuits
Makes 18 large biscuits/cookies
Adapted from Averie Cooks

250g unsalted butter
1 cup white sugar
1 tbs dark brown sugar, packed
1 large egg at room temperature
2 ts vanilla extract
2 cups plain flour
1/2 ts baking powder
1/4 teaspoon salt
1/2 cup hundreds & thousands (plus 1/2 cup extra to decorate, optional)

Place the flour, salt and baking powder in a medium bowl and whisk together to combine. Set aside.

In a stand mixer or large bowl using a hand mixer, cream together the butter and sugars at medium-high speed until light and fluffy. Stop and scrape down the sides of the bowl and add the egg and vanilla. Beat for 30 seconds, until just combined.

Switch to a spatula and fold through the flour and sprinkles until just combined. Wrap the dough in plastic wrap and refrigerate for at least 2 hours (or up to 5 days) before baking.

Preheat oven to 180 degrees C / 160 degrees fan-forced. Line 3 baking sheets with baking paper and set aside.

Divide the dough into 18 balls (my batch of dough weighed 968g so I got 18 x 54g pieces from the batch). Roll each ball in the extra sprinkles and place on the prepared trays, 6 per tray leaving plenty of room for spreading. Use your hand or lightly grease the bottom of a glass to flatten each ball to about 1cm thick.

Depending on your oven size you can bake these all at once or in batches. I did 1 tray at a time, with the remaining trays waiting in the fridge.

Bake for 12 minutes, rotating the trays halfway. They will be just golden brown around the edges and pale golden in the middle. Remove and allow to cool on the tray for at least 5 minutes before carefully lifting them onto a wire rack to cool completely. They will firm up as they cool.

Store the biscuits in an airtight container at room temperature for up to 5 days or in the freezer for up to 3 months. You can also store unbaked cookie dough in an airtight container or plastic wrap in the fridge for up to 5 days before baking.


Tuesday, March 19, 2013

BWJ - Mocha Chocolate Chips

Mocha Chocolate Chips © www.foodbabylife.com
They may not be the prettiest things but they were pretty tasty!

I made just a 1/4 batch of these Mocha Chocolate Chips because I don't need 4 dozen chocolate anythings hanging around here. I also left out the apricots as that just seemed a little odd.

Most of the batch was frozen and it was great I could eat them straight from the freezer as they didn't go rock hard.

So that's about it! Probably wouldn't make them again but they did disappear pretty quickly which is always a good sign.

Our host this week is Peggy of Galettista and you will find the recipe there.


Thursday, February 7, 2013

Carrot Cake Cookies

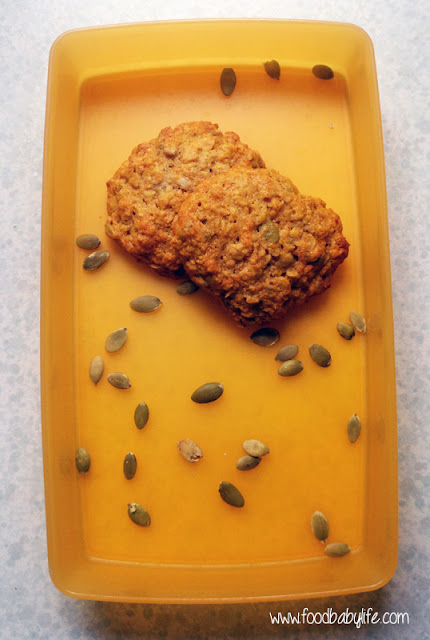
Carrot and Seed Cookies © www.foodbabylife.com

I've had a hankering for carrot cake this week but really couldn't be bothered making a whole cake. Plus I've been meaning to make a big batch of something to stash in the freezer for after-kindy snacks and a cake doesn't really work.

I spotted some Sunflower Seed Cookies on Planning with Kids a while back and have had them bookmarked to try.

As always when I find a recipe I like I very rarely make it as written. Here I've switched around quite a few of the ingredients using wholemeal flour, carrot and pumpkin seeds which weren't in the original. I've also used dextrose instead of sugar to make them lower in sugar/fructose and added extra baking powder so they are more cakey. Think a not-too-sweet carrot cake but in cookie form.

My boys went nuts for these! They had 2 each with a glass of milk for afternoon tea desperately wanted more but mean mummy said no.

This recipe makes a huge batch so they will last for more than 5 minutes. Most of the batch is in the freezer and I'm looking forward to bringing them out for after-kindy afternoon teas. As they are nut-free they would also be suitable to pack in Oscar's lunchbox for kindy.

Carrot Cake Cookies
Inspired by Sunflower Seed Cookies on Planning with Kids
Makes 4 dozen

225 grams butter, softened
1 ½ cups dextrose (or white sugar)
2 eggs
1 teaspoon vanilla
1 cup plain flour
1 cup wholemeal plain flour
1 teaspoon baking soda
1 teaspoon ginger
1 teaspoon cinnamon
1 teaspoon baking powder
1/4 teaspoon salt
2 cups rolled oats
½ cup sunflower seeds
½ cup pumpkin seeds
1 cup grated carrot (about 3 carrots peeled then finely grated)

Preheat oven to 180 degrees celsius /160 degrees fan-forced. Line 4 baking trays with non-stick paper and set aside.

Place the butter and dextrose a large bowl and beat with an electric beater until light and fluffy. Add the eggs one at a time followed by the vanilla, beating well after each addition.

In another bowl add all the dry ingredients and stir to combine then pour over the butter mixture. When roughly combined add the grated carrot and enough milk to make a thick and slightly sticky batter.

Roll heaped tablespoons of dough into balls and place them onto the trays (12 per tray), leaving plenty of room for spreading.

Bake for approx 12 minutes, rotating the trays halfway through, until lightly golden brown. Leave the cookies to cool for 5 minutes then transfer them to a wire rack to cool completely. Cookies will be soft but will firm up when cooled.

Makes approx 48. Suitable to freeze.

Friday, December 21, 2012

Cranberry, White Chocolate & Pistachio Cookies

Cranberry White Chocolate and Pistachio Cookies © food-baby.blogspot.com All rights reserved

These cookies just shout Christmas to me! They're red, white and green and packed with Christmassy flavours. I always make cookies to give as Christmas gifts because they are so transportable and always so well received.  Every year I say I should make more cookies and fewer chocolate-y things because of the heat but it never happens!

These are the sort of cookies with so many mix-ins you wonder how they will stay together. Then you make them and they're perfect, crunchy on the outside, chewy in the middle and packed with little surprises. Oh and they make the house smell amazing :)

Cranberry, White Chocolate and Pistachio Cookies
Recipe adapted from Brown Eyed Baker

1¼ cups plain flour
½ ts baking powder
½ ts baking soda
¼ ts salt
120g butter, at room temperature
½ cup light brown sugar
½ cup white sugar
1 large egg
1 ts vanilla extract
½ cup rolled oats
½ cup roasted salted pistachios, chopped
1 cup white chocolate chips
1 cup dried cranberries

Preheat oven to 190 / 170 degrees fan-forced. Line 2 trays with baking paper and set aside.

Whisk together the flour, salt, baking powder and baking soda in a medium bowl.

Using an electric mixer beat the butter and both sugars until light and fluffy. Add the egg and vanilla and beat until well combined. Carefully mix in the dry ingredients then using a spatuala, fold through the oats, pistachios, cranberries and white chocolate.

Roll the dough into balls and place onto prepared trays, allowing room for spreading. Flatten the top of each biscuit with your fingers then bake for approx 10 minutes or until slightly golden on top. Allow to cool on the trays for 5 minutes then transfer to a wire rack to cool to room temperature. Store in an airtight container.

Makes approx 30.

Saturday, August 4, 2012

Peanut Butter Cookies

In the midst of a flu-ridden and miserable week the urge for peanut butter cookies struck. These went from bowl to belly in 20 minutes flat...

Peanut Butter Cookies
Makes 24

1 cup natural peanut butter
1 cup brown sugar
1/2 cup rolled oats
1/2 cup wholemeal flour
1/2 ts salt
1 ts vanilla extract
1 egg

Preheat oven to 180 degrees celsius (160 degrees fan-forced). Line 2 trays with baking paper and set aside.

Combine dry ingredients in a large bowl then add the egg, vanilla and peanut butter. Mix well. Roll tablespoons of mixture into balls and place on the prepared trays. Flatten each ball slightly then bake for 10-12 minutes, rotating the trays halfway through.

Remove trays from the oven and allow to cool for at least 5 minutes before turning the cookies out onto a wire rack to cool completely. Devour.

Tuesday, July 3, 2012

TWD BWJ - Biscotti

© food-baby.blogspot.com All rights reserved

I think every baker has something they fear, whether it be caramel, pastry or decorating cakes. For me in the past it has been biscotti. Sounds crazy for something so simple but I have never been able to get it right! So in an attempt to overcome this silly fear I made this week's pick twice (which I never do).

I have a huge bag of raw almonds in the fridge so that's what I went with rather than buying hazelnuts. 

Batch one I made with almonds, vanilla and cinnamon and replaced the booze with milk. The dough mixed up well, looked great when it was baked but then pretty much fell apart when I sliced it. So I ended up with chunky crumbly-edged tooth-breakers. Really tasty dunked in tea but not much good for anything else!

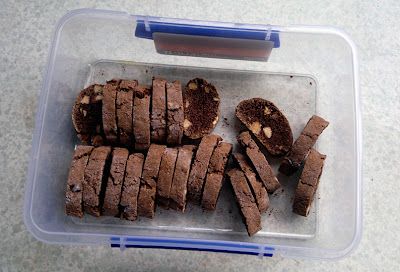
Batch two I made with almonds, cocoa and brandy. I chopped the nuts up more finely and when it came time to slice I used my best serrated knife and took it really slowly. 

© food-baby.blogspot.com All rights reserved

Success!  These were pretty much the perfect biscotti. I got the size right, they sliced cleanly and were lovely and toasty. And of course delicious! I would happy giving these as gifts come Christmas time which is a pretty big tick of approval!

Our hosts this week are Jodi of Homemade and Wholesome and Katrina of Baking and Boys. They will have the recipe for the original hazelnut biscotti on their blogs so make sure you go and check it out!

Sunday, June 3, 2012

Sunday Baking - Cornflake Biscuits


Does anyone else remember these fondly from their childhood? They were always a favourite of mine and now with young kids, they are perfect for lunchbox treats or a rainy day baking project.

You can experiment with different add-ins. I generally use sultanas but any dried fruit would work, as would chocolate chips or nuts. Just go crazy!

Cornflake Biscuits

125g softened butter
1/3 cup raw sugar
1 1/4 cups self-raising flour
1 tbs milk
1 ts vanilla extract
1/2 cup sultanas or chocolate chips
2 cups cornflakes, lightly crushed

Preheat oven to 180 degrees celsius (160 degrees fan-forced). Line 2 baking trays with baking paper and set aside.

Using an electric mixer, beat the butter, sugar and vanilla together until creamy. Sift in the flour, add the milk and mix until the mixture forms a dough. Add the sultanas/choc chips and 1 cup of the cornflakes and fold together until well combined.

Place remaining 1 cup of cornflakes into a bowl. Roll tablespoons of mixture into the cornflakes then place onto baking trays, allowing some room for spreading. Press each biscuit down with the back of a fork. 

Bake for 12-15 minutes or until golden brown. Allow to cool on the trays for 5 minutes before carefully placing them on a wire rack to cool. Makes approx 22.

Sunday, April 29, 2012

Sunday Baking - Lunchbox Biscuits

Is it just me or does this picture look like it came straight out of a 1970s Woman's Weekly magazine?? Not quite sure how I managed that but conveniently this is a pretty retro recipe so perhaps it was meant to be.

These are simply called Lunchbox Cookies and everyone seems to have their own variation. I found this one online at Best Recipes and made a few changes. These are wonderful warm from the oven but hubby has been taking a few from the freezer every day to have with his morning coffee at work and really enjoyed them.

Lunchbox Cookies
Very slightly adapted from Best Recipes

1 cup self raising flour
1/2 cup milk powder
1 cup rolled oats
1/2 cup coconut
1 cup dried dates, chopped
1/4 cup sugar
150g melted butter
1 egg, beaten
1 ts cinnamon

Preheat oven to 180 degrees celsius. Combine the dry ingredients in a large mixing bowl. Add the melted butter and beaten egg and mix well to combine. Roll tablespoons of mixture into balls and place on a lined baking tray, allowing some room for spreading. Flatten each biscuit with a fork.  Bake for around 15 minutes or until golden brown. Remove from oven and let rest on tray for 5 minutes before turning out onto a wire rack to cool completely. Makes approx 18.


Sunday, January 17, 2010

Ten in 10 Update 2 and Jam Drops

Well, another week done and it's been really up and down. We had some sad news on Thursday when we found out my uncle (Dad's brother) passed away suddenly overnight. Totally unexpected and I still can't believe it.

I'm the sort of person who cooks and cleans when I'm upset so the house looks great and I made some yummy cookies which I will get to in a moment.

First an official update for Ten in 10...

Things I did well this week:

1. Exercised 5 days out of 7. I was aiming for 7 days this week but overslept 2 mornings after being up a few times in the night with Oscar.

2. Switched workout dvds. The old one was becoming too easy so I guess that means my fitness is improving!

3. Weighed myself once! Lost 0.6kg which I am really happy with.

Things to work on for next week:

1. Eating consciously/watching portion size. I ate 4 jam drop cookies before I even knew what I was doing. Oh well.

When the urge to bake struck I was going to make Moogie's chocolate-filled poppyseed cookies but I think my poppyseeds were rancid. Ugh.

But I love these jam drops. Very homey and comforting. They are really sweet though so I would use only dark chocolate and a tart jam or marmalade. The flavour is more mellow the second day but they don't hold together as well. That's if they last that long!

Jam Drops/Choc Drops
Recipe adapted from Modern Classics #2 by Donna Hay, p18

180g (6oz) softened butter
1 cup caster sugar
1 egg
1 ts vanilla essence
2 cups plain flour
1/2 ts baking powder
jam and chocolate melts to decorate

Preheat the oven to 180 degrees C. Place the butter and sugar in the bowl of an electric mixer and beat until light and creamy. Add the egg and vanilla and beat well. Stir through the flour and baking powder and mix to a dough.

Roll tablespoonfuls of mixture into balls. Place on a baking tray lined with non-stick baking paper, allowing room for each biscuit to spread, and flatten slightly. Press a finger into the middle of the dough to make an indent.

Fill the hole with jam (preferably something tart like raspberry or rosella) or a chocolate melt. Bake for 10 minutes or until golden brown. Remove from the oven and add a little extra jam or another chocolate melt to each biscuit while they are still warm. Allow to cool completely before serving.

Makes approx 30 large or 60 small biscuits.

Saturday, December 5, 2009

Tuesdays with Dorie: Lemon Sables

We're well and truly into the Christmas spirit at chez food.baby this week and thanks to Barbara of Bungalow Barbara I have found another item to add to my Christmas gift baskets ... Lemon Sables!

These are simple slice and bake cookies, basically a buttery shortbread, that can be flavoured with virtually anything. I love citrus so went with lemon and let me tell you, the smell of that lemon zest scented sugar was divine.

I found the cooking time to be way off the mark. I happened to check on these at the 12 minute mark (the recipe said 17 to 20) and they were already pretty dark around the edges.

The taste test ...

Yum, yum yum! So simple to make, no fancy ingredients but absolutely delicious. I really loved the crackly, sugar-encrusted edges. Next time though I would increase the amount of zest and maybe do a lemon-orange combo. Really though, the possibilities are endless!

Thanks Barbara, we loved these! You can find the recipe on her blog.

Tuesday, November 17, 2009

Tuesdays with Dorie: Sugar-Topped Molasses Spice Cookies

Pamela of Cookies with Boys chose Dorie's Sugar-Topped Molasses Spice Cookies this week, and this is the one recipe of the month that I am posting on the actual date!

After last weeks mammoth effort for the chestnut cake I was really happy with this pick. Only thing was I discovered after I started to make them that I was completely out of cinnamon. (Totally not my fault though as hubby threw away the pack because it wasn't sealed properly and then didn't replace it. Love you sweetie!).

Rather than wait and make them another day I compensated by upping the ginger by 1/2ts and adding in 1/4 ts ground cardamon and a very generous pinch of pepper. I also used treacle rather than molasses as I already had some.

The taste test ...

Crispy on the outside, chewy in the middle and packing a real punch of flavour. They'd be perfect for icecream sandwiches or even just dunked in a glass of ice cold milk. And I don't even like milk! These are definitely going on the list for my Christmas baking.

Thanks for an awesome pick Pamela! You can find the recipe on Pamela's blog.

Thursday, October 29, 2009

Triple Treat Chocolate Chip Cookies

After the hot weather we've had lately, it was a relief that yesterday was grey, misty and cool. The kind of day that is perfect for curling up with a good book, a hot drink and something sweet to nibble on.

Which brings me to these.

There is much debate on what consitutes the 'perfect' chocolate chip cookie but I say, to each their own. If your preference is for thin, crunchy or chewy these are not for you. Or they may just convert you!

Triple Treat Chocolate Chip Cookies
Adapted from 'Chocolate Chip Cookies' on p16 of Modern Classics Number 2 by Donna Hay

125g butter, at room temperature
1/2 cup white sugar
1/2 cup brown sugar
1ts vanilla extract
2 eggs, at room temperature
2 cups plain flour
1 ts baking powder
100g dark chocolate, roughly chopped
100g white chocolate, roughly chopped
2/3 cup roasted salted peanuts

Preheat oven to 180 degrees C. Line 2 baking trays with baking paper.

Beat together the butter, sugar and vanilla until thick and smooth. Add the eggs and beat to combine. Using a spatula, fold through the flour and baking powder until just barely combined. Add the chocolate and nuts and fold through.

Roll dessertspoonfuls of mixture into balls and place on prepared trays allowing room for each cookie to spread.

Bake at 180 degrees for 10 to 12 minutes, or until puffed and lightly golden. They will still be very soft. Remove from oven and allow to rest for a few minutes before transferring to wire racks to cool completely.

Monday, July 27, 2009

Daring Bakers July - Milan Cookies

The July Daring Bakers’ challenge was hosted by Nicole at Sweet Tooth. She chose Chocolate Covered Marshmallow Cookies and Milan Cookies from pastry chef Gale Gand of the Food Network.

I love cookies so was really happy with this month's picks. I used to make marshmallows pretty regularly as a kid for school fetes etc so I opted to make the Milan Cookies first. Unfortunately I then ran out of time to make the Mallows this month.

Let me just say, the recipe makes a lot of cookies. A LOT. I would suggest you make a half batch unless you are feeding an army or you will end up throwing out some mixture like I did.

While cookies don't seem particularly 'daring' these did test my piping skills - I ended up with lots of irregular blobby shapes but by the end was doing pretty well. The ganache was absolutely delicious but then I love fruit and chocolate together. The only change I made was to add just 2 ts each of the vanilla and lemon essences instead of 2 tablespoons (?!?!?).

The only thing I didn't like was just how cakey these cookies came after they cooled down. I was hoping for something with a bit of crunch. That said they were still yummy and got the thumbs up from my taste testers!

Milan Cookies
Recipe courtesy Gale Gand, from Food Network website

Prep Time: 20 min
Inactive Prep Time: 0 min
Cook Time: 1 hr 0 min
Serves: about 3 dozen cookies

12 tablespoons (170grams/ 6 oz) unsalted butter, softened
2 1/2 cups (312.5 grams/ 11.02 oz) powdered sugar
7/8 cup egg whites (from about 6 eggs)
2 tablespoons vanilla extract
2 tablespoons lemon extract
1 1/2 cups (187.5grams/ 6.61 oz) all purpose flour

Cookie filling:
1/2 cup heavy cream
8 ounces semisweet chocolate, chopped
1 orange, zested

1. In a mixer with paddle attachment cream the butter and the sugar.
2. Add the egg whites gradually and then mix in the vanilla and lemon extracts.
3. Add the flour and mix until just well mixed.
4. With a small (1/4-inch) plain tip, pipe 1-inch sections of batter onto a parchment-lined sheet pan, spacing them 2 inches apart as they spread.
5. Bake in a preheated 350 degree oven for 10 minutes or until light golden brown around the edges. Let cool on the pan.
6. While waiting for the cookies to cool, in a small saucepan over medium flame, scald cream.
7. Pour hot cream over chocolate in a bowl, whisk to melt chocolate, add zest and blend well.
8. Set aside to cool (the mixture will thicken as it cools).
9. Spread a thin amount of the filling onto the flat side of a cookie while the filling is still soft and press the flat side of a second cookie on top.
10. Repeat with the remainder of the cookies.

Related Posts Plugin for WordPress, Blogger...