Showing posts with label Chicken. Show all posts

Monday, June 20, 2016

Garlic Chicken with Polenta (SRC)


Well, where has June gone?? I didn't mean for the blog to become a ghost town this month but between exams and assignments and just daily life with 3 children I've been really stretched this month!

But there is no way I would miss out on my Secret Recipe Club post! Each month members are assigned a blog in secret to peruse and choose something to share on the reveal day. This is my second month as a member of Group C and I am loving discovering all these new blogs!

This month I was assigned Where is my spoon? by Adina. Adina is Romanian but has lived in Germany for the past 10 years with her husband and 2 young children. Her recipes really reflect this European heritage and I spent many happy hours on her blog. There were literally dozens of very European recipes I would love to make - German Schnitzel, Transylvanian Yeast Cake and Linzer Torte just to name a few. But then I also loved her kid friendly recipes like homemade Chocolate Peanut Butter and the delightfully named Magical Soup for Children.

As Winter has finally arrived here I was looking for some serious comfort food and Adina's Garlic Chicken with Polenta ticks all the boxes. A simple but intensely flavourful meal, nothing fancy or complicated but so delicious that everyone is licking their fingers and asking for seconds. Adina describes it as a typical Romanian dish and something that her grandmother would have made. Perfect.

These photos really don't do it justice (it was pouring rain and very dark) but this was SO DELICIOUS! I made a few small changes to the sauce, just reducing it down a little and cooking out the garlic a little more to suit my kids' tastes.

I love simple food like this that when cooked with a little care become so much more than the sum of its parts.


Garlic Chicken with Polenta
Slightly adapted from Where is my spoon?

For the chicken:
8 chicken drumsticks
2 tbs extra virgin olive oil
2 cups chicken broth
1 ts sweet paprika
1/2 bunch flat leaf parsley, divided
4 cloves garlic, crushed
1 tbs butter
salt and pepper to taste

For the polenta:
1 litre water
1 tbs extra virgin olive oil
250g polenta
1 ts salt

Season the chicken with salt and pepper.

Heat the oil in a large, heavy based frying pan.

Fry the chicken pieces until browned on all sides.

Pour over the chicken broth, sprinkle on the paprika and half the chopped parsley.

Bring to the boil then lower the heat and simmer with the lid on but just ajar slightly to let some of the steam escape. Turn the chicken in the broth several times while cooking for about 30 minutes or until the chicken is cooked through.

(Start the polenta now).

Remove the chicken pieces to a dish and cover with foil to keep warm while you prepare the sauce.

Add the crushed garlic to the pan, increase the heat and simmer rapidly with the lid off for about 10 minutes or until it has reduced by half. Add the butter and stir to combine. Strain the sauce through a sieve into a jug, then return the sauce to the pan along with the chicken pieces.

Coat the chicken in the sauce, sprinkle over the remaining parsley and serve with polenta.

To make the polenta:

Bring the water and salt to the boil in a large heavy based pot. Once boiling add the polenta in a steady stream, along with the oil and cook over low heat, whisking often for 30-40 minutes or until cooked through.

Thank you for a wonderful month, Adina – this recipe is a keeper!

Thursday, March 10, 2016

How to: Cook a Perfect Roast Chicken

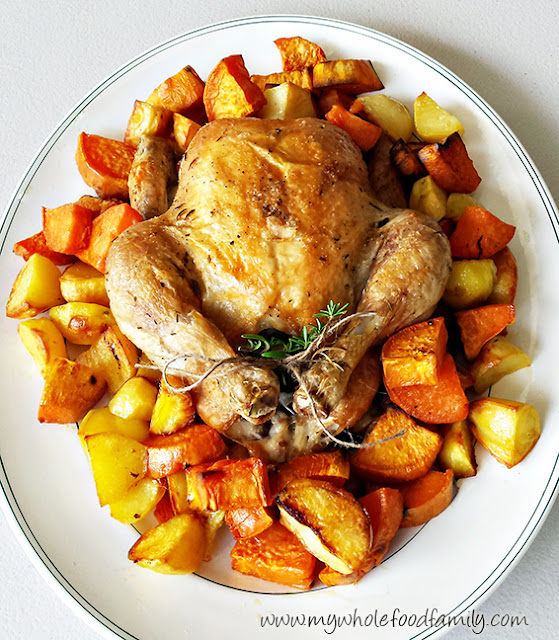
How To Perfect Roast Chicken from www.mywholefoodfamily.com

Whether it's a special occasion or just a Sunday roast, knowing how to cook a roast chicken is practically a life skill. What other food is as comforting and economical as the humble roast chook?

Growing up we regularly had roast chicken but apart from the drumstick it was never my favourite thing. The breast meat was always quite dry and powdery and without smothering it in gravy it didn't really have much flavour. But after learning a few simple tips and tricks I can finally say I have mastered the roast chicken and we have one every fortnight.

Forget buying a ready roasted chicken that is packed with nasty ingredients from the supermarket, my perfect roast chicken will become a staple at your place.

First things first, you need to choose the right chicken. If your budget allows then organic and free range is definitely the best and if you choose a large one it should give you enough meat for 2 dinners and a litre or so of broth from the bones.

To make sure you have enough meat for 2 dinners don't serve the chicken whole at the table. Instead carefully strip the meat off the bones and reserve some immediately. I allow just over half with roast vegetables for the first night then freeze the rest for risotto, stir-fry or just a salad loaded up with green veg, avocado and a great dressing. Don't forget to save all the bones for a broth - you can pop them straight into the slow cooker if you have one with some veggies and a few litres of water (I will be posting the full recipe for my bone broth soon so keep an eye out for that).

My top tips for a perfect roast chicken:

1. Check your timing - a good rule of thumb is to cook your chook at 190 degrees Celsius for 25 minutes per 500g plus an extra 20 minutes.

2. Flavour the chicken from the inside - lemon, onion, garlic and herbs are all brilliant.

3. Turn it upside down to rest - this will guarantee juicy breast meat.

4. Rest the meat for at least 20 minutes or anywhere up to half the cooking time, just cover with a few sheets of alfoil and a folded towel to keep in the heat.

5. Use the pan juices to make amazing gravy - you will see in the recipe below what I do to make an easy chicken gravy.

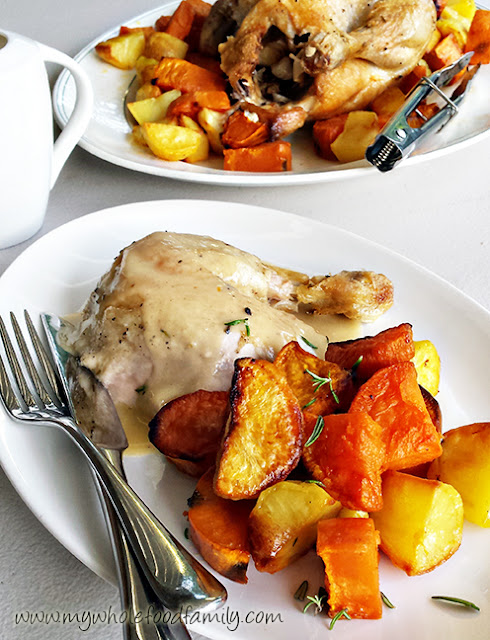
How To Perfect Roast Chicken from www.mywholefoodfamily.com

My Perfect Roast Chicken

1.7kg chicken
1 onion, peeled and quartered
6 cloves garlic, smashed
1 tbs extra virgin olive oil
1 ts salt
1/2 ts cracked black pepper
1 sprig fresh rosemary or 2 sprigs fresh thyme, finely chopped
1 1/2 cups water

1.2 kg potatoes, sweet potato and pumpkin, cut into 4cm pieces
2 tbs duck fat
salt and pepper to taste

Preheat the oven to 190 degrees celsius. Place the duck fat into a large baking dish and put in the oven to heat up.

Place the chicken into another large baking dish (I use pyrex). Place the garlic and half the onion inside the cavity.

Pour the oil over the top of the chicken, sprinkle on the salt, pepper and rosemary and massage them all in well. Add the onion to the dish and pour in the water around the chicken (this will form the basis of the gravy later).

Carefully remove the hot baking dish from the oven and tip in the chopped vegetables. Use 2 spoons to toss the veggies in the duck fat, sprinkle with salt and pepper.

Place both baking dishes in the oven and roast for 1 hour 40 minutes.

Remove the dishes from the oven. Place the chicken onto a serving plate and using tongs, carefully turn the chicken upside down (breast side down). Cover with foil and leave to rest for at least 20 minutes.

To make an easy chicken gravy:

Pour the pan juices and the onion into the Thermomix bowl along with 25g butter, 25g white spelt flour and 1 ts vegetable or chicken stock paste. Cook for 5 minutes / 90 degrees / SP 3. The puree for 10 secs / SP 9. Check for seasoning.

Linking up with Domesblissity's Thriving on Thursdays.

Monday, January 25, 2016

Crispy Southwest Chicken Bites (SRC)

Crispy Southwest Chicken Bites with Dairy Free Ranch Dressing from www.mywholefoodfamily.com

Happy new year everyone! What a long 2 months it's been since our last post for Secret Recipe Club. We had a wonderful Christmas, the kids are all set for school starting this week and it's Australia Day tomorrow. I love this time of year :)

Before I talk about the amazing recipe I chose this month, I need to let you know of some changes I've made around here. As you may have noticed my blog has a new look and a new name! I am now My Wholefood Family, which I think is much more reflective of the way we shop, cook and eat these days. I've also finally ventured onto Facebook a few days ago and I would love you to join me (it's a little quiet there at the moment!).

All done? Now back to the food. This month I was assigned the blog Burnt Apple. Traci is a married mum of 3 who cooks "healthy meals on a tight budget and on a tight schedule." Um yep sounds like I'm in the right place!

I got some great ideas from the roundup of AIP (auto immune protocol) dessert ideas, was intrigued by this non-dairy ice cream made using flax milk (I didn't know that was thing), drooled over these coconut sugar brownies, knew that with 3 boys a recipe for Fart Cookies would be a hit, on a hot summer day who wouldn't want some refreshing Watermelon Lemonade and for the perfect Christmas (or anytime) time snack how about Cinnamon Sugar Almonds?

In the end I settled on Traci's Crispy Southwest Chicken Bites. They were full of flavours I love and let me tell you, these did not disappoint. We loved them. No really, LOVED them! These are one the easiest and best tasting things I've made in ages. We can't buy ranch dressing here in Australia so after a bit of research I decided to make my own version which I adapted from here and here.

Crispy Southwest Chicken Bites filling www.mywholefoodfamily.com

Look at those colours! You just know that is going to taste amazing. I wasn't in my usual supermarket when I shopped for these and I couldn't find wonton wrappers anywhere. I settled for spring roll wrappers and while they were obviously a lot bigger they worked brilliantly.

I was amazed how good they tasted. With a simple brushing of egg white and baked in the oven they were super crispy and almost fried tasting. And dipped into that cool creamy dressing these were magic.


Crispy Southwest Chicken Bites
Recipe from Burnt Apple

2 cooked chicken breasts, shredded (mine was poached with garlic)
2 tbs olive oil
1/2 onion, finely diced
1/2 red capsicum, finely diced
2 cloves garlic, crushed
1/4 cup coriander, chopped
1/4 cup salsa verde
spring roll wrappers
2 egg whites
ranch dressing, to serve

Preheat the oven to 180 degrees Celsius / 350 degrees Fahrenheit. Lightly grease a large baking tray and set aside.

Add the oil to a frypan and sautee the onion and capsicum until tender (about 5 minutes). Add the garlic and cook for another minute or so. Remove from the heat and allow to cool slightly.

In a large bowl place the shredded chicken, coriander, salsa verde and cooled onion mixture and mix well.

Lay a spring roll wrapper on a board with the point facing you. Place a heaped spoon full of filling just below the middle and spread out slightly. Brush the edges with egg white. Fold over the bottom point, then fold in the sides then roll up into a spring roll shape.

Image source
Place onto the baking tray and repeat with remaining ingredients. Brush the rolls with egg white and bake for 15-20 minutes, flipping and brushing the other side with egg white halfway through cooking.

Remove from the oven and allow to cool for a few minutes before serving with ranch dressing.

Makes approximately 20

Thanks for a great month Traci! We loved this recipe and it's become a family favourite.

Tuesday, June 30, 2015

Apricot Chicken

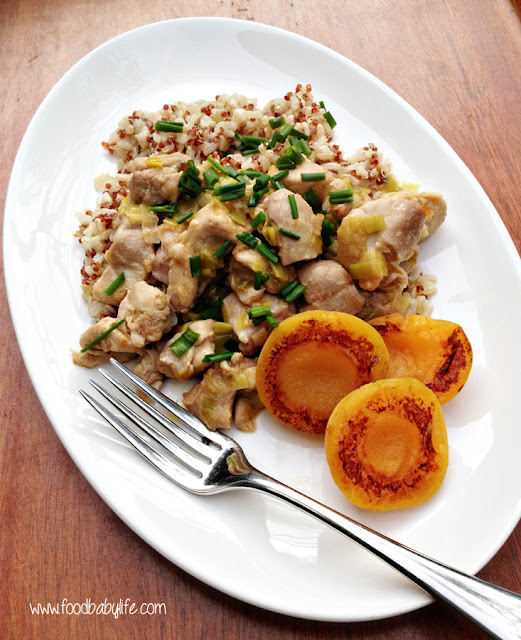
Apricot Chicken © www.foodbabylife.com

When I was growing up, apricot chicken was one of my favourite dinners. There's just something so delicious about that combination of sweet and savoury.

Last week on Better Homes and Gardens, Fast Ed did a series of 'kid-friendly' dishes which included apricot chicken and I realised my kids have never tried it. This is an updated version of the one I would have had growing up, which almost certainly would have included a packet of french onion soup mix!

The boys actually love watching BHG with me. Oscar really likes the gardening and pet segments, Charlie likes the building and of course we all love the cooking. So when we saw this recipe and the boys wanted to try it, of course we had to.

I copied it down directly from the show but you can view the video with the recipe here. It doesn't give all the exact quantities so I have included what I used below. The recipe said to use a rice and quinoa blend which I have seen around but never tried. As it was on special this week we got a bag and it was great. Really filling and much more interesting and nutritious than regular rice.

Fast Ed's Apricot Chicken
Serves 6

3 tbs butter
2 leeks, finely sliced
2 cloves garlic, crushed
1kg chicken thigh fillets, cut into 2cm pieces
1/4 cup flour
1 x 400ml tin apricot nectar
400ml chicken stock
1 x tin apricot halves
salt and pepper to taste
fresh chives
rice and quinoa to serve

Melt 1 tbs of the butter in a large pan over medium-high heat and saute the leeks until they are starting to soften. Add the crushed garlic and cook together until the leeks are tender and collapsed. Remove from the pan.

Dust the chicken pieces in flour and set aside. Cook your rice or quinoa using your preferred method and keep warm until ready to serve.

Add another 1 tbs of butter to the pan and fry off the chicken in 2 batches until it is well browned. Use the remaining 1 tbs of butter for the second batch of chicken pieces. Return the leek mixture and all the chicken to the pan and pour in the apricot nectar and chicken stock. Stir well and simmer, uncovered, for 15-20 minutes until the chicken is cooked through and the sauce has reduced and thickened a little. Check for seasoning and sprinkle in some fresh chopped chives just before serving.

In a separate non-stick pan over medium-high heat, place the apricot halves in, cut side down, and fry until golden brown. Remove and keep warm.

Serve the apricot chicken with rice or quinoa and the fried apricot halves.

The taste test ... we loved this! My 1yo and 6yo went absolutely nuts for it and wanted seconds and then thirds. This is definitely going into our rotation of meals.


Friday, April 24, 2015

Marinated Chicken Burger with Fountain Good Choice Sauces

I gave up sugar in September 2012 after reading Sweet Poison by David Gillespie and then stumbling across Sarah Wilson's I Quit Sugar program. While I don't remember the exact date I do remember jumping up and clearing out the pantry and being horrified at the amount of sugar that was hiding in our everyday products. I thought we were eating quite healthily but the bags of stuff I threw away said otherwise!

One group of products that didn't survive the great cull of 2012 were condiments. I knew that some sauces were quite sweet but I was astounded that our tomato sauce was over 25% sugar, the BBQ sauce around 40% and the sweet chilli contained a whopping 60%! I know you don't use much at a time but if I was going to be eating something so packed with sugar I would have rather had a chocolate bar or bowl of ice cream!

While I make most things from scratch these days, especially since buying our Thermomix, I have never really made any sauces.  I just didn't think I would be able to make a version that the kids would really like and I didn't think we would get through a whole batch before it went off.

So I was delighted to receive a pack of Fountain Good Choice Sauces to review thanks to Product Talk by Nuffnang. All the sauces are free of both sugar and gluten and the pack included a squeezy bottle each of tomato and barbeque sauces, and glass bottles of sweet chilli, hot chilli and soy sauces. Instead of sugar the sauces are all sweetened with Natvia which is an alternative sweetener using stevia.

Fountain Good Choice Sauces Review

We had a BBQ at Oscar's birthday party last weekend and I knew this would be perhaps the greatest test for the Good Choice Tomato and BBQ sauces. Would the kids be able to taste the difference? Would the adults notice the labels on the bottles? Well, I can say that both sauces got the thumbs up from all our big and little taste testers, every sausage got eaten and there was not a single complaint!!

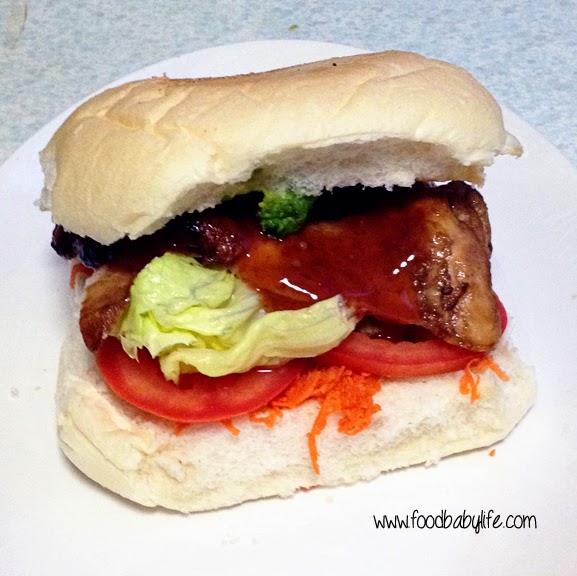
As for the other sauces I decided the best test for them would be a burger. I mean, it's not a real burger unless there's sauce dripping from your chin! I came up with this simple marinated chicken burger and it was SO good: lick-your-fingers-to-savour-every-last-bit good. I was surprised how spicy the sweet chilli sauce was (in a good way) but the hot one was too hot for me. In fact you can tell just how much we like the sweet chilli sauce as by the time I got around to taking the photo of the bottles it was half empty!

Marinated Chicken Burger with Fountain Good Choice Sauces © www.foodbabylife.com

Marinated Chicken Burger

For the marinade:
6 chicken thigh fillets
2 tbs Fountain Good Choice Soy Sauce
1 tbs Fountain Good Choice Tomato Sauce
1 tbs Fountain Good Choice Sweet Chilli Sauce
1 crushed clove of garlic

Place all ingredients into a large ziplock bag. Seal the bag, removing as much air as possible. Massage the sauces into the chicken pieces until well covered and then leave to marinate in the fridge for at least a 2 hours. The chicken pieces can be fried, grilled or barbecued until cooked through. I baked mine at 200 degrees C for approximately 20 minutes (make sure you check they are cooked through). Cover the chicken pieces with foil and leave to rest for 10 minutes while you prepare the burgers.

For the burger:
6 hamburger buns
1 avocado
2 tomatoes
lettuce
2 grated carrots
Fountain Good Choice Sweet Chilli or Hot Chilli Sauce

Assemble your burgers with your favourite salad ingredients, place a piece of chicken on top and drizzle over some sweet or hot chilli sauce to taste.

So. Would I buy these for myself? Yes but I'd still use them in moderation. There's not too much research into stevia yet and I've gotten my kids out of the habit of smothering everything in sauce so for us these sauces would still be a 'sometimes' food.  That being said I do love that this range is available and for anyone who wants to switch to something healthier but is worried the kids would reject it, try these!  The full range is available at Woolworths both in store and online.

*This is NOT a sponsored post. I received product for review and all thoughts and opinions are my own.

Monday, July 28, 2014

Chicken Paprikash (Secret Recipe Club)

Secret Recipe Club time! This month I was assigned Loving Life by Kirstin. Kirstin is a mum of 2 teenage daughters and blogs about her everyday life and all the delicious food she makes for her family. She has lots of great recipes to choose from and there were 3 which really caught my eye - the Texas Caviar, Candied Spiced Chickpeas and the Watermelon Cake.

But, there was one which I simply couldn't go past - Chicken Paprikash. Does anyone else remember that scene from When Harry Met Sally? 'Waiter there is too much pepper on my paprikash'. You can find it here if you have no idea what I'm talking about!

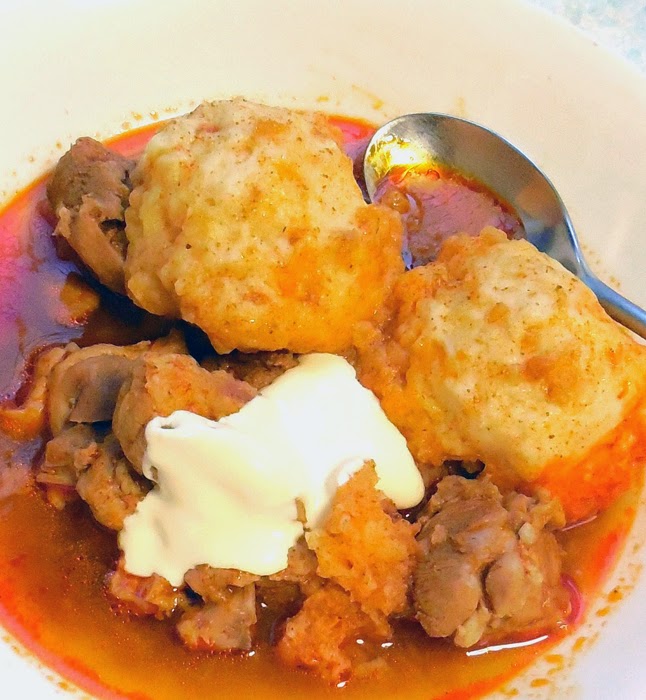
So Chicken Paprikash is essentially a Hungarian chicken soup flavoured with paprika. Or it's supposed to be. Mine turned out more like an Hungarian inspired chicken and dumplings! Even if it didn't turn out quite like it was supposed to (make sure you visit Kirstin's blog for a way more attractive photo of this dish) it was absolutely delicious. Really hearty and warming and perfect for the the chilly Winter weather we've been having here. I served it with a dollop of sour cream for the rest of the family.

Please don't be put off by this photo, it tastes WAY better than it looks here!!

So I'm not sure if I actually did something wrong or there was a mistake in the original recipe but there really wasn't enough liquid to make this a soup, even when I doubled it. I wanted to message Kirstin to ask her but then my recipe wouldn't have been secret any more! Either way, it was totally delicious and well worth making.

Paprikash inspired Chicken and Dumplings
Recipe adapted from Loving Life

1 onion, finely diced
1 clove garlic
1 kg chicken thigh fillets, each cut into 6 pieces
2 tbs Sweet Hungarian paprika
2 cups water
2 cups chicken broth/stock
1 tbs olive oil
Salt and pepper to taste

Add the oil to a large pot over medium heat and fry the onion until it starts to soften before adding the garlic and cooking for another minute or so. Add the cut up chicken and fry until brown. Add the paprika, water and stock and simmer for 1 to 1 ½ hours.

To thicken the soup (which I completely forgot to do):

1 tbs cornflour or arrowroot flour
2 tbs milk

Mix together the cornflour and milk in a small bowl and once combined, add in a small amount of the hot soup and stir until blended. Return the mixture to the pot and stir well. Season with salt and pepper to taste. Add the dumplings (if not already there).

To make the dumplings:

2 cups plain flour (I used spelt flour)
2 ts baking powder
2 eggs
2/3 cup milk (I used rice milk)
Pinch salt

Mix the dumpling ingredients together in a medium bowl and then drop by tablespoonfuls either directly into the soup or in a pot of gently boiling water. Simmer until the dumplings float.

Serves 6.

Thanks for a great recipe Kirstin!


Secret Recipe Club

Monday, January 27, 2014

Pistachio Crumbed Chicken with Raspberry Soy Sauce (Secret Recipe Club)


Happy new year everyone and welcome to my first Secret Recipe Club post of 2014!

So my blogging has been a little sporadic to say the least over the past couple of months. Who would have thought that 3 little boys would keep me so busy! My littlest boy is now 3 months old and sleeping pretty well so I am finally starting to feel more like myself and more motivated to get back into the kitchen.

This month for SRC I was assigned My Judy the Foodie by Shari. I love the idea behind this blog, with Shari cooking her way through her mother Judy's recipes as a way of remembering her and preserving her culinary prowess.

I can really relate to Shari as I lost my mum to cancer in 2008 and actually started this blog within a few weeks of her passing. While she didn't love cooking she certainly encouraged me and loved eating anything I made. I know she would have loved me blogging.

While Shari has some delicious sounding sweets on her blog I am on a healthy-eating kick at the moment to shift some baby weight so decided to stick with a main meal. The one I chose, Pistachio Crusted Chicken with Raspberry Soy Sauce, had me so intrigued I just had to make it!

I sent my husband out to buy the ingredients for this one and we both had mini heart attacks at the price of pistachios - about $60/kg!!! So we got just 1 cup of un-shelled pistachios and made up the rest of the quantity with mixed nuts. The end result was still really tasty with that gorgeous pistachio green colour. I would however recommend blitzing the nuts in a food processor for a smoother crumb. I crushed mine very carefully with a rolling pin so as not to wake the baby!

I was a little dubious about the sauce, I mean who mixes raspberry jam with soy sauce and horseradish? I will admit to having a little taste of the sauce on its own and wondering whether I'd made a huge mistake. But Judy was onto something because when it was poured over the chicken it was delicious! I served it with sweet potato mash and it made a really lovely dinner.

Recipe Pistachio Crusted Chicken with Raspberry Sauce
Adapted from My Judy the Foodie

500g chicken thigh fillets
garlic powder
olive oil for frying
sea salt
3 eggs, beaten
1 cup flour
1.5 cups crushed pistachio nuts
250g jar of raspberry jam (mine was St Dalfour 100% fruit)
90mls low salt soy sauce
2 ts of white horseradish from a jar

Preheat oven to 180 degrees Celsius.

Season the chicken with garlic powder and sea salt. Dip the chicken fillets into a bowl filled with flour, then into a bowl full of beaten eggs. After chicken is fully coated with egg wash, place in a bowl with the crushed pistachio nuts and cover completely.

In a large fry pan over medium high heat, fry the chicken pieces in about ¼ cup olive oil until both sides are golden, approximately 2-3 minutes per side.

Remove the pieces from the pan and place on a baking tray and bake for approximately 20 minutes or until cooked through.

To make the sauce, combine the raspberry jam, soy sauce and horseradish in a small bowl and mix completely to desired taste. Heat the sauce if you wish and pour over top baked chicken.


Secret Recipe Club


Monday, August 26, 2013

Chicken and Drop Dumplings (SRC)

Chicken and Drop Dumplings © www.foodbabylife.com


Yay Secret Recipe Club time again! If you're new here, each month SRC members are assigned a blog at random where they get to choose a recipe to make, keep it a secret and then all post on the same day. This month I was excited to be given Angel's Homestead by April who happens to be the fearless leader of SRC!

I really enjoyed taking the time to read through April's blog which is full of simple, easy to make and delicious recipes. I love her philosophy of frugal and sustainable living and this is really reflected in the food she makes for her family.

I don't have time for complicated meals at the moment. Life with 2 little kids is busy and in a couple of months, will be getting a lot busier with the arrival of #3! We're due at the end of October so only about 9 weeks to go.

Anyway, on to this month's recipe! Chicken and Dumplings...

I've made dumplings quite a few times, usually with a slow cooked beef casserole. They are such a great alternative to rice or pasta and so easy to whip up. My husband in particular is a big fan and really enjoyed these ones.

We've been having unseasonably warm weather for August so I was lucky that the day I had set aside to make this for dinner was cold and windy and just perfect for a warming and hearty dish like this.

April has several chicken and dumplings recipes on her blog so I decided to choose the simplest one and make a couple of changes of my own.

First I never use stock cubes because I am yet to find a good one without MSG and other yucky ingredients. So to boost the chicken flavour I browned the meat first and added some vegies to the broth while the chicken cooked. I also added some carrots and peas to the final dish for colour and because I can't help myself! I also used wholemeal flour because that's what I bake with most often.

Chicken and Drop Dumplings
Adapted from Angel's Homestead

4 chicken marylands (leg & thigh quarters)
1 litre chicken stock
2 cups water
1 medium onion, quartered
2 cloves garlic, peeled but whole
1 carrot, roughly chopped
1 stick celery, roughly chopped
3 carrots, extra (sliced thinly)
1 cup frozen peas

For the dumplings:
2 cups wholemeal self-raising flour (or plain flour with 1 tbs baking powder sifted through)
1/2 tsp salt
50g butter
1 cup of milk

To make the broth, heat up a large pot over medium high heat and sear the chicken pieces, skin side down, until golden brown. Remove the pieces and any excess oil. Throw in the onion, garlic, carrot and celery and fry for a few minutes. Return the chicken to the pot and pour in the stock and water (the chicken should be completely covered). Reduce heat to medium, put the lid on and allow to simmer for around 40 minutes or until the chicken is cooked through and the meat is pulling away from the bones.

Remove the chicken pieces then strain the broth through a fine metal strainer, discarding the vegies.

Shred the chicken meat and return to the pot along with the sliced carrots, frozen peas and strained broth and place over medium-low heat. Check for seasoning and add salt if needed.

To make the dumplings, mix together the flour and salt in a large bowl and set aside. Place the milk and butter in a small saucepan over medium-low heat until the butter is melted. Once melted, pour the milk and butter over the flour and mix until just combined. Drop the dumplings into the pot, a tablespoon at a time until all the mixture is used. Cover and let simmer for about 15 minutes.

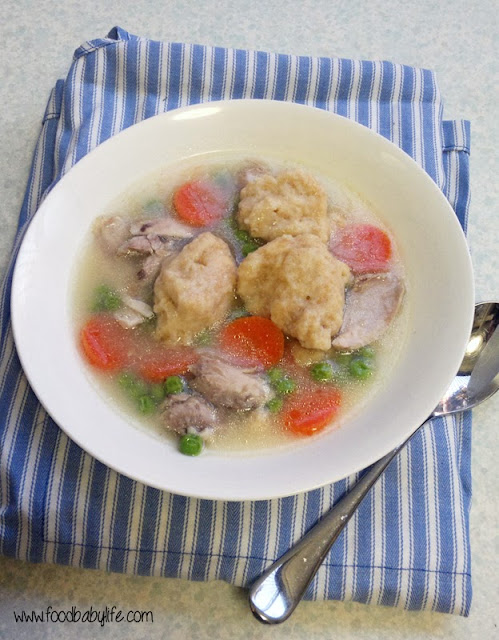
We all really enjoyed this, such a hearty and savoury meal for a cold day. Normally when I make chicken stock or soup I make it ahead of time so I can remove some of the fat. I didn't do that this time so there was quite a bit as you can see in the photo but I love that. It was a delicious dinner and one we'll be making again for sure.

Secret Recipe Club

Tuesday, March 26, 2013

Secret Recipe Club - Chicken Cheesesteaks

Chicken Cheesesteaks © www.foodbabylife.com

Secret Recipe Club time! This month I was given So Tasty So Yummy by Katie, and let me tell you I was really spoilt for choice when it came to picking a recipe. She has some amazing things on there!

Her Sea Salt Peanut Butter Oatmeal Chocolate Chip Cookies are on my must-bake list for another time, as is Katie's mum's Chocolate Cheesecake (swoon).

But for this month I really wanted an easy dinner to add into our rotation and her Chicken Cheesesteaks fit the bill perfectly.

I've always been intrigued by 'cheesesteaks' and used to imagine it was some sort of cheese that was crumbed and fried (how awesome would that be!). A little research showed it was actually thinly sliced steak covered with melted cheese. Katie has a chicken version on her blog which is much more us as we always have chicken in the freezer.

I made a few minor changes to the recipe, using chicken thighs instead of breast, red capsicum instead of green, red onion and mozzarella instead of provolone.

And the verdict? We LOVED this. So quick and easy and sooo tasty. Perfect for a quick dinner or weekend lunch. I topped ours with homemade dijonnaise (a mixture of mayonnaise and dijon mustard) and it was absolutely delicious! Definitely a keeper.

Chicken Cheesesteaks
Recipe from So Tasty So Yummy

1 tbs olive oil
2 large chicken thigh fillets
1/2 red onion, finely sliced
1/2 red capsicum, finely sliced
Worcestershire sauce, a few dashes to taste
1 cup shredded mozzarella cheese
4 long white bread rolls
Salt and pepper to taste

Split the rolls and place under the grill for 1-2 minutes to toast.

Thinly slice the chicken (you can freeze the pieces for about 15 minutes first to make this easier). Saute the onion and capsicum in the oil for a few minutes until starting to soften, then add the sliced chicken and cook until the chicken is starting to brown. Add the salt, pepper and worcestershire sauce and cook for another minute or so until the chicken is cooked through.

Place the chicken mixture into each roll, top with mozzarella and grill until the cheese is melted and bubbly.


Secret Recipe Club

Tuesday, February 26, 2013

Secret Recipe Club - Chicken Tikka Masala and Garlic Chive and Mozzarella Paratha


This is my first post for the Secret Recipe Club! I was given a really interesting blog called Enriching Your Kid written by mum Shirley to chronicle the recipes she makes for her family.

The recipes all have a strong Indian vibe and given we love Indian food in this house it was a really tough choice picking just one. So I went with 2 instead!

First up was a creamy Chicken Tikka Masala with a twist, that twist being that it contains cheese! A little research showed this is actually not uncommon. I love cheese but would never have thought to use it in a curry.

I did make a few changes to the recipe, firstly using chicken thighs instead of breast for extra flavour and also to ensure it stayed moist as we were cooking on the BBQ. Secondly, I used the remainder of the marinade in the sauce so as not to waste all those delicious flavours and to make the sauce really creamy. There were a few measures missing from the original recipe, for example the amount of lemon juice needed so I have just included what I used. I also doubled the recipe and that's what you will see below. You could easily halve it.

The second recipe I chose was the Garlic Chive and Mozzarella Parathas. While we do make curries pretty often I have never really made Indian breads and this one looked too good to pass up. It didn't disappoint. We all LOVED this bread!

The chicken and parathas made a fabulous dinner. The Chicken Tikka Masala has a lovely warmth from the spices (no chillies) so it is the perfect curry for kids. My 2 year wasn't keen (but he's going through a VERY picky stage) but he did love the bread. My almost 4 year old loved both and wanted seconds. So that's a pretty big tick of approval.

There were lots of other great recipes for choose from so make sure you check out Shirley's blog!

Chicken Tikka Masala
Recipe adapted from Enriching Your Kid

8 chicken thighs

1st marinade
1 tbs ginger-garlic paste (see recipe below)
Juice of 1 lemon

Cut each chicken thigh in half, add marinade ingredients and mix thoroughly. Place in the fridge for at least 1 hour or overnight.

2nd marinade
200 ml Cream
2tbs ginger-garlic paste
50 grams cheddar cheese, finely grated
3 tbs almond meal
2 egg white
1 tsp cardamom powder
1 ts crushed black pepper
oil
salt to taste

In a large bowl, mix together the first 5 ingredients the cheese dissolves and becomes a fine paste. Add the cardamom and pepper and mix well. Add the marinated chicken pieces and mix until the chicken is well coated. Set aside in the fridge for 2 hours.

Remove the chicken from the marinade, scraping off any excess. Reserve the leftover marinade to use in the sauce. Drizzle oil over the pieces, sprinkle with salt to taste and cook on a hot grill, turning often until golden brown and cooked through, approx 10 minutes.

Sauce

1 tbs oil
½ tsp cumin seeds
1 large onion
2 large ripe tomatoes
½ bunch fresh coriander, roughly chopped
salt to taste

Blitz the onion and tomato in a blender until smooth. Heat oil in a large frying pan, add the cumin seeds and cook for a few minutes until fragrant. Add the onion and tomato mixture along with the remaining marinade and mix well. Bring to the boil then cover, reduce the heat to low and simmer for around 15 minutes. Season to taste. Toss through the cooked chicken pieces and coriander and serve with parathas.

Serves 6.


Ginger & Garlic Paste
Recipe from Hub UK

115g fresh ginger, peeled and roughly chopped
115g garlic cloves

In a food processor blend the ginger and garlic to form a smooth paste, adding a little cold water or oil if necessary. Store in the fridge for up to 2 weeks in a glass container. Makes approximately 100ml.


Garlic Chives and Mozzarella Paratha
Recipe adapted from Enriching Your Kid

1 bunch garlic chives, finely chopped
½ cup grated mozzarella
1 cup wholemeal flour
1 cup plain flour
2 tbs olive oil
1 tsp cumin
1 tsp tumeric
½ tsp chilli powder
½ tsp asafoetida (I used 2 ts ginger-garlic paste instead)
1 ts salt
Approx 1/3 cup water

Mix all the ingredients in a large bowl and add enough water to create a dough. Leave to rest for 30 minutes.

Divide the dough into 8 equal portions and roll each portion out into a round, approx 15 cm across. Brush each side with oil and fry in a hot pan on both sides until crisp and golden brown. Serve hot.
Makes 8.


Secret Recipe Club


Sunday, March 14, 2010

Daring Cooks March - Risotto

This month's Daring Cooks challenge was all about comfort food. The meal? Risotto!

The 2010 March Daring Cooks challenge was hosted by Eleanor of MelbournefoodGeek and Jess of Jessthebaker. They chose to challenge Daring Cooks to make risotto. The various components of their challenge recipe are based on input from the Australian Masterchef cookbook and the cookbook Moorish by Greg Malouf.

I adore risotto so we tend to have it quite regularly. I do admit to cheating though and using premade stock. Not this time though.

The recipe in the MasterChef cookbook (which I happened to receive for Christmas) was for a pumpkin risotto. Hubby hates pumpkin with a passion so I chose to do a roast chicken and garlic risotto instead.

You don't really need a recipe for stock. I roasted 2kg of chicken drumsticks with 2 whole heads of garlic at 200 degrees for a couple of hours. I sauteed a couple of leeks in olive oil then added the chicken and garlic. Covered the whole lot with water, brought to the boil then simmered for 2 1/2 hours. Removed the meat from the bones and stored separately. Refrigerated the stock overnight then removed the fat on the surface. Bring the stock back up to the boil then strain and you are ready to go.

The verdict? Yum! The homemade stock really takes this dish from easy weeknight meal to dinner party showstopper. Absolutely delish and very easy to do.

Thanks for a great challenge girls! You can find the challenge recipe on MelbournefoodGeek or Jessthebaker.

Wednesday, January 20, 2010

Chicken Noodle Soup

It's official. Oscar has his first cold. I think he's done really well to get to 9 months without picking up any bugs, particularly as both hubby and I had the flu a few months ago.

Despite it being the middle of a hot summer, chicken noodle soup was definitely in order. While Oscar only got a little of the broth and some finely chopped chicken, the rest of us got the whole deal including noodles made from scratch.

Chicken Noodle Soup

For the broth:

1 x 2kg chicken, preferably organic
1 carrot,
1 stick of celery
2 cloves of garlic
1 red onion
2 bay leaves
water

Rinse the chicken under cold water and place in a large stock pot.Chop the onion, carrot and celery into large chunks. Add to the pot with the garlic and bay leaves. Cover with cold water and place over high heat. Bring to the boil then reduce the heat and simmer gently for 1 hour, skimming any scum that comes to the surface.

Remove the chicken from the broth and refrigerate. Remove and discard the vegetables and bay leaves (you may need to strain the broth to remove the onion and any sediment). Pour the broth into a large jug and refrigerate for at least a few hours. Once cold, remove most of the fat that has risen to the surface and discard. If you don't do this the soup may be too oily.

Once the chicken is cool, remove the meat from the bones and shred or chop it into pieces. Refrigerate until needed.

For the noodles:
Recipe adapted from Romaine's Chicken and Dumplings


1 1/2 cups plain flour
1 egg beaten
1 tbs butter
1/2 ts salt
5 tbs cold water

Add the flour, salt and butter to the bowl of your food processor and blitz until the mixture resembles course sand. Add the egg and pulse a few times to combine. Add the water 1 tablespoon at a time, pulsing in between additions, until the mixture starts to form a ball.

Remove from the mixer, cover with plastic wrap and let rest for 10 minutes.

Flour a large board or work surface and roll out the dough into a thin sheet (basically as thin or thick as you would like the noodles to be). Use a sharp knife to cut into the desired shape. I cut long ribbons about 1/2 inch wide, then cut each ribbon into 4 inch strips.

Cover with a tea towel and allow to dry for 20 minutes.

For the soup:

1 large carrot, finely diced
1/2 onion, finely chopped
1 zuchini, finely diced
salt and pepper to taste
Your cooked chicken and cooled broth
Noodles

Pour the cooled broth into a large saucepan and bring it to the boil. Check for seasoning at this stage and add salt and pepper to taste. Once boiling, add the vegetables and noodles and cook for about 10 minutes, or until the vegetables are tender. Add the chicken and stir through until hot.

Serves 6.

It doesn't matter how hot the weather is, there is just something so comforting about chicken noodle soup, and the homemade noodles really made this dish something special!

Saturday, November 14, 2009

Daring Cooks November - Sushi

The November 2009 Daring Cooks challenge was brought to you by Audax of Audax Artifex and Rose of The Bite Me Kitchen. They chose sushi as the challenge.

Yay, sushi! While I'm not exactly a sushi connoisseur (I'm not a raw fish fan - it's a textural thing) I have made it a number of times at home. This meant I already had the rice, mats, vinegar etc and was ready to get started.

Our challenge this month had 4 elements - first the sushi rice itself, which we then made into 3 different end products. I followed the recipe to the letter and have to say my rice turned out better than it ever has before.

First up - Dragon Roll ...

My dragon roll filled with delicious terriyaki chicken and topped with sliced avocado.

And turned into a dragon. Grrrr!

Yes, I am aware my dragon looks like it was made by a 3 year old. Let's pretend it was!

Next, Spiral Sushi Roll ...

I think I rolled these the wrong way because they look like the regular sushi rolls I buy all the time. Very tasty though, filled with terriyaki chicken, avocado, cucumber, carrot, omelette and sesame seeds.

And last, bite sized Ngiri ...


I made two varieties of these, one with smoked salmon and the other with omelette and nori. Yum!

I won't post the recipes here as they are really long, but you can find a printable PDF version here.

Thanks for a wonderful challenge Audax and Rose!

Wednesday, October 14, 2009

Daring Cooks October - Vietnamese Pho

Daring Cooks time again!

The October 2009 Daring Cooks’ challenge was brought to us by Jaden of the blog Steamy Kitchen. The recipes are from her new cookbook, The Steamy Kitchen Cookbook.

I was really excited about this month's pick, not only because it was chosen by Jaden but also because I love Vietnamese food! It is definitely my favourite Asian cuisine - fresh, fragrant and flavoursome. That being said, I've never actually had pho before.

We were given the option of doing either a long or short version of the dish. I originally chose the short version (which uses a premade stock) because I intended to make it again later in the month. Unfortunately I ran out of time but no matter, we will definitely be having this again!

I only made minor changes to the recipe, using chicken thighs because I feel they have more chickeny flavour, and using vermicelli noodles instead of the wider rice stick ones.

The taste test ...

Well, I didn't pick the best day to make soup for dinner. It was a hot and sticky 35 degrees in Brisbane that day, definitely not soup weather but it didn't matter. This was AMAZING! For really very little effort and a short list of ingredients we had a phenomenal meal. Light, fragrant and absolutely packed with flavour. I was also impressed with how clear the broth remained even after simmering the chicken. All I can think is if it tastes this good using purchased stock, it must be unbelievably good with homemade. I can't wait to try!

Vietnamese Chicken Pho

For the Chicken Pho Broth:
2 tbsp. whole coriander seeds
4 whole cloves
2 whole star anise
2 litres store-bought or homemade chicken stock
1 whole chicken breast (bone in or boneless)
½ onion
7.5 cm chunk of ginger, sliced and smashed with side of knife
1 to 2 tbsps. sugar
1 to 2 tbsps. fish sauce
500 grams dried rice noodles (about ¼ inch/6 mm wide)

Accompaniments:
2 cups bean sprouts, washed and tails pinched off
Fresh cilantro (coriander) tops (leaves and tender stems)
½ cup shaved red onions
½ lime, cut into 4 wedges
Sriracha chili sauce
Hoisin sauce
Sliced fresh chili peppers of your choice

Directions:

To make the Chicken Pho Broth: heat a frying pan over medium heat. Add the coriander seeds, cloves and star anise and toast until fragrant, about 3-4 minutes. Immediately spoon out the spices to avoid burning.

In a large pot, add all the ingredients (including the toasted spices) and bring to a boil. Reduce the heat to medium-low and let simmer for 20 minutes, skimming the surface frequently. Use tongs to remove the chicken breasts and shred the meat with your fingers, discarding the bone if you have used bone-in breasts.

Taste the broth and add more fish sauce or sugar, if needed.

Strain the broth and discard the solids.

Prepare the noodles as per directions on the package.

Ladle the broth into bowls. Then divide the shredded chicken breast and the soft noodles evenly into each bowl.

Have the accompaniments spread out on the table. Each person can customize their own bowl with these ingredients.

A big thank you to Jaden for introducing us to pho!

You can find the long version of the recipe here.

Wednesday, August 27, 2008

Chicken Pie

I love pie. There is something so homey, so comforting, so rustic about a pie. At least the way I make them anyway! They never taste the same twice but you can't go too far wrong whatever filling or flavours you decide upon. Buttery, flaky shortcrust pastry encasing a warm, savoury filling. Yum!

Basic Shortcrust Pastry
Recipe from Modern Classics No1 by Donna Hay, p155

2 cups plain flour
145g (5oz) cold butter
2-3 tbs ice cold water

Blitz the flour and butter together in a food processor until it resembles course breadcrumbs. With the mixer on low, drizzle in enough cold water to form a smooth dough.

Turn out onto a floured board and knead very lightly. Wrap in plastic wrap and refrigerate for 30 minutes. When ready to use, roll out until 3mm thick. This quantity will line up to a 25cm (10in) pie dish.

(I normally need 1 1/2 times this quantity for my pie dish)

Chicken Pie
A Food.Baby original

There really isn't a recipe as such for this. You choose whatever vegetables and herbs you like. The only thing to watch is that you cook the filling until it is thick enough and cool it slightly before using. Here is what I used for this particular pie:

750g chicken thigh fillets, cut into small chunks
6 large field mushrooms, diced
2 large carrots in small dice
1 onion, chopped finely
3 cloves of garlic
2 leeks, quartered and chopped finely
500ml chicken stock
1 tbs plain flour
1 bouqet garni
corn flour to thicken

Heat some oil in a heavy based pan over medium-high heat. Toss the chicken pieces with the flour and then cook until they are browned on all sides. Remove and place the pan back on the heat. Add a little more oil if needed and fry the onion, garlic, carrots and leeks until they are starting to soften.

Return the chicken to the pan with the vegetables. Add the bouquet garni and any other herbs you like. Pour in the stock. Bring to the boil then reduce heat to low and simmer for around 30 minutes.

After 30 minutes, add the chopped mushrooms and stir well. Simmer for another 15 minutes. Season with salt and pepper to taste. If the mixture is too liquid at this stage, add a few teaspoons of cornflour mixed with a small amount of water. When you are happy with the taste and consistency, remove from the heat and allow to cool slightly.

Preheat the oven to 200 deg C. Roll out 1/2 the pastry to line the base of your pie dish. Pour in the cooled filling then roll out the other half of the pastry to cover. Pinch the edges to seal and make a few slits in the middle to allow some steam to escape. Brush lightly with beaten egg.

Bake for approx 45 minutes or until the pie is puffed, bubbling and golden. Cool for 10 minutes before serving with a green salad or vegetables.

Serves 6.

Sunday, August 10, 2008

Sesame Chicken with Ginger Rice

This is one our favourite chicken dishes and the bonus is that it's light, healthy and full of flavour. But be warned, if you don't like ginger, DO NOT make this recipe! Or at least cut down the amount of fresh ginger. The ginger beer sounds strange but it creates beautifully sticky, fragrant rice that is tasty enough to eat on its own. We always make double the recipe so there is enough for lunch the next day.

Sesame Chicken with Ginger Rice
Adapted from Simply Healthy, 1999, p82

500g chicken breast
1 tablespoon sesame seeds
1 tablespoon rice wine
2 tablespoons honey
2 tablespoons soy sauce
2 tablespoons oyster sauce (I leave this out because it contains MSG)
1 tablespoon sesame oil
1 tablespoon of fresh ginger, chopped finely
1 tablespoon sesame oil
1 cup short grain rice
330ml ginger beer
1 teaspoon diced pickled ginger ( I leave this out because it is full of artificial colours etc)
1 tablespoon finely chopped spring onions

Toast the sesame seeds in a dry frying pan for 2-3 minutes.Combine sesame seeds, rice wine, honey, soy sauce, oyster sauce and sesame oil together in a large bowl to create the marinade. Cut the chicken into large strips and place in the marinade for 1 hour or overnight.

For the rice, place the fresh ginger and sesame oil in a large saucepan over a low heat. Cook, stirring occasionally for 5 minutes and then add the rice. Stir for 2 minutes. Stir in the ginger beer and the pickled ginger. Bring to the boil and then reduce the heat and cover. Cook for 10-15 minutes until the liquid is absorbed. (We always make ours in a rice cooker and it works perfectly. Just remember to follow the recommendations given in the manual - usually 1:1 rice to liquid for white rice).

While the rice is cooking, thread the chicken onto skewers and then BBQ or grill for 10-15 minutes, brushing with the marinade as they cook. (We don't normally skewer the chicken, just cook it in a large fry pan in batches).

To serve, spoon rice into serving bowls and top with chicken pieces. Sprinkle over sliced spring onions and tasted sesame seeds. Serve with greens. Yum!

Serves 4.

Monday, July 21, 2008

10 Minute Chicken Noodle Soup


This doesn't really qualify as a recipe, more of a 'meal idea'. Basically it's a 10 minute soup perfect for a cold winter's night. You can put in just about anything you like but always remember to taste the broth to make sure the flavours are balanced.

10 Minute Chicken Noodle Soup

2 L chicken stock (if not making it yourself, use a salt-reduced one)
1 pack soba noodles
500g chicken fillets (I use tenderloins - no cutting required!)
1-2 garlic cloves, sliced
1 thumb size piece of ginger, sliced
1/2 red onion, sliced finely
1 bunch asparagus, woody ends removed and sliced on diagonal
1 tbs tamari (or other soy sauce)
a few drops of sesame oil
1 small red chili, chopped finely
1 bunch fresh coriander

Cook the soba as per directions and set aside.

Meanwhile, in a large pot place the chicken stock, garlic, ginger, onion and chili. Bring to the boil then reduce heat to medium. Add the tamari and sesame oil and stir to combine.

Add the chicken pieces and simmer for 3 minutes. Add the asparagus and any other veges you like and simmer until both chicken and vegetables are cooked through (a couple of minutes max).

Refresh the noodles in hot water then drain and divide into serving bowls. Top each serve with a few chicken pieces and some vegetables. Ladle over the broth. Top with freshly chopped coriander.

Enjoy!

Related Posts Plugin for WordPress, Blogger...