Showing posts with label Fructose free. Show all posts

Monday, August 15, 2016

Peanut Butter Loaf (SRC)

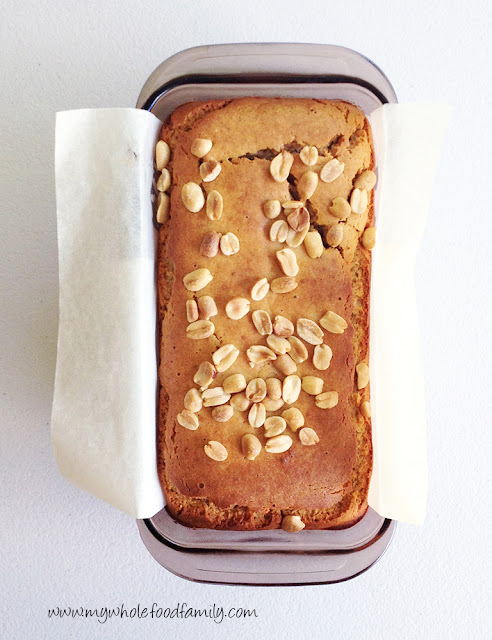
Gluten free peanut butter loaf cake - from www.mywholefoodfamily.com

It's Secret Recipe Club time again! Is it just me or does it seem like each month is going by faster and faster these days? For those counting there are only 4 more SRC reveals until Christmas!!

Anyway, for those who are new here, every month SRC members are assigned a blog in secret to choose a recipe from, then we all post on the same day. Today is reveal day for group C.

This month I was assigned Our Eating Habits by Jamie - a Disney-obsessed, Christmas-loving mother of 3 from Calgary. Jamie actually had my blog last month so it was extra fun looking through hers this month. Jamie also homeschools her kids which I find so fascinating because that's pretty rare here in Australia. She has also posted loads of restaurant reviews which I had a look through even though I am on the other side of the world!

Jamie has so many recipes to choose from that she has divided her recipe index into 2 categories - cooking and baking. I started making a list of possible recipes but it got a little out of hand so I will share just a few that caught my eye.

Firstly, my kids would go crazy for Spaghetti Tacos, this Sweet Shepherd's Pie is a great twist on a classic, I'm always looking for interesting vegetable side dishes and the Broccoli with Asian Garlic Sauce and Cumin Honey Carrots sound delicious, and lastly Kung Pao Chicken which I've never seen on a menu here but it always seems to feature on American TV shows for some reason.

I moved over to the baking section and bookmarked these Molasses Muffins. Then I noticed Jamie has not one, but two recipes for peanut butter loaf - Amish Peanut Butter Loaf and Peanut Butter Loaf. I've never heard of this before but we love our peanut butter around here so I had to give it a try!

Basically this is exactly what it sounds like, a loaf cake made with peanut butter. If you love peanuts and peanut butter, this loaf is for you!

Peanut butter loaf - gluten and dairy free - from www.mywholefoodfamily.com

I'm still doing my gluten-free experiment so I made it gluten free and swapped out the sugar for rice malt syrup as well. I also added a scattering of peanuts over the the top for some extra crunch.

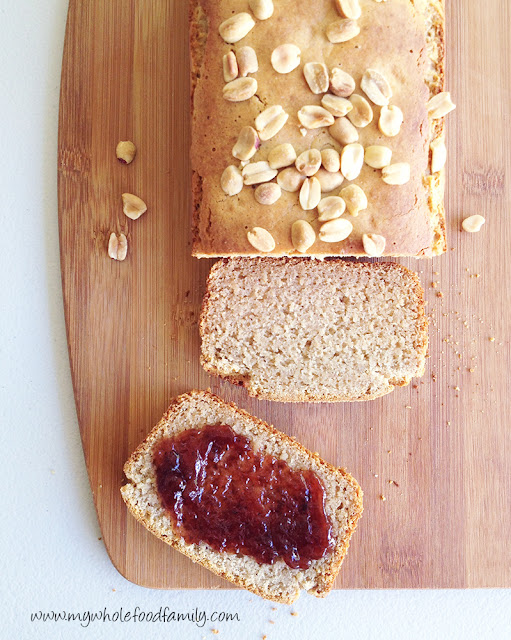
Peanut butter loaf with strawberry jam - gluten and dairy free - from www.mywholefoodfamily.com

This was a huge hit with my boys! Seriously, my husband missed out completely because it was completely devoured for afternoon tea before he got home. I used my own blend of gluten free flour and it made a moist, chewy loaf with a crispy crust. So delicious! I was imagining it would be amazing toasted but it didn't last long enough for me to find out! Guess I will just have to make it again.

Peanut butter loaf with strawberry jam - gluten and dairy free - from www.mywholefoodfamily.com

We usually buy freshly ground natural peanut butter but we only had peanuts in the pantry so I made my own peanut butter for this recipe. I used the Thermomix but any high powered blender or food processor will work. If you are using regular peanut butter you might want to adjust the amount of sugar or salt you use in the loaf.

Homemade Peanut Butter

160g roasted natural peanuts
15g coconut oil

Place the peanuts into the Thermomix bowl and chop 15 seconds / SP 8. Scrape down the sides, add the coconut oil and process for 6 seconds / SP 6. Makes exactly 2/3 cup needed for this recipe.

Peanut Butter Loaf - Gluten, Dairy and Fructose Free
Adapted from here and here

2/3 cup natural peanut butter
110g rice malt syrup
1 cup rice milk
2 cups gluten free plain flour
1 tbs gluten free baking powder
1/4 ts sea salt

Preheat the oven to 180 degrees Celsius / 350 degrees F. Grease and line a standard loaf pan with baking paper and set aside.

Beat together the peanut butter, syrup and milk until smooth. Add the remaining ingredients and fold through until well combined.

Pour into the prepared pan and bake for approximately 50 minutes, or until golden brown and a skewer inserted into the middle comes out clean.

Cool on a wire rack before serving sliced with strawberry jam.

Thank you for a great recipe, Jamie - this one is a keeper!

Thursday, January 21, 2016

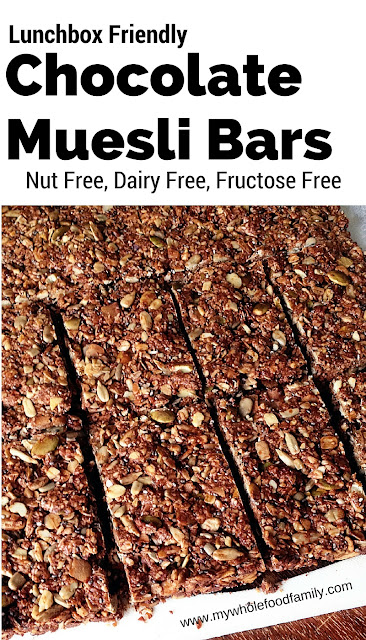
Lunchbox-friendly Chocolate Muesli Bars (Nut, Dairy and Fructose Free)

Lunchbox friendly chocolate muesli bars - nut free dairy free fructose free - from www.mywholefoodfamily.com

I've been making these muesli bars for the kids for years now but with all 3 kids off to school or daycare this year (sob) I can officially call them 'lunchbox friendly.'

If you want to eat fewer processed foods, then making your own snacks like these is a great place to start.

Store bought muesli bars, especially the ones plastered with statements like 'no added sugar', '99% fat free' and 'no artificial colours or flavours' can be full of rubbish ingredients. (I will be doing a post on how to read product labels next month so keep an eye out for that!)

These use a mixture of seeds instead of nuts, coconut oil instead of butter and rice malt syrup instead of sugar. If you have no problems with dairy then use butter by all means and you could also replace the syrup with either honey or maple syrup (although this means they won't be fructose free).

They are absolutely delicious and really filling too so my kids will having one of these and a piece of fruit in their lunchbox for morning tea next week at school. It will keep them going for hours!

Chocolate Muesli Bars

140g rice malt syrup
90g coconut oil
2 1/2 cups rolled oats
1 cup shredded coconut
1 cup pumpkin seeds
1 cup sunflower seeds
1/4 cup chia seeds
1/4 cup sesame seeds
2 tbs raw cacao
3 ts vanilla extract
1/2 ts salt

Preheat oven to 160 degrees C / 140 degrees C fan-forced.

Line a 20 x 30 cm slice pan with baking paper and set aside.

TMX - melt together the syrup, coconut oil and vanilla extract for 2 minutes / 80 degrees / SP 2. Add all remaining ingredients and process for 20 seconds / SP 4.

No TMX? Melt the syrup, coconut oil and vanilla in a small pot over medium heat. Place all remaining ingredients in a large bowl and toss to combine. Pour over the syrup mixture and mix really well.

Tip the mixture into the prepared pan and press down well.

Bake for approximately 25 minutes. Use your nose with this one, the house will smell amazing and it will look evenly browned. Do not overcook!

Remove from the tin by lifting the baking paper on each side and slice into bars while still warm. Leave until completely cooled. Store in an airtight container or freezer.

Makes 16-20 but you can slice them into whatever size bars you need


Saturday, November 21, 2015

Creamiest Dairy Free Chocolate Ice Cream

Creamiest Dairy Free Chocolate Ice Cream

Happy November everyone! I never intended to be absent so long but life got busy, as it tends to do this time of year. Anyway you'll be glad I'm back because this ice cream is awesome and perfect for the stinking hot weather we're having at the moment (33 degrees C right now if anyone else is a weather tragic like me!)

So ice cream without dairy can be a little tricky, it can swing between too icy or too coconutty (totally a word) pretty quickly. But as 3 out of 5 of us are dairy free I've done a lot of experimenting. You're welcome.

My kids claimed this was the best chocolate ice cream ever and their chocolate covered faces spoke volumes. It was smooth and luscious and intensely chocolatey. The perfect antidote to a hot summer's day.

The weather made it impossible to get a picture before it melted (that and the kids kept opening the freezer every 5 minutes to check if it was ready!)

Make this. It's really good.

Creamiest Dairy Free Chocolate Ice Cream

400g tin coconut cream
400g rice milk (or any dairy-free milk you like)
2 eggs
2 heaped tbs raw cacao
2 tbs arrowroot
120g rice malt syrup (or maple syrup)
2 ts vanilla extract
pinch salt

TMX - place all ingredients in mixing bowl and cook 9 minutes / 90 degrees / SP 4.

Don't have a thermomix? Warm the milks in a large saucepan over medium heat and bring it to a simmer. Meanwhile in a medium heatproof bowl, beat together all remaining ingredients. Pour the warmed milks into the other ingredients whisking continuously. Tip the mixture back into the saucepan and stir over medium heat with a wooden spoon until it thickens and coats the back of the spoon, 5-10 minutes.

Pour the custard into a heatproof bowl and cool to room temperature before placing into the fridge and leaving to chill for at least 4 hours. Make sure you press some baking paper over the surface of the custard to stop it drying out.

Once the custard is completely cold, pour into your ice cream maker and churn for approximately 15 minutes or according to the manufacturer's instructions. It will be soft-serve consistency at this stage so pop it in a glass container in the freezer for a few hours before serving (if you can wait that long).

Thursday, June 18, 2015

Fudgy (almost) Grain-free Chocolate Brownies

Fudgy Grain-free Chocolate Brownies © www.foodbabylife.com

I have been on the search for the perfect 'healthy' brownie for more than a year now. I've tried literally dozens of recipes, and a few of them have actually been pretty good like this Healthier Chocolate Brownie.

But I still hadn't found one I was completely happy with in terms of both taste and ingredients. Until now. This brownie recipe comes from Eat Drink Paleo where Irena describes them as the brownies that blew her away. And now that I've made them I completely agree!

Now my husband would say that the best part of a brownie is the crispy edges but I actually prefer the fudgy middle and that's what these brownies deliver unlike so many others.

My kids loved these and they disappeared so quickly I barely had a chance to take a photo. They had no idea there was sweet potato in them, and you certainly can't taste it, but that must be what makes the texture so fudgy and delicious.

The only change I made was to use rice malt syrup instead of honey. This makes them fructose free but no longer paleo as rice is obviously a grain, hence the (almost) grain-free of the title!

These would make a fabulous dessert served with berries and coconut cream or dairy-free ice-cream but we had them simply dusted with extra cacao powder.

The original recipe said to bake for 25-30 minutes but this made my first batch too dry so second time around I baked for just 20 minutes and they were perfect.

Fudgy (almost) Grain-free Chocolate Brownies 
Slightly adapted from Eat Drink Paleo

1 medium sweet potato (approx 2-3 cups grated)
2 whole eggs
1/2 cup coconut oil, melted
1/3 cup rice malt syrup
2 ts vanilla extract
1/2 cup raw cacao powder
1 ts baking powder
1 ts bicarbonate of soda
2 1/2 tbs coconut flour

Preheat oven to 180 degrees C / 160 degrees fan-forced. Grease and line an 8 inch square baking pan.

In a large mixing bowl, place the sweet potato, eggs, vanilla, syrup and coconut oil and mix together until well combined. Next stir through the cacao, baking powder and bicarb soda, and then add the coconut flour mixing until only just combined.

Pour the mixture into the prepared tray and bake for 20-25 minutes. Remove from the oven and allow to cool for 10 minutes before carefully removing from the tin. Serve dusted with extra cacao powder and some berries.

Related Posts Plugin for WordPress, Blogger...