Showing posts with label Hidden Veggies. Show all posts
Showing posts with label Hidden Veggies. Show all posts
Tuesday, March 21, 2017
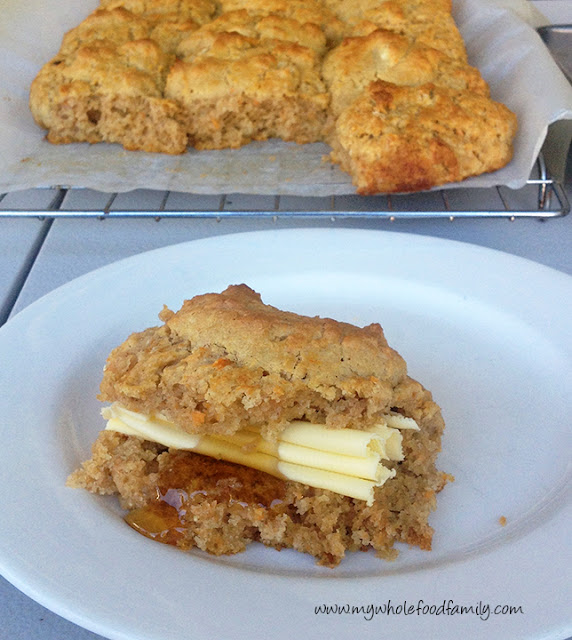
Gluten Free Sweet Potato Scones
As I was writing up this post, Mr 6 came into the room and looking over my shoulder said 'YUCK! I'm never going to eat sweet potato scones!'
Ok, I say, but what I'm thinking is 'bad luck buddy, you actually scoffed down 3 of them last week and loved them.'
Ha!
I think it is completely fine to hide vegetables in kids food. In fact I pride myself on doing it really well.
Why?
Because my kids are always served vegetables or salad with dinner. I know what they like and what they don't like, and this is the perfect way to boost the nutrition of a snack.
The only sweetness in these is from the sweet potato but the kids ate them with butter and rice malt syrup and they were definitely sweet enough.
I saved a few of these to eat with soup for my lunches and they were the perfect accompaniment to a savoury meal.
Like most gluten-free baked goods they are best eaten fresh but I didn't mind how crumbly they got. It was perfect with soup!
Gluten Free Sweet Potato Scones
150g buckwheat flour
150g gluten free plain flour
1 tbs gluten free baking powder
1/2 ts salt
100g cold butter, cubed
120g cold mashed sweet potato
1 egg
190ml coconut milk (+ 2 tbs extra to glaze)
Preheat oven to 200 degrees Celsius.
Line a 20 x 30cm baking tray with baking paper and set aside.
Place flours, baking powder, salt and butter into the bowl and mix for 6 secs / SP 6.
Add remaining ingredients and combine for 20 secs / lid locked / KNEAD.
Dollop big spoonfuls of mixture into the tray (I got exactly 15 to fill the tray). Brush the tops with the extra milk.
Bake for 15-17 minutes or until golden brown and cooked through.
Cool in the tin for 5 minutes before lifting out using the baking paper as handles on each side. Place on a wire rack until cool enough to eat.
Delicious served warm with butter and syrup.
Makes 15.
What's your favourite scone recipe?
Do you think your kids would enjoy these?
Let me know below!
Susan x
Tuesday, February 21, 2017
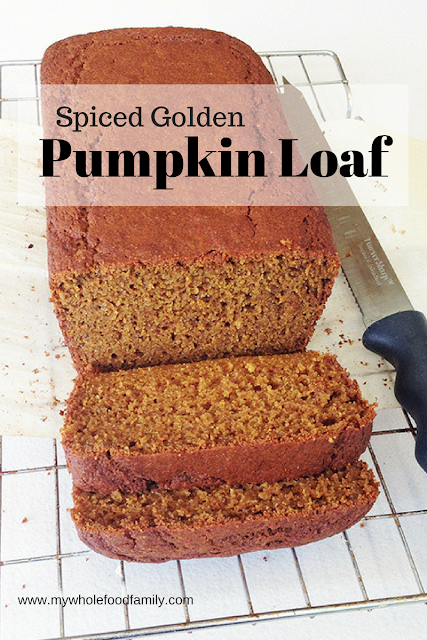
Pumpkin Loaf aka Spicy Golden Loaf
Having a child who is fussy about food is incredibly frustrating at the best of times.
And at the worst of times? It's a bit of a nightmare.
My now 6-year-old hasn't eaten a good dinner since before he was 2.
Let that fact sink in a little.
That's approximately 1500 nutritious dinners prepared lovingly by me that have NOT BEEN TOUCHED.
If we can get him to the table, he will eat plain pasta with extra virgin olive oil, homemade pizza (no sauce and topped only with cheese, olives and tinned pineapple) and takeaway fish and chips.
The list of foods he will eat is incredibly small and shrinking by the week.
We've done feeding therapy sessions with an occupational therapist and speech pathologist, and seen a GP, naturopath, dietician and psychologist.
So where does that leave us?
Well, it leaves us trying to pack in nutrition wherever and whenever we can.
At the moment breakfast is the only decent meal he will consume in a day.
It is usually a smoothie which I cram to the brim with good stuff like avocado, chia seeds, oats, yoghurt, protein powder, nut butters, berries, greens and more. Something like My Favourite Green Smoothie but with organic full cream milk.
Lunch usually comes home completely untouched so needless to say he is STARVING when he gets home.
So that leaves afternoon tea.
I try to make it a good one!
Hiding vegetables in cakes and muffins etc is not new, but it is definitely my favourite way to increase their nutrition. These have been some of favourites:
'Apple' Crumble Slice (without any apple!)
Chocolate Beetroot Cake
Pumpkin Fruit Cake
Chocolate and Zucchini Muffins
Sweet Potato Brownies
Pumpkin, zucchini, carrot, sweet potato and beetroot all work beautifully in baked goods. Add in a good unrefined sweetener and some sweet spices like cinnamon, nutmeg and vanilla and you have a delicious sweet treat that will fill them up and give them some much need veggies.
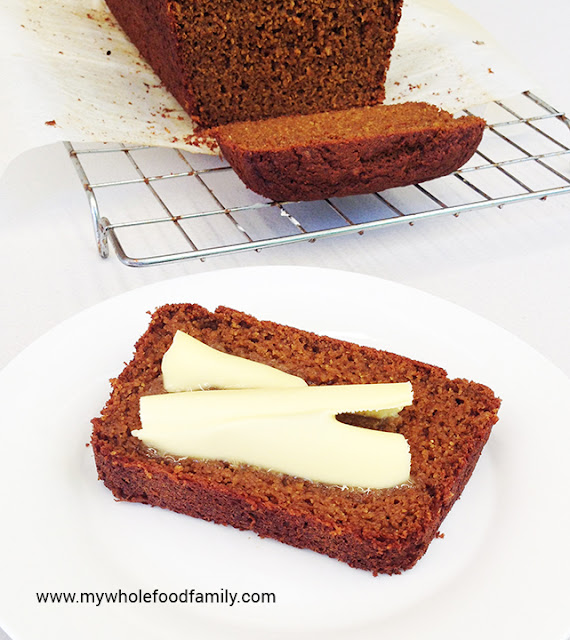
Today I had a lot of pumpkin to use up so I whipped up this pumpkin loaf cake which I am calling a 'Spicy Golden Loaf'. It is beautifully moist with lovely warm flavours of cinnamon, nutmeg, clove, ginger, orange and molasses.
A slice of this with a glass of milk will happily fill up even the fussiest tummy.
Spicy Golden Loaf
100g butter, at room temperature
100g coconut sugar
2 large eggs
1 ts vanilla extract
1 ts blackstrap molasses
zest of 1/2 orange
1 cup mashed pumpkin
1 2/3 cups wholemeal spelt flour
1 tbs baking powder
1/2 ts bicarb soda
1 ts cinnamon
1/2 ts nutmeg
1/2 ts ginger
1/4 ts cloves
Beat together the butter and coconut sugar until light and fluffy.
Add the eggs one at a time beating until smooth.
Add the pumpkin, vanilla, molasses and orange zest and mix until well combined.
Add the dry ingredients and fold through until just combined.
Pour mixture into prepared loaf pan and bake for 45-55 minutes, or until golden brown and the middle springs back when pressed gently.
Turn out onto a wire rack to cool. Delicious warm from the oven or at room temperature. Serve with butter.
Do you have a fussy eater?
What are your strategies? Let me know below!
Susan
Thursday, July 7, 2016
Chocolate Beetroot Cake
We're coming to the end of 2 weeks school holidays here and while I've been baking up a storm I've taken a bit of a break from blogging. I do have a slew of awesome recipes lined up for the next few weeks though!
Having all 3 of my boys for 2 weeks has been wonderful and they've been very willing guinea pigs for my baking experiments. Some hits, some misses ... but they've devoured the lot!
This recipe was an unexpected hit with my boys - they LOVED it! I had a couple of beetroots leftover at the end of the week and rather than make juice or a beetroot dip as I normally would I decided to make something sweet.
As you know I love boosting the nutrition of my baked goods by using spelt instead of wheat, adding nuts and seeds and of course, adding vegetables. Carrot, pumpkin, sweet potato and zucchini all work brilliantly. I wondered if the earthy flavour of the beetroot would be too much for the kids but I needn't have worried, they just saw it as a chocolate cake and each had seconds, and then thirds!
The boys had theirs with butter and then the next day I had a piece toasted and topped with my homemade roasted strawberry chia jam. SO delicious.
You can increase the chocolate flavour by replacing 1/4 cup of the white spelt flour with 1/4 cup raw cacao powder.
Wheat-free, Dairy-free Chocolate Beetroot Cake
120g coconut oil
80g dark chocolate (Green and Black's 70%)
2 beetroots, finely grated (mine was 286g peeled)
2/3 cup coconut sugar
1 cup white spelt flour
1/2 cup wholemeal spelt flour
3 ts baking powder
pinch salt
3 eggs, lightly beaten
Preheat the oven to 170 degrees Celsius.
Grease and line a loaf pan with baking paper and set aside.
In a small pan, melt the coconut oil and chocolate together over low heat, stirring until it is smooth. Remove from the heat and allow to cool for a few minutes.
Place the coconut sugar, flours, baking powder and salt in a large bowl and stir with a whisk until well mixed.
Pour in the cooled chocolate mixture, grated beetroot and eggs, and fold together with a spatula until just combined.
Thermomix - roughly chop the beetroot then grate for 4-5 seconds / SP 6. Tip out the beetroot into a small bowl and scrape down the sides well. Add the chocolate and chop for a few seconds / SP 6-7. Add the coconut oil and melt for 3 minutes / 37 degrees / SP 3. Add the coconut sugar, flours, baking powder and salt, followed by the beetroot and eggs. Mix for 10 seconds / REV / SP 3. Scrape down the sides and repeat if needed.
Pour the mixture into the prepared pan and bake for approximately 50 minutes or until the top springs back when pressed and a skewer comes out clean.
Leave in the tin to cool for at least 15 minutes before turning out onto a wire rack.
Have you tried hiding vegetables in cakes and muffins? Do you have a favourite recipe you could share? I'm always looking for inspiration!
~ Susan
Monday, January 18, 2016
My Sweet Corn Pancakes
One of the very few vegetables my Mr 5 will eat (and I'm not counting chips as a vegetable because he won't touch homemade ones) is corn on the cob. But there is absolutely no way he will eat a muffin, pancake or anything else with pieces of corn in it.
I adore corn fritters with their sweet and savoury flavour and packed with herbs. But I accept that those won't get eaten and sometimes you have to compromise. I came up with these sweet corn pancakes and was delighted to see them gobbled up without a pause.
The secret is processing the corn with the eggs and milk to form a completely smooth puree. The small amount of coconut sugar enhances the sweetness but you could leave that out, add 1/2 ts salt and make them savoury instead. They would be delicious served with avocado and smoked salmon.
Hope your fussy eaters enjoy these as much as mine!
My Sweet Corn Pancakes
1 x 425g tin corn kernels, drained and rinsed
4 eggs
200ml rice milk*
2 cups wholemeal spelt flour
3 ts baking powder
2 ts coconut sugar
pinch salt
oil or ghee for frying
Place the corn kernels into the food processor and blitz until chopped. Add the eggs and milk and process for 30 seconds or so, scraping down the sides if you need to, until the mixture is completely smooth.
Add the dry ingredients and process until just combined. Use a spatula to scrap the sides and mix through an extra flour. * Add an extra tbs or so of milk if you feel the batter is too thick at this stage as all flours differ.
Heat a large frypan over medium heat and add the oil or ghee.
Once hot, place heaped tablespoons of mixture into the pan (I can fit 4 at a time) and cook for approximately 3 minutes each side.
Remove to a plate and keep warm as you repeat with the remaining mixture.
Serve with butter, syrup and crispy bacon.
Makes around 16 pancakes.
Wednesday, July 8, 2015
'Apple' Crumble Slice

This may be the most amazingly sneaky recipe I've ever made. I mean I've done lots of hidden veggies recipes before but this really takes the cake. I called it an apple crumble slice and my kids went nuts for it. But let me tell you a secret ... there isn't any apple in it.
So do you want to take a guess as to exactly what is cooking in this pan?
It's zucchini!!!
Seriously.
I found this recipe for Zucchini Pie Bars on Crazy for Crust and I was immediately intrigued but quite dubious. How on earth would zucchinis taste like apples? Especially as I wouldn't be smothering it in ice cream and caramel sauce like the original recipe. But I'm always up for a challenge so I gave it a go.
The slice consists of a pastry base which you bake until golden brown. Then the filling is diced zucchini sauteed in butter, cinnamon and sugar until just soft and then drained. Next there is a buttery crumble topping.
There was absolutely no discernible taste of zucchini. For all intents and purposes it was an apple slice, although perhaps a little less sweet than normal. The crust and crumble were crisp and buttery and the filling was soft and lightly spiced with cinnamon and lemon. My boys absolutely devoured it, asking for seconds and thirds.
So do I feel a little guilty about the deception? Not even a little bit. It is totally delicious and my extremely fussy 4 year old actually ate a serve of vegetables. Win!
'Apple' Crumble Slice
Adapted from Crazy for Crust
For the Crust:
125g softened butter
1 1/2 cups white spelt flour
1/4 cup coconut sugar
1/4 ts salt
For the Filling:
3 large zucchini, peeled and diced
2 tbs butter
2 tbs coconut sugar
1 ts cinnamon
zest 1/2 lemon
For the Topping:
125 softened butter
1/2 cup coconut sugar
1 cup white spelt flour
1/2 ts cinnamon
1/2 cup rolled oats
1/4 ts salt
Line a 20x30cm slice pan with baking paper. Preheat oven to 170 degrees Celsius.
To prepare the crust, place all ingredients into a food processor and pulse until the mixture is crumbly. It may look dry but if it sticks together when you squeeze a handful it is ready. Press the mixture into the prepared tin and bake for 13 minutes.
To make the filling, melt the butter and sugar together in a frying pan over low-medium heat. Add the zucchini, cinnamon and lemon zest and cook, stirring often, for approximately 5 minutes or until the zucchini is just starting to soften. Remove from the heat and drain until ready to use.
While the zucchini is cooking prepare the topping. Place all ingredients into the food processor and pulse until crumbly.
Remove the hot crust from the oven and scatter the cooked zucchini carefully over the top before sprinkling the topping evenly over the top. Bake for around 25 minutes or until golden brown.
Cool completely in the pan before slicing into bars and serving. Can be stored in the fridge for 3 days in an airtight container or up to 1 month in the freezer.
Monday, June 15, 2015
Vegie-loaded Spaghetti Bologanise
I can't believe that in 7 years blogging I've never even considered posting my spaghetti bolognaise recipe before. I mean everyone and their mum has the best recipe out there, can you really improve on perfection? I changed my mind though as there has been a theme in my baking and cooking lately of surprise ingredients and hidden veggies and thought it might be interesting to others.
I just recently spilled the beans to my cauliflower-hating husband that he's been happily chowing down on cauliflower rice without even noticing! I did feel a little guilty about that but honestly if he enjoyed it then most kids will. But that's a recipe for another day.
The basic secret to my bolognaise sauce is pureeing a whole heap of veggies until they are very fine and cooking it very slowly for maximum flavour. By fully incorporating the vegetables into the sauce there are no weird textures or bits for the kids to pick. out. It is all just tomato saucy goodness!
To be honest this is easiest in the Thermomix as it chops, cooks and then purees all in the same pot however a food processor and stick blender will do the job as well.
I always make a big batch. The recipe below makes 2 full dinners plus leftovers for our family of 5 easily. We always use half on the night is made and freeze the rest for later. One will be spaghetti bologanise and then the next will be lasagne.
The rest of the family loves spaghetti but I will often have my bolognaise sauce on a pile of roasted pumpkin and greens. Makes my tummy happier and I get even more veggies in one meal which is a good thing.
If you have fussy kids (or husbands!) give this one a go :)
My Veggie-loaded Spaghetti Bolognaise
1 onion
3 cloves garlic
2 carrots
2 stalks celery
2 zucchinis
2 red capsicums
1-2 cups greens (kale, spinach, broccoli stems etc)
1kg beef mince (or a beef/pork/veal blend)
1 x 750ml jar tomato passata
2 tbs olive oil
a big handful of fresh herbs (basil/oregano/parsley) roughly chopped or 1tbs dried Italian herb mix
1 heaped tbs homemade veggie stock paste
salt and pepper to taste
-------------------------------
TMX - place the onion, garlic, carrots, celery and capsicum into the bowl and chop for 10 seconds / SP 5-8, using the spatula to stir if needed. Add the oil, herbs, stock paste and passata and cook for 20 minutes / 100 degrees / SP 2. Scrap down the sides and puree for 1 minute / SP 5-9. Check for seasoning. While the sauce is cooking, brown the mince in a large pan. When the sauce is done either add it to the pan and simmer together for at least 30 minutes, or place the mince and sauce plus an extra jar of passata into the slow cooker and cook on low for 4-5 hours.
-------------------------------
Using a food processor or by hand, grate the carrots, celery, zucchini and capsicums and then set aside.
Place a large pot over medium heat and add 1 tbs oil. Brown the mince and then remove it from the pan, draining the fat if you wish (I don't bother).
Add the remaining 1 tbs oil along with the chopped onion and garlic and saute until translucent.
Add the grated veggies, passata, stock and herbs and simmer for around 30 minutes, until the vegetables are cooked and it smells amazing.
Using a stick blender or food processor, blitz the sauce until it is completely smooth.
Return to the pot, add the browned mince, give it a good stir together and simmer for as long as you can (I usually do this step in the crockpot and allow it to cook on low for 4-6 hours) but even an hour would be good. Check for seasoning.
Serve with pasta or veggie noodles.
Makes LOTS.
Thursday, May 21, 2015
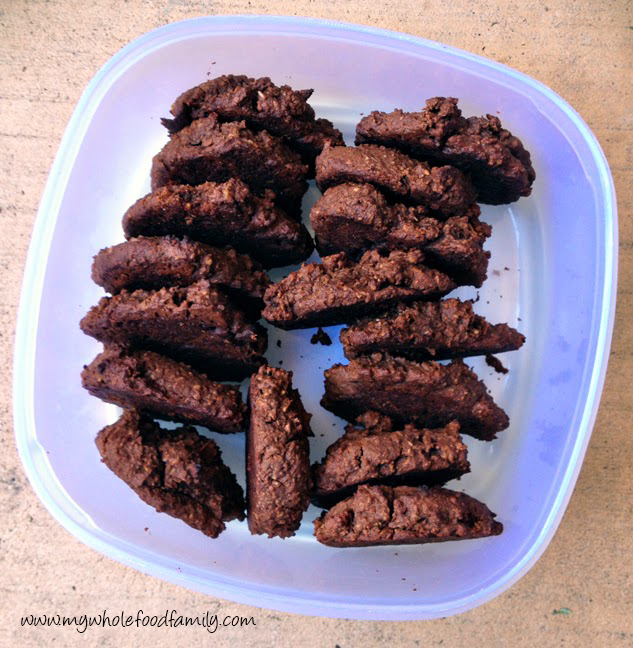
Chocolate Chickpea Biscuits
I know they don't look like much but these Chocolate Chickpea Biscuits are one of the best things I've baked in ages. Seriously! I've made a Magic Bean Chocolate Cake before which we all loved and these biscuits are just as good with their fudgy chocolate middles surrounded by raggedy, crinkly, crispy edges that make it incredibly hard to stop at 1 (or 2).
My kids are always ravenous at the end of the day and afternoon tea often turns into one big grazing session (and yes they still eat a big dinner!). We had an after school function to go to the day I made these so I packed them up and hoped it would be enough to keep them going until we got home. Well, they each ate 3 biscuits and were set. They absolutely loved them but 3 was enough and I didn't get a single 'I'm hungry' the whole afternoon! The chickpeas and oats in these are packed with protein and fibre and they are really satisfying. Next time I will be doubling the recipe and stashing some in the freezer.
Even straight from the oven there was absolutely no discernible taste or smell of the chickpeas so if you've been on the fence about the whole beans-in-cakes thing give these a go!
Chocolate Chickpea Biscuits - Gluten, Dairy and Fructose Free
Recipe adapted from The Road to Loving My Thermomixer
45g quinoa flakes
80g rice malt syrup*
zest of 1 orange (optional but delicious!)
400g tin chickpeas
40g raw cacao powder
1 ts vanilla extract
1 ts gluten-free baking powder
100g coconut oil
Preheat oven to 180 degrees C / 160 degrees fan-forced. Line 2 trays with baking paper and set aside.
Place quinoa flakes into a food processor and blitz for 20 seconds (TMX 20 secs / SP 7). Add all remaining ingredients and process for 30 seconds (TMX 30 secs / SP 5).
Dollop small spoonfuls of mixture onto the prepared trays, allowing some room to spread, and flatten slightly (I often forget to do this).
Bake for 15 minutes. Remove from the oven and allow to cool for 5 minutes before placing the biscuits on a wire rack to cool completely (or not, they are absolutely delicious warm from the oven!).
* Using RMS is what makes these fructose free but they are definitely not as sweet as the original - if you're not worried about fructose you could use raw honey instead or half-and-half.
Makes approx 20
Thursday, May 7, 2015
Pumpkin Banana Bread
I'm beginning to think I have a bit of an obsession with banana bread. I was too scared to check just how many variations I've posted over the years but I know I've never made a Pumpkin Banana Bread before!
We bought a whole pumpkin last weekend for just $2 and we enjoyed it roasted last night, mashed for lunch today and now baked into a cake. There will also be pumpkin soup made in a few days when it cools down again after a few days of unseasonably hot weather.
Mr Fussy 4yo loves cinnamon and was willing to taste some pumpkin roasted with cinnamon last night (it got a screwed up face) but even he couldn't resist this Pumpkin Banana Bread still warm from the oven and spread with lots of butter. It was the perfect afternoon tea for the kidlets and I can vouch for the fact that it is just as good if not better toasted the next day.
The original recipe had 1/2 cup honey AND 1/2 cup sugar which I replaced with just 1/2 cup rice malt syrup and an extra banana and it definitely sweet enough for us. You may want to increase it a little.
This was incredibly moist, lightly spiced and absolutely delicious. We will be making it again!
Gotta love hidden veggies!
Pumpkin Banana Bread
adapted from allrecipes
3 ripe bananas, mashed
2 large eggs
1/3 cup olive oil
1 1/3 cups pumpkin puree
1/2 cup rice malt syrup
2 1/2 cups plain flour
1 ts baking powder
1 ts baking soda
1/2 ts salt
2 ts cinnamon
1/4 ts nutmeg
1/4 ts cloves
Preheat oven to 175 degrees C / 350 degrees F. Grease and line a 9 x 5 inch loaf pan.
In a large bowl, stir together the mashed banana, eggs, oil, pumpkin and syrup. In another bowl combine the dry ingredients and then stir these into the banana mixture until just combined (don't over-mix).
Pour batter into the prepared pan and bake for 45 minutes (mine took 50 - it was huge!) or until the top springs back when touched and a skewer comes out clean.
Cool in the pan for 10 minutes before turning out onto a wire rack to cool completely. Serve warm or cold. Suitable to freeze.
TMX - place bananas, eggs, oil, pumpkin and syrup into the mixing bowl and blend for 10 seconds / speed 6. Add remainder of ingredients and blend 6 seconds / speed 6. Scrape down the sides of the bowl and proceed with baking instructions above.
Friday, March 20, 2015
Sweet Potato Brownies
The idea of hiding veggies isn't new but I must admit I am becoming more and more intrigued by just what you can get away with hiding! I have a very fussy 4 year old and we have struggled with expanding his range of foods. We've been through feeding therapy with a speech pathologist and occupational therapist which helped a little but his palate is still extremely limited and he is not at all open to trying new things. So while we still put veggies on his plate at dinner time the only time they actually pass his lips is if they are hidden in something else.
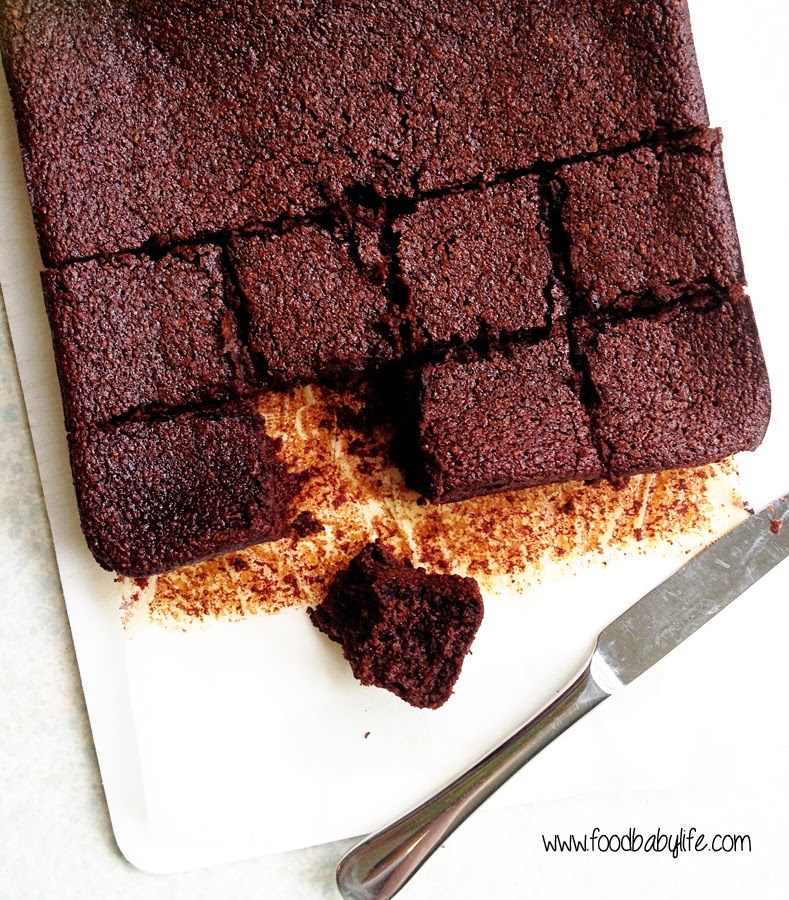
Chocolate is the ideal medium for hiding veggies not only because kids love it but it's taste and colour are great at disguising them. These chocolate and zucchini muffins have been a continued success but our new favourites are these Sweet Potato Brownies. There are 2 small sweet potatoes hidden here which along with the coconut oil, eggs, almond meal and raw cacao make them not only a really substantial snack but also a really nutrient dense one.
My boys all loved these. In the words of my 5 year old 'Mum please make these again and DON"T CHANGE A THING.' Hilarious!
These are richly chocolatey like all good brownies and even have a little crunch around the edges but the interior is very soft. I sliced these when they were still a bit warm and it was a bit messy as you can see. We kept the rest in the fridge and it was equally delicious cold but it sliced much more cleanly.
Sweet Potato Brownies
Adapted from this and this
1 medium sweet potato (3 cups grated)
2 ts vanilla extract
2 eggs, at room temperature
1/2 cup liquid coconut oil or olive oil
1/2 cup raw cacao
1/2 cup rice malt syrup
1/2 cup almond meal with 1 tbs coconut flour mixed in
1 ts baking powder
1 ts bicarbonate soda
Preheat oven to 180 degrees C. Grease and line an 8 inch square brownie pan and set aside.
Finely grate the sweet potato (and place in the food processor along with the vanilla, eggs and oil. Mix well. Add the dry ingredients and pulse until just combined.
Pour the mixture into the prepared pan and bake for approx 35 minutes or until just set and firm to the touch in the middle. Allow to cool completely in the pan before slicing.
Store in the fridge. Makes 16 serves.
Subscribe to:
Posts (Atom)


