Showing posts with label Kids. Show all posts
Showing posts with label Kids. Show all posts
Tuesday, July 17, 2018
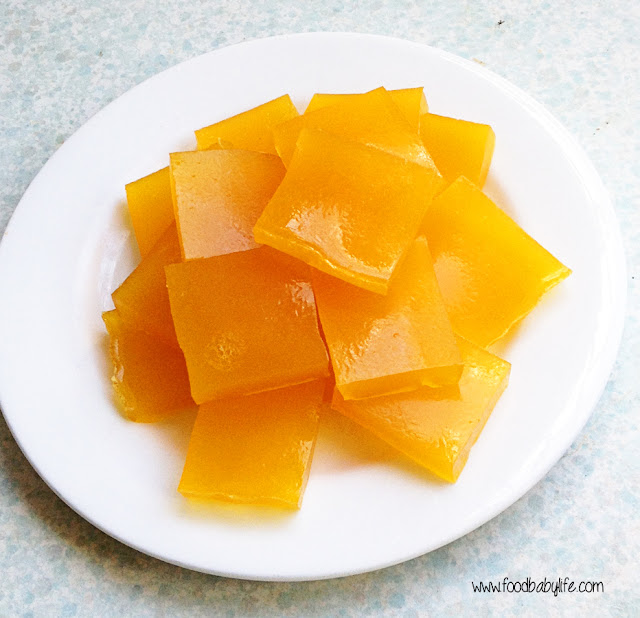
Lemon, Ginger and Turmeric Gummies
My kids adore gummies and with the weather so cold at the moment it is definitely time for a new batch to help us ward off all those bugs doing the rounds.
I usually make gummies using juice as a base but I didn't want the sugar this time so I've replaced it with coconut water and xylitol for a little sweetness instead.
This makes a big batch but it still never lasts very long around here!
LEMON, GINGER & TURMERIC GUMMIES
1.5 cups water
1.5 cups coconut water
1/4 cup xylitol
juice of 1 large lemon
1/2 ts organic turmeric powder
5 drops lemon essential oil*
2 drops ginger essential oil*
6 tbs gelatin (I like Great Lakes or Changing Habits)
In a small bowl mix together the xylitol, lemon juice, turmeric powder and essential oils.
Bring the water and coconut water to the simmer over medium heat. Add the xylitol mixture and stir well to combine.
Sprinkle the gelatin over the top and use a whisk to stir until it has dissolved. Pour through a sieve into a heatproof dish and leave to set in the fridge. Slice into squares to serve.
Gelatin is fantastic for gut health, helping to heal and seal the gut and in turn support your immune system.
It's also packed with protein and makes a great snack for hungry kids.
Enjoy! xx
*I only use and recommend doTERRA essential oils. Click here for a quick guide to essential oils, doTERRA and how you can get your own (no matter where you are in the world!)
Friday, March 16, 2018
Ginger Oat Slice
I've come home from doTERRA's Australia/NZ Convention in Sydney this past weekend with a full heart, a mind bursting with possibilities and ... a chopping board!
There was a lot of merchandise on offer but as a foodie, I couldn't pass this up, especially as it's the perfect prop for all my oil-infused treats.
This was a super easy slice I made for the kids' afternoon tea yesterday. Basic pantry ingredients with a gorgeous ginger flavour from the ginger essential oil. I love using my oils like this - no need to worry about that bottle of ginger powder in the pantry that's long expired, or the fresh piece of ginger going soft in the fridge. #cookingwithoils
If you'd like to learn more about using essential oils in your food make sure you download the free cheat at the bottom of this post!
Ginger Oat Slice
100g melted butter
100g dried dates
1 cup rolled oats
1 cup desiccated coconut
1ts vanilla extract
Pinch salt
3 drops Ginger essential oil
Place all ingredients in the Thermomix or food processor and blitz until well combined. TMX - melt butter with dates 5 mins / 100 deg / SP 1. Add remaining ingredients and mix 10 secs / SP 8.
Press into a lined 8inch square brownie pan and place in the fridge to set. Slice into squares.
My kids LOVED this but full disclosure, I haven’t tasted it because of the gluten! (insert sad face here).
I will have to whip up a dairy and gluten free version for myself because this smelled amazing and was devoured in about 5 minutes.
Happy cooking!
Susan xx
Tuesday, January 23, 2018
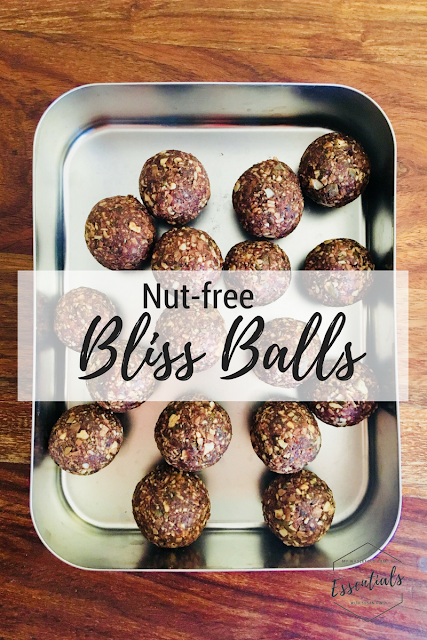
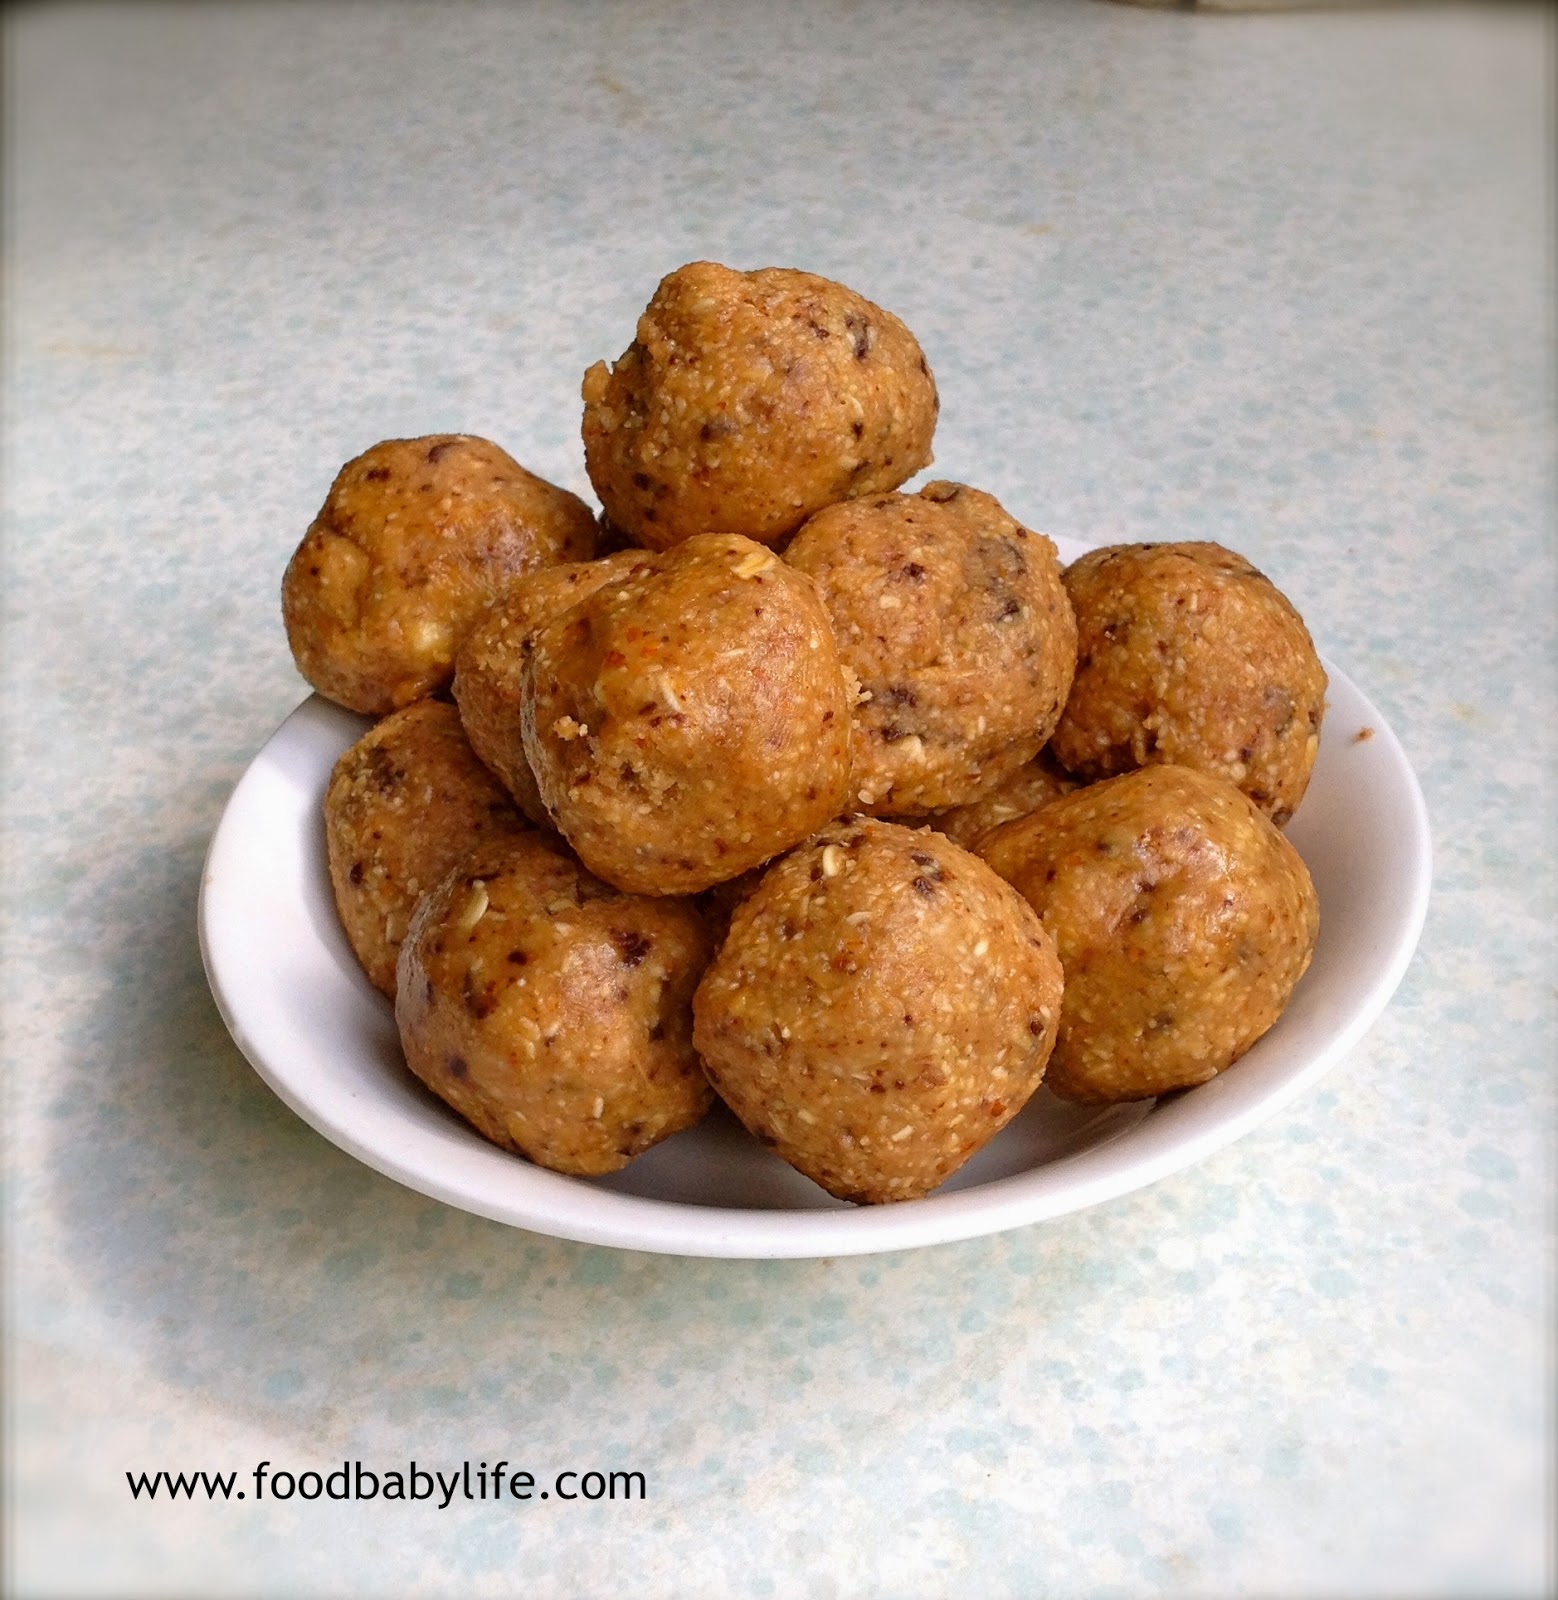
Nut-free Bliss Balls
So I was feeling really organised - I'd chosen a handful of favourite recipes to prep and freeze for school lunches and was all set to start. Then I remembered that my youngest is starting kindy and all the food we provide has to be nut-free. *face palm*
At least I remembered now and not on the first day!
So back to square one with the recipes.
I whipped up these nut-free bliss balls to go in the freezer and will add 1 to his lunchbox every day. I got 16 out of this batch so they should last us about 6 weeks as long as sneaky fingers don't sneak them out of the freezer!
If your child will notice and freak out about the visible green from the pepitas, by all means, roll the bliss balls in coconut to cover them up. Mine don't care luckily as I had run out of desiccated coconut!
With the dates, these are definitely not a low-sugar option but they tick lots of other boxes and will be a great high energy snack for my very active 4-year-old.
Enjoy!
Nut-free Bliss Balls
1 cup shredded coconut
1/2 cup sunflower seeds
1/2 cup pepitas
1 cup dried dates (soaked in boiling water for 5 mins and drained)
1 heaped tbs raw cacao
1 ts vanilla extract
pinch salt
5 drops Wild Orange essential oil (optional - I only use and recommend doTERRA)
2/3 cup desiccated coconut (optional - extra to roll the balls in)
Place the dates in a small heat-proof bowl, cover with boiling water and leave to soften for 5 minutes. Drain and place into your food processor or Thermomix bowl.
Add all remaining ingredients and process until the mixture is sticky and clumps together (TMX SP 5 / 30 secs).
Roll mixture into balls and if desired, into desiccated coconut.
Store in fridge or freezer.
Makes approx 16
What are your favourite nut-free school snacks? Please share some recipes below as I need a refresher!
Susan xx
Wednesday, January 3, 2018
Raspberry Jelly Ice Blocks
Summer has well and truly arrived here in Brisbane. It's steamy and sticky, the kind of weather where you're still sweating when you step out of a cold shower!
All that really means though is it's DEFINITELY ice block weather.
I've been making batch after batch of ice blocks and icy poles for the kids these holidays, nothing particularly fancy. Often just whatever fruit we haved whizzed up or even just fruit juice with coconut water.
We have a gorgeous set of stainless steel ice block moulds and a couple of sets of silicone icy pole moulds. These are much better options than plastic, even if they say BPA free.
These jelly ice blocks were an experiment, hoping they would fill the kids up a little with the addition of protein-rich gelatin plus, being jelly, they don't drip so much! A big plus when they start melting the instant they come out of the freezer.
I love the combo of raspberry and orange but you could use whatever fruit and juice you have. I added a couple of drops of Wild Orange essential oil to pump up the flavour, but that's totally optional (delicious though!).
The first batch I made I didn't bother straining the mixture but the kids definitely preferred it strained and seed-free.
If you make them let me know what you think!
-----------------------------------------------
Raspberry Jelly Ice Blocks
1 cup fresh orange juice
2 cups frozen raspberries, thawed
1-2 tbs sweetener of choice (I use rice malt syrup)
2 ts good quality gelatin (I use Changing Habits or Great Lakes)
2-3 drops Wild Orange essential oil
Place the juice, raspberries and sweetener into your food processor or Thermomix and blitz for about 10 seconds until well combined.
Pour into a saucepan and set over low heat. Once just warm (not hot), sprinkle over the gelatin and leave for 1 minute. Using a whisk, whisk the jelly mixture until smooth.
Strain into a pouring jug, then pour into your ice block moulds.
Place into the freezer to set.
Enjoy!
Susan xx
Tuesday, June 20, 2017
Super Sprinkle!
I used to love breakfast.
Back in the days when I ate gluten and dairy (and had a myriad of health problems I might add), breakfast was my favourite meal of the day!
Sugary cereal, yoghurt, fruit bread, toast with jam, pancakes, waffles you name it.
These days I'm not really hungry as soon as I wake up and often won't have breakfast until after I've dropped the kids off at school. And as a side note, there's a lot of research about the benefits of fasting so getting a solid 14-15 hours between dinner and breakfast is probably doing me lots of good!
Most days I have eggs scrambled up with some veggies leftover from dinner the night before BUT I'm really starting to crave other things and getting a bit bored of eggs.
For the past few days my breakfast has been a grated appled topped with a few tablespoons of this super sprinkle mix on top. Light, fresh and surprisingly filling!
It's really just a mixture of nuts and seeds but I've started calling it Super Sprinkle to get my kids on board with it. Once I gave it a name they have loved having it on their porridge or yoghurt and in smoothies. Haha!
It's a great way to boost their nutrients and good fats and of course it tastes delicious too.
Just throw everything into the food processor and blitz. We like it a little chunky but you could process it until it is more finely ground and add it to your biscuits and muffins as well to give them an extra boost.
Super Sprinkle
1/2 cup raw almonds
1/2 cup sunflower seeds
1/2 cup pumpkin seeds
1/2 cup coconut flakes
1/4 cup linseeds
1/4 cup chia seeds
1 tbs cinnamon
pinch sea salt
Place all ingredients in your food processor or Thermomix and blitz to desired consistency (TMX about 8-10 seconds / SP 9).
What's your favourite breakfast? x
Friday, May 26, 2017
No-bake Popcorn Slice
As much as I enjoy baking, when life get busy often the LAST thing I feel like doing is turning on the oven and cooking!
That's when no-bake treats are perfect and let me tell you, I'm building quite the repertoire.
Popcorn is a regular afternoon tea at our place. Air-popped popcorn + melted butter = happy kids!
I wanted to mix it up a little this week though so I decided to turn their popcorn into something a bit more special.
This is such a flexible recipe. You could replace the tahini and rice malt syrup with peanut butter and honey, or almond butter and maple syrup (I would use a less honey or maple syrup though as it would be very sweet). Use different dried fruit, replace with dark chocolate chips or just leave it out. So good!
No-bake Popcorn Slice
1/4 cup tahini
1/4 cup rice malt syrup
pinch salt
40g natural dried apricots or dates, roughly chopped
5 cups popped corn (around 2 tbs unpopped)
Line a square brownie pan with baking paper and set aside.
Mix tahini, syrup, salt and dates together in a large bowl.
Add the popcorn and mix well to coat.
Pour into prepared pan and press down well with your hands.
Place into the fridge to firm up a little.
Cut or tear into 16 squares.
Enjoy!
Tuesday, February 21, 2017
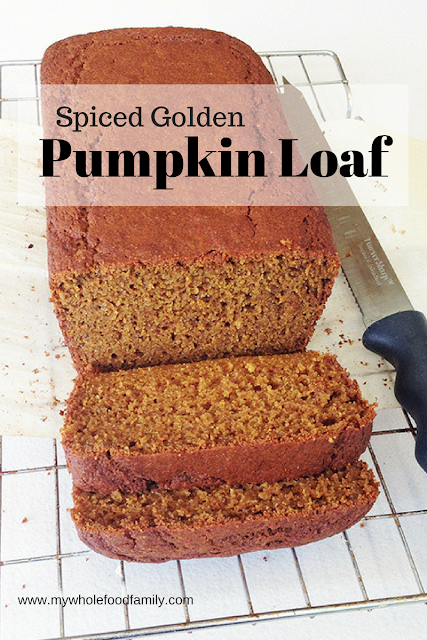
Pumpkin Loaf aka Spicy Golden Loaf
Having a child who is fussy about food is incredibly frustrating at the best of times.
And at the worst of times? It's a bit of a nightmare.
My now 6-year-old hasn't eaten a good dinner since before he was 2.
Let that fact sink in a little.
That's approximately 1500 nutritious dinners prepared lovingly by me that have NOT BEEN TOUCHED.
If we can get him to the table, he will eat plain pasta with extra virgin olive oil, homemade pizza (no sauce and topped only with cheese, olives and tinned pineapple) and takeaway fish and chips.
The list of foods he will eat is incredibly small and shrinking by the week.
We've done feeding therapy sessions with an occupational therapist and speech pathologist, and seen a GP, naturopath, dietician and psychologist.
So where does that leave us?
Well, it leaves us trying to pack in nutrition wherever and whenever we can.
At the moment breakfast is the only decent meal he will consume in a day.
It is usually a smoothie which I cram to the brim with good stuff like avocado, chia seeds, oats, yoghurt, protein powder, nut butters, berries, greens and more. Something like My Favourite Green Smoothie but with organic full cream milk.
Lunch usually comes home completely untouched so needless to say he is STARVING when he gets home.
So that leaves afternoon tea.
I try to make it a good one!
Hiding vegetables in cakes and muffins etc is not new, but it is definitely my favourite way to increase their nutrition. These have been some of favourites:
'Apple' Crumble Slice (without any apple!)
Chocolate Beetroot Cake
Pumpkin Fruit Cake
Chocolate and Zucchini Muffins
Sweet Potato Brownies
Pumpkin, zucchini, carrot, sweet potato and beetroot all work beautifully in baked goods. Add in a good unrefined sweetener and some sweet spices like cinnamon, nutmeg and vanilla and you have a delicious sweet treat that will fill them up and give them some much need veggies.
Today I had a lot of pumpkin to use up so I whipped up this pumpkin loaf cake which I am calling a 'Spicy Golden Loaf'. It is beautifully moist with lovely warm flavours of cinnamon, nutmeg, clove, ginger, orange and molasses.
A slice of this with a glass of milk will happily fill up even the fussiest tummy.
Spicy Golden Loaf
100g butter, at room temperature
100g coconut sugar
2 large eggs
1 ts vanilla extract
1 ts blackstrap molasses
zest of 1/2 orange
1 cup mashed pumpkin
1 2/3 cups wholemeal spelt flour
1 tbs baking powder
1/2 ts bicarb soda
1 ts cinnamon
1/2 ts nutmeg
1/2 ts ginger
1/4 ts cloves
Beat together the butter and coconut sugar until light and fluffy.
Add the eggs one at a time beating until smooth.
Add the pumpkin, vanilla, molasses and orange zest and mix until well combined.
Add the dry ingredients and fold through until just combined.
Pour mixture into prepared loaf pan and bake for 45-55 minutes, or until golden brown and the middle springs back when pressed gently.
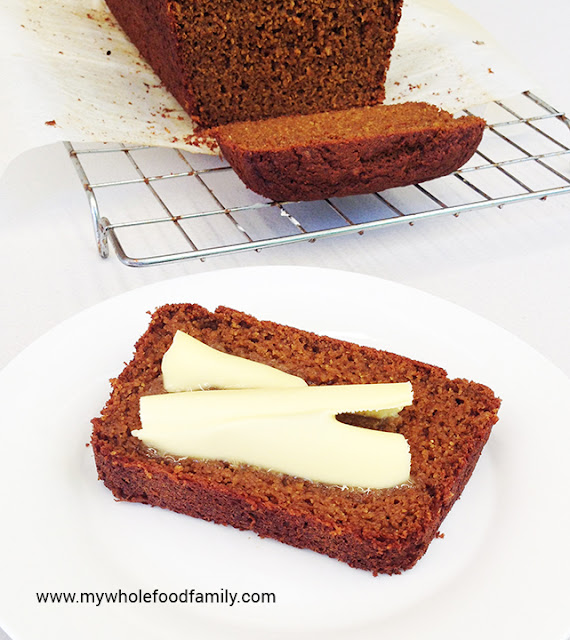
Turn out onto a wire rack to cool. Delicious warm from the oven or at room temperature. Serve with butter.
Do you have a fussy eater?
What are your strategies? Let me know below!
Susan
Monday, November 21, 2016
Salted Peanut Butter Honey Cookies (SRC)
Well, this is it. The final ever reveal for the Secret Recipe Club!
My first post for SRC was back in February 2013 when I made a delicious Chicken Tikka Masala. We love Indian food but it was the first time I'd ever made that recipe myself. And it was amazing!
I've loved getting a peek inside other people's kitchens, trying out recipes that I would otherwise have never even heard of, let alone tried.
And I think that has been the beauty of SRC. We all come from different parts of the world, have different tastes, different families and yet, we have all been brought together by our love of food.
For this final month, I was assigned Savory Moments by Amy, a stay at home mum of twins from Western NY and passionate foodie, and I knew immediately I would find some great food.
Her blog's header reads that she is 'trying to learn skills that have been lost along the way by many people of my generation: cooking, baking, growing food, preserving, and appreciating a healthy, home-cooked meal.'
Yes!
This is exactly why I cook and blog too.
I think so many of us are time-poor and have been seduced by the ease of convenience foods, which in reality are chemical-laden, nutrient-deficient filler foods, setting us up for a lifetime of ill-health.
To grow your own food, even if it's just having a few pots of herbs on your windowsill, to buy what is seasonally available and then cook it from scratch is so rewarding and the best way of setting up a culture of good food in your family.
We are a predominantly gluten, dairy and refined sugar-free household these days, and I found loads of recipes on Amy's blog that fit the bill, or that could be easily adapted.
Some of my favourites were the Turmeric and Honey Roasted Chickpeas, Avocado Chocolate Pudding, Lemony Raw Kale Salad, Roasted Sweet Potatoes with Spinach and Cranberries and Bog salad with maple vinaigrette to name just a few.
When it came down to it though, I decided to make something just for my boys.
I've been in a bit of a baking rut recently, so wanted to try something new. So it had to be Amy's Salted Peanut Butter-Honey Cookies!
My only change to the recipe was to use buckwheat flour instead of the wholemeal, to make them gluten free.
I also made them smaller than stated, getting 20 cookies out of the batch instead of the 14-16 Amy suggested. I baked them for just 10 minutes but even that was too much, so if you make them small I would suggest just 8-9 minutes!
This is a great recipe to make with kids - just 5 ingredients, mix, roll and flatten with a fork. Mr 3 was my very willing helper with these and he was hovering close to taste the first one.
My boys absolutely loved these and the entire batch went in one afternoon tea. For the record I had just 2, and the other 18 were devoured by the 3 of them, along with a glass of cold milk each.
I think that makes them a winner!
Salted Peanut Butter-Honey Cookies
Adapted from Savoury Moments
3/4 cup buckwheat flour
1/2 cup natural peanut butter
1/2 cup raw honey
1/2 ts bicarb soda
1/4 ts sea salt, plus extra for sprinkling
Preheat oven to 180 degrees Celsius / 160 degrees fan-forced.
Line a tray with baking paper and set aside.
In a small bowl whisk together the flour, bicarb and salt.
In a large bowl beat together the peanut butter and honey until smooth.
Add the dry ingredients into the peanut butter mixture and stir until well combined.
Roll tablespoons of mixture into balls and place on the prepared trays. Gently press down with the tines of a fork to make a criss-cross pattern. Sprinkle with a little extra sea salt.
Bake for approximately 8-10 minutes, until they just begin to turn golden brown.
Makes 20 cookies.
Thank you Amy for a great recipe, we will definitely be making them again!
And thank you Sarah E for all your hard work in keeping SRC running for us these past few years. It's been great! :)
Tuesday, November 8, 2016
Little Charley Bear Cake
'Mummy, can I have a bear cake this year? Pleeeeeeese?'
It's s not just my kids who start planning their birthday cake months ahead of time, is it?
While the whining can be annoying, the benefit is I have months of time to think about how to make a bear cake!
Mr 5 received a Little Charley Bear for his first birthday and it has been his constant companion ever since. He's only spent one night apart from him, and that was when he accidentally left him at daycare and I didn't even know he'd taken him there. We survived the night. Just. But it's not an experience I would care to repeat.
So when he asked for a bear cake for his 6th birthday, I knew I would have to make it a Little Charley Bear cake. How could I not?
I always make my kids birthday cakes even though cake decorating is not my strength, and of course these days we avoid artificial colours and flavours like the plague which makes the more brightly coloured cakes a bit of a challenge.
Good thing bears are brown!
How to make a Little Charley Bear cake
First thing was to find an image I could use as a template. There are surprisingly few Little Charley Bear colouring pages online, which is basically what you are after. What I found was a still from a You Tube video called 'How to draw Little Charley Bear.' Perfect.
I saved the image, cropped off the bears on the sides and pasted it into PowerPoint.
My cake tin measured 33cm long so that was the maximum size for the image.
Enlarge the image to 33cm, then copy it onto 2 slides - one with the top half and one with the bottom half. Then print out both slides and tape them together to form one 33cm high image.
Lay a sheet of baking paper over the top and trace the outline and details with a sharpie.
Cut out the image.
Lay the template over your cake and using a sharp knife at 90 degrees, carefully cut around the edge, holding it with one hand to prevent it slipping.
Carefully slide your cake onto a prepared cake board and you are ready to decorate!
Wholefood Chocolate Sheet Cake
400g white spelt flour
100g raw cacao powder
2 tbs baking powder
250g unsalted butter, softened
1/4 ts fine sea salt
3 eggs, lightly beaten
500g rice malt syrup
250ml water
1 ts vanilla extract
Preheat oven to 170 degrees Celsius / 150 degrees fan-forced.
Grease a 23 x 33cm tin and line the base and sides with baking paper.
Place all ingredients into a large bowl and using electric beaters, beat together at low speed until combined, then on high speed for 2 minutes until smooth and glossy.
Pour the mixture into the prepared tin and bake for approx 50 minutes or until a skewer inserted into the middle comes out clean and the top springs back when lightly pressed.
Cool in the tin for 5 minutes before turning out onto a wire rack to cool completely. Cover with a tea towel to stop it drying out.
Cream Cheese Icing
500g cream cheese (in blocks)
250g butter
150g coconut sugar
2 ts vanilla extract
30g raw cacao
2 charcoal capsules
Beat together the cream cheese, butter, coconut sugar and vanilla together until smooth.
Remove about 1/4 of the icing and set aside in a small bowl. This is for all the light coloured parts on the tummy and eyebrow.
Remove 1 tablespoon of this icing and place into another small bowl, this will be for the brown inside the ears.
Add the cacao to the rest of the mixture and mix until smooth and completely combined.
Place 2 tablespoons of this mixture into a small bowl and add the contents of the charcoal capsules - mix until well combined. You should have a strong black icing.
Take a small amount of the black icing and add it to the tablespoon of light icing set aside - add little by little until you get a darkish grey-brown. This is for inside the ears.
To decorate
Prepare your template and cut out the cake as per instructions above.
Place the cake onto your prepared board. I use a large cake board covered with wrapping paper.
Cut strips of baking paper and slip them under the edges of the cake. This keeps the board clean while you ice the cake. Just pull them away when you are finished for nice crisp edges and a clean board!
Cover the whole cake, top and sides, with a thin coat of the chocolate icing. This is the crumb coat and it seals in all the crumbs and gives a better finish. Place the cake in the fridge for 20 minutes for the icing to firm up before moving on to the next step.
Now you need to cut out each element from the template.
Starting by cutting out the light colour tummy. Lay it on the iced cake and using a skewer trace around the edge. Fill in with light coloured icing. Repeat with the smaller pawprints on the tummy and fill in with chocolate icing.
Repeat for paw and ears, and use black icing for the nose and eyes.
Serve immediately or if you need to put the cake in the fridge, bring it out an hour beforehand to warm up.
Use a skewer to draw the outlines of his arms (don't be like me and forget to outline the outstretched arm!)
So there you go.
If I can make a Little Charley Bear cake, anyone can!
And free from refined sugar and artificial colours.
Happy Birthday Mr 6!
Wednesday, August 10, 2016
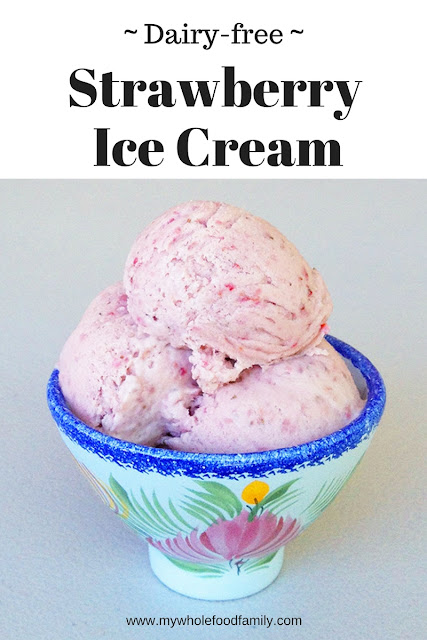
Dairy-free Strawberry Ice Cream
We're having a public holiday here today in honour of the Ekka, otherwise known as the Royal Queensland Show. Gotta love a day off in the middle of the week!
I have such fond memories of going to the Ekka as a child - catching the train in with huge crowds of people, feeding the animals, climbing into the rickety stands to watch the dog show, eating a dagwood dog and a strawberry sundae.
We've never actually taken the kids to the Ekka and we're not going this year either. Mr 2 still has a daytime sleep and also broke his arm a few weeks ago so has a sling on. It all seems too hard. Next year the boys will be 8, 6 and 3 which I think will be perfect for them to handle a full day out and enjoy all the different activities.
I have to say, ice cream has always been my weakness. Back when I was a bit of a sugar addict I would easily eat a tub a week (if not more). Terrible right? Well it's now been almost 3 years since I ate commercial ice cream. And I'm totally ok with that.
The ice cream they use for the strawberry sundaes at the Ekka is actually great quality, so perhaps next year my kids will experience the joy of having one.
Until then though my dairy-free strawberry ice cream will definitely satisfy everyone.
I made this ice cream a little differently than I have in the past. I know from past experience that adding strawberries can really water down the mixture making it very icy, or leave you with pebbles of rock hard frozen strawberry that will break your teeth.
This time I was careful to make the custard base extra thick and creamy and use very ripe strawberries for maximum flavour.
The result?
Just divine. Smooth and creamy ice cream with big strawberry flavour. The kids declared it to be 'the best ice cream ever' (although they do have short memories because my chocolate ice cream formerly held that lofty honour).
This really was so simple to make.
If you don't have a Thermomix, I would recommend beating the eggs, syrup and arrowroot together in a large bowl until smooth. Warm the coconut milk and vanilla in a medium pot then pour over the egg mixture and whisk together well, then pour the mixture back into the pot and stir over medium heat until the custard has thickened. The follow the instructions below for adding the strawberries, churning and freezing.
Dairy-free Strawberry Ice Cream
500g strawberries (washed, stems removed, halved)
150g rice malt syrup, divided
500ml coconut milk (full fat, from a tin)
4 egg yolks
60g arrowroot powder
2 ts vanilla extract
Place the strawberries and 40g of rice malt syrup into the mixing bowl and blend for 10 seconds / SP 5. Pour into a small bowl and set aside.
Without washing the bowl, add all remaining ingredients and cook for 7 minutes / 90 degrees / SP 4. It will be very thick and creamy.
Remove the lid and leave to cool for 20 minutes. Add the strawberry puree and blend for 5 seconds / SP 4.
Place into the fridge to cool completely (several hours).
Pour into ice cream maker and churn as per manufacturer's instructions - about 20 minutes.
Enjoy straight away as soft serve or pour into a glass container and freeze for a few hours until firm enough to scoop.
Linked up to Thriving on Thursdays.
Do you have a favourite food memory from your childhood?
Monday, March 28, 2016
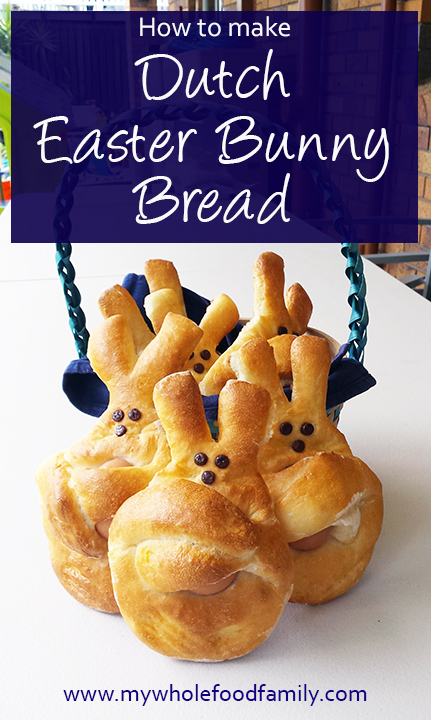
Dutch Easter Bunny Bread (SRC)
This month's Secret Recipe Club has given me one of my most favourite baking projects in years. I was delighted to be assigned Tara's Multicultural Table by, you guessed it, Tara. She has 2 young children and a beautiful blog themed by country, meaning she has cooked and baked her way around the world and back again!
Being Australian I of course had to first check whether she had any recipes from my region and loved that she has baked Sausage Rolls and Pikelets, both of which are quintessentially Aussie.
Tara has dozens of recipes which caught my eye but to be honest, once I saw this one for Dutch Easter Bunny Bread I knew I didn't have to look any further. The fact that reveal is the day after Easter seemed like it was meant to be!
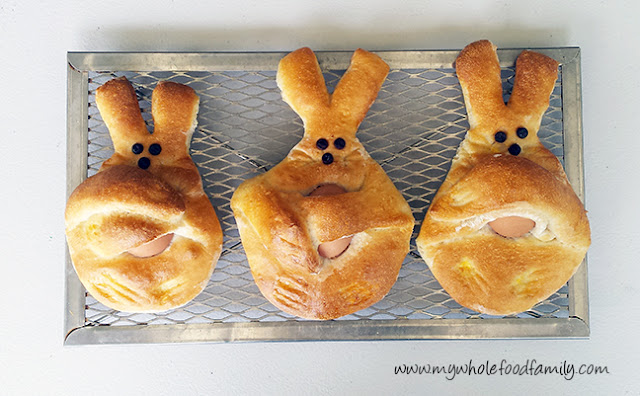
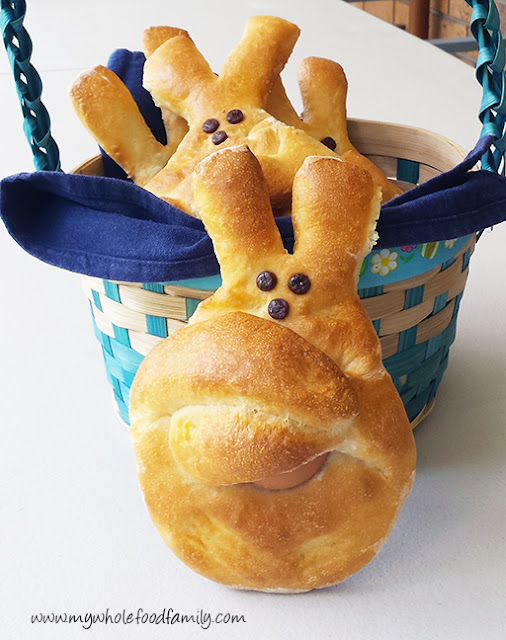
Paashaasjes (Easter bunnies in Dutch) are a basic bread rolled and shaped into bunnies with raisins or chocolate chips for eyes and holding an egg which becomes perfectly hardboiled when cooked with the bread.
While mine are nowhere near as neat as Tara's, the boys and I had a great time rolling, shaping and decorating these little bunnies and they certainly loved eating them too.
Dutch Easter Bunny Bread
Adapted for Thermomix from Tara's Multicultural Table
250g water
1 1/2 ts instant yeast
1 ts raw honey
500g plain flour
120g buttermilk
1/2 ts salt
Decoration:
6 eggs, at room temperature, washed and dried
18 chocolate chips or sultanas
1 egg, beaten with 1 tbs water
Place the water, yeast and honey into the bowl and heat for 3 mins / 37 degrees / SP 1.
Add the flour, buttermilk and salt and knead for 3 mins / closed lid.
Shape into a ball and placed in a greased bowl. Cover and allow to rest for about 1 hour, or until doubled in size.
Preheat the oven to 190 degrees Celsius / 170 degrees fan-forced. Line 2 trays with baking paper and set aside.
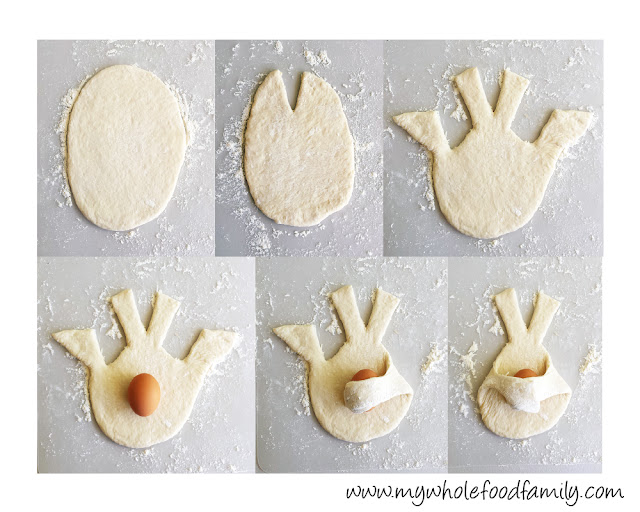
Divide the dough into 6 equal pieces. Shape one ball of dough at a time and leave the rest covered until ready to use. Roll the dough out into an oval approximately 7 inches tall. Cut as per the pictures below to form the bunny shape.
Lift the dough shape onto the prepared tray. Place an egg into the middle lower third of the dough then fold over the arms. Repeat with remaining dough. Cover and leave to rest for 20-30 minutes until puffed.
Place 3 chocolate chips on each for the eyes and nose of the rabbit. Use a toothpick to draw whiskers and mark the paws. Brush with beaten egg. Bake in preheated oven for 20 minutes or until golden brown. Cool on a wire rack.
Makes 6
Aren't they gorgeous?
Thanks for a great month Tara! I loved making these with my boys and I think we have now found a new Easter tradition.
Monday, March 14, 2016
My top 5 No-Bake Snacks for Kids
So you may have noticed that I like to bake. A lot! But in reality we're not eating baked goods all the time. I always make big batches and stash at least half in the freezer for another time. Things like muffins and biscuits and slices are brilliant to have on hand to pop into lunchboxes or to grab out when we have a playdate.
But there are also plenty of times when to be honest, I just don't feel like baking. Or we're too busy or it's too hot ... you get the idea. I also want to mix things up a bit so we're not eating the same things all the time and if the kids have had a muffin in their lunchbox they are certainly not getting cake for afternoon tea.
It's a good idea to have a range of no-bake options that you can whip up quickly as soon as the hungry horde descends after school.
Smoothies
This is a no-brainer! A smoothie can be a meal in a glass if you pack it full of nutrient dense (and delicious) ingredients. I personally have been down the green smoothie road and can say with certainty that they don't agree with me. I just don't feel good drinking them even when they taste good. But there are other ways to get in some goodness. This is my go-to smoothie formula for the kids:
Per child:
1 cup milk (we use rice, almond or coconut)
1/2 frozen banana or handful berries
1/4 avocado
1 ts chia seeds
1 ts mixed ground seeds (sunflower, pepita and linseed)
cinnamon, vanilla or cacao
probiotic powder
Place all ingredients into a high powered blender and process until smooth (TMX 1 minute / SP 9).
Bliss balls
So these require a little more planning but once they are made they can be stored in the freezer and will keep for ages. There are loads of bliss ball recipes out there but as most of them are packed full of dried fruit they are very high in sugar. Two of my family favourites are my Almond and Chia Bliss Balls which are fruit-free and my Chocolate Bliss Balls which are nut and coconut free but do contain some dates. You can really let your imagination run wild here though - you can swap the nuts, the sweetener, the fruit to whatever you happen to have on hand. Just taste as you go and when the mixture sticks together they are ready to roll!
Popcorn
An oldie but a goodie. Is there anything better than popcorn? I'm talking the homemade stuff here not anything with synthetic 'butter flavour' that is artificially coloured yellow. There are 2 easy ways to make popcorn. First you can heat up some oil in a large pot (coconut oil or ghee are brilliant), toss in the kernels, cover and wait for them to stop popping. Or you can buy an air-popper really cheaply from places like Kmart. We have had an air popper for years and it gets used at least once a week. Simply throw in the kernels, turn it on and voila, popcorn!
We always have lots of butter and a sprinkle of sea salt on our popcorn and the kids love it. We recently switched to Honest 2 Goodness brand organic popping corn and have been amazed by how fresh and tasty it is compared with the stuff you can buy from the supermarket. And it is GMO free unlike most of the corn products you buy at the shops.
Here's an extra tip, if you start noticing that you are left with heaps of unpopped kernels in the bottom of the bowl it means that they have dried out and are stale. The kernels only pop because the water inside them turns to steam and they basically explode from the inside. No moisture inside means they can't pop. So always store your popping corn in an airtight container to keep it fresh!
Apple slices with peanut butter
Ok this one sounds like a cop-out but the kids love it! It's as easy as slicing up an apple and spreading some peanut butter on each piece. That's it. Adding the peanut butter means they are getting some good fat and protein and it keeps them fuller far longer than just an apple on it's own.
Can't have peanuts? Use cashew or almond butter or even tahini instead. Make sure you choose a good quality nut butter than is 100% nuts with no oils, salt, sugar or preservatives.
Crackers, veggie sticks and cheese
I do make homemade crackers on occasion but they can be fiddly and time consuming to roll out and slice and I'm not doing that every day (or even every week). When I buy crackers there are 2 types I choose, either brown rice crackers like the Eat Rite brand or an organic rice cake (Pure Harvest brand is good). Throw some crackers on a plate with whatever veg your kids like to eat raw - think carrot sticks, cucumber, cherry tomatoes and some cheese and that's afternoon tea sorted. My fussy Mr 5 LOVES soft cheese like brie or camembert so if there happens to be some on special I might surprise him with some. Easy as.
So that's it, my top 5 no-bake snacks for kids. Do you have a favourite afternoon tea for your kids? Do you bake for afternoon tea or only for special occasions?
Wednesday, February 3, 2016
My Bircher Muesli
Our kids have swimming at 8am every Sunday morning. Yep, we must be crazy! Actually it's not so bad. The classes are a little quieter at that time and let's be honest with young kids it's not like we ever get a sleep in!
Breakfast is important every day but on Sundays it's especially important as it has to be quick, easy and nourishing to give the boys lots of energy for their swim.
One of our favourites is bircher muesli aka overnight oats. Everyone has their own version of bircher muesli and this is mine. Unlike most others it does not include yoghurt or fruit juice, instead it has rice milk with cinnamon, red apple and raw honey for sweetness.
Adding seeds is a great way to increase the nutritional value - the sunflower seeds are a great source of vitamin E, magnesium and selenium, pumpkin seeds are especially high in zinc and chia seeds provide fibre, protein and omega 3s. Oh and they taste great too!
This is a great alternative to cereal or porridge and the possible variations are endless.
My Bircher Muesli
2 cups rolled oats
4 cups rice milk
1 ts cinnamon
1/4 cup sunflower seeds
1/4 cup pumpkin seeds
1/4 cup chia seeds
1 red apple, grated (per person)
raw honey to serve
Place the oats, milk cinnamon and seeds into a large bowl and stir to combine. Cover and place in the fridge overnight.
In the morning, serve up into bowls and top with grated apple and a drizzle of honey.
Enjoy!
Serves 4-6
Monday, September 14, 2015
Healthy chocolate crackle slice
Snacks, snacks snacks! That's what we seem be needing a lot of lately. I guess moving really does work up an appetite!
And today is moving day! As you read this the truck will already be here loading our things and getting us ready to start our new family life in our new home.
For anyone who grew up in Australia you will be very familiar with the chocolate crackle, which featured at every birthday party and school fete as a kid.
These are a far healthier version from the Naughty Naturopath Mum who calls them anti-LCM bars. I have to admit my kids have never eaten an LCM and would have no idea what they are (yay!) so I just called it a chocolate rice bubble slice for them.
We don't usually buy rice bubbles either but half a bag came home with them from their sleepover down the coast in the holidays and frugal me didn't want to throw them, but also didn't want them to just eat it for breakfast because they would be starving again in 5 minutes.
These were SOOOO delicious. Chocolatey, caramelly, crispy and chewy and just plain good. Still a treat but one you can definitely feel good about.
Healthy Chocolate Crackle Slice or Anti-LCM Bars
From the Naughty Naturopath Mum
4 cups rice bubbles (puffed rice from the health food shop is better!)
2 cups desiccated coconut (check that it is preservative free)
1 cup rice malt syrup
1/2 cup coconut oil
1/4 cup chia seeds
1/4 cup raw cacao
pinch salt
Grease and line a slice pan with baking paper.
Place all dry ingredients into a large bowl and mix together.
In a small pan over medium heat, place the rice malt syrup and coconut oil and warm gently until it is smooth and only just starting to bubble. Pour immediately over the dry ingredients and mix until well combined.
Tip the mixture into the prepared pan and press down well, smoothing the top as you go.
Store in the fridge and slice into bars when ready to serve (you can't store this out of the fridge as the coconut oil will start to melt as it warms up).
Makes lots.
Enjoy!
Thursday, August 20, 2015
Healthy Orange Jellies
When you think of healthy foods I'm pretty sure jelly isn't the first thing that springs to mind! But did you know you can make a jelly that is not only delicious but healing too?
I've been reading about and experimenting with all sorts of gut healing foods lately and one ingredient that continually appears is gelatin. Not all gelatin is created equal though and it is important to source a high quality product. I use Great Lakes Gelatin (red label) which I bought online from iHerb at less than half the price you can buy it in Australia.
Gelatin is packed full of protein, collagen and minerals all of which help to support healthy gut and immune function. A great source of gelatin is bone broth which I have been making all winter as a base for soups and casseroles and even just drinking warm with a pinch of salt. You can read about the benefits of bone broth here and here.
Two of my three boys love bone broth and the savoury meals I make with it but Mr 4 won't go near it in any form. This jelly however has become a favourite treat and I know he's getting all the health benefits he needs.
The ginger, turmeric and Manuka honey are all brilliant for coughs and colds and combined with hydrating coconut water and the vitamin-C from the orange juice this makes one seriously healthy jelly!
Healthy Orange Jellies
Adapted from Well Nourished
1 cup coconut water
1 1/2 cups freshly squeezed orange juice (I got enough from 3 large oranges)
2 cm piece of fresh ginger
1/4 ts dried turmeric
1-2 tbs Manuka honey
3 tbs good quality gelatin powder
Oil and line a small slice/brownie pan and set aside.
Squeeze your oranges and measure out 1 cup of juice into a heatproof jug (mine was pyrex).
Place the coconut water, ginger and turmeric in a medium pan over low-medium heat. Bring to the simmer and allow to steep for 5 minutes.
Pour the coconut water mixture through a sieve into the orange juice. Stir to combine then return to the pan by pouring through the sieve again to remove any orange pulp (my juice was cold from the fridge so my mixture was just luke-warm. Allow to cool slightly before adding the Manuka honey if your mixture feels hot to touch).
Add the honey and stir to combine.
Sprinkle the gelatin over the warm liquid, one tablespoon at a time, whisking well after each addition. Continue whisking until the gelatin is completely absorbed. If you have lumps of gelatin return the pan to the heat but don't let it get more than luke-warm.
Pour the mixture through the sieve into the prepared pan and place in the fridge to set for a few hours.
I give the kids a couple of pieces a day and it lasts for about 1 week in the fridge.
Wednesday, July 8, 2015
'Apple' Crumble Slice

This may be the most amazingly sneaky recipe I've ever made. I mean I've done lots of hidden veggies recipes before but this really takes the cake. I called it an apple crumble slice and my kids went nuts for it. But let me tell you a secret ... there isn't any apple in it.
So do you want to take a guess as to exactly what is cooking in this pan?
It's zucchini!!!
Seriously.
I found this recipe for Zucchini Pie Bars on Crazy for Crust and I was immediately intrigued but quite dubious. How on earth would zucchinis taste like apples? Especially as I wouldn't be smothering it in ice cream and caramel sauce like the original recipe. But I'm always up for a challenge so I gave it a go.
The slice consists of a pastry base which you bake until golden brown. Then the filling is diced zucchini sauteed in butter, cinnamon and sugar until just soft and then drained. Next there is a buttery crumble topping.
There was absolutely no discernible taste of zucchini. For all intents and purposes it was an apple slice, although perhaps a little less sweet than normal. The crust and crumble were crisp and buttery and the filling was soft and lightly spiced with cinnamon and lemon. My boys absolutely devoured it, asking for seconds and thirds.
So do I feel a little guilty about the deception? Not even a little bit. It is totally delicious and my extremely fussy 4 year old actually ate a serve of vegetables. Win!
'Apple' Crumble Slice
Adapted from Crazy for Crust
For the Crust:
125g softened butter
1 1/2 cups white spelt flour
1/4 cup coconut sugar
1/4 ts salt
For the Filling:
3 large zucchini, peeled and diced
2 tbs butter
2 tbs coconut sugar
1 ts cinnamon
zest 1/2 lemon
For the Topping:
125 softened butter
1/2 cup coconut sugar
1 cup white spelt flour
1/2 ts cinnamon
1/2 cup rolled oats
1/4 ts salt
Line a 20x30cm slice pan with baking paper. Preheat oven to 170 degrees Celsius.
To prepare the crust, place all ingredients into a food processor and pulse until the mixture is crumbly. It may look dry but if it sticks together when you squeeze a handful it is ready. Press the mixture into the prepared tin and bake for 13 minutes.
To make the filling, melt the butter and sugar together in a frying pan over low-medium heat. Add the zucchini, cinnamon and lemon zest and cook, stirring often, for approximately 5 minutes or until the zucchini is just starting to soften. Remove from the heat and drain until ready to use.
While the zucchini is cooking prepare the topping. Place all ingredients into the food processor and pulse until crumbly.
Remove the hot crust from the oven and scatter the cooked zucchini carefully over the top before sprinkling the topping evenly over the top. Bake for around 25 minutes or until golden brown.
Cool completely in the pan before slicing into bars and serving. Can be stored in the fridge for 3 days in an airtight container or up to 1 month in the freezer.
Wednesday, May 13, 2015
Sunshine Soup (aka Carrot, Pumpkin and Sweet Potato Soup)
We've been hit with numerous bouts of colds recently and seemingly permanent runny noses so I've been looking for lots of nutrient rich foods to boost the kids immune systems - fresh juices made on carrots, celery, beetroot, spinach, orange and ginger in the morning and warming drinks with lemon and raw honey in the afternoon when the coughs and sniffles come back.
And now that it seems like Winter is finally on the way (we've dropped into single digits overnight in the last few days) it's soup time!!!
I don't tend to follow recipes for soup, I usually just throw in whatever veggies we have on hand, add some herbs and stock and call it a day. This soup, which my boys called Sunshine Soup because of its gorgeous sunny colour, was the perfect tonic for my big boy who was home sick from school yesterday. As usual I thought I made plenty but it disappeared in record time and I will be making another batch today!
I did this in the Thermomix but you can easily adapt it and I have included alternative directions below.
We all loved this soup. My 18 month old ate more than 1 1/2 cups and wanted more but there wasn't any left!
Sunshine Soup (Carrot, Pumpkin and Sweet Potato)
2 large carrots, roughly chopped
1 large sweet potato, roughly chopped
1 big wedge of pumpkin, roughly chopped
3 cloves garlic
2cm piece ginger
2cm piece fresh turmeric OR 1ts dried turmeric
2 1/2 cups water or stock
1 ts vegetable stock paste (only if using water)
1 heaped tbs solid coconut oil
sea salt and pepper to taste
TMX - place the ginger, garlic and fresh turmeric (if using) into the bowl and chop 3 secs / SP 7. Add the coconut oil and dried turmeric (if using) and saute 2 mins / Varoma / SP 1. Add the carrot, sweet potato and chop 15 secs / SP 7. Scrape down the sides of the bowl, add the stock or water and cook 20 mins / 100 degrees / SP 1. Blend 45 secs / sp8, gradually increasing from SP 1 to SP 8. Add sea salt and pepper to taste.
If not using a Thermomix, place all ingredients except the water/stock and oil into a food processor and process until finely chopped. Pour into a medium saucepan, add the oil and water or stock. Bring to the boil then simmer for 20 minutes or until veggies are tender. Using a stick blender, process the soup until smooth.
Serves 4.
Monday, February 23, 2015
Peanut Butter Chocolate Chip Cookie Dough Balls (SRC)
It's Secret Recipe Club time! Every month SRC members are assigned a blog in secret to peruse and choose a recipe, then we all post on the same day. This month I was assigned Life on Food by Emily.
Emily is a self-proclaimed foodie who has been blogging since 2009. She and her husband Jordan are expecting their first baby next month (how exciting!) and she had the most gorgeous baby shower with a Very Hungry Caterpillar theme. My kids all love that book and we read it constantly.
I was definitely spoilt for choice when it came to picking a recipe. I wanted something sweet and easy this month and a few things caught my eye straight away. I have bookmarked the Chocolate Chunk Zucchini Bread to try when we have some spare zucchinis and I was so tempted by the Brownies with Cookie Dough Frosting (OMG) but continuing on a cookie dough theme I ended up choosing Emily's Peanut Butter Chocolate Chip Cookie Dough Balls. I made a double batch because I knew they would be good and let me tell you, I was not disappointed. These were SO good!!!
We gobbled up 3 each as soon as they were made and I stashed the rest in the freezer just to make them last longer. They have been brilliant to grab as a quick snack for the boys before or after school and kindy and I can see many, many batches of these being made in the future!
I made a few small changes to the recipe to fit in with our dietary requirements, such as using natural peanut butter, rice malt syrup and dextrose instead of regular sugar and ground almonds instead of flour. I'm thinking next time I might add some vanilla protein powder and some chia seeds to boost the protein content and make them an even more substantial snack.
Peanut Butter Chocolate Chip Cookie Dough Balls
Adapted from Life on Food
6 tbs natural peanut butter
4 tbs butter, softened
1/4 rice malt syrup or honey
2 tbs dextrose (or granulated sugar)
2 ts vanilla
1/4 ts salt
1/2 cup ground almonds
1/2 cup quick oats
6 tbs chocolate chunks
In a mixer, beat together the butter, peanut butter, rice malt syrup and dextrose until fluffy. Add the vanilla and beat again. Add in the remaining ingredients except the chocolate and mix until combined. Fold through the chocolate chunks.
Roll into balls (makes approx 16) and freeze or refrigerate until needed. Try not to eat them all at once.
Thanks for an amazing recipe Emily!
Monday, February 2, 2015
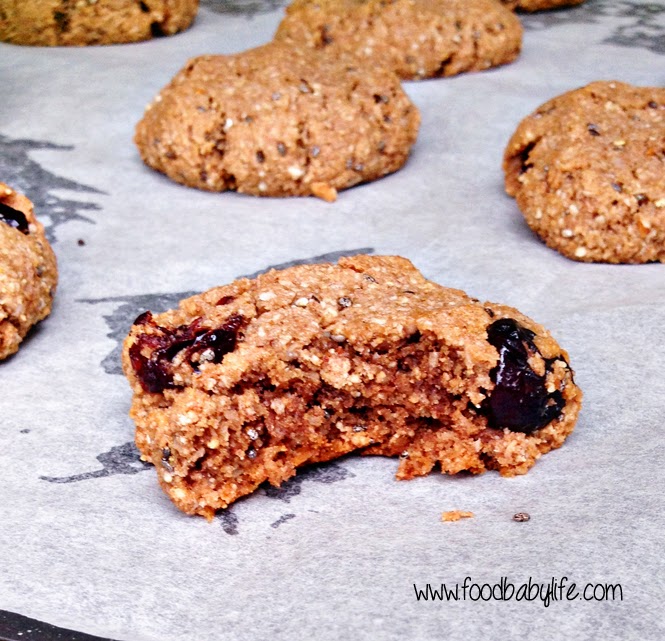
Grain-free Choc Cranberry Cookies
These are a very simple adaptation of the Grain-free Oatmeal Raisin Cookies which our family is so in love with. Seriously, I have lost count of how many batches I have made with the intention of freezing them for after-school snacks, only to find that they disappear almost before they have cooled down!
Cranberry and chocolate is always a winning combination but the coconut in these also shines through. They are moist, chewy and chocolatey with a nice little zing from the cranberries. They are only slightly sweet, which my kids are used to, but if you're not you may want to up the sweetness, perhaps with a few drops of liquid stevia which will add sweetness without affecting the consistency of the dough.
We've been having a heat wave here for the past few weeks but some overnight rain has brought a cool change so I have been baking up a storm and even made a batch of curried pumpkin soup for lunch (recipe to come).
Grain-Free Choc Cranberry Cookies
Follow the recipe for Grain-free Oatmeal Raising Cookies but replace the spice with 1 tablespoon of cocoa powder and use dried cranberries instead of raisins. Shape and bake as usual. Enjoy!
Sunday, January 18, 2015
Mud Monster Smoothie
Why is it that kids eat so much on holidays?? I just can't seem to fill mine up these days and I'm constantly replying to 'Mummy I'm hungry' with 'but you just ate 10 minutes ago!'
Smoothies have been a real lifesaver. I can cram them full of nutritious ingredients and the kids love them because they taste so good.
A few years I jumped on the green smoothie bandwagon with a vengeance and ended up with my IBS symptoms flaring up to be the worst they had been in more than a decade. I think a combination of too much fruit and the wrong type of protein powder were to blame. Being dairy free I was using a vegan pea protein which I later learned can indeed cause digestive issues. I was never comfortable giving it to the kids either and with good reason.
After much research I stumbled across Thriving Protein by Nutra Organics which is a blend of different protein sources like sprouted brown rice as well as red algae and high vitamin D mushroom powder. It is packed with protein and essential vitamins and minerals and provides a complete amino acid profile. It's good stuff!
There are 3 flavours to choose from and after some experimentation the CacaoChoc one is my kids favourite (although they do drink all 3). This smoothie has been their snack of choice lately and while it definitely doesn't look pretty (hence the name they came up with!) it does taste delicious!
I've been so impressed with Thriving Protein I have actually signed up with NutraOrganics as an affiliate so if you purchase after clicking a link on my page I will receive a small commission (thank you!)

My boys love this smoothie and the fact it looks like slime or monster mud makes it just that much more appealing for them!
Mud Monster Smoothie
Per serve:
1 cup very cold milk (we use organic rice milk or homemade almond-sunflower seed milk)
1/2 frozen banana
1 tbs chia seeds
1 tbs CacaoChoc Thriving Protein
1 handful baby spinach OR 1 leaf kale with stem removed
Place all ingredients into the thermomix or other high powered blender and blitz for 1 minute or until thick and smooth and completely blended. Pour into a glass, add a straw and drink!
Serves 1
Subscribe to:
Posts (Atom)


