Showing posts with label Lunchbox. Show all posts

Thursday, June 9, 2016

One-bowl Banana Bread


When I first got into cooking again as an adult I was all about trying new things, sourcing new ingredients and making every meal spectacular. I now have 3 young children and while I still want delicious food, my priorities have definitely changed!

What I look for now is - how long is this going to take me to make when I have a dozen other things I need to do right now? how many ingredients do I need to search for in the supermarket when I have a fussy, whingy toddler in the trolley trying to grab everything off the shelves? will my kids actually eat this or am I wasting my time?

One-pot dinners and one-bowl bakes - those words are music to my ears!

While I have made a hundred different banana breads this one is my simplest yet. Real ingredients, nothing fancy and just one bowl. Hallelujah.

I did this in the Thermomix (which to me is the epitome of one-bowl cooking) but a large bowl, a fork and a spoon will do the job just as well.

My husband scored a 15kg box of bananas for just $7 on the weekend so we have bananas coming out our ears at the moment. Most of these have been peeled and frozen so I am down to the last couple of bunches which are getting nice and brown and spotty, perfect for banana bread.

So here you go, the simplest wholefood banana bread around. This recipe is a keeper!

One-Bowl Banana Bread

3 ripe bananas (250g peeled)
2 extra large eggs
1/3 cup oil (coconut, macadamia or olive oil)
1/3 cup sweetener (rice malt syrup, honey or maple syrup)
1/4 cup milk (rice, almond or coconut)
1 1/2 cups wholemeal spelt flour
3 ts baking powder
1 ts cinnamon
pinch salt

Preheat oven to 170 degrees Celsius / 150 degrees fan-forced. Grease a loaf pan and line with baking paper.

In a large bowl mash the bananas, then add the eggs, oil and sweetener and beat together until smooth (TMX - 10 secs / SP 6).

Add the remaining ingredients and fold together until just combined (TMX - 10 secs / SP 3 - scrape down the sides and repeat if you need to).

Pour mixture into prepared pan and bake for 40-45 minutes or until it is golden brown and the tops springs back when you press lightly.

Remove from the oven and leave in pan for 5 minutes before turning out onto a wire rack to cool completely.

Delicious still warm from the oven or cold in lunchboxes.

Have you scored any amazing fruit and veg bargains lately?

What would you do with 15kg of bananas??

~ Susan

Monday, March 14, 2016

My top 5 No-Bake Snacks for Kids


So you may have noticed that I like to bake. A lot! But in reality we're not eating baked goods all the time. I always make big batches and stash at least half in the freezer for another time. Things like muffins and biscuits and slices are brilliant to have on hand to pop into lunchboxes or to grab out when we have a playdate.

But there are also plenty of times when to be honest, I just don't feel like baking. Or we're too busy or it's too hot ... you get the idea. I also want to mix things up a bit so we're not eating the same things all the time and if the kids have had a muffin in their lunchbox they are certainly not getting cake for afternoon tea.

It's a good idea to have a range of no-bake options that you can whip up quickly as soon as the hungry horde descends after school.

Smoothies

This is a no-brainer! A smoothie can be a meal in a glass if you pack it full of nutrient dense (and delicious) ingredients. I personally have been down the green smoothie road and can say with certainty that they don't agree with me. I just don't feel good drinking them even when they taste good. But there are other ways to get in some goodness. This is my go-to smoothie formula for the kids:

Per child:
1 cup milk (we use rice, almond or coconut)
1/2 frozen banana or handful berries
1/4 avocado
1 ts chia seeds
1 ts mixed ground seeds (sunflower, pepita and linseed)
cinnamon, vanilla or cacao
probiotic powder

Place all ingredients into a high powered blender and process until smooth (TMX 1 minute / SP 9).

Bliss balls

So these require a little more planning but once they are made they can be stored in the freezer and will keep for ages. There are loads of bliss ball recipes out there but as most of them are packed full of dried fruit they are very high in sugar. Two of my family favourites are my Almond and Chia Bliss Balls which are fruit-free and my Chocolate Bliss Balls which are nut and coconut free but do contain some dates. You can really let your imagination run wild here though - you can swap the nuts, the sweetener, the fruit to whatever you happen to have on hand. Just taste as you go and when the mixture sticks together they are ready to roll!

Popcorn

An oldie but a goodie. Is there anything better than popcorn? I'm talking the homemade stuff here not anything with synthetic 'butter flavour' that is artificially coloured yellow. There are 2 easy ways to make popcorn. First you can heat up some oil in a large pot (coconut oil or ghee are brilliant), toss in the kernels, cover and wait for them to stop popping. Or you can buy an air-popper really cheaply from places like Kmart. We have had an air popper for years and it gets used at least once a week. Simply throw in the kernels, turn it on and voila, popcorn!

We always have lots of butter and a sprinkle of sea salt on our popcorn and the kids love it. We recently switched to Honest 2 Goodness brand organic popping corn and have been amazed by how fresh and tasty it is compared with the stuff you can buy from the supermarket. And it is GMO free unlike most of the corn products you buy at the shops.

Here's an extra tip, if you start noticing that you are left with heaps of unpopped kernels in the bottom of the bowl it means that they have dried out and are stale. The kernels only pop because the water inside them turns to steam and they basically explode from the inside. No moisture inside means they can't pop. So always store your popping corn in an airtight container to keep it fresh!

Apple slices with peanut butter

Ok this one sounds like a cop-out but the kids love it! It's as easy as slicing up an apple and spreading some peanut butter on each piece. That's it. Adding the peanut butter means they are getting some good fat and protein and it keeps them fuller far longer than just an apple on it's own.

Can't have peanuts? Use cashew or almond butter or even tahini instead. Make sure you choose a good quality nut butter than is 100% nuts with no oils, salt, sugar or preservatives.

Crackers, veggie sticks and cheese

I do make homemade crackers on occasion but they can be fiddly and time consuming to roll out and slice and I'm not doing that every day (or even every week). When I buy crackers there are 2 types I choose, either brown rice crackers like the Eat Rite brand or an organic rice cake (Pure Harvest brand is good). Throw some crackers on a plate with whatever veg your kids like to eat raw - think carrot sticks, cucumber, cherry tomatoes and some cheese and that's afternoon tea sorted. My fussy Mr 5 LOVES soft cheese like brie or camembert so if there happens to be some on special I might surprise him with some. Easy as.

So that's it, my top 5 no-bake snacks for kids. Do you have a favourite afternoon tea for your kids? Do you bake for afternoon tea or only for special occasions?

Thursday, February 18, 2016

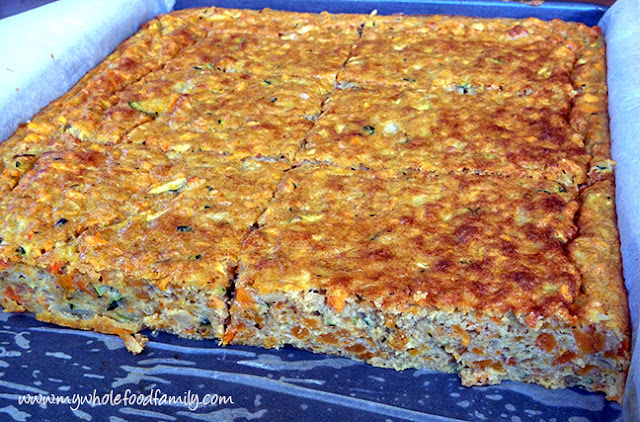
Curried Veggie Slice

Curried vegetable slice www.mywholefoodfamily.com

A few weeks ago we realised our fridge was suddenly not cold anymore so I baked up a storm, trying to use up everything that I could before it went bad. This was one of the results and it was absolutely delicious!

It's basically my take on a classic zucchini slice. Unfortunately not one of my children will eat zucchini slice, something I've found incredibly frustrating as it's such an easy meal and can be served hot for dinner or cold in lunchboxes.

I did have a small win with this recipe though, as after leaving out the bacon, swapping some of the veggies and adding some curry powder I called it a Curried Veggie Slice and my 6 year old loved it! Go figure.

I ate some for lunch straight away and froze the rest in single serves. It's been brilliant for my lunch on study days when I need something quick and filling.

Have you had any luck changing the name of something to get your kids to like it?

Curried Veggie Slice

1 onion, finely chopped
1 clove garlic, crushed
450g grated vegetables (I used sweet potato, carrot and zucchini*)
6 eggs
50g extra virgin olive oil
100g wholemeal spelt flour (or rice flour to be gluten free)
1 ts baking powder
1 tbs veggie stock paste
1 ts curry powder
1 tbs nutritional yeast flakes (or a handful of grated cheese if not dairy free)

Grease and line a 20 x 30cm slice pan with baking paper and set aside.

Preheat oven to 180 degrees C / 160 degrees fan-forced.

In a small bowl beat the eggs, oil, stock paste, curry powder and nutritional yeast until well combined. Place all other ingredients into a large bowl. Pour the egg mixture over the top  and mix well.

Pour the mixture into the prepared pan and bake for approximately 30 minutes or until golden brown and just set.

Leave to cool for at least 15 minutes before serving or refrigerate until needed. Great for lunchboxes.

*make sure you squeeze out the excess liquid from the zucchini before adding it otherwise your mixture will be very wet and the slice won't bake properly.

Sunday, February 14, 2016

Chocolate Bliss Balls (Nut free, Coconut free)

Chocolate Bliss Ball nut free coconut free www.mywholefoodfamily.com

Well love it or loathe it, today is Valentine's Day!

We don't really celebrate it as such but do tend to have something a bit more special for dinner and I will often bake something chocolate-y for us all to enjoy. This year, being determined to keep some treats in the freezer at all times for school lunches and afternoon tea, I decided to just make a batch of chocolate bliss balls.

Yep another bliss ball recipe. I love them! They really are perfect little morsels of deliciousness.

Our school doesn't have any nut restrictions so I don't really need to make things nut free but I think it's good to mix things up a bit so we're not eating the same things all the time. I tend to avoid dates as they are so high in fructose but as a treat now and then (and especially on Valentine's Day) I'm not going to worry about it, especially as they are also a great source of fibre and oh yeah, they're delicious!

The only reason these are coconut free is that we were almost completely out of coconut! Totally unheard of in this house as there is usually coconut in all forms - coconut milk, coconut cream, coconut oil, coconut water, shredded coconut and desiccated coconut #coconutaddict.

So whether you are celebrating Valentine's Day or not, I hope you had a wonderful day!

My (Nut free, Coconut free) Chocolate Bliss Balls

3/4 cup sunflower seeds
3/4 cup pumpkin seeds
2 tbs chia seeds
2 tbs raw cacao
1 ts vanilla extract
1/4 ts sea salt
1/2 cup dried dates
2 tbs coconut oil

Place all ingredients into a food processor and blend until the mixture is sticky and clumping together (TMX 10 secs / SP 8).  Using wet hands, roll the mixture into balls and store in the fridge or freezer.

Make approximately 16

Thursday, January 21, 2016

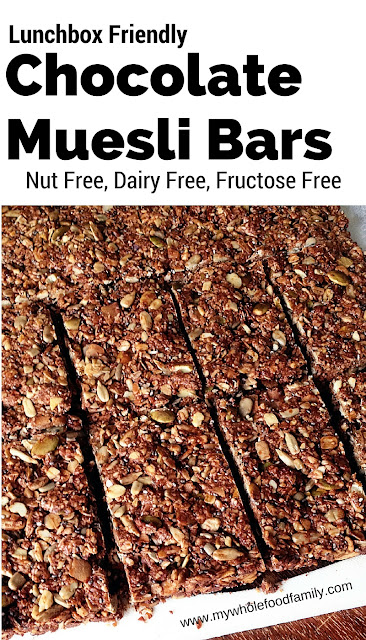
Lunchbox-friendly Chocolate Muesli Bars (Nut, Dairy and Fructose Free)

Lunchbox friendly chocolate muesli bars - nut free dairy free fructose free - from www.mywholefoodfamily.com

I've been making these muesli bars for the kids for years now but with all 3 kids off to school or daycare this year (sob) I can officially call them 'lunchbox friendly.'

If you want to eat fewer processed foods, then making your own snacks like these is a great place to start.

Store bought muesli bars, especially the ones plastered with statements like 'no added sugar', '99% fat free' and 'no artificial colours or flavours' can be full of rubbish ingredients. (I will be doing a post on how to read product labels next month so keep an eye out for that!)

These use a mixture of seeds instead of nuts, coconut oil instead of butter and rice malt syrup instead of sugar. If you have no problems with dairy then use butter by all means and you could also replace the syrup with either honey or maple syrup (although this means they won't be fructose free).

They are absolutely delicious and really filling too so my kids will having one of these and a piece of fruit in their lunchbox for morning tea next week at school. It will keep them going for hours!

Chocolate Muesli Bars

140g rice malt syrup
90g coconut oil
2 1/2 cups rolled oats
1 cup shredded coconut
1 cup pumpkin seeds
1 cup sunflower seeds
1/4 cup chia seeds
1/4 cup sesame seeds
2 tbs raw cacao
3 ts vanilla extract
1/2 ts salt

Preheat oven to 160 degrees C / 140 degrees C fan-forced.

Line a 20 x 30 cm slice pan with baking paper and set aside.

TMX - melt together the syrup, coconut oil and vanilla extract for 2 minutes / 80 degrees / SP 2. Add all remaining ingredients and process for 20 seconds / SP 4.

No TMX? Melt the syrup, coconut oil and vanilla in a small pot over medium heat. Place all remaining ingredients in a large bowl and toss to combine. Pour over the syrup mixture and mix really well.

Tip the mixture into the prepared pan and press down well.

Bake for approximately 25 minutes. Use your nose with this one, the house will smell amazing and it will look evenly browned. Do not overcook!

Remove from the tin by lifting the baking paper on each side and slice into bars while still warm. Leave until completely cooled. Store in an airtight container or freezer.

Makes 16-20 but you can slice them into whatever size bars you need


Saturday, January 10, 2015

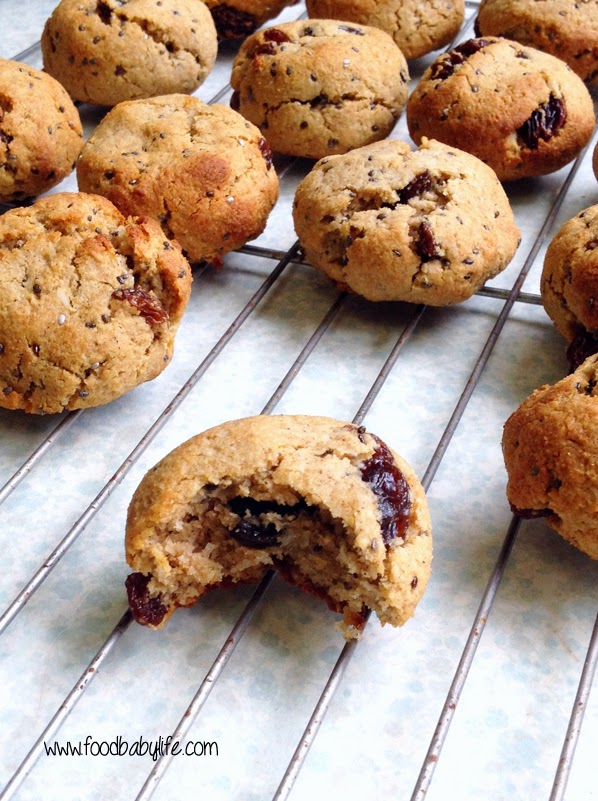
Grain-free Oatmeal Raisin Cookies

Grain-free oatmeal raisin cookies © www.foodbabylife.com 

If you're anything like me you have tons of recipes marked to try - ripped out of magazines, bookmarked, pinned or printed out. I had been meaning to make these little bites of awesomeness from Against All Grain for ages and you should definitely follow Danielle on Facebook if you don't already!

We devoured this batch in record time. They were sweet, spicy, chewy and delicious. Exactly what you expect from an oatmeal raisin cookie and even the most hardened gluten addict (I'm looking at my husband here) wouldn't miss the grain. I've had problems with my coconut oil based cookies spreading lately so even though the recipe said to press them down I only gave them the teeniest little press with my fingers and of course they didn't spread at all! So we have been calling them oatmeal raisin balls and pretending that's how they are supposed to be.

I will be making 2 batches of these as part of my back to school baking over the next couple of weeks and stashing them straight in the freezer ready for lunchbox treats and after school snacks.

Grain-free oatmeal raisin cookies © www.foodbabylife.com

These were so SO good and I'm wishing I had one (or 3) right now!

Grain-free Oatmeal Raisin Cookies
Adapted from Against All Grain

1/4 cup coconut oil, liquid
3 tbs honey or maple syrup
1 ts vanilla extract
1 large egg, at room temperature
1 tbs mixed spice (or 4 ts cinnamon plus 3/4 ts nutmeg)
1 cup almond meal
2 tbs coconut flour
1/2 ts bicarb soda
1/4 ts sea salt
2 ts chia seeds
3/4 cup desiccated coconut
1/2 cup raisins

Preheat the oven to 180 degrees celsius / 160 degrees fan-forced / 350 degrees fahrenheit. Line 2 trays with baking paper and set aside.

In a small bowl mix the coconut oil, honey, egg and vanilla together until well combined.

In a large bowl mix together the spice, flours, bicarb soda, salt, chia seeds and coconut.

Add the wet ingredients into the dry ingredients and stir together until just combined.

Fold through the raisins.

Roll golf ball sized balls of dough and place on the prepared trays, making 16 cookies. Press down lightly on each cookie with your palm or the bottom of a glass.

Bake for 9-10 minutes or until golden brown.

Remove from the oven and cool for 5 minutes on the trays before turning out onto a wire rack to cool completely.

Makes 16.

Tuesday, January 28, 2014

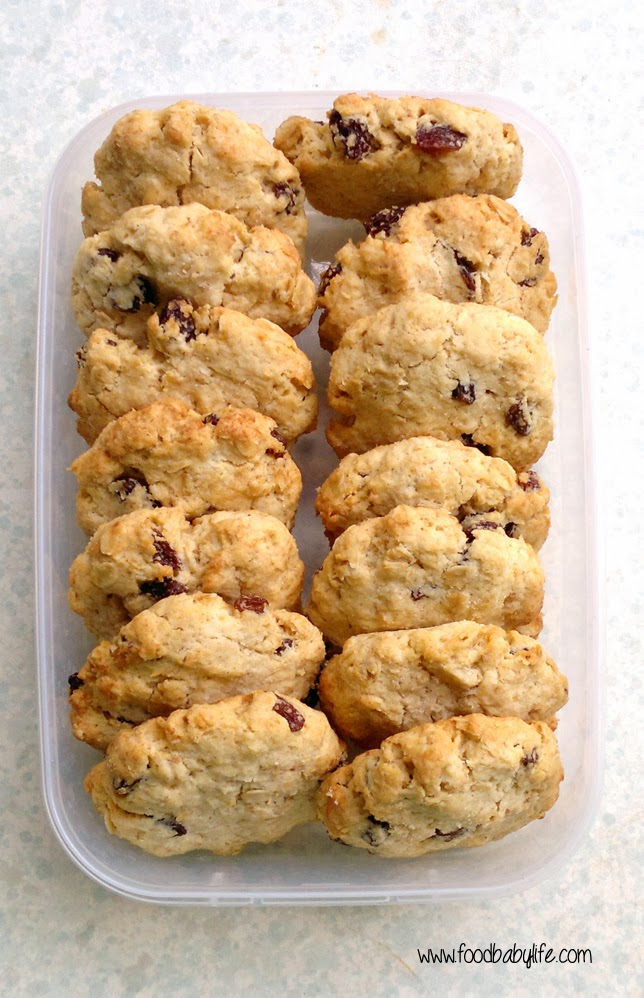
Starting School and Sultana Oat Biscuits

Sultana Oat Biscuits © www.foodbabylife.com
Today is a big day in our family as our eldest is starting school! While this year is called different things around the country here in Queensland this first year of school is called prep and is for kids who will turn 5 by the 30th of June.

Whatever you call it, it is the end of an era for us and the start of a new exciting chapter for Oscar!

We have been preparing for months getting school uniforms bought, washed and labelled, school books covered and the all-important lunch box chosen. After much deliberation I went with a medium size Fridge to Go lunch bag, a stainless steel lunchbots trio container and a 4 My Earth sandwich wrap and snack pocket. I bought all of these on Lime Tree Kids (my favourite online kids store) but they are available at other places. All of these should last him for years and I'm happy to be moving away from plastic to more environmentally friendly products.

At Oscar's school they eat 3 times in first term then twice a day after that. This means we need to send a piece of fruit for mini munch, lunch and a snack. For this first week I thought a yummy cookie would be perfect for his afternoon snack as it only has to keep him going for the hour or so until he gets home and I can bake and freeze ahead of time.

I came up with these Sultana Oat Biscuits using ingredients I had in the pantry. While I am baking without wheat and dairy most of the time these days, Oscar doesn't have any allergies and these are sugar free, contain wholemeal flour and will give him a good energy hit from the sultanas.

Good luck to all the preppies and their mums/dads today!

Sultana Oat Biscuits
Recipe by me

125g butter, softened
1 tbs stevia (I used Natvia)
1 ts vanilla extract
1 egg
1/2 cup wholemeal plain flour
1/2 cup plain flour
1 cup rolled oats
1 ts baking powder
pinch salt
1/2 cup dessicated coconut
1/2 cup sultanas

Preheat the oven to 180 degrees Celsius. Line 2 baking trays with baking paper and set aside.

Cream the butter and stevia together until pale, add the vanilla and egg and beat until thick and smooth. Fold through the dry ingredients until well combined. Roll spoonfuls of dough into 16 balls and place on 2 trays. Flatten each ball with damp fingers.

Bake for approx 10-12 minutes or until golden brown. They will be soft at first but will firm up when cool.

Tuesday, January 15, 2013

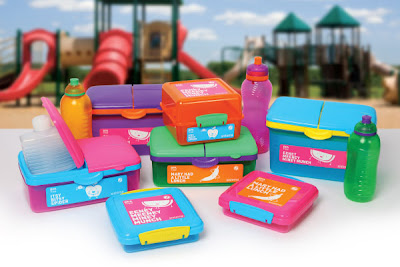
Sistema Quaddie Lunch Box Review

Well it's almost back to school time! I always loved this time of year when I was a kid. The holidays had dragged on long enough that I was looking for something to do and it was exciting getting new books, uniforms and stationery.

Oscar starts kindy at the end of this month (sniff) and I am just starting to get organised. Luckily he has a bag already, leftover from his daycare days, and doesn't need sheets etc now that he no longer has a daytime nap. What we really needed were labels to make sure all of his things come home and of coure, the all important lunch box.

My baby loves his food so finding something practical that he also really liked was important.

My requirements:
- BPA free
- easy for him to open and close
- big enough to hold both morning tea and lunch
- dishwasher safe

We are lucky that our kindy stores all lunchboxes in the fridge so we don't need an insulated lunch bag and special cold bricks. That narrowed our choices down to a few but the Sistema Quaddie (Itsy Bitsy Lunch range) in blue and yellow was a clear winner.


It has 3 compartments on top, one of which fits an included bottle which can be frozen to keep lunch cold. I plan on using the largest compartment for some sliced fruit, then separating out either cheese, crackers, carrot sticks or a homemade treat in the other 2.

Underneath there is plenty of space for a sandwich, muffin, tub of yoghurt or whole apple/orange. We saw lots of lunchboxes which had space for a sandwich but not much else. For the sake of variety I would like to be able to include a savoury muffin instead of a sandwich or include a proper tub of yoghurt rather than those small-but-full-of-sugar tubes of yoghurt with cartoon characters on them. Those things simply wouldn't fit or would be pretty squashed in some of the other lunchboxes.

We have had a few trial runs and Oscar found it easy to open all the individual lids and we have already made it a rule that it will be morning tea on the top and lunch in the bottom.

Not to be left out, Charlie has an identical quaddie lunchbox and I'm planning on packing his lunch up the same as Oscar's on kindy days. This should be a bit of a timesaver and also be special for Charlie who is going to miss his big brother terribly.

We bought our Sistema Quaddies at Kmart but they are pretty widely available. You can find stockists and more information here.

Note - this is not a sponsored post and no brand associations exist with Sistema or Kmart. I just wanted to share something that I like!

Sunday, October 21, 2012

Pumpkin, Banana and Date Muffins

Pumpkin Banana and Date Muffins © food-baby.blogspot.com All rights reserved

I've been on a real pumpkin kick lately, it's just such a versatile ingredient. Coming into summer here I foresee lots of roast pumpkin and feta salads, while from the northern hemisphere there is sure to be an abundance of pumpkin pie and cake recipes. Bring it on!

Ever on the hunt for healthy lunchbox ideas for hubby and the boys, I came across these muffins in a healthy lunchbox post on Fig & Cherry. I made a few small changes to the original recipe - using all wholemeal flour instead of half and half. I also added a mashed banana simply because I didn't have quite enough leftover pumpkin and wasn't keen to cook any more.

All my boys loved these. I think the banana upped the sweetness a bit and helped them to not be quite so pumpkiny (a bonus for my pumpkin-hating husband).

We took these for morning tea on our day trip to Underwater World last weekend and they felt like a real treat! Definitely made me feel better about the fish and chips we had for lunch later that day :-)

Pumpkin, Banana and Date Muffins
Adapted from Weight Watchers via Fig & Cherry

2 cups (300g) wholemeal self-raising flour (or 2 cups plain flour plus 4 ts baking powder)
2 ts ground cinnamon
1/3 cup (80g) brown sugar
1/2 cup (125ml) oat milk (or any milk)
1/4 cup (60ml) rice bran oil
1 egg
1 cup (250g) cooked mashed pumpkin
1/2 cup (100g) mashed ripe banana
1/2 cup (80g) dried dates, chopped
1 tbs raw sugar (optional)

Preheat the oven to 180 degrees (160 degrees fan forced). Line a 12 hole muffin tray with paper liners and set aside.

Whisk together the flour, cinnamon and sugar in a large bowl. In a separate bowl, mix the milk, egg and oil together. Pour the wet ingredients over the dry and stir until just combined. Fold through the pumpkin and dates being careful not to overmix.

Spoon the mixture into the prepared tray, sprinkle the tops with raw sugar and bake for 18-20 minutes or until cooked. Stand in the tin for 5 minutes before turning out onto a wire rack.

Makes 12 muffins.

Sunday, July 1, 2012

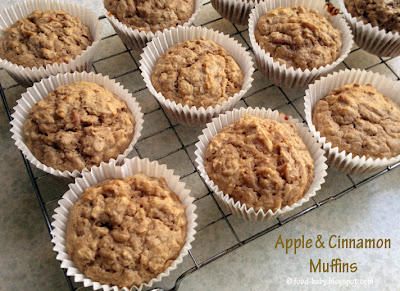
Sunday Baking - Apple and Cinnamon Muffins


© food-baby.blogspot.com All rights reserved
I've been thinking a lot about healthy lunchbox ideas recently. My husband takes his lunch to work every day (saving us literally thousands of dollars a year!) and always likes a little sweet something to have with his morning coffee. It's now also only a matter of months until Oscar starts kindy next year when having interesting and healthy treats will become even more important. 

These apple and cinnamon muffins are something I've been making for awhile and are a bit of a twist on what can be a sugar and fat-filled indulgence. They stay really moist and are perfect to freeze for lunches.

Apple & Cinnamon Muffins
Recipe by me

3/4 cup self-raising flour
3/4 cup wholemeal plain flour
1/4 cup rapadura or brown sugar
1 ts baking powder
1 ts cinnamon
1 cup rolled oats
1 cup low fat milk
1/4 cup coconut oil
1 ripe banana, mashed
1 large apple, washed and grated (skin and all)
1 egg

Preheat oven to 180 / 160 degrees celsius. Line a 12 cup muffin tray and set aside.

In a large bowl add the flours, baking powder, cinnamon, oats and sugar and whisk to combine. 

In a smaller bowl place the milk, egg, coconut oil and banana and whisk together. 

Add the grated apple to the dry ingredients then pour over the wet ingredients. Using a fork, stir until only just combined.

Spoon the mix into the prepared tray and bake for 20-25 minutes or until golden brown and a skewer comes out clean. Makes 12. Suitable to freeze.

I was pretty happy with this batch but they did stick to the paper cases a bit. Not a huge problem though and Oscar loved eating the extra 'cake' on the paper!

Sunday, May 6, 2012

Sunday Baking - Hummingbird Slice


I've had Hummingbird Cake and Hummingbird Muffins but I've never had Hummingbird Slice. That's reason enough to get baking!

This is a Donna Hay recipe and I have to admit in the past I've found her food to be really hit and miss. Always visually stunning but often lacking in flavour or with wildly inaccurate cooking times or techniques. No complaints about this one though, it was easy to bake and really tasty.

Normally I like cream cheese icing with these but in the interest of saving a few calories and making them freezer-friendly I've left them plain. Perfect for morning tea, or just anytime really!

Hummingbird Slice
Recipe slightly adapted from Donna Hay

140g brown sugar
125ml oil (I used extra light olive oil)
2 eggs
1/2 cup canned crushed pineapple, drained
1 banana, mashed
1 cup grated carrot (about 2 carrots)
115g self-raising flour
1/2 ts bicarbonate of soda
1/3 cup sultanas
2 ts cinnamon
20g dessicated coconut
30g chopped pecans

Preheat oven to 160°C.

Sift together the flour and bicarb soda and then add the cinnamon, coconut and pecans.

Place the sugar, oil and eggs in a large bowl and whisk well. Add the pineapple, banana and carrot and stir together. Add the dry ingredients and mix well to combine.

Spoon into a greased and lined 20cm x 30cm tin. Bake for approx 40-45 minutes or until it springs back when touched in the centre and starting to pull away from the sides of the tin. Allow to cool in the tin before slicing.

Donna suggest serving this slice with honey but with brown sugar and all that fruit no extra sweetness is needed. They are moist and packed with flavour and just as good, if not better, the next day.

A great treat for the kids' (or husband's) lunchboxes so get baking!

Sunday, April 1, 2012

Sunday Baking - Milo Muffins

In a few years I'll be baking treats for my kids' lunchboxes, but for now I am baking for the big kid in my life aka the hubby! We are trying to cut back our spending and making sure he takes lunch with him every day is a big part of that.

We have been planning our dinners pretty carefully for a while so that there are always leftover meals for his lunch, and now I am baking every Sunday so there is something sweet to have with his coffee as well. I'm such a good wife! Ha!

I stumbled across these Milo Muffins on the Essential Kids website but they are actually from one of my favourite bloggers, Melissa at Frills in the Hills.

Milo Muffins
Recipe very slightly adapted from Essential Kids
Makes 12 small or 6 jumbo muffins

1 1/2 cups self raising flour
2/3 cup milo
1 egg
2/3 cup milk
2/3 cup brown sugar
1/2 tsp baking powder
60g butter, melted
Chocolate sprinkles to decorate

Preheat oven to 190 degrees celsius. Place all ingredients in a large bowl and mix until smooth. Pour into muffin papers until 3/4 full. Cover each with chocolate sprinkles and bake for approx 20 minutes.

Cool in tin for 5 minutes then turn out onto a wire rack to cool completely. Suitable to freeze.

I made 6 jumbo muffins which meant 1 for me and 5 for hubby's lunches. He did forget to take one one day and I got a text with sad face that morning!
Related Posts Plugin for WordPress, Blogger...