Showing posts with label Pastry. Show all posts

Monday, May 16, 2016

Chocolate Pecan Pie (SRC)

Wholefood Chocolate Pecan Pie - wheat free - no refined sugar - from www.mywholefoodfamily.com

I've been doing a lot of baking lately but it's been all muffins, bliss balls and breads. It seems like aaaages since I've made a proper dessert - something the kids get really excited over and that seems a bit special.

As this is my first month with Group C in the Secret Recipe Club (after moving across from Group D) I thought I would celebrate and choose something sweet and out of the ordinary!

This month I was assigned The Avid Appetite by Rachel who lives in Jersey City with her husband and gorgeous daughter Penelope (the cutest name ever). I loved spending time on Rachel's blog and   apart from a love of food (obviously), found we have a quite lot in common such as loving overnight oats for breakfast to being a fan of both Castle and Gretchen Ruben!

I was really spoilt for choice when it came to selecting a recipe and there were loads that I bookmarked for later. I love the sound of her Vanilla Cinnamon Quinoa for a protein-packed breakfast, I'm intrigued by the Pumpkin Butter and my boys would go crazy for these Banana Bars with Chocolate Frosting.

It was the Chocolate Pecan Pie adapted from a Paula Deen recipe that really caught my eye though (I have a bit of a soft spot for Paula Deen after reading her autobiography a few years ago).

(Does anyone else remember 'pecan pie' scene from When Harry Met Sally?)

I was prepared to make a few changes in order to fit in with our wholefoods way of eating, and just a couple of simple switches later we had the most amazing, but not too sweet, dessert!

We LOVED this. Perfectly short pastry, sweet nutty filling with little pops of dark chocolate. What's not to love?

Try as I might though I couldn't get a clean slice. I mean, is there a trick to slicing a pecan pie neatly without all the nuts smooshing out the sides? Still the taste made up for the messiness. DELICIOUS!

Wholefood Chocolate Pecan Pie - wheat free - no refined sugar - from www.mywholefoodfamily.com

Chocolate Pecan Pie
Adapted from Paula Deen via The Avid Appetite

Shortcrust Pastry (my own recipe):

300g wholemeal spelt flour
2 ts coconut sugar
160g cold butter, diced
1/3 cup cold water, approx

Place all ingredients except the water into a food processor and blitz until it forms breadcrumbs. Add the water a little at a time until the dough comes together and forms a ball. Wrap in plastic and place in the fridge to chill for 30 minutes.

Roll out the dough in between 2 sheets of baking paper, large enough to fit a 22cm tart dish. Either wrap the remainder of the dough and place in the freezer for another time or roll it flat and cut out cookies to bake at the same time as the pie. My boys love this!

Preheat the oven to 190 degrees Celsius.

Filling:

2 cups pecans
3 large eggs, beaten
3 tbs melted butter, cooled
1/2 cup rice malt syrup
1 tbs molasses
1/2 cup coconut sugar
100g dark chocolate, chopped (I used Lindt 85%)

Scatter pecans over the uncooked pastry shell.

Place the eggs, butter, syrup, sugar and chocolate into a mixing bowl and whisk together until well combined. Pour the mixture over the pecans.

Place the pie onto a baking sheet and cook for 10 minutes. Lower the temperature to 180 degrees and cook for a further 25 minutes or until set.

Remove from the oven and place on a rack to cool completely.

Thanks for a great recipe Rachel! My family loved it.

Sunday, December 13, 2015

My Fruit Mince Tarts


The first day of the school holidays was unexpectedly cool and rainy so what better way to spend it than to with some Christmas baking! My husband has been dropping not so subtle hints for fruit mince tarts over the past few weeks so that was first on my list.

Before I got into my wholefoods groove I used to make fruit mince tarts with packet pastry and a jar of pre-made fruit mince. Not any more. I love making pastry and after a few years of practice I feel like I understand it a little more and can prevent some disasters. And honestly how amazing is homemade pastry?  If you don't feel up to making your own, the Careme brand pastry in Australia is really good and they even have a gluten free version.

I used my go-to spelt pastry recipe and developed my own fruit mince recipe which was SO delicious I couldn't help taking lots of sneaky spoonfuls for 'just to check if it was ready.' Ha!


The kids were hanging around by the oven waiting for them to bake because they smelt so amazing and then each had 3 for afternoon tea. So that's a big tick of approval.

The pastry recipe makes enough for one batch of 12 tarts and I rolled the scraps out into some little biscuits which we snacked while waiting for the tarts to cool enough to eat.


The fruit mince recipe makes enough for 2 batches of 12 tarts and is stashed in the fridge to make some more next weekend. As I was making these for kids I cooked the brandy in with the fruit to get the flavour but cook off most of the alcohol. You can add the brandy at the end once the fruit is cooked for a bit more of a kick.


My Fruit Mince Tarts

Fruit mince:

500g organic mixed dried fruit
5 granny smith apples (peeled, cored and diced)
1 cup fresh orange juice, pulp and all
1/2 cup rice malt syrup
1/4 cup brandy
zest of 1 orange
1 ts cinnamon
1/4 ts nutmeg
1/4 ts clove
1/4 ts allspice

Place all ingredients into a pot over medium heat. Bring to the boil then reduce the heat and simmer until the apple has completely softened and the mixture is thick and sticky. This will take around 20 minutes or so. Remove from the heat and leave to cool completely.

Pastry:

250g white spelt flour
20g coconut sugar
125g cold salted butter
1 egg yolk
2-3 tbs iced water, as needed

Place flour and sugar into the thermomix or food processor and mix just to combine and break up any lumps. Add the butter and process for a few seconds at a time, until the mixture resembles rough sand. Add the egg yolk and 1 tbs iced water and process again for a few seconds at a time until the dough starts to clump together. Add extra water 1 tbs at a time only if needed.

Turn the dough out onto a piece of plastic wrap and press into a disc. Wrap well and place into the fridge to rest for at least 20 minutes before rolling.

To assemble the tarts:

Preheat the oven to 180 degrees C / 160 degrees fan-forced. Grease a 12 cup tart or muffin tray and set aside.

Roll out about 2/3 of the dough (leave the rest in the fridge) about 3mm thick. Using a round cutter (mine was 7cm), cut out 12 circles for the bases of your tarts. Choose a cutter that is just a little wider than the diameter of each hole in your tray and they will fit perfectly. Press each circle over the base of your prepared tray and set the scraps of dough aside.

Place a teaspooful of fruit mince mixture into each tart base, being careful not to overfil or the edges won't seal. Using your finger, dab some water around the edge of pastry of each tart.

Roll out the remainder of the dough from the fridge in the same way, but use a slightly smaller cutter (mine was 6cm) to cut 12 circles for the tops of your tarts. Place a piece on top of each tart and then use a fork to crimp and seal the edges. Use the fork to pierce the top of each tart to allow steam to escape.

Bake for 15-20 minutes until the tarts are golden brown and smell amazing. Cool in the tray for 5 minutes before turning out onto a rack. Delicious warm or cold.

Buttery pastry surrounding sweet and spicy fruit, there's a reason these are a classic!

Monday, July 27, 2015

Chocolate Chess Pie (SRC)

Chocolate Chess Pie © www.foodbabylife.com

Secret recipe club time! For those who are new, each member of SRC is secretly assigned a blog each month to peruse and choose a recipe to post. All is revealed on the same day and today is Group D's turn!

This month I was assigned I am a Honey Bee by Nicole. I had a brilliant time on Nicole's blog and found even though we live on opposite sides of the world we actually have a lot in common (apart from just a love of food and cooking) - we are both detail oriented, hate the cold, are morning people, think eggs Benedict is the best way to eat eggs and love Buffy the Vampire Slayer (I binge-watched the entire series again when Oscar was a baby and I was stuck on the couch feeding).

I also found similar food journeys and she has completed not one but two rounds of the Whole30. I eat pretty cleanly (no sugar or dairy and reduced grain) most of the time and am really keen to give it a go. I have bookmarked a few of Nicole's Whole30 posts to re-read when I do finally take the plunge.

So what did I end up choosing? Well it was really tough to choose and I narrowed it down to 3 - Lemony Raspberry Zucchini Bread with a Lemony Glaze, Paleo Waffled Breakfast Sandwiches and
Chocolate Chess Pie.

In the end I couldn't go past the Chocolate Chess Pie because I have seen the name around for years and wondered what on earth it had to do with chess! After a bit of research I am none the wiser (there seem to be at least 3 distinct explanations) but I am delighted to have made this delicious chocolate pie. I love that this one has cocoa powder rather than chocolate which makes it cheaper and easier to whip up.

I did make a few substitutions like using coconut oil instead of shortening in the pastry and some rice malt syrup instead of just sugar in the filling.

The taste test? It was completely delicious. The top was crispy and crackly while underneath was creamy, chocolatey and sweet without being too rich. The pastry was light and flaky and I loved the slight hint of coconut with the chocolate. The pastry was a little underdone in the middle although the filling was perfect so next time I would blind bake the pastry first to make it extra crisp.

Chocolate Chess Pie with strawberries © www.foodbabylife.com

Chocolate Chess Pie
Slightly Adapted from I am a Honey Bee

Crust:
1 1/2 cups plain flour
1/2 ts salt
60g coconut oil, very cold and cut into pieces
60g butter, very cold and cut into pieces
4-6 tablespoons ice water

Filling:
2/3 cup rice malt syrup
1/4 cup raw cacao powder
1/2 teaspoon instant coffee powder (optional)
4 tbs butter, melted and slightly cooled
1 ts vanilla extract
2 eggs, lightly beaten

To make the crust:

Grease a 9 inch pie dish and set aside. Keep the butter and coconut oil in the fridge until ready to use.

Place the flour and salt in a food processor fitted with the dough blade and pulse a few times to combine. Add the coconut oil and butter and pulse until the mixture is crumbly. Gradually add enough ice water to the mixture while pulsing until a ball of dough is about formed.

Tip the dough onto a lightly floured surface. Press into a disc then wrap in plastic and place in the fridge for 20 minutes.

Once chilled place the dough back on a floured surface and roll out to approx 3mm thick. Add more flour if it starts to stick to the bench while you’re rolling.

Press onto the base and sides of the prepared pie dish and trim and crimp the edges as needed. Cover the pie plate with plastic wrap and place in the refrigerator for at least 30 minutes to overnight.

To make the pie:

Preheat the oven to 180 degrees C / 350 degrees F.

Using a stand mixer or large bowl with electric beaters, beat together the cacao, sugar, coffee powder, melted butter and syrup and beat on high speed.

Add the vanilla extract and eggs and mix on high for approximately 2-3 minutes.

Pour the mixture into the unbaked pie shell and bake for 35-40 minutes. The centre of the pie will still be a little soft but it will firm up as it cools. Leave on a wire rack for at least an hour before slicing. I baked mine the day before and stored in the fridge then left at room temperature for 1 hour before serving.

Thanks Nicole for a great recipe and great month!


Saturday, February 7, 2015

Bacon and Egg Pie

Bacon and Egg Pie © www.foodbabylife.com

I am very lucky that my boys have a great relationship with their nanna (my mother in law). She is always happy to watch them when we need her to and has them over for a 2 night sleepover every holidays. I'm also lucky that she doesn't give them too many treats but they still come home telling me all about the yummy things they ate for dinner.

One of Oscar's favourite meals from Nanna's house has been bacon and egg pie, so I decided to make it for him at home too. A quick google search led me to this recipe from Taste which looked easy and tasty and we even had all the ingredients already.

The original recipe for this includes sun-dried tomatoes in the filling, but we prefer to serve it with a big dollop of homemade relish or chutney. This pie can be served warm or cold and is brilliant for feeding a crowd if you are having friends around for brunch. Oh and its perfect for the lunchbox too as it doesn't need to be reheated.

There's a reason why classic recipes like this are still popular - they are delicious!!!

Bacon and Egg Pie
Adapted from Taste

Pastry:
1 1/2 cups (225g) plain flour
1 3/4 cups (265g) self-raising flour
220g cold butter, chopped
1/2 cup (125ml) iced water

Filling:
450g bacon, rind removed and chopped roughly
12 eggs
1/2 cup milk
pepper
pinch nutmeg

2 tbs milk, extra

To make the pastry, place the flours into the food processor and blitz for a few seconds to remove any lumps. Add the butter and pulse until combined into a chunky breadcrumb. Add the water and pulse a few times or until it starts to clump together. Squeeze a small amount in your hand and if it comes together it is ready. If you feel you need more water add just a teaspoon or so at time because you can't take it back out!

Divide the dough into 2 portions, making one a little bigger than the other. Shape each piece into a disc then cover in plastic wrap and place in the fridge for 1 hour.

Preheat the oven to 180 degrees C/350 F and grease a deep-sided 17 x 26 cm baking dish.

Roll out the larger of the pastry discs into a rectangle large enough to line the base and sides of the baking dish. Line the dish with pastry and trim the edges.

Scatter half the bacon over the pastry then crack 6 eggs over the top. Cover with remaining bacon then 4 more eggs. Beat the remaining 2 eggs with the milk and nutmeg then pour over the top.

Roll out the remaining pastry into a rectangle large enough to fit the top of the dish. Lay over the filling then fold the edges in to seal. Brush the top with the extra milk and then bake for 50 minutes or until golden brown and crisp.

Serve warm or cold.
Serves 8-10


Tuesday, September 17, 2013

Profiteroles (Baking with Julia)

Profiteroles with Cinnamon Icecream and Chocolate Sauce © www.foodbabylife.com

I used to be obsessed with profiteroles and growing up I always wanted a croquembouche wedding cake. When it came to it we ended up having an awesome cupcake tower but I still love my profiteroles!

These were not my finest moment. In order to make them child and preggo friendly I left out the espresso and made regular profiteroles. I couldn't find a plain piping tip so had to use a star one and they came out a little odd looking (although they did puff up beautifully). I only used 1/2 ts cinnamon in my eggless ice cream and it had a really blah could-have-been-anything flavour, and then I decided to use a simple cocoa glaze rather than chocolate sauce and made it too thin.

BUT put those 3 less than perfect elements together and it was delicious. The fact that I immediately ate 2 with all the trimmings says they couldn't have been too bad!

To see what everyone else thought don't forget to check the LYL page!

Tuesday, June 18, 2013

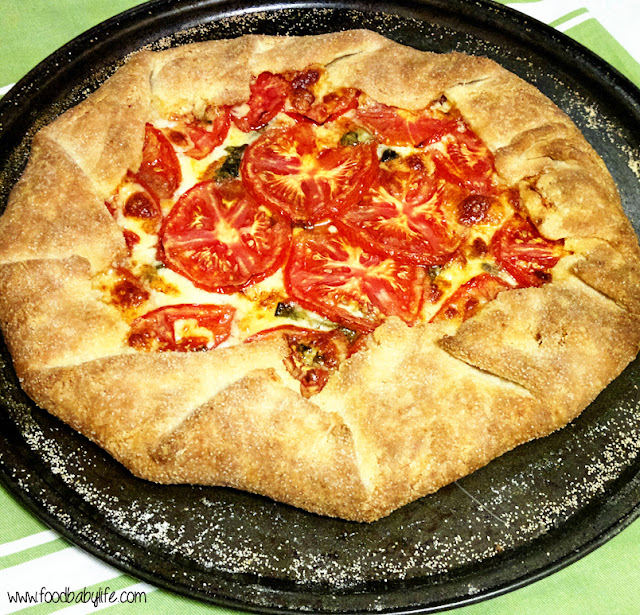
BWJ - Cheese and Tomato Galette

Cheese and Tomato Galette © www.foodbabylife.com
I actually wasn't really expecting much from this one but I was so wrong. We LOVED it! It was all the best parts of a pizza encased in a buttery flaky pastry. Just divine.

I knew we didn't have any cornmeal and couldn't be bothered searching for it so I used semolina instead for the dough and it worked brilliantly. I also just used regular tasty cheese and shredded mozzarella.

Originally I intended to make a sweet one as well but it actually didn't make as much dough as I thought. I used the full batch for this galette and it was the perfect dinner for the 4 of us with just one largeish piece leftover (for my lunch, yum!).

The dough was a little sticky but I didn't have any problems with it, possibly because it is winter here and quite a cool day?

This recipe is definitely a keeper and we'll be making it again.

Tuesday, January 22, 2013

BWJ - French Apple Tart

Apple Frangipane Tart © www.foodbabylife.com

I'm not off to a great start with BWJ this year, seeing I completely forgot about the last one (seriously how did the 8th of January come around so quickly?!) and only just scraped in with this one!

I knew there was an apple tart coming up so I bought 2 bags of green apples assuming they would last. When I got ready to bake however, I realised there was just 1 lonely apple left and this recipe would require some major tweakage (that's totally a word).

I think the beauty of this tart lies in the swirled apple slices on top so that's what I save my apple for. Rather than trying to sub another fruit for the filling, I went with a frangipane filling as I happened to have some almond meal. Apple and almonds are a great combination so I knew whatever happened this tart would at least be edible!

The taste test ...

Flaky buttery pastry topped with smooth almondy frangipane and fragrant apples. There really is no way this could be bad. I'm really keen to try the original version with the apple filling but this was a great substitute. Seeing as this tart bears little resemblance to the original I have included my recipe below.

My apologies to Gaye of Laws of the Kitchen for not making the actual tart. It's now on my to-bake list!

Mini Apple Frangipane Tarts
Makes 2 x 4 inch tarts

Pastry
1/2 cup plain flour
1/2 cup wholemeal flour
1 pinch salt
1 ts sugar
120g cold butter, diced
1-2 tbs cold water

Filling
25g almond meal
25g sugar
25g butter, at room temperature
1 egg yolk
1/2 ts vanilla extract

Topping
1 granny smith apple
1 tbs melted butter
1 tbs honey, warmed

To make the pastry - combine the dry ingredients in a bowl, add the butter and rub in with your fingertips, being sure to leave some pea-sized bits. If the butter starts to get too soft, place the bowl in the fridge for a few minutes. Once the butter is rubbed in add 1 tbs of the cold water and start to bring the dough together. If the mixture is too dry add extra water just a few drops at a time. Shape into a ball, wrap in plastic and leave in the fridge for 30 minutes.

Roll out the dough to approx 5mm thick and fit into 2 x 4 inch tart pans (there will be dough left over). Place the pans in the freezer for 20 minutes.

Preheat the oven to 180 degrees celsisus.

To make the filling mash the butter together with the sugar and almond meal then stir in the egg yolk and vanilla. Set aside.

Bake the tart shells for 20 minutes or until dry to the touch and very lightly golden brown. Remove from the oven and allow to cool for 15 minutes before spooning in the filling and smoothing the tops.

Slice the apple into thin wedges. Lay the slices across the top of each tart and brush with melted butter.

Reduce the oven temperature to 170 degrees and bake the tarts for approx 25 minutes or until the pastry and frangipane are golden brown and the apples are tender. Remove from the oven and brush with warmed honey.

Serve just warm.

Thursday, December 20, 2012

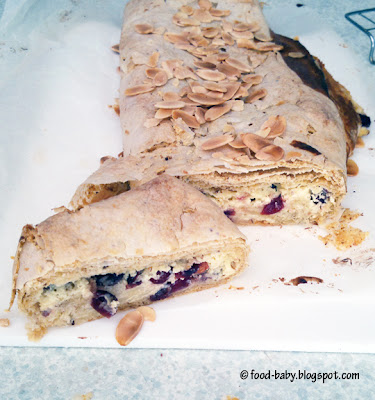
Cranberry & Cream Cheese Strudel

Cranberry & Cream Cheese Strudel © food-baby.blogspot.com All rights reserved

I love all the free Christmas magazines put out by supermarkets at this time of year. I mean I love food magazines any time but you gotta love free stuff! While there is a lot of advertising you can find little recipe gems and some great ideas for menu plans, table settings and gifts.

This recipe came from a freebie booklet from Coles called Recipes for Christmas Baking. I've no idea whether it is still available but just check your local Coles.

I made this intending to take it to our mother's group Christmas breakup but after baking I realised it is actually more of a dessert than a morning tea treat. No worries, I made a batch of brownies to take and saved this strudel for us!

It has gorgeous Christmas flavours with cranberries, almond and nutmeg but it would make a lovely dessert any time of the year. While it is meant to be served warm with ice cream, we ate most of ours sliced and cold from the fridge and it was delicious that way too.

Cranberry & Cream Cheese Strudel

250g cream cheese, softened
1 large egg
1/2 cup cream
1/4 cup caster sugar
1/2 ts ground nutmeg
100g dried cranberries
1/2 cup dry breadcrumbs
1/2 cup almond meal
6 sheets filo pastry
75g melted butter
1/4 cup flaked almonds

Preheat oven to 200 / 180 degrees fan-forced and line a baking tray with baking paper.

With an electric mixer, beat together the cream cheese, cream, egg, sugar and nutmeg until smooth and well combined. Fold in the cranberries and set aside.

In a small bowl mix together the almond meal and breadcrumbs. Lay one sheet of filo onto your prepared tray and brush with melted butter. Sprinkle over 1 tablespoon of the almond/breadcrumbs mixture. Lay another sheet of filo on top and repeat until all filo and almond mixture is used.

Spread the cream cheese mixture over the filo stack, leaving a 4cm border around all edges. Fold in the short sides of the pastry, then with the long side facing you roll up tightly into a log. Brush the top with remaining melted butter and sprinkle over the flaked almonds.

Bake for 5 minutes at 200 /180 degrees fan forced then reduce the temperature to 180 / 160 degrees and bake for a further 25-30 minutes or until crisp and golden on top and firmish to the touch.

Serve warm with ice cream and cold from the fridge. Serves 8-10.

Tuesday, August 7, 2012

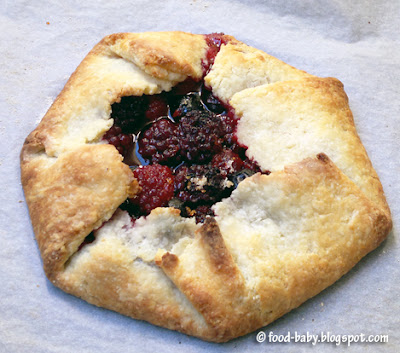
Baking with Julia - Berry Galette

Berry Galette © food-baby.blogspot.com All rights reserved

After making a delicious (but boring) apple pie last time, there was no way I was passing on berries again this week! I did have to resort to frozen berries but honestly they worked just fine.

This is one of those cases where the end result is far greater than the sum of it's parts. The galette is a simple, buttery pastry folded around mixed berries. That's it. 

I made only slight changes to the recipe, based on what I had in the pantry. That meant using semolina instead of cornmeal in the pastry. After reading the P & Q this week I decided not to add any water at all to my pastry. I used 3 heaped tablespoons of natural yoghurt (instead of sour cream) and the dough came together perfectly. I also added the zest of 1/2 an orange in with the berries and sugar which gave a lovely citrus perfume when it came out of the oven. 

The resulting galette was insanely good and seemed far more special than just pastry wrapped around frozen berries!

I was surprised by how small the galette was, and I think next time I would use the full batch of pastry with double the fruit.

Our hosts this week are Lisa of Tomato Thymes in the Kitchen and Andrea of The Kitchen Lioness. They will post the recipe under today's date so make sure you check it out. Like Dorie says, this recipe is a keeper!


Tuesday, March 6, 2012

TWD BWJ - Rugelach

This week we have Rugelach! Before making them for TWD a few years ago I had never heard of Rugelach and had no idea how to pronounce it let alone how they were supposed to look or taste. I felt a bit more prepared this time around and had fun with the recipe.

I made just a 1/3 batch (using only 1 stick of butter instead of 3!!!) and used prunes, dark chocolate and walnuts for the filling. Yum!

It seemed like the humidity would be a problem for this pastry so I made it in the food processor using cold butter and cream cheese then chilled it overnight before rolling. It worked like a charm and made some seriously good pastry!

Even with a 1/3 batch I still got 24 little cookies (pastries?). They were amazing straight out of the oven and still good the next day although they had lost their crispy edges.

There's still about a cup of prune levkar left and my boys are loving it spread on their toast or stirred through porridge for breakfast.

Thanks to Margaret and Jessica for a great pick! I'm happy to have conquered Rugelach and will definitely make them again with the apricot filling too. You will find the recipe on their blogs under today's date.

Saturday, October 16, 2010

TWD Double Up

I'm back! Can't believe it's been almost 3 weeks since I posted but between moving and unpacking and some trouble getting our internet sorted it's kinda not surprising. We're all settled now in our new home and not a moment too soon as bub #2 is due in less than a month!

I have still been baking these past few weeks though, and with reasonable success given the variables of a new oven. So on to my TWD catch up ...

First up from 5th October, Lynne of Honey Muffin chose the Double Apple Bundt Cake.

Let me just say I adored this cake. Incredibly moist, packed with apple and spice flavours and not too heavy on the butter. I didn't bother with a glaze or even icing sugar. It was absolutely perfect on its own or warm with custard. Mmmmmm.

Next up was the Fold-Over Pear Torte chosen by fabulous fellow Aussie blogger Cakelaw.

I really wanted to love this tart. One of my all time favourite Dorie recipes was the French Pear Tart and I was hoping this would be similar. I love everything in it - pears, apricots, nuts, custard, pastry. Yum. But somehow the combination fell a little short.

Part of my meh-ness about this one has to be the fact it just took soooooo loooooooong to cook. After 2 hours in the oven the middle was still oozy even though the top layer of custard had burnt to a crisp (which actually didn't matter because my foil tent stuck to it and peeled it off making for one butt-ugly tart).

But the pastry, oh the pastry! We splurged on a new food processor (partly because I managed to break the old one while packing) and this baby rocks! This was seriously the. best. pastry. EVER. Light, buttery, flaky and just plain delicious.

I'm so sorry I butchered your pick Cakelaw! If you haven't already, make sure you visit her blog for how it should be done.

I'm looking forward to more cooking/baking (for the next couple of weeks anyway). I really need to get stuck into some freezable meals to get us through those first few insane new baby weeks. I'm also planning on starting my Christmas baking asap so we have some yummy treats to look forward to!

Tuesday, September 28, 2010

Tuesdays with Dorie: Tarte Fine

This week Leslie of Lethally Delicious chose Dorie's Tarte Fine for TWD and I'm so, soooo grateful. Not only was it delicious it is one of the easiest recipes ever!

You see we're moving house on Thursday and chaotic doesn't even begin to describe the state of our place at the moment. Apart from almost everything in the kitchen being packed already there is barely a clear surface to put a pan down on. So a recipe that calls for pre-bought puff pastry, a few apples, an egg and some sugar was heaven sent.

This is one of those desserts that looks really impressive but takes literally minutes to prepare. In my case an extra 5 minutes was needed to hunt through a box for a pastry brush!

In spite of all that I still managed to burn it (and then carefully crop that bit from the photo). Our oven has developed a nasty hot spot that will singe things into oblivion if you don't carefully turn the tray a few times during cooking. Which I of course forgot to do. Blame the pregnancy brain.

The taste test ...

Utter perfection. Flaky butter puff pastry topped with slightly tart apples and a crispy scattering of sugar. Delicious warm from the oven or at room temperature hours later with a big scoop of vanilla icecream.

This time next week we will be all settled in our new home. Fingers crossed the new oven will be better than the old!

You will find the Tarte Fine recipe at Lethally Delicious. Thanks Leslie!

Tuesday, August 24, 2010

Tuesdays with Dorie: Crunchy and Custardy Peach Tart


This week's TWD pick was chosen by Rachel of Sweet Tarte. This recipe was actually on my shortlist when it was my turn to pick back in June but I decided against it because I couldn't get fresh peaches. Unfortunately it is still winter here so no fresh peaches!

This is essentially a sweet pastry base topped with custard, sliced peaches and a streusel topping. Just as the name says it is a 'Crunchy and Custardy Peach tart'!

This was a breeze to make and as always I am grateful to have discovered Dorie's Sweet Tart Dough recipe. It has forever cured me of my aversion to making pastry.

I did stray from the recipe slightly. I used the original tart dough, no almond essence (blech!) and pecans instead of almonds in the streusel. All of which could account for ...

The taste test ...

It was - nice. There was pastry, custard, peaches and streusel. All tasty. But there was definitely something missing and I think it was juicy, flavour packed fresh peaches. My canned peaches tasted quite peachy on their own but they were totally lost in this tart making the whole thing a little too sweet and a little bland. So disappointing!

Thanks to Rachel for a great pick. Sorry I couldn't do justice to it! You will find the recipe on Sweet Tarte or check out what the other TWDers got up to here.

Thursday, May 27, 2010

Daring Bakers May - Croquembouche!

I have been in love with the croquembouche as long as I can remember! And really, what's not to love? Choux pastry filled with smooth vanilla cream and smothered in crunchy, sweet caramel.

The May 2010 Daring Bakers’ challenge was hosted by Cat of Little Miss Cupcake. Cat challenged everyone to make a piece montée, or croquembouche, based on recipes from Peter Kump’s Baking School in Manhattan and Nick Malgieri.

This month's challenge brings me full circle, as my very first Daring Bakers' challenge was chocolate eclairs. It was my first time making choux pastry and I definitely had a few dramas. This time around I'm happy to say they were worked perfectly.

I made just 10 cream puffs and half the caramel glaze. I was keen to try the spun sugar effect but I had just 20 minutes of Oscar-free time so after assembling my 'tower' I just poured the remainder over the top.

The result?

Amazing. Just as good as anything I've tasted elsewhere for surprisingly little work. When I have more time and a special occasion to bake for I will definitely be making a full size croquembouche with spun sugar. But for now, this hit the spot and I can cross it off my to-make list.

Thanks for a fabulous challenge Cat!

Tuesday, May 11, 2010

Tuesdays with Dorie: Quick Berry Tart

What's quicker than a Quick Classic Berry Tart? These even quicker Itty-Bitty-Puff-Berry-Tartlets! As much as I love Dorie's sweet tart dough I wasn't in the mood for making pastry this week, especially since I only wanted to make minis.

Why? We're still working our way through the fabulous Banoffee Tart my lovely hubby made for dinner on Mothers' Day, along with this delicious rack of lamb with roast veges.

So for this week's TWD I chose the cheat's option and grabbed a sheet of puff pastry from the freezer and cut out little circles. The pastry cream takes only minutes to make and I topped each one with 3 perfect blueberries (frozen ones because they are always in season).

I will definitely make the original Classic Berry Tart sometime as I adore fruit tarts. My apologies to Cristine of Cooking with Cristine for not making the exact recipe which you can find on her blog. But I hope you enjoy my version!

Tuesday, March 16, 2010

Tuesdays with Dorie: Soft Chocolate and Raspberry Tart

My husband has had his eye on this recipe since day one so was very excited it was picked for March. Big thanks to Rachelle of Mommy? I'm hungry! for making his day!

I made a half recipe which fit perfectly in a 6" pan. I used all dark chocolate with frozen raspberries and it worked perfectly. Not so the sweet tart dough with nuts which I tried for the first time. The consistency was just plain weird, almost like a coconut macaroon and very crumbly.

The taste test ...

Chocolate and raspberry is a classic combination so I knew we would all love this. But what really sold me was the texture of the filling. At room temperature it was smooth and oh so silky. Straight out of the fridge it was like chocolate fudge. Absolutely delicious! I didn't love the crust though and probably won't make the tart dough with nuts again, especially when I know how good the original version is.

Thanks for a great pick Rachelle! You can find the recipe on her blog under today's date.

Tuesday, December 22, 2009

Tuesdays with Dorie: My Favourite Pecan Pie

I have to admit I wasn't that excited about making pecan pie this week. I've been in Christmas baking mode for weeks now and have been snacking on lots of goodies. Pecan pie is SO sweet that just the thought of it made me want to eat a truckload of veges.

BUT this pecan pie is a little bit different. First of all there is way less sugar/corn syrup than in some versions plus it has a few extras like chocolate and coffee powder. To boost the chocolate factor I decided to do a chocolate crust as well (using Dorie's Chocolate Shortbread Tart Dough from p 476 of Baking).

The taste test ...

Oooh boy, this is one hell of a pecan pie! While it's definitely rich it's not too sweet, with the coffee and chocolate notes providing the perfect balance. The chocolate crust was fantastic! It got a little browner than I planned (but not at all burnt even though it appears that way in the top photo). We served it with a big scoop of Cappucino Indulgence icecream. Yummmmmm.

Coming after one of the best Sunday dinners I think I've ever made (chargrilled Angus beef with avocado bearnaise sauce and mashed potato), it was a wonderful end to a great weekend!

Thanks to Beth of Someone's in the Kitchen with Brina for this week's pick! You can find the recipe on her blog under today's date.

Tuesday, December 1, 2009

Tuesdays with Dorie: Rosy Poached Pear and Pistachio Tart

Lauren of I'll Eat You chose Dorie's Rosy Poached Pear and Pistachio Tart this week, and wow, what a stunner! Absolutely perfect for the 1st of December because this beauty just screams Christmas.

I think I was lucky to find some ok pears from the very limited selection available as it's not pear season here. Once poached they were perfect, just a little on the small side.

The pastry cream was fabulous, such a full flavour, however it never got as firm as it was supposed to. You can see from the photos that my pears were already sinking into the pastry cream and once cut, it oozed everywhere. Didn't affect the taste though!

The taste test ...

This is definitely a special occasion recipe. Crisp, buttery pastry, rich pastry cream and tart pears. And that pistachio praline? An absolute revelation! It was a shame it was so messy to serve.

Thanks for a wonderful pick, Lauren. You can find the recipe on her blog.

Tuesday, September 29, 2009

Tuesdays with Dorie: Chocolate-Crunched Caramel Tart

Boy it's been a pastry filled month around the food.baby household! While it hasn't been great for my waistline, between the turnovers, pufflets, vols-au-vent and now this tart, I can say I have well and truly conquered my fear of making pastry. Woo hoo!

I have been eyeing off the Chocolate-Crunched Caramel Tart since I first flicked through Baking, and yes, it was every bit as good (and as rich) as it looks!

I searched high and low (well on high shelves and low shelves in woolies) for honey roasted peanuts without success. Just as I'd given up we walked past the Christmas section and noticed some honey roasted cashews. Sold! I'm trying to ignore the fact there are Christmassy foods out already.

The pastry came together beautifully. I probably overcooked it slightly but it was still tender and crumbly and shortbready. Even the caramel behaved as it should (I added an extra pinch of sea salt along with the salted butter). My only issue was with the ganache.

Note to self - do not store chocolate on top of the oven. For any reason. Even if only for a few minutes while you wipe down the bench because you WILL forget to remove it. And then your husband will cook lunch in that oven without realising there is chocolate on top.

Exhibit A - my lovely block of Green & Blacks 70% ...

This happened the day before I was planning on making the tart, so rather than have to remelt it the next day and hope that it survived the process, I made the ganache and refrigerated it overnight.

I poured the warm cream over the chocolate and got a smooth, luscious looking ganache. Then I added the butter and got an oil slick. I think butter really has no place in ganache. I stirred it through as best I could but the next morning I got this ...

Exhibit B - ewwwwww

I scraped the butter off the top and it was exactly the amount I added in. I'm never adding butter to ganache again. After nuking my ganache was back to delicious.

The taste test ...

Wow. Seriously, wow. I just wish I'd been able to get a decent photo (my camera is in being repaired and the focus on my phone sucks). It sliced beautifully, the layers were really pretty and the taste was sensational. We will definitely be making this again.

Thanks to Carla of Chocolate Moosey (love that name!) for choosing this week's recipe. Make sure you visit her blog for the recipe along with the TWD blogroll to see much better photos than mine!

Sunday, September 27, 2009

Daring Bakers September: Vols-au-Vent

Wow, this month's DB challenge was awesome! When I started my blog last year it was because I was inspired by all the amazing things the Daring Bakers (and TWDers) were turning out. At that point I didn't even realise it was possible to make puff pastry at home, let alone good puff pastry! So for me this challenge marks a real turning point. After all, if I can make puff pastry and vols-au-vent then I am up for the challenge of just about anything!

The official line - The September 2009 Daring Bakers' challenge was hosted by Steph of A Whisk and a Spoon. She chose the French treat, Vols-au-Vent based on the Puff Pastry recipe by Michel Richard from the cookbook Baking With Julia by Dorie Greenspan.

As my husband was heading to Adelaide for a conference and would be away for a few days, I decided to make these for his going away lunch the day before. With the weather being so warm, it was an easy decision to have a cold filling.

The puff pastry was actually surprisingly easy to make. The instructions were clear and it all worked really well. I did have to pop the dough back in the fridge a few times though as it started to ooze.

I used half the dough (froze the rest) and cut 6 discs using a 4 1/2" cutter.

The finished product was puffed and golden and so exciting to see! I found they needed a little longer than stated to cook, and even then the insides were a little underdone. I think this was probably because I pushed them down with spoon during the cooking a little too often, and it stopped the layers separating.

I made a cold prawn and avocado salad for the filling with diced avocado, celery, spanish onion, lemon and prawns in a light cream dressing. Delicious!

I used the caps of the vols-au-vent to top the Eton Mess I made for dessert. This is a scrummy mixture of whipped cream, fresh strawberries and crushed meringue.

(my very messy presentation - but very yummy!)

Michel Richard’s Puff Pastry Dough
From: Baking with Julia by Dorie Greenspan
Yield: 2-1/2 pounds dough

Pastry Ingredients:
2-1/2 cups (12.2 oz/ 354 g) unbleached all-purpose flour
1-1/4 cups (5.0 oz/ 142 g) cake flour
1 tbsp. salt (you can cut this by half for a less salty dough or for sweet preparations)
1-1/4 cups (10 fl oz/ 300 ml) ice water
1 pound (16 oz/ 454 g) very cold unsalted butter plus extra flour for dusting work surface

Mixing the Dough:

Check the capacity of your food processor before you start. If it cannot hold the full quantity of ingredients, make the dough into two batches and combine them. Put the all-purpose flour, cake flour, and salt in the work bowl of a food processor fitted with a metal blade and pulse a couple of times just to mix. Add the water all at once, pulsing until the dough forms a ball on the blade. The dough will be very moist and pliable and will hold together when squeezed between your fingers. (Actually, it will feel like Play-Doh.)

Remove the dough from the machine, form it into a ball, with a small sharp knife, slash the top in a tic-tac-toe pattern. Wrap the dough in a damp towel and refrigerate for about 5 minutes.

Meanwhile, place the butter between 2 sheets of plastic wrap and beat it with a rolling pin until it flattens into a square that's about 1" thick. Take care that the butter remains cool and firm: if it has softened or become oily, chill it before continuing.

Incorporating the Butter:

Unwrap the dough and place it on a work surface dusted with all-purpose flour (A cool piece of marble is the ideal surface for puff pastry) with your rolling pin (preferably a French rolling pin without handles), press on the dough to flatten it and then roll it into a 10" square. Keep the top and bottom of the dough well floured to prevent sticking and lift the dough and move it around frequently.

Starting from the center of the square, roll out over each corner to create a thick center pad with "ears," or flaps. Place the cold butter in the middle of the dough and fold the ears over the butter, stretching them as needed so that they overlap slightly and encase the butter completely. (If you have to stretch the dough, stretch it from all over; don't just pull the ends) you should now have a package that is 8" square.

To make great puff pastry, it is important to keep the dough cold at all times. There are specified times for chilling the dough, but if your room is warm, or you work slowly, or you find that for no particular reason the butter starts to ooze out of the pastry, cover the dough with plastic wrap and refrigerate it . You can stop at any point in the process and continue at your convenience or when the dough is properly chilled.

Making the Turns:

Gently but firmly press the rolling pin against the top and bottom edges of the square (this will help keep it square). Then, keeping the work surface and the top of the dough well floured to prevent sticking, roll the dough into a rectangle that is three times as long as the square you started with, about 24" (don't worry about the width of the rectangle: if you get the 24", everything else will work itself out.)

With this first roll, it is particularly important that the butter be rolled evenly along the length and width of the rectangle; check when you start rolling that the butter is moving along well, and roll a bit harder or more evenly, if necessary, to get a smooth, even dough-butter sandwich (use your arm-strength!). With a pastry brush, brush off the excess flour from the top of the dough, and fold the rectangle up from the bottom and down from the top in thirds, like a business letter, brushing off the excess flour. You have completed one turn.

Rotate the dough so that the closed fold is to your left, like the spine of a book. Repeat the rolling and folding process, rolling the dough to a length of 24" and then folding it in thirds. This is the second turn.

Chilling the Dough:

If the dough is still cool and no butter is oozing out, you can give the dough another two turns now. If the condition of the dough is iffy, wrap it in plastic wrap and refrigerate it for at least 30 minutes. Each time you refrigerate the dough, mark the number of turns you've completed by indenting the dough with your fingertips. It is best to refrigerate the dough for 30 to 60 minutes between each set of two turns. The total number of turns needed is six.

If you prefer, you can give the dough just four turns now, chill it overnight, and do the last two turns the next day. Puff pastry is extremely flexible in this regard. However, no matter how you arrange your schedule, you should plan to chill the dough for at least an hour before cutting or shaping it.

Thank you Steph for a wonderful challenge this month! I feel very proud of myself :-)
Related Posts Plugin for WordPress, Blogger...