Showing posts with label Snacks. Show all posts
Showing posts with label Snacks. Show all posts
Tuesday, July 17, 2018
Lemon, Ginger and Turmeric Gummies
My kids adore gummies and with the weather so cold at the moment it is definitely time for a new batch to help us ward off all those bugs doing the rounds.
I usually make gummies using juice as a base but I didn't want the sugar this time so I've replaced it with coconut water and xylitol for a little sweetness instead.
This makes a big batch but it still never lasts very long around here!
LEMON, GINGER & TURMERIC GUMMIES
1.5 cups water
1.5 cups coconut water
1/4 cup xylitol
juice of 1 large lemon
1/2 ts organic turmeric powder
5 drops lemon essential oil*
2 drops ginger essential oil*
6 tbs gelatin (I like Great Lakes or Changing Habits)
In a small bowl mix together the xylitol, lemon juice, turmeric powder and essential oils.
Bring the water and coconut water to the simmer over medium heat. Add the xylitol mixture and stir well to combine.
Sprinkle the gelatin over the top and use a whisk to stir until it has dissolved. Pour through a sieve into a heatproof dish and leave to set in the fridge. Slice into squares to serve.
Gelatin is fantastic for gut health, helping to heal and seal the gut and in turn support your immune system.
It's also packed with protein and makes a great snack for hungry kids.
Enjoy! xx
*I only use and recommend doTERRA essential oils. Click here for a quick guide to essential oils, doTERRA and how you can get your own (no matter where you are in the world!)
Monday, April 2, 2018
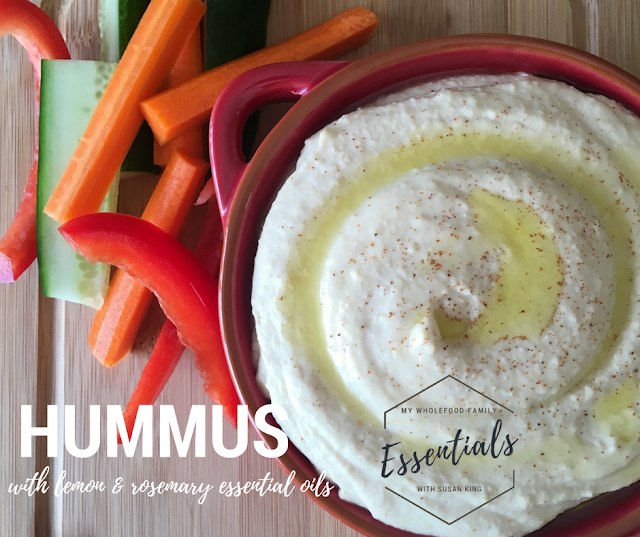
Lemon Rosemary Hummus
Happy Easter everyone!
Was there a chocolate explosion at your place? I didn't have too much chocolate but with a little too much sugar overall I was so thankful for the DigestZen tummy tamer blend.
In the lead up to the Easter weekend, I tried to cram in as many veggies as possible. I'm not going to stop the kids eating chocolate but we've still got to get the good stuff in too right?
In the lead up to the Easter weekend, I tried to cram in as many veggies as possible. I'm not going to stop the kids eating chocolate but we've still got to get the good stuff in too right?
Anything with a dip is a winner with my kids and this lemon and rosemary hummus is so good it entices them to eat some veggies too.
You can definitely make this without a Thermomix and it's up to you whether you fry off the garlic first or just throw everything into the food processor and blitz until smooth. Either way, it's delicious!
Lemon and Rosemary Hummus
2 garlic cloves
2 tbs extra virgin olive oil
1 tin organic chickpeas, drained and rinsed
2 tbs tahini
Juice 1/2 lemon
2 tbs water
1/2 ts salt
2 drops Lemon essential oil
1 drop Rosemary essential oil
Thermomix instructions: chop the garlic 5 scs / SP 5. Scrape down the sides, add the oil and cook for 5 mins / 100 deg / SP 1 / MC off.
Add all remaining ingredients and process until smooth, about 1 minute / SP 9, scraping down the sides as needed.
Pour into serving bowl, add a drizzle of extra virgin olive oil and a dash of paprika or sumac.
I often serve this hummus with crackers and veggie sticks at my essential oil workshops, along with the bliss balls as I know not everyone has a sweet tooth.
Enjoy! xx
Tuesday, January 23, 2018
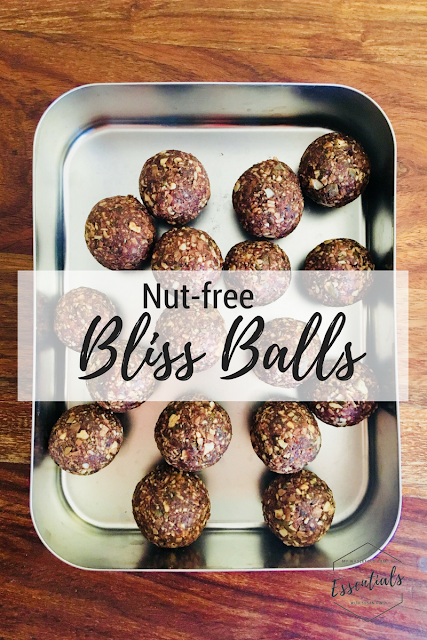
Nut-free Bliss Balls
So I was feeling really organised - I'd chosen a handful of favourite recipes to prep and freeze for school lunches and was all set to start. Then I remembered that my youngest is starting kindy and all the food we provide has to be nut-free. *face palm*
At least I remembered now and not on the first day!
So back to square one with the recipes.
I whipped up these nut-free bliss balls to go in the freezer and will add 1 to his lunchbox every day. I got 16 out of this batch so they should last us about 6 weeks as long as sneaky fingers don't sneak them out of the freezer!
If your child will notice and freak out about the visible green from the pepitas, by all means, roll the bliss balls in coconut to cover them up. Mine don't care luckily as I had run out of desiccated coconut!
With the dates, these are definitely not a low-sugar option but they tick lots of other boxes and will be a great high energy snack for my very active 4-year-old.
Enjoy!
Nut-free Bliss Balls
1 cup shredded coconut
1/2 cup sunflower seeds
1/2 cup pepitas
1 cup dried dates (soaked in boiling water for 5 mins and drained)
1 heaped tbs raw cacao
1 ts vanilla extract
pinch salt
5 drops Wild Orange essential oil (optional - I only use and recommend doTERRA)
2/3 cup desiccated coconut (optional - extra to roll the balls in)
Place the dates in a small heat-proof bowl, cover with boiling water and leave to soften for 5 minutes. Drain and place into your food processor or Thermomix bowl.
Add all remaining ingredients and process until the mixture is sticky and clumps together (TMX SP 5 / 30 secs).
Roll mixture into balls and if desired, into desiccated coconut.
Store in fridge or freezer.
Makes approx 16
What are your favourite nut-free school snacks? Please share some recipes below as I need a refresher!
Susan xx
Wednesday, August 16, 2017
Coconut Pannacotta Gummies
Are you a fan of gummies?
We've been making LOADS of them over winter with orange juice, coconut water and immune supporting essential oils like lemon, orange and On Guard. Get the recipe for my citrus gummies here.
The gelatin is just so good for gut health plus the kids love them and have no idea they're eating something so healthy!
I wanted to switch things up a little this time and make more of a dessert.
Pannacotta is one of my all time favourite desserts and it was easily converted into gummies.
While gummies are usually quite firm, I wanted to recreate the wobble that is so characteristic of a Pannacotta so I used just 1 tablespoon of gelatin. With this amount of liquid you could use up to 1/4 cup of gelatin.
I used rice malt syrup as the sweetener here to keep them fructose free, but you could use honey or maple syrup instead. You might just need less though as they are much sweeter than the rice malt syrup!
Coconut Pannacotta Gummies
1 tin Ayam coconut milk
1 tin Ayam coconut cream
1/3 cup rice malt syrup (or preferred sweetener)
2 ts vanilla extract
1 tbs gelatin (I use Great Lakes)
Place the coconut milk, cream, syrup and vanilla into a small saucepan and mix until just combined.
Sprinkle over the gelatin and leave to bloom for 5 minutes.
Place the pan over low heat and stir together until melted and smooth.
Pour into a glass dish and place in the fridge to set.
Slice into squares and serve.
What's your favourite gummies recipe? x
Saturday, July 23, 2016
Superfood Bliss Balls
What a week! I don't normally post on a Saturday but after attempting to write up this post for days now is my first chance! Mr 2 has been home from daycare this week with some sort of virus that caused conjunctivitis and just as it started to clear he broke out in spots. Before having children I had no idea there were so many illnesses that caused spots! Being the third child we didn't even take him to the doctor (he's completely fine now by the way).
Anyway between having a clingy and sick 2 year old hanging off me, and trying to complete two whole subjects before the September school holidays, I haven't had a whole lot of spare time.
So this week, yet again, bliss balls saved my life.
I have made a ton of different bliss balls over the past few years, but it was actually only once I had my third baby that I really appreciated them. When Mr 2 was very little I used to make a batch of bliss balls every week and had them stashed in the freezer for a quick breakfast, a mid-afternoon pick me up or a late night snack while feeding.
This week there quite a few times when I was hungry but didn't want to make anything from scratch, so I grabbed 2 of these from the freezer and was completely satisfied.
These ones are a little different in that I have specifically chosen ingredients to suit my health at the moment. There is no gluten, nuts or refined sugar and they have an extra boost of superfoods. Think antioxidants from the raw cacao, zinc from the pumpkin seeds, calcium from the tahini, fibre and essential minerals from the dates, good fat from the coconut, along with the amino acids, minerals and hormone balancing properties of maca.
Oh, and they're totally delicious!
As with anything containing chia seeds, make sure you check your teeth before venturing out in public!
Superfood Bliss Balls
Recipe by me
2 tbs (20 g) raw cacao
1 tbs (15 g) maca powder
1/4 cup (40g) chia seeds
1 cup (150g) pumpkin seeds
1 cup (65g) desiccated coconut
40 g tahini
1/4 tsp sea salt
80 g semi-dried dates
30 g coconut oil
zest of one orange
Place all ingredients into the food processor and blitz until the mixture clumps together (Thermomix 20 seconds / speed 6).
With damp hands, roll spoonfuls of mixture into balls.
Makes about 20
Store in the fridge or freezer.
What's your go-to snack?
Monday, April 25, 2016
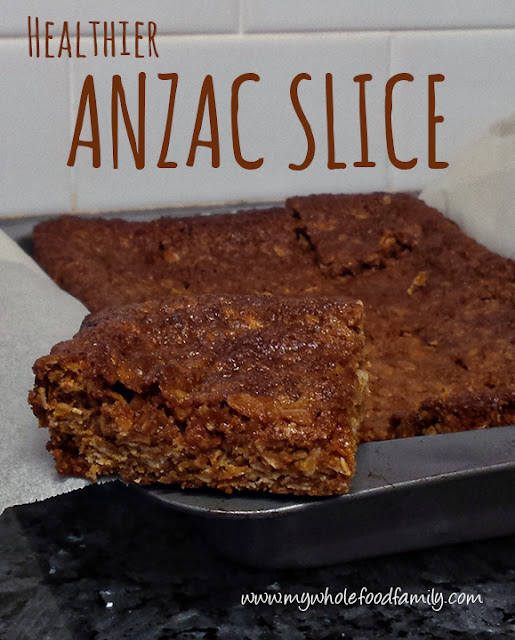
Healthier ANZAC Slice
It just wouldn't be Anzac Day without Anzac Biscuits. I did a round-up of healthy Anzac biscuits on Friday and then posted on Facebook yesterday that I also made some Really Healthy Anzac Biscuits. But I couldn't just leave it at that!
We had friends around for breakfast today and I wanted to make something sweet to finish our meal. A quick search found lots of different recipes for Anzac Slice and I chose one to tweak. This is still very sweet and definitely a sometimes food but overall far healthier than the regular white flour and golden syrup varieties.
It went down a treat - this recipe is a keeper!
Healthier Anzac Slice
Adapted from Cooking in the Chaos
130g white spelt flour
90g rolled oats
65g shredded coconut
150g butter
120g rice malt syrup
40g coconut sugar
1/2 ts bicarb soda
Preheat the oven to 180 degrees Celsius / 160 degrees fan-forced.
Grease a slice pan (mine was 15 x 23 cm) and line with baking paper.
Mix together the flour, oats, coconut and coconut sugar in a large bowl.
Place the butter and syrup into a small pan and melt over medium heat. Add the bicarb and stir as it bubbles and froths. Pour into the dry ingredients and mix well.
Tip the mixture into the prepared pan and smooth the top.
Bake for approx 20 minutes or until golden brown and pulling away from the sides. Leave to cool in the pan before slicing into squares (12) or bars (16).
This is a really forgiving recipe and you can easily swap out the flour or sweeteners for whatever you happen to have.
Enjoy!
Monday, March 14, 2016
My top 5 No-Bake Snacks for Kids
So you may have noticed that I like to bake. A lot! But in reality we're not eating baked goods all the time. I always make big batches and stash at least half in the freezer for another time. Things like muffins and biscuits and slices are brilliant to have on hand to pop into lunchboxes or to grab out when we have a playdate.
But there are also plenty of times when to be honest, I just don't feel like baking. Or we're too busy or it's too hot ... you get the idea. I also want to mix things up a bit so we're not eating the same things all the time and if the kids have had a muffin in their lunchbox they are certainly not getting cake for afternoon tea.
It's a good idea to have a range of no-bake options that you can whip up quickly as soon as the hungry horde descends after school.
Smoothies
This is a no-brainer! A smoothie can be a meal in a glass if you pack it full of nutrient dense (and delicious) ingredients. I personally have been down the green smoothie road and can say with certainty that they don't agree with me. I just don't feel good drinking them even when they taste good. But there are other ways to get in some goodness. This is my go-to smoothie formula for the kids:
Per child:
1 cup milk (we use rice, almond or coconut)
1/2 frozen banana or handful berries
1/4 avocado
1 ts chia seeds
1 ts mixed ground seeds (sunflower, pepita and linseed)
cinnamon, vanilla or cacao
probiotic powder
Place all ingredients into a high powered blender and process until smooth (TMX 1 minute / SP 9).
Bliss balls
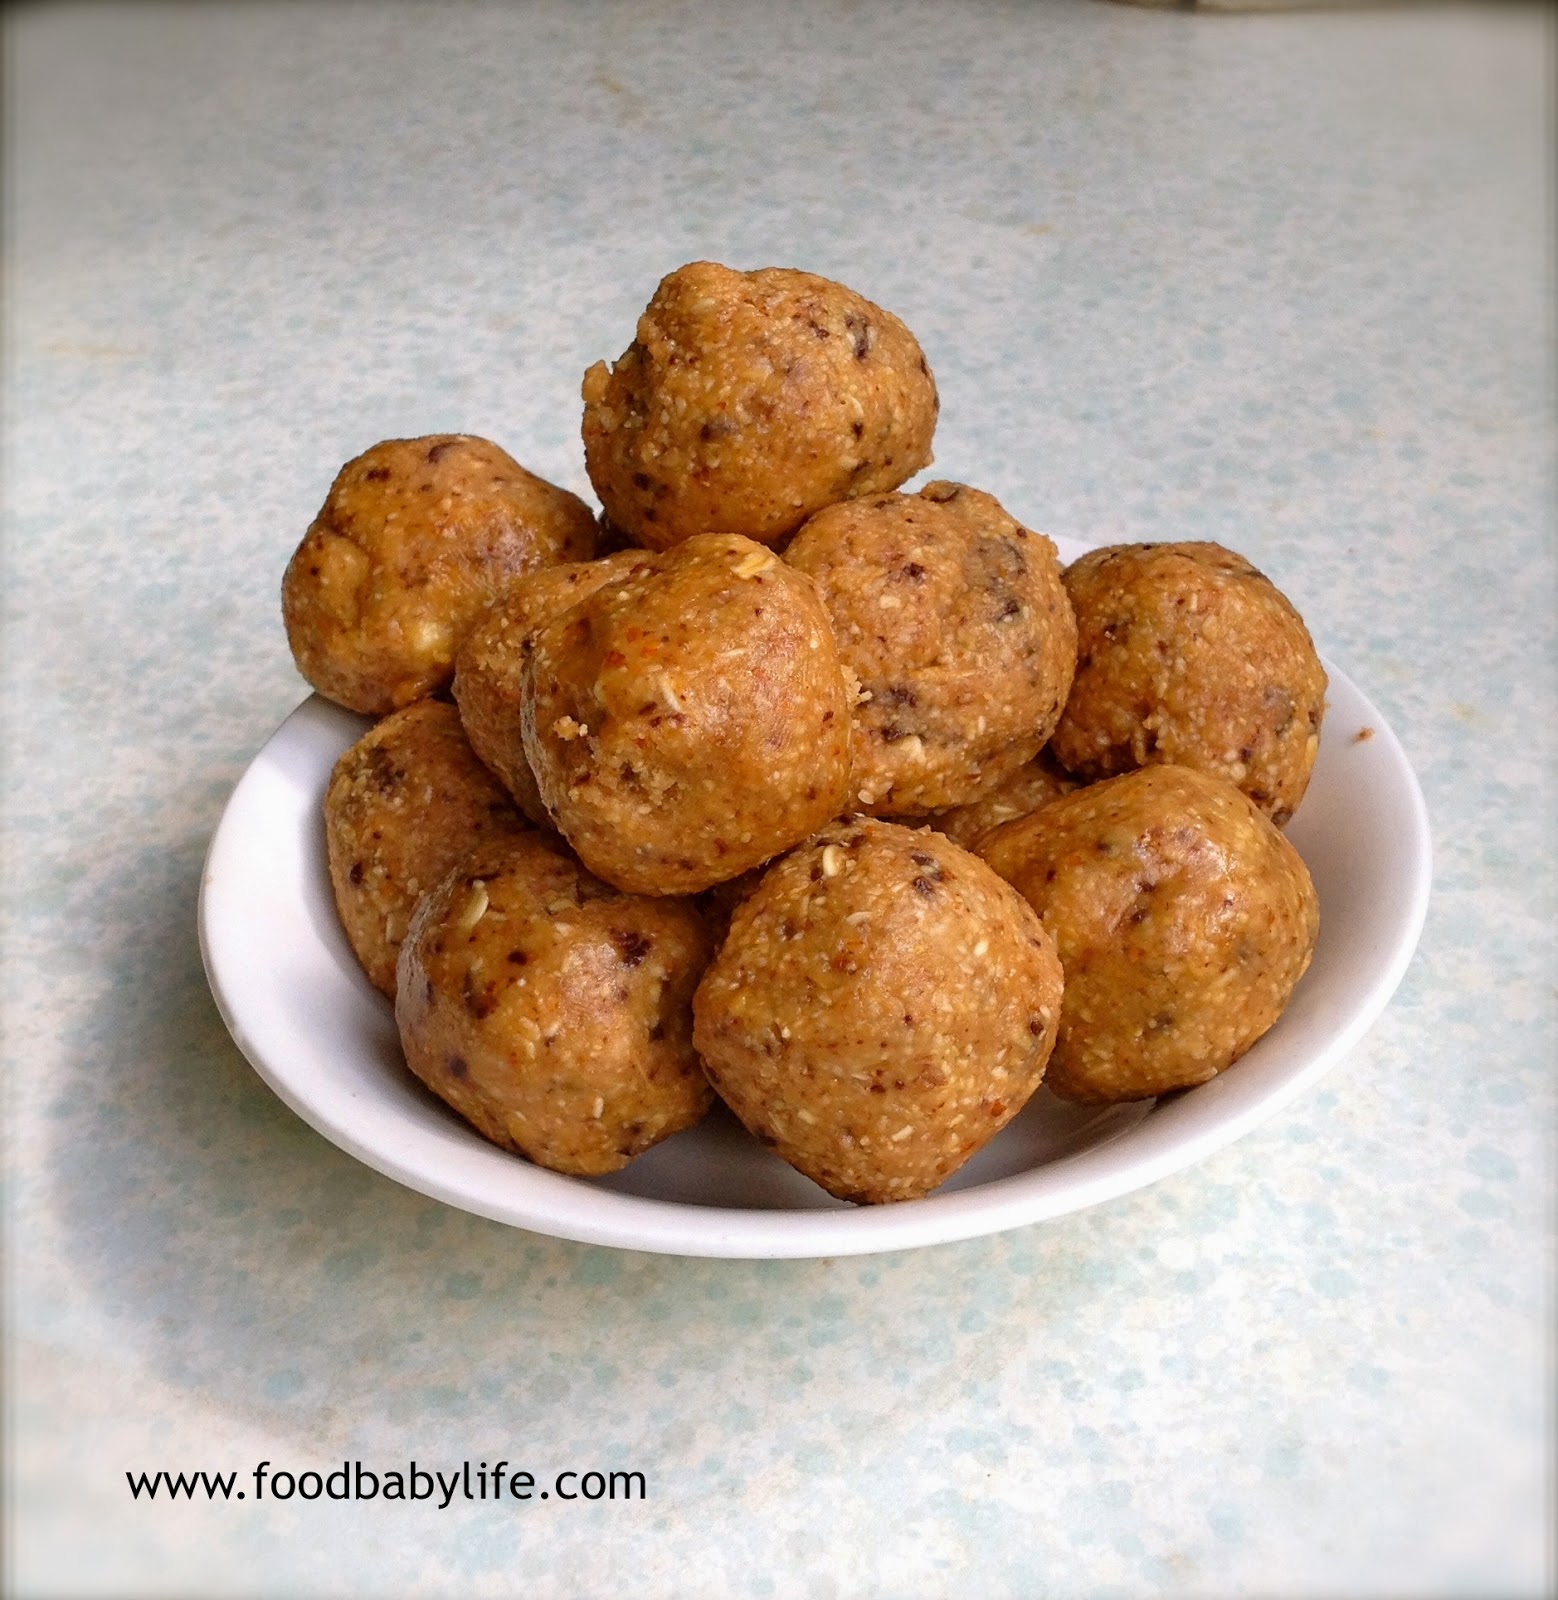
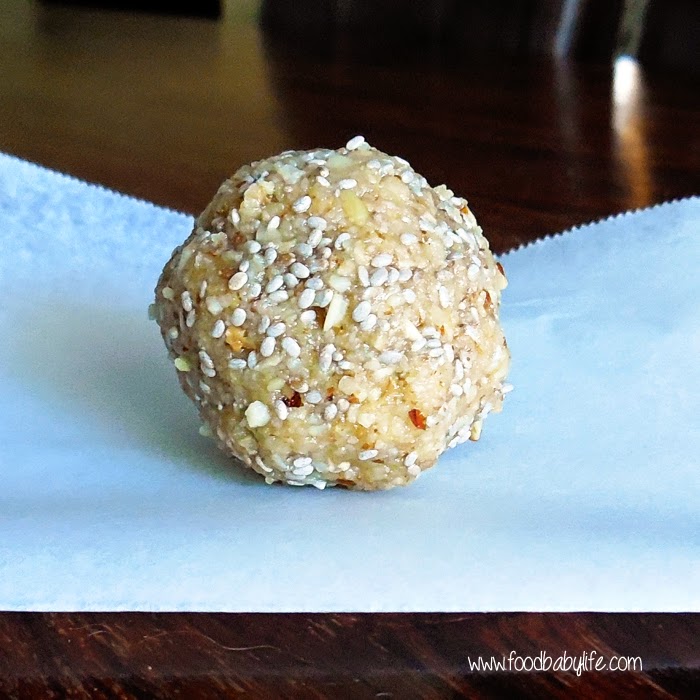
So these require a little more planning but once they are made they can be stored in the freezer and will keep for ages. There are loads of bliss ball recipes out there but as most of them are packed full of dried fruit they are very high in sugar. Two of my family favourites are my Almond and Chia Bliss Balls which are fruit-free and my Chocolate Bliss Balls which are nut and coconut free but do contain some dates. You can really let your imagination run wild here though - you can swap the nuts, the sweetener, the fruit to whatever you happen to have on hand. Just taste as you go and when the mixture sticks together they are ready to roll!
Popcorn
An oldie but a goodie. Is there anything better than popcorn? I'm talking the homemade stuff here not anything with synthetic 'butter flavour' that is artificially coloured yellow. There are 2 easy ways to make popcorn. First you can heat up some oil in a large pot (coconut oil or ghee are brilliant), toss in the kernels, cover and wait for them to stop popping. Or you can buy an air-popper really cheaply from places like Kmart. We have had an air popper for years and it gets used at least once a week. Simply throw in the kernels, turn it on and voila, popcorn!
We always have lots of butter and a sprinkle of sea salt on our popcorn and the kids love it. We recently switched to Honest 2 Goodness brand organic popping corn and have been amazed by how fresh and tasty it is compared with the stuff you can buy from the supermarket. And it is GMO free unlike most of the corn products you buy at the shops.
Here's an extra tip, if you start noticing that you are left with heaps of unpopped kernels in the bottom of the bowl it means that they have dried out and are stale. The kernels only pop because the water inside them turns to steam and they basically explode from the inside. No moisture inside means they can't pop. So always store your popping corn in an airtight container to keep it fresh!
Apple slices with peanut butter
Ok this one sounds like a cop-out but the kids love it! It's as easy as slicing up an apple and spreading some peanut butter on each piece. That's it. Adding the peanut butter means they are getting some good fat and protein and it keeps them fuller far longer than just an apple on it's own.
Can't have peanuts? Use cashew or almond butter or even tahini instead. Make sure you choose a good quality nut butter than is 100% nuts with no oils, salt, sugar or preservatives.
Crackers, veggie sticks and cheese
I do make homemade crackers on occasion but they can be fiddly and time consuming to roll out and slice and I'm not doing that every day (or even every week). When I buy crackers there are 2 types I choose, either brown rice crackers like the Eat Rite brand or an organic rice cake (Pure Harvest brand is good). Throw some crackers on a plate with whatever veg your kids like to eat raw - think carrot sticks, cucumber, cherry tomatoes and some cheese and that's afternoon tea sorted. My fussy Mr 5 LOVES soft cheese like brie or camembert so if there happens to be some on special I might surprise him with some. Easy as.
So that's it, my top 5 no-bake snacks for kids. Do you have a favourite afternoon tea for your kids? Do you bake for afternoon tea or only for special occasions?
Monday, January 25, 2016
Crispy Southwest Chicken Bites (SRC)
Happy new year everyone! What a long 2 months it's been since our last post for Secret Recipe Club. We had a wonderful Christmas, the kids are all set for school starting this week and it's Australia Day tomorrow. I love this time of year :)
Before I talk about the amazing recipe I chose this month, I need to let you know of some changes I've made around here. As you may have noticed my blog has a new look and a new name! I am now My Wholefood Family, which I think is much more reflective of the way we shop, cook and eat these days. I've also finally ventured onto Facebook a few days ago and I would love you to join me (it's a little quiet there at the moment!).
All done? Now back to the food. This month I was assigned the blog Burnt Apple. Traci is a married mum of 3 who cooks "healthy meals on a tight budget and on a tight schedule." Um yep sounds like I'm in the right place!
I got some great ideas from the roundup of AIP (auto immune protocol) dessert ideas, was intrigued by this non-dairy ice cream made using flax milk (I didn't know that was thing), drooled over these coconut sugar brownies, knew that with 3 boys a recipe for Fart Cookies would be a hit, on a hot summer day who wouldn't want some refreshing Watermelon Lemonade and for the perfect Christmas (or anytime) time snack how about Cinnamon Sugar Almonds?
In the end I settled on Traci's Crispy Southwest Chicken Bites. They were full of flavours I love and let me tell you, these did not disappoint. We loved them. No really, LOVED them! These are one the easiest and best tasting things I've made in ages. We can't buy ranch dressing here in Australia so after a bit of research I decided to make my own version which I adapted from here and here.
Look at those colours! You just know that is going to taste amazing. I wasn't in my usual supermarket when I shopped for these and I couldn't find wonton wrappers anywhere. I settled for spring roll wrappers and while they were obviously a lot bigger they worked brilliantly.
I was amazed how good they tasted. With a simple brushing of egg white and baked in the oven they were super crispy and almost fried tasting. And dipped into that cool creamy dressing these were magic.
Crispy Southwest Chicken Bites
Recipe from Burnt Apple
2 cooked chicken breasts, shredded (mine was poached with garlic)
2 tbs olive oil
1/2 onion, finely diced
1/2 red capsicum, finely diced
2 cloves garlic, crushed
1/4 cup coriander, chopped
1/4 cup salsa verde
spring roll wrappers
2 egg whites
ranch dressing, to serve
Preheat the oven to 180 degrees Celsius / 350 degrees Fahrenheit. Lightly grease a large baking tray and set aside.
Add the oil to a frypan and sautee the onion and capsicum until tender (about 5 minutes). Add the garlic and cook for another minute or so. Remove from the heat and allow to cool slightly.
In a large bowl place the shredded chicken, coriander, salsa verde and cooled onion mixture and mix well.
Lay a spring roll wrapper on a board with the point facing you. Place a heaped spoon full of filling just below the middle and spread out slightly. Brush the edges with egg white. Fold over the bottom point, then fold in the sides then roll up into a spring roll shape.
 |
| Image source |
Remove from the oven and allow to cool for a few minutes before serving with ranch dressing.
Makes approximately 20
Thanks for a great month Traci! We loved this recipe and it's become a family favourite.
Thursday, January 21, 2016
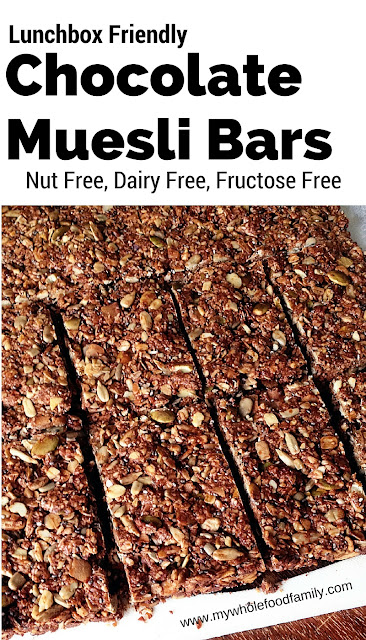
Lunchbox-friendly Chocolate Muesli Bars (Nut, Dairy and Fructose Free)
I've been making these muesli bars for the kids for years now but with all 3 kids off to school or daycare this year (sob) I can officially call them 'lunchbox friendly.'
If you want to eat fewer processed foods, then making your own snacks like these is a great place to start.
Store bought muesli bars, especially the ones plastered with statements like 'no added sugar', '99% fat free' and 'no artificial colours or flavours' can be full of rubbish ingredients. (I will be doing a post on how to read product labels next month so keep an eye out for that!)
These use a mixture of seeds instead of nuts, coconut oil instead of butter and rice malt syrup instead of sugar. If you have no problems with dairy then use butter by all means and you could also replace the syrup with either honey or maple syrup (although this means they won't be fructose free).
They are absolutely delicious and really filling too so my kids will having one of these and a piece of fruit in their lunchbox for morning tea next week at school. It will keep them going for hours!
Chocolate Muesli Bars
140g rice malt syrup
90g coconut oil
2 1/2 cups rolled oats
1 cup shredded coconut
1 cup pumpkin seeds
1 cup sunflower seeds
1/4 cup chia seeds
1/4 cup sesame seeds
2 tbs raw cacao
3 ts vanilla extract
1/2 ts salt
Preheat oven to 160 degrees C / 140 degrees C fan-forced.
Line a 20 x 30 cm slice pan with baking paper and set aside.
TMX - melt together the syrup, coconut oil and vanilla extract for 2 minutes / 80 degrees / SP 2. Add all remaining ingredients and process for 20 seconds / SP 4.
No TMX? Melt the syrup, coconut oil and vanilla in a small pot over medium heat. Place all remaining ingredients in a large bowl and toss to combine. Pour over the syrup mixture and mix really well.
Tip the mixture into the prepared pan and press down well.
Bake for approximately 25 minutes. Use your nose with this one, the house will smell amazing and it will look evenly browned. Do not overcook!
Remove from the tin by lifting the baking paper on each side and slice into bars while still warm. Leave until completely cooled. Store in an airtight container or freezer.
Makes 16-20 but you can slice them into whatever size bars you need
Monday, September 14, 2015
Healthy chocolate crackle slice
Snacks, snacks snacks! That's what we seem be needing a lot of lately. I guess moving really does work up an appetite!
And today is moving day! As you read this the truck will already be here loading our things and getting us ready to start our new family life in our new home.
For anyone who grew up in Australia you will be very familiar with the chocolate crackle, which featured at every birthday party and school fete as a kid.
These are a far healthier version from the Naughty Naturopath Mum who calls them anti-LCM bars. I have to admit my kids have never eaten an LCM and would have no idea what they are (yay!) so I just called it a chocolate rice bubble slice for them.
We don't usually buy rice bubbles either but half a bag came home with them from their sleepover down the coast in the holidays and frugal me didn't want to throw them, but also didn't want them to just eat it for breakfast because they would be starving again in 5 minutes.
These were SOOOO delicious. Chocolatey, caramelly, crispy and chewy and just plain good. Still a treat but one you can definitely feel good about.
Healthy Chocolate Crackle Slice or Anti-LCM Bars
From the Naughty Naturopath Mum
4 cups rice bubbles (puffed rice from the health food shop is better!)
2 cups desiccated coconut (check that it is preservative free)
1 cup rice malt syrup
1/2 cup coconut oil
1/4 cup chia seeds
1/4 cup raw cacao
pinch salt
Grease and line a slice pan with baking paper.
Place all dry ingredients into a large bowl and mix together.
In a small pan over medium heat, place the rice malt syrup and coconut oil and warm gently until it is smooth and only just starting to bubble. Pour immediately over the dry ingredients and mix until well combined.
Tip the mixture into the prepared pan and press down well, smoothing the top as you go.
Store in the fridge and slice into bars when ready to serve (you can't store this out of the fridge as the coconut oil will start to melt as it warms up).
Makes lots.
Enjoy!
Monday, February 23, 2015
Peanut Butter Chocolate Chip Cookie Dough Balls (SRC)
It's Secret Recipe Club time! Every month SRC members are assigned a blog in secret to peruse and choose a recipe, then we all post on the same day. This month I was assigned Life on Food by Emily.
Emily is a self-proclaimed foodie who has been blogging since 2009. She and her husband Jordan are expecting their first baby next month (how exciting!) and she had the most gorgeous baby shower with a Very Hungry Caterpillar theme. My kids all love that book and we read it constantly.
I was definitely spoilt for choice when it came to picking a recipe. I wanted something sweet and easy this month and a few things caught my eye straight away. I have bookmarked the Chocolate Chunk Zucchini Bread to try when we have some spare zucchinis and I was so tempted by the Brownies with Cookie Dough Frosting (OMG) but continuing on a cookie dough theme I ended up choosing Emily's Peanut Butter Chocolate Chip Cookie Dough Balls. I made a double batch because I knew they would be good and let me tell you, I was not disappointed. These were SO good!!!
We gobbled up 3 each as soon as they were made and I stashed the rest in the freezer just to make them last longer. They have been brilliant to grab as a quick snack for the boys before or after school and kindy and I can see many, many batches of these being made in the future!
I made a few small changes to the recipe to fit in with our dietary requirements, such as using natural peanut butter, rice malt syrup and dextrose instead of regular sugar and ground almonds instead of flour. I'm thinking next time I might add some vanilla protein powder and some chia seeds to boost the protein content and make them an even more substantial snack.
Peanut Butter Chocolate Chip Cookie Dough Balls
Adapted from Life on Food
6 tbs natural peanut butter
4 tbs butter, softened
1/4 rice malt syrup or honey
2 tbs dextrose (or granulated sugar)
2 ts vanilla
1/4 ts salt
1/2 cup ground almonds
1/2 cup quick oats
6 tbs chocolate chunks
In a mixer, beat together the butter, peanut butter, rice malt syrup and dextrose until fluffy. Add the vanilla and beat again. Add in the remaining ingredients except the chocolate and mix until combined. Fold through the chocolate chunks.
Roll into balls (makes approx 16) and freeze or refrigerate until needed. Try not to eat them all at once.
Thanks for an amazing recipe Emily!
Thursday, November 20, 2014
Sweet and Salty Potato Chip Cookies
I am a sucker for the combination of sweet and salty, be it popcorn, pastry or salted caramel. When I saw these pop up on Laws of the Kitchen and I happened to have half a bag of potato chips sitting in the pantry their fate was sealed!
The little green pieces in my cookies are actually pumpkin seeds. I didn't have enough of any one type of nuts to make up the 1/2 cup needed for the recipe but I did have a bag of Lucky Smart Snax Recovery which has oven roasted peanuts, almonds, cashews and pepitas. It was perfect for these cookies and using a mixture of nuts made them especially tasty.
My cookies were no where near as chunky looking as the original so I think I overprocessed the nuts and chips but they were still packed with crunchy bits and were deliciously sweet and salty. They were a real hit with the kids and they disappeared in record time. Sorry for the blurry photo, I think someone's little sticky fingers have been playing with my camera!
Oh and there's only 1 day left to win the #luckysmartsnax hamper so if you're an Australian resident and want to win some nuts visit my post here to enter!
Sweet and Salt Potato Chip Cookies
Adapted from The Caker via Laws of the Kitchen
225g butter
1 cup dextrose (or 100g sugar)
1/2 cup nuts, finely chopped
250g plain flour
1/2 cup crushed salty potato chips
1 ts vanilla extract
Preheat oven to 180 degrees celsius. Line 2 baking trays with baking paper and set aside.
In a stand mixer cream together the butter and sugar until smooth and pale. Add the vanilla and beat to combine. Fold in the flour and when mostly combined add the nuts and potato chips and stir until well mixed through.
Roll the dough into balls and place on the prepared trays. Flatten with the bottom of a glass or your palm.
Bake for approximately 15 minutes or until just golden brown around the edges. Remove from the oven and allow to cool on the tray for 5 minutes before turning out onto a wire rack to cool completely.
Makes 24.
Friday, November 14, 2014
Lucky Smart Snax Review and Giveaway!
** The giveaway is now closed. The winner will be announced and contacted shortly**
It's been a really interesting experience going back to study after 13 years. First time around was straight after high school when I lived on campus and did all the usual sorts of things uni students do! I did well academically but I could have (and should have) done a lot more work.
I remember long nights cramming for exams fuelled by lots of caffeine and sugary snacks. There was a 24 hour convenience store a short walk from my building and I used to go for midnight walks with friends to stock up on Sara Lee Ultra Choc ice cream!
This time around I am in my 30s and the mum of 3 young children. Needless to say it's been an entirely different experience! These days I study whenever I get a spare moment - waking up at 5am to get an hour of reading time before anyone else is up. Working feverishly during my baby's nap time to get as much done as possible before he wakes up. 10pm is about as late as I can stay up at night both in terms of being able to concentrate and to ensure I get enough sleep and not feel like a zombie the next day.
My study snacks have also changed. Definitely no more chocolate ice cream for me seeing as I avoid both sugar and dairy these days!
My go-to snack for the past year or so has been nuts. I've been buying them in bulk from a local organic food store and making up snack mixes, bliss balls, biscuits and toasted muesli with them. They are filling, packed with nutrients and good fats and best of all they keep me going when I don't always have time to eat a proper meal.
So when I was offered the chance to review the new range of Lucky Smart Snax thanks to Product Talk by Nuffnang I was so excited! I am already a big fan of the Lucky brand and in fact I reviewed their range of nuts for Christmas baking last year which you can find here.
So what are Lucky Smart Snax? They are a range of 6 snack mixes of nuts, seeds and dried fruit with each mix designed to meet the specific needs of individual bodies. Some have just nuts, some have nuts and seeds, some have dried fruit and one even has a little chocolate!
Lucky Smart Snax Digestive – Oven Roasted Almonds, Peanuts, Hazelnuts, Cranberries, Sunflower Kernels and Pepitas. The dietary fibre in this blend will help maintain a healthy digestive system.
Lucky Smart Snax Recovery – Oven Roasted Almonds, Peanuts, Cashews and Pepitas. This blend is a good source of protein which is vital for growth, muscle development and recovery from exercise.
Lucky Smart Snax Womens – Cashews, Almonds, Brazil Nuts and Walnuts. This blend is a souce of Vitamin E, iron and monounsaturated fat, as well as calcium, folate and selenium.
Lucky Smart Snax Cardio – Almonds, Sultanas, Cranberries and Blueberries. This is a sweet and very high energy blend to help keep you pumping through the day.
Lucky Smart Snax Power – Oven Roasted Peanuts, Almonds, Walnuts, Hazelnuts and Dark Chocolate. This sweet and toasty blend gives a boost of natural energy.
Lucky Smart Snax Low Carb – Brazil Nuts, Peanuts, Pepitas, Almonds and Walnuts. This tasty blend of nuts and seeds is naturally low in carbohydrates and a great snack option.
I love that these are not only delicious but also the real deal in terms of healthy snacks -the nuts are all either raw or oven roasted with no extra oil added, they are not too heavy on the dried fruit so are mostly low in sugar, and as nuts and seeds are packed with goodness they are a nutrient dense snack that actually fills you up. My personal favourite has been the Digestive blend which is oven roasted and has just a little sweetness from the dried cranberries.
I've had a bag of Smart Snax to graze on at nearly every morning study session since I received them, as well as a bag stashed in my handbag for when I'm out. I have to say they have also been a lifesaver at exam time when I didn't really feel like eating (too many butterflies in my tummy) but needed something light and nutritious to get me through a 2 hour science exam.
The new range of Lucky Smart Snax are available in the dried fruit and nut aisle of Coles, Woolworths and independant grocers, near the baking products and they retail for $4.99 per pack.
Giveaway!
I am really excited that I have a Lucky Smart Snax hamper to give away which includes all 6 products in the range. This giveway is open to Australian residents only and to enter, just leave a comment below answering the question:
The competition closes in 1 week on Friday 21st November at 5pm so make sure you get in quick! To find out more about Lucky Smart Snax you can visit their website or get to your local supermarket and grab a pack for yourself.
Good luck!!!
* This is not a sponsored post. I received product for review. All thoughts and opinions are my own.
It's been a really interesting experience going back to study after 13 years. First time around was straight after high school when I lived on campus and did all the usual sorts of things uni students do! I did well academically but I could have (and should have) done a lot more work.
I remember long nights cramming for exams fuelled by lots of caffeine and sugary snacks. There was a 24 hour convenience store a short walk from my building and I used to go for midnight walks with friends to stock up on Sara Lee Ultra Choc ice cream!
This time around I am in my 30s and the mum of 3 young children. Needless to say it's been an entirely different experience! These days I study whenever I get a spare moment - waking up at 5am to get an hour of reading time before anyone else is up. Working feverishly during my baby's nap time to get as much done as possible before he wakes up. 10pm is about as late as I can stay up at night both in terms of being able to concentrate and to ensure I get enough sleep and not feel like a zombie the next day.
My study snacks have also changed. Definitely no more chocolate ice cream for me seeing as I avoid both sugar and dairy these days!
My go-to snack for the past year or so has been nuts. I've been buying them in bulk from a local organic food store and making up snack mixes, bliss balls, biscuits and toasted muesli with them. They are filling, packed with nutrients and good fats and best of all they keep me going when I don't always have time to eat a proper meal.
So when I was offered the chance to review the new range of Lucky Smart Snax thanks to Product Talk by Nuffnang I was so excited! I am already a big fan of the Lucky brand and in fact I reviewed their range of nuts for Christmas baking last year which you can find here.
So what are Lucky Smart Snax? They are a range of 6 snack mixes of nuts, seeds and dried fruit with each mix designed to meet the specific needs of individual bodies. Some have just nuts, some have nuts and seeds, some have dried fruit and one even has a little chocolate!
Lucky Smart Snax Digestive – Oven Roasted Almonds, Peanuts, Hazelnuts, Cranberries, Sunflower Kernels and Pepitas. The dietary fibre in this blend will help maintain a healthy digestive system.
Lucky Smart Snax Recovery – Oven Roasted Almonds, Peanuts, Cashews and Pepitas. This blend is a good source of protein which is vital for growth, muscle development and recovery from exercise.
Lucky Smart Snax Womens – Cashews, Almonds, Brazil Nuts and Walnuts. This blend is a souce of Vitamin E, iron and monounsaturated fat, as well as calcium, folate and selenium.
Lucky Smart Snax Cardio – Almonds, Sultanas, Cranberries and Blueberries. This is a sweet and very high energy blend to help keep you pumping through the day.
Lucky Smart Snax Power – Oven Roasted Peanuts, Almonds, Walnuts, Hazelnuts and Dark Chocolate. This sweet and toasty blend gives a boost of natural energy.
Lucky Smart Snax Low Carb – Brazil Nuts, Peanuts, Pepitas, Almonds and Walnuts. This tasty blend of nuts and seeds is naturally low in carbohydrates and a great snack option.
I love that these are not only delicious but also the real deal in terms of healthy snacks -the nuts are all either raw or oven roasted with no extra oil added, they are not too heavy on the dried fruit so are mostly low in sugar, and as nuts and seeds are packed with goodness they are a nutrient dense snack that actually fills you up. My personal favourite has been the Digestive blend which is oven roasted and has just a little sweetness from the dried cranberries.
I've had a bag of Smart Snax to graze on at nearly every morning study session since I received them, as well as a bag stashed in my handbag for when I'm out. I have to say they have also been a lifesaver at exam time when I didn't really feel like eating (too many butterflies in my tummy) but needed something light and nutritious to get me through a 2 hour science exam.
The new range of Lucky Smart Snax are available in the dried fruit and nut aisle of Coles, Woolworths and independant grocers, near the baking products and they retail for $4.99 per pack.
Giveaway!
I am really excited that I have a Lucky Smart Snax hamper to give away which includes all 6 products in the range. This giveway is open to Australian residents only and to enter, just leave a comment below answering the question:
Which Lucky Smart Snax is your favourite and why?
Good luck!!!
* This is not a sponsored post. I received product for review. All thoughts and opinions are my own.
Tuesday, May 20, 2014
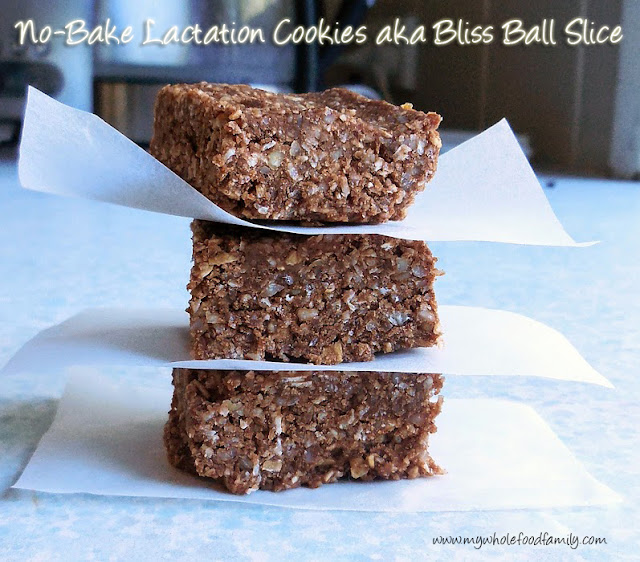
No Bake Lactation Cookies (Bliss Ball Slice)
If you have no interest in breastfeeding this may not be the post for you!
As any new parent will tell you, the first few months with a baby revolve around feeds, sleeps and nappy changes. While I have happily breastfed all 3 of my boys it has not always been easy. In fact at some points it has been excruciatingly painful and downright stressful.
With each baby though I have learnt new strategies and this time around one thing I committed to doing was increasing/maintaining my supply through my diet.
I found some really good recipes for lactation cookies online and made a couple of batches a few weeks before my due date to stash in the freezer. I snacked on a few in the days before Noah was born and took a bagful to the hospital with me as well.
I found the midwives to be really interested and supportive of the choices we made during labour (things like having a doula and choosing drug-free methods of pain relief) and they were keen to find out about what I was doing in the days after Noah was born as well. I snacked on my lactation cookies immediately after labour and at all hours of the day and night in those first few sleepless days and I can say with certainty that my milk came in almost a full day earlier than was expected or had experienced before. Was it the cookies? Who knows, but they certainly didn't do any harm!
My research showed that the key active ingredients in lactation cookies are oats, flaxseed and brewers yeast so every batch I made was based around those.
Some of the sites I found suggested that you could see better results if you just ate the dough rather than bake them. Even after pregnancy I am a little leery of raw eggs (even though that isn't too much of an issue here in Australia) so I always baked mine. That is until I came up with the idea to combine the active ingredients of a lactation cookie with the energy packed ingredients of a bliss ball!
I found it really easy to make up a big batch of my lactation bliss balls and store them in the freezer to grab as an easy snack during the day or a pick-me-up during Noah's nighttime feeds. Those bliss balls really got me through those first few exhausting months!
Lately I can't be bothered to roll the mixture into balls so I simply line a large baking dish with paper and press the mixture in well. Once it has chilled in the fridge I slice it into squares and throw in the freezer. Easy. Both my big boys love them as well so they sometimes get some of 'mummy's special slice' as a treat too.
No Bake Lactation Cookies (Bliss Ball Slice)
Recipe by me
2 cups traditional rolled oats
2 cups raw ABC nuts (almond, brazil and cashew nuts)
1 cup dessicated coconut
1/2 cup ground flaxseed
1/2 cup raw cacao
2 tbs brewers yeast
2 tbs coconut oil
1 tbs cinnamon
1/2 ts sea salt
1/2 cup rice malt syrup
1-2 tbs rice milk
Line a lamington tray with baking paper and set aside.
Place the oats and nuts into a food processor and blitz to a fine crumb. Add in remaining dry ingredients and process until well combined. Add the rice malt syrup and coconut oil and process until the mixture becomes sticky and starts to clump together. Only add the milk if needed, a little at a time.
(Make sure you taste the mixture at this stage. Brewers yeast has quite a strong flavour so you can add more syrup or other spices (ginger works well) or even some dried fruit. I find the cinnamon and rice malt syrup to be sweet enough for me and the salt creates a yummy and really balanced taste.)
Tip the mixture into the prepared tin and press down well before placing in the fridge to chill for 1 hour.
Remove from the fridge and tip the slice out onto a large cutting board. Using a large sharp knife slice into small squares (I get at least 40 from this amount). Place in an airtight container and store in the freezer.
I found snacking on a few of these every afternoon really helped to boost my supply for Noah's evening feeds, which was always when he was hungriest and wanted to cluster-feed. They also make a great breakfast on the run which is perfect if you have older children and can't sit down to eat properly in the mornings.
* This post does not constitute medical advice, it is for your information only. If you are having issues with breastfeeding please consult a GP, lactation consultant or child health nurse.
Thursday, April 24, 2014
Almond and Chia Bliss Balls
I have become a huge fan of bliss balls in recent months. I love that I can whip up something so tasty, filling and nutritious and just have it stashed in the freezer to grab whenever I want.
Life has become extra busy since Oscar started school and most days I don't have time to eat a proper breakfast before we leave. But there is always time to eat a bliss ball or 2 on the run which keeps me going until we get home and I can take a few minutes to sit down and eat properly. Not exactly ideal when you are breastfeeding but it's certainly better than nothing!
I have made literally dozens of types recently but this one was especially delicious and both the boys love them too.
Bliss ball recipes are very forgiving so if you don't have a particular ingredient you can easily substitute for something else eg, honey for the rice malt syrup, peanut butter for tahini etc.
Almond and Chia Balls
Recipe by me
200g toasted almonds
1/2 cup chia seeds
1 cup rolled oats
1 cup dessicated coconut
1/4 cup tahini
2 ts vanilla extract
1 heaped tbs coconut oil
2 tbs rice malt syrup
generous pinch sea salt
Place all the dry ingredients into the food processor and blitz to a fine crumb. Add the remaining ingredients and process until it comes together in a sticky ball. If the mixture is too dry you can add some extra syrup or a splash of rice milk. Roll tablespoons of mixture into balls and store in the fridge or freezer. Makes approx 20.
Tuesday, March 25, 2014
Breakfast Bars
Lately it's been really hard to fill up my kids. At 3 and almost 5 these boys eat a LOT. Even my 5 month old who has just started on solids has already eaten kilos of fruit and vegetable purees. Heaven help us when they're teenagers!!!
I spend a lot of time looking for new recipes for snacks and quick meals that will fill them up for longer. My main criteria are high protein, low/no sugar and wholegrain. I've been reading Bianca's Wholefood Simply blog for ages but last week I splurged and bought her gorgeous cookbook of the same name. It is a treasure trove of favourites from the blog and so beautifully photographed and put together. The boys spent a good half an hour last night before bed flicking through and deciding what they would like me to make.
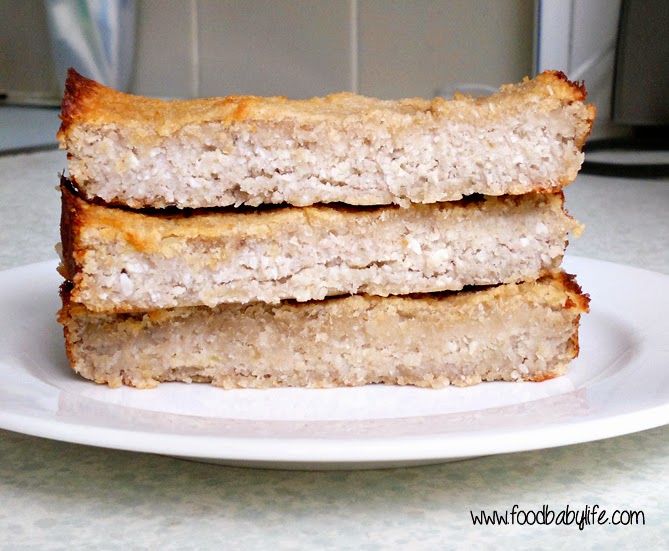
For me these breakfast bars were an immediate winner in terms of both ingredients and being so easy to make. My boys loved them for afternoon tea with a glass of milk and it keeps them going until dinner.
Breakfast Bars
Very slightly adapted from Wholefood Simply
1 cup raw macadamias
1 cup dessicated coconut
2 ripe bananas, mashed
2 ts vanilla extract
pinch salt
Preheat oven to 180 degrees celsius. Line a loaf pan with baking paper and set aside.
If you have a high speed blender or food processor simply throw in all the ingredients and blitz until smooth. If you think your blender would struggle (like mine did), use it to process the nuts then simply mix with the remaining ingredients in a bowl.
Tip the mix into the prepared pan, smooth the top and bake for approx 25 minutes or until it is golden around the edges and skewer comes out clean.
Allow to cool on a wire rack then slice into bars and enjoy!
Tuesday, October 8, 2013
Date and Cashew Power Balls
It's baby month! Hard to believe but we are on the home stretch now with bub due in just a matter of weeks. So I thought I would dedicate this month to some recipes I've found that are perfect for pregnancy, labour and breastfeeding.
To kick things off, have you heard that eating dates during the last month or so of pregnancy can assist with labour? It's all come from a study in Jordan which you can find here but there seems to be lots of anecdotal evidence online as well.
Now since quitting (most) sugar, dates have been on my avoid list as they are incredibly high in fructose, the highest of any fruit in fact. According to the study you need to eat 6 dates per day to reap the rewards.That's a lot of dates and a LOT of sugar!
So I guess I am hedging my bets on this one. I can't commit to eating that many dates, and in fact if you have gestational diabetes I would steer clear of this completely, but I thought an occasional energy and protein packed snack wouldn't do any harm. I've been grabbing one from the freezer mid-afternoon to stave off the munchies and I'm sure they will be a great energy boost for labour and breastfeeding as well.
Date and Cashew Power Balls
Makes approx 30
2 cups raw cashews
2 cups dried dates
2 tbs raw cacao powder
2 tbs chocolate protein powder
1 ts vanilla extract
1/4 ts salt
2 tbs coconut oil
Place all ingredients except the coconut oil in the food processor and blitz until well combined and rubbly. Add the coconut oil one tablespoon at a time and process until the mixture comes together and clumps. You may find you need more or less coconut oil. Form dessertspoonfuls of mix into balls. Store in the fridge or freezer.
* This post is for your information only and does not represent medical advice!
Monday, June 24, 2013
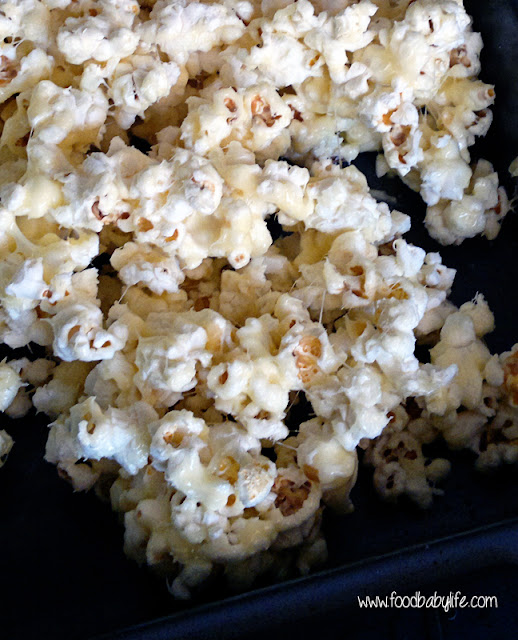
Snow White Popcorn Treats (Secret Recipe Club)
SRC time again! This month I was assigned Life and Kitchen by Lindsay. I love that Lindsay posts so many veggie and meatless meals but after doing something savoury for the past few months of SRC I had already decided to do something sweet this month, and was delighted that she had so many to choose from!
The instant I saw these Snow White Popcorn Treats I was sold. It actually is winter here, but this is as close as my boys will get to snow!
We make popcorn a few times a week using our air popper. I like mine with a little melted butter and sea salt but the kids are totally happy having it plain. But let me tell you they were very excited about their special sticky popcorn!
The recipe called for 1 large or 2 small bags of popcorn but I have no idea what size that would actually be. I just did the usual 1/4 cup we always do and hoped for the best. It was pretty much spot on.
So how did it taste? Totally amazing as you would expect! I did find it VERY sweet though and added extra salt to mine (love that sweet and salty contrast). This would be perfect bagged up and given as gifts at Christmas and I will be doing just that this year.
Thanks for a great recipe Lindsay!
Snow White Popcorn Treats
From Life and Kitchen
1/4 cup popping corn
20 white marshmallows
2 tbs butter
1/4 cup white chocolate
sea salt
Pop the corn and spread it out on a lightly greased baking tray, making sure to remove any unpopped kernals.
In a medium pan over lowish heat gently melt the butter and the marshmallows, stirring constantly. Once they are completely melted and liquidy, add in the white chocolate and stir until smooth.
Quickly pour the mixture over the popcorn using a silicone spatula to toss it all together, coating as much of the popcorn as you can.
Sprinkle generously with sea salt and leave to set for about 10 minutes before devouring.

Monday, October 15, 2012
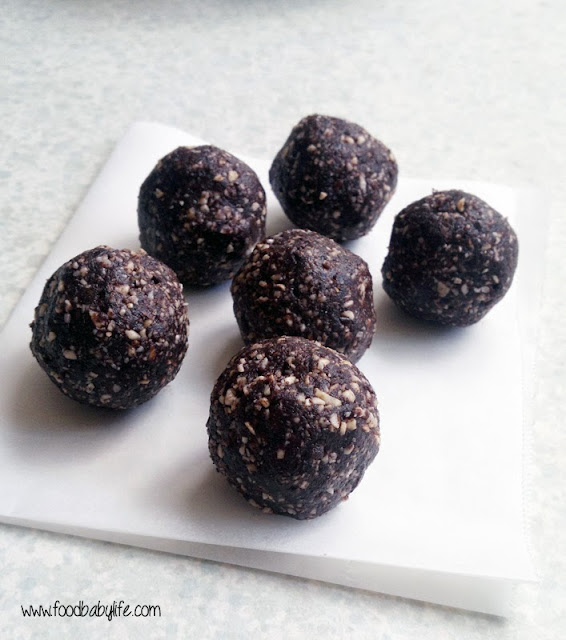
Cocoa, Cranberry and Almond Balls
After completing my 3 day juice cleanse I was on the lookout for some snacks that were in line with a detox, that is, no wheat, dairy or refined sugar. What I found online was a veritable treasure trove of vegan treats. Call them truffles, bliss bombs or whatever you like, they taste amazing and are a brilliant portable snack.
This is my version simply based on what I happened to have in the pantry, but the possibilities are endless!
Cocoa, Cranberry and Almond Balls
Makes approx 20
2 cups raw almonds
1/2 cup dried cranberries
1 tbs cocoa
1 tbs rice malt syrup
1/2 cup dessicated coconut for rolling (optional)
Place the almonds in the bowl of your food processor and blitz until they form chunky crumbs. Add the cranberries, cocoa and rice malt syrup and process until you get a sticky and cohesive mix. You can made the mixture as smooth as you like but I prefer to see the ingredients in the finished product so didn't over-process them. Roll into balls, using coconut if you wish. Stored in an airtight container in the fridge they will keep for up to 2 weeks.
The taste test ...
Absolutely delicious! I'm already planning on making these, as well as a few other variations, at Christmas time. They make a great alternative to sugar and saturated fat filled chocolate truffles. Both the boys loved them too which makes for a happy mummy!
This post is linked to Veggie Mama's Meatless Mondays:
Wednesday, December 23, 2009
Spiced Sugared Nuts
 With all the Christmassey fare I've made over the years, I can't believe I've never made nuts. Until now, that is! I saw the recipe for these spiced sugared nuts in the December/January edition of Super Food Ideas magazine and knew they would be perfect as a gift.
They have a crisp, crackly coating of sugar and spices and the chilli adds just enough heat to cut through the sweetness. These nuts are definitely moreish!
Spiced Sugared Nuts
3/4 cup icing sugar
1 teaspoon ground cardamom
1 teaspoon ground cinnamon
1 teaspoon chilli powder
1/2 teaspoon salt
400g assorted, unsalted mixed nuts
1 eggwhite, lightly whisked
Preheat oven to 180 degrees C (350F). Combine the dry ingredients in a bowl. Place the nuts and eggwhite in a large bowl. Stir to combine. Add the spice mixture to the nut mixture and mix well.
Line a large baking tray with baking paper. Spread over the nut mixture in a single layer and bake for 10 minutes or until golden. Remove from oven and cool completely on the tray. Break up any large clusters. Serve immediately or wrap in a cellophane bag tied with ribbon for a lovely Christmas gift.
Makes 4 cups.
Subscribe to:
Posts (Atom)


