Showing posts with label Vegetables. Show all posts

Monday, April 2, 2018

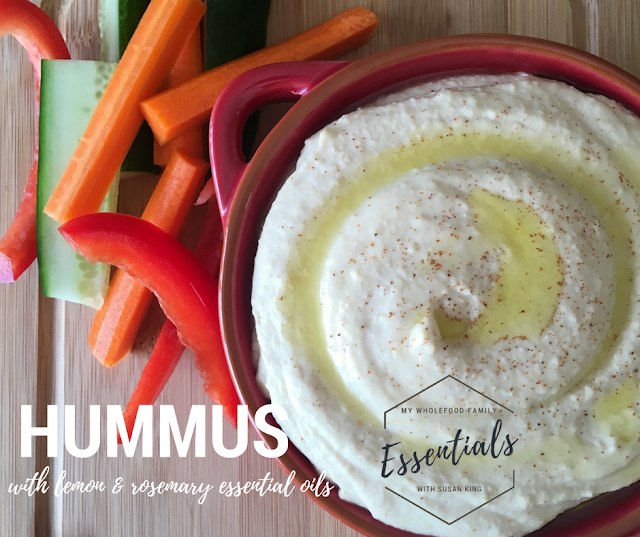
Lemon Rosemary Hummus

hummus with doTERRA lemon and rosemary essential oils - www.mywholefoodfamily.com


Happy Easter everyone!

Was there a chocolate explosion at your place? I didn't have too much chocolate but with a little too much sugar overall I was so thankful for the DigestZen tummy tamer blend. 

In the lead up to the Easter weekend, I tried to cram in as many veggies as possible. I'm not going to stop the kids eating chocolate but we've still got to get the good stuff in too right?

Anything with a dip is a winner with my kids and this lemon and rosemary hummus is so good it entices them to eat some veggies too.

You can definitely make this without a Thermomix and it's up to you whether you fry off the garlic first or just throw everything into the food processor and blitz until smooth. Either way, it's delicious!

Lemon and Rosemary Hummus 

2 garlic cloves
2 tbs extra virgin olive oil
1 tin organic chickpeas, drained and rinsed
2 tbs tahini
Juice 1/2 lemon
2 tbs water
1/2 ts salt
2 drops Lemon essential oil
1 drop Rosemary essential oil

Thermomix instructions: chop the garlic 5 scs / SP 5. Scrape down the sides, add the oil and cook for 5 mins / 100 deg / SP 1 / MC off.

Add all remaining ingredients and process until smooth, about 1 minute / SP 9, scraping down the sides as needed.

Pour into serving bowl, add a drizzle of extra virgin olive oil and a dash of paprika or sumac.


I often serve this hummus with crackers and veggie sticks at my essential oil workshops, along with the bliss balls as I know not everyone has a sweet tooth.

Enjoy! xx


Thursday, February 18, 2016

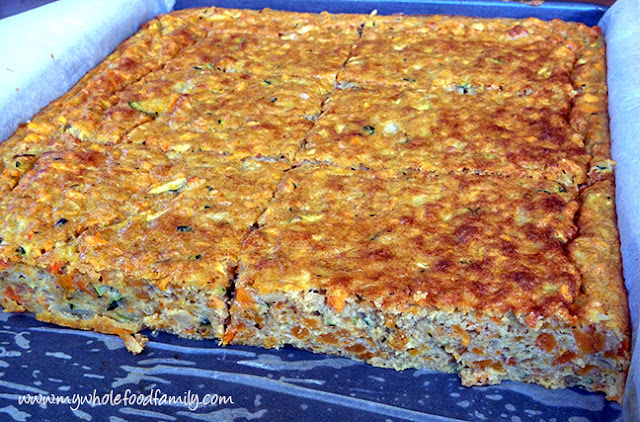
Curried Veggie Slice

Curried vegetable slice www.mywholefoodfamily.com

A few weeks ago we realised our fridge was suddenly not cold anymore so I baked up a storm, trying to use up everything that I could before it went bad. This was one of the results and it was absolutely delicious!

It's basically my take on a classic zucchini slice. Unfortunately not one of my children will eat zucchini slice, something I've found incredibly frustrating as it's such an easy meal and can be served hot for dinner or cold in lunchboxes.

I did have a small win with this recipe though, as after leaving out the bacon, swapping some of the veggies and adding some curry powder I called it a Curried Veggie Slice and my 6 year old loved it! Go figure.

I ate some for lunch straight away and froze the rest in single serves. It's been brilliant for my lunch on study days when I need something quick and filling.

Have you had any luck changing the name of something to get your kids to like it?

Curried Veggie Slice

1 onion, finely chopped
1 clove garlic, crushed
450g grated vegetables (I used sweet potato, carrot and zucchini*)
6 eggs
50g extra virgin olive oil
100g wholemeal spelt flour (or rice flour to be gluten free)
1 ts baking powder
1 tbs veggie stock paste
1 ts curry powder
1 tbs nutritional yeast flakes (or a handful of grated cheese if not dairy free)

Grease and line a 20 x 30cm slice pan with baking paper and set aside.

Preheat oven to 180 degrees C / 160 degrees fan-forced.

In a small bowl beat the eggs, oil, stock paste, curry powder and nutritional yeast until well combined. Place all other ingredients into a large bowl. Pour the egg mixture over the top  and mix well.

Pour the mixture into the prepared pan and bake for approximately 30 minutes or until golden brown and just set.

Leave to cool for at least 15 minutes before serving or refrigerate until needed. Great for lunchboxes.

*make sure you squeeze out the excess liquid from the zucchini before adding it otherwise your mixture will be very wet and the slice won't bake properly.

Monday, June 15, 2015

Vegie-loaded Spaghetti Bologanise


I can't believe that in 7 years blogging I've never even considered posting my spaghetti bolognaise recipe before. I mean everyone and their mum has the best recipe out there, can you really improve on perfection? I changed my mind though as there has been a theme in my baking and cooking lately of surprise ingredients and hidden veggies and thought it might be interesting to others.

I just recently spilled the beans to my cauliflower-hating husband that he's been happily chowing down on cauliflower rice without even noticing! I did feel a little guilty about that but honestly if he enjoyed it then most kids will. But that's a recipe for another day.

The basic secret to my bolognaise sauce is pureeing a whole heap of veggies until they are very fine and cooking it very slowly for maximum flavour. By fully incorporating the vegetables into the sauce there are no weird textures or bits for the kids to pick. out. It is all just tomato saucy goodness!

To be honest this is easiest in the Thermomix as it chops, cooks and then purees all in the same pot however a food processor and stick blender will do the job as well.

I always make a big batch. The recipe below makes 2 full dinners plus leftovers for our family of 5 easily. We always use half on the night is made and freeze the rest for later. One will be spaghetti bologanise and then the next will be lasagne.

The rest of the family loves spaghetti but I will often have my bolognaise sauce on a pile of roasted pumpkin and greens. Makes my tummy happier and I get even more veggies in one meal which is a good thing.

If you have fussy kids (or husbands!) give this one a go :)

My Veggie-loaded Spaghetti Bolognaise

1 onion
3 cloves garlic
2 carrots
2 stalks celery
2 zucchinis
2 red capsicums
1-2 cups greens (kale, spinach, broccoli stems etc)
1kg beef mince (or a beef/pork/veal blend)
1 x 750ml jar tomato passata
2 tbs olive oil
a big handful of fresh herbs (basil/oregano/parsley) roughly chopped or 1tbs dried Italian herb mix
1 heaped tbs homemade veggie stock paste
salt and pepper to taste

-------------------------------

TMX - place the onion, garlic, carrots, celery and capsicum into the bowl and chop for 10 seconds / SP 5-8, using the spatula to stir if needed. Add the oil, herbs, stock paste and passata and cook for 20 minutes / 100 degrees / SP 2. Scrap down the sides and puree for 1 minute / SP 5-9. Check for seasoning. While the sauce is cooking, brown the mince in a large pan. When the sauce is done either add it to the pan and simmer together for at least 30 minutes, or place the mince and sauce plus an extra jar of passata into the slow cooker and cook on low for 4-5 hours.

-------------------------------

Using a food processor or by hand, grate the carrots, celery, zucchini and capsicums and then set aside.

Place a large pot over medium heat and add 1 tbs oil. Brown the mince and then remove it from the pan, draining the fat if you wish (I don't bother).

Add the remaining 1 tbs oil along with the chopped onion and garlic and saute until translucent.

Add the grated veggies, passata, stock and herbs and simmer for around 30 minutes, until the vegetables are cooked and it smells amazing.

Using a stick blender or food processor, blitz the sauce until it is completely smooth.

Return to the pot, add the browned mince, give it a good stir together and simmer for as long as you can (I usually do this step in the crockpot and allow it to cook on low for 4-6 hours) but even an hour would be good. Check for seasoning.

Serve with pasta or veggie noodles.

Makes LOTS.

Monday, May 18, 2015

Sweet Potato, Bacon and Egg Bake (Dairy Free)

Sweet Potato Bacon and Egg Bake © www.foodbabylife.com

We go through lots of eggs in this house, at least 2-3 dozen or more if I'm doing lots of baking. We love them boiled, scrambled and fried. Turned into omelettes, quiches, custard and french toast.

A quick flick through an old Woman's Weekly cookbook called Cheap & Cheerful and I came across a Kumara, Bacon and Egg Bake. We had everything on hand it was such an easy and delicious dinner! Itwas somewhere between a quiche and a frittata and would work really well if you happened to have some leftover steamed veggies in the fridge already. I used sweet potato and regular potatoes but really you could use anything you have.

We had this for dinner but I think it would be a perfect brunch dish, especially as it could be prepared ahead of time and then popped in the oven at the last minute.

Sweet Potato, Bacon and Egg Bake
Adapted from Cheap & Cheerful (Australian Woman's Weekly, ACP Books, p50-51)

1 large sweet potato (about 500g)
2 large potaotes (about 500g)
5 bacon rashers (about 350g)
8 eggs
1/4 cup milk (I used rice milk)
1 ts ground cumin
2 tbs nutritional yeast

Chop the sweet potatoes and potatoes into a 2-3cm dice and steam until just tender and then set aside to cool.

Preheat the oven to 180 degrees / 160 degrees fan-forced. Grease a baking dish ( mine was 20 x 26 cm) with olive oil.

Roughly chop the bacon and fry it in a pan over medium heat until just starting to crisp up. Sprinkle over the cumin and toss to combine. Spread the potatoes over the base of the baking dish and scatter the bacon over the top.

Whisk together the eggs, milk and nutritional yeast in a medium bowl and then pour over the potatoes and bacon. Bake for 30 minutes. Serve warm or hot with a green salad.


Wednesday, May 13, 2015

Sunshine Soup (aka Carrot, Pumpkin and Sweet Potato Soup)

Sunshine Soup (Carrot, Pumpkin and Sweet Potato Soup) © www.foodbabylife.com

We've been hit with numerous bouts of colds recently and seemingly permanent runny noses so I've been looking for lots of nutrient rich foods to boost the kids immune systems - fresh juices made on carrots, celery, beetroot, spinach, orange and ginger in the morning and warming drinks with lemon and raw honey in the afternoon when the coughs and sniffles come back.

And now that it seems like Winter is finally on the way (we've dropped into single digits overnight in the last few days) it's soup time!!!

I don't tend to follow recipes for soup, I usually just throw in whatever veggies we have on hand, add some herbs and stock and call it a day. This soup, which my boys called Sunshine Soup because of its gorgeous sunny colour, was the perfect tonic for my big boy who was home sick from school yesterday. As usual I thought I made plenty but it disappeared in record time and I will be making another batch today!

I did this in the Thermomix but you can easily adapt it and I have included alternative directions below.

We all loved this soup. My 18 month old ate more than 1 1/2 cups and wanted more but there wasn't any left!


Sunshine Soup (Carrot, Pumpkin and Sweet Potato)

2 large carrots, roughly chopped
1 large sweet potato, roughly chopped
1 big wedge of pumpkin, roughly chopped
3 cloves garlic
2cm piece ginger
2cm piece fresh turmeric OR 1ts dried turmeric
2 1/2 cups water or stock
1 ts vegetable stock paste (only if using water)
1 heaped tbs solid coconut oil
sea salt and pepper to taste

TMX - place the ginger, garlic and fresh turmeric (if using) into the bowl and chop 3 secs / SP 7. Add the coconut oil and dried turmeric (if using) and saute 2 mins / Varoma / SP 1. Add the carrot, sweet potato and chop 15 secs / SP 7. Scrape down the sides of the bowl, add the stock or water and cook 20 mins / 100 degrees / SP 1. Blend 45 secs / sp8, gradually increasing from SP 1 to SP 8. Add sea salt and pepper to taste.

If not using a Thermomix, place all ingredients except the water/stock and oil into a food processor and process until finely chopped. Pour into a medium saucepan, add the oil and water or stock. Bring to the boil then simmer for 20 minutes or until veggies are tender. Using a stick blender, process the soup until smooth.

Serves 4.

Friday, November 28, 2014

Sweet Potato Pancakes


While I am a very keen meal-planner, I tend not to plan anything much for Friday and Saturday nights. Sometimes we have leftovers and sometimes I just try to use up whatever odds and ends are left in the fridge before we do the grocery shopping on the weekend. We also often have breakfast for dinner (aka dinner) with pancakes, waffles, bacon and eggs and the like.

When we happened to have a large sweet potato that was fast approaching it's use-by, I saw it as the perfect opportunity to try out these sweet potato pancakes that I found on Weelicious a few months ago.

They are a little more time consuming than regular pancakes in that you need to steam and puree the sweet potato first but if you happened to have leftover vegetables from dinner that would make it really easy.

I was amazed at how much my kids loved these. Even my notoriously picky Mr 4 devoured them - in fact he ate 7! The recipe made 16 and I was expecting my husband and I to be able to have some but nope, my 3 boys gobbled up all 16 in record time.

If you don't have sweet potato then pumpkin, carrot or swede would also work brilliantly.

The pancakes have a very soft texture, to the point  you might be wondering if they are actually cooked. They are! Check out the original post and all the comments for more info on that.

Easy Sweet Potato Pancakes
Adapted from Weelicious

1 cup spelt flour
3 teaspoons baking powder
1 teaspoon ground cinnamon
1/4 teaspoon ground nutmeg
1/2 teaspoon salt
1 large egg
1/2 cup coconut milk
3/4 cup rice milk
1 tablespoon rice malt syrup
1 tablespoon coconut oil
1 cup sweet potato puree

Place the flour, baking powder, cinnamon, nutmeg and salt in a large bowl and whisk to combine.

In a separate bowl, whisk together the remaining ingredients until smooth

Gradually add the dry ingredients to the wet ingredients and stir until just combined. Don’t overmix.

Heat a large pan over medium heat and add a little butter or coconut oil.

Pour large spoonfuls of the mixture into the pan, making as many pancakes as will fit, and cook for 2-3 minutes before flipping and cooking for a further minute or so until cooked through and golden brown.

Makes 16 pancakes. Serve with butter and rice malt syrup.


Monday, April 28, 2014

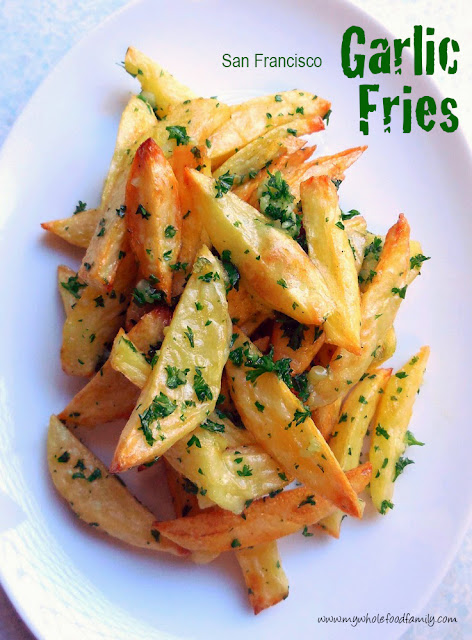
San Francisco Garlic Fries (Secret Recipe Club)

San Francisco Garlic Fries homemade by www.mywholefoodfamily.com

Another month has flown by and it's Secret Recipe Club time again!

This month I was assigned Melissa's blog Fried Ice and Donut Holes. I really love the story behind her blog's name that her Grandpa used to tell them all to behave or they'd be having fried ice and donut holes (aka nothing) for dinner.

Stories about grandpas are making me a little teary at the moment as we got some sad news yesterday that my Grandad passed away. He was 91, married for more than 60 years to my Grandma (who passed away a few years ago) and an all-round great character. Such a great sense of humour, easy way with people and so successful in everything he put his mind to. He will be missed.

Moving on to this month's recipe, I had a great time perusing Melissa's blog and found some real gems including her No-Bake Energy Bites and Buffalo Chicken Shepherd's Pie. But as soon as I saw the fries they were calling my name.

We're still on a bit of a health kick and tend not to buy takeaway anymore BUT that doesn't mean we can't make our own cheaper and healthier versions at home! And these San Francisco Garlic Fries fit the bill perfectly.

We ate these with some gorgeous pan-fried salmon, avocado and salad on Good Friday and it was an amazing meal. These are hands-down the best fries I've ever made. I kept some plain for Charlie (who's 3 and a very fussy eater) but Oscar loved them with garlic and parsley too.

These are a winner!

San Francisco Garlic Fries
Recipe from Fried Ice and Donut Holes

1 kg potatoes
3 tbs olive oil
4 cloves of garlic, minced
2 tbs fresh parsley, finely chopped
Salt and pepper

Preheat the oven to 230 degrees C / 450 degrees F. Grease 2 baking trays and set aside.

Slice the potatoes into chips and toss in a large bowl with 2 tablespoons of the oil then season them with salt and pepper. Spread the chips in single layers on the prepared baking trays and bake for 30 minutes, or until the fries are tender and lightly browned.

Increase the temperature to 260 / 500 degrees and continue cooking for another 5 minutes or so until the fries are dark brown around the edges.

Meanwhile, whisk the remaining  tablespoon of oil with the garlic and parsley in a large bowl. Add the hot fries and toss to coat. Season to taste with salt and pepper before serving. Try not to eat them all yourself!


Secret Recipe Club


Monday, July 9, 2012

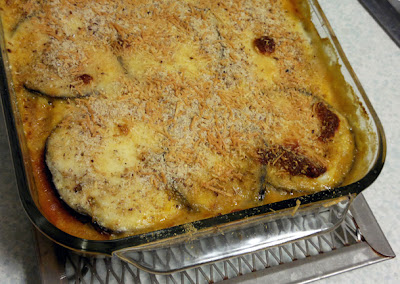
Meatless Monday - Moussaka

© food-baby.blogspot.com All rights reserved

So it's not the most photogenic dish in the world. Trust me it looked worse after it was served up. But this was delicious!!!

I've never made a vegetarian moussaka before and this one was all vegetables, no fake mince, and let me tell you, even my meat-loving husband really loved it! This is a great alternative to lasagne if you are trying to cut back on carbs. Or even if you're not, it's well worth a go and perfect for this time of year.

Moussaka

1 onion, diced
2 carrots, grated
2 zucchinis, grated
2 large eggplants
3 cloves garlic
1 ts mixed dried Italian herbs
1 tin diced tomatoes
1 tin red kidney beans
2 ts chicken style veggie stock powder
2 x 2tbs olive oil

60g butter
1/4 cup plain flour
2 cups milk
125g grated tasty cheese

2 tbs grated parmesan cheese
2 tbs dried breadcrumbs

Preheat the oven to 160 degrees celsisus fan-forced. Lightly grease a lasagne style baking dish and set aside.

To prepare the eggplant - slice crossways into 1cm rounds. Spread the pieces out on 1 or 2 baking trays, sprinkle each piece with salt and leave for around 20 minutes. You should see liquid on the top of each piece. Rinse them well under running water and pat dry.

To make the sauce - heat 1 tbs olive oil in a large pot over medium high heat. Fry off the onion, garlic, carrot and zucchini until they are soft and any liquid has evaporated. Add the herbs, tomatoes, beans and stock powder, along with 1/2 tin of water. Stir well and bring to the boil. Reduce heat to low and simmer while you prepare the rest of the dish. Season to taste.

Once your sauce is simmering you can cook the eggplant. Heat 1 tbs oil in a large non-stick frypan over medium high heat. Fry off the eggplant in batches until it has softened and is golden brown on each side.

To make the white sauce, melt the butter in a medium saucepan. Once melted add the flour and cook for 2 minutes, stirring constantly. Add the milk all in one go and whisk well. Keep stirring until the sauce begins to thicken. Add the cheese, stir to combine and set aside.

To assemble the moussaka, place layers of tomato sauce, eggplant and white sauce into the baking dish finishing with a final layer of white sauce. Sprinkle over the breadcrumbs and Parmesan cheese. Bake for approx 20 minutes or until the cheese is melted and everything is bubbling and golden. Allow to cool for 10 minutes before serving with plenty of crusty bread to soak up the sauce.

Serves 6-8.

Monday, May 21, 2012

Minestrone Soup

We've been having gorgeous Autumn weather lately with cool nights and lovely warm sunny days. This is the perfect time of year for soup and really is there anything more comforting than a big bowl of steaming hot soup served with crusty bread on a cold night? Unfortunately hubby does not share my enthusiasm. Oh well, more for me and the kids!

This is my version of a minestrone soup. You can use absolutely any vegetables you like or happen to have on hand. The more the better. Add some beef stock, kidney beans and tomatoes and you have a hearty and warming winter meal. You can of course easily use vegetable stock for a vegetarian version that is just as yummy.

My Minestrone Soup

2 onions
2 medium carrots
2 stalks celery
2 medium potatoes
2 corn cobs, kernels removed
1 large zucchini
1 parsnip
1 swede
1 large wedge of pumpkin
1 bunch asparagus
1 tin diced tomatoes
1 tin red kidney beans, drained and rinsed
1 tbs Gourmet Garden Chunky Garlic Paste
1 tbs Gourmet Garden Basil Paste
2 ts Gourmet Garden Thyme Paste
2 bay leaves
1 - 1/2 litres beef stock
2 tbs oil

Dice all the fresh vegetables to roughly the same size and set aside. Heat the oil in a very large saucepan over medium-high heat. Add all your vegetables at once and stir to coat in the oil. Cook for about 5 minutes. 

Add the tomatoes, beans, herbs and enough stock to cover the veges. Cover the pot and bring to the boil. Spoon off the froth/scum that has risen to the surface then reduce the heat to low and simmer gently for an hour or so, or until the vegetables are cooked through. 

Add salt and pepper to taste. Remove bay leaves. Serve with crusty bread and some grated Parmesan cheese.

To make it more kid friendly, simply puree the soup and serve with grated cheese and lots of hot buttered toast.


Enjoy! This makes enough to feed an army so be prepared to freeze it in smaller batches to pull out later for an easy dinner.

Monday, April 16, 2012

Meatless Monday - Easy Pumpkin Soup

We've had some lovely cool nights and mornings and to me that signals the beginning of soup weather. However my husband hates both pumpkin AND soup so it's no surprise the boys and I had this for lunch instead of dinner!

This is just about the easiest soup you could possibly make. Just chop, throw it all in a pot for a while then blend and eat. Yum!


Easy Pumpkin Soup
Serves 4

1/2 onion
2 cloves garlic
20g butter (or coconut oil for dairy free)
800g pumpkin (peeled weight), roughly chopped into 3cm pieces
approx 1 litre water or vegetable stock
salt, pepper and freshly grated nutmeg to taste
cream (or coconut cream) to serve

Place a large saucepan over a medium heat and the butter. Roughly chop the onion and garlic and add to the pan when the butter has melted and is starting to foam. Cook for a few minutes until the onion has softened. Add the chopped pumpkin and toss to combine. Add enough water or vegetable stock to cover the pumpkin, place the lid on the pan and bring to the boil.

Once boiling remove the lid and reduce the heat down to a simmer. Cook uncovered for 15-20 minutes until the pumpkin is soft and cooked through. Add salt, pepper and nutmeg to taste. Add a splash of cream.

You can blend the soup using either a stick blender in the saucepan (off the heat) or by pouring the soup into a food processor.

Serve with another swirl of cream, a grating of fresh nutmeg and lots of crusty, buttered bread. Delicious!

Monday, April 2, 2012

Meatless Monday - Chickpeas in Spicy Tomato Sauce


I'm sure I never ate curry when I was 2 but luckily both my kids are big fans!

This was a hit at our place this week and in spite of the name it's basically a curry with a rich tomato hit from both tinned tomatoes and tomato paste. It's also one of those dishes where you will likely have all the ingredients on hand already and can whip this up easily for a mid-week dinner.


Chickpeas in Spicy Tomato Sauce
Recipe Source - Cheap & Cheerful from The Australian Woman's Weekly, p68-69

2 tbs ghee (I used rice bran oil)
2 brown onions, chopped
2 cloves garlic, crushed
20g piece fresh ginger, grated
2 ts cumin seeds (I used ground cumin)
1tbs coriander
1 ts turmeric
1ts cayenne pepper
2 tbs tomato paste
2 x 400g tins diced tomatoes
2 cups water (I used vege stock)
2 x 420g tins chickpeas, drained
1 large sweet potato (500g) cut into a small dice
300g spinach, chopped coarsely
(Salt, pepper and sugar to taste)

Heat ghee in a large pan and add the onion, garlic and ginger. Cook until the onion is soft, stirring often. Add the spices and cook for another minute. Add the tomato paste and cook for 2 minutes.

Next add the sweet potato and cook for another 2 minutes, stirring well to coat in the spice and onion mix.

Add in the tinned tomatoes, chickpeas and water and bring to the boil. Reduce heat to a simmer and cook stirring occasionally for about 30 minutes, or until the sweet potato is cooked through. Just before serving, add in the chopped spinach.

Serve on basmati rice.

I didn't make many changes to the recipe but you can see them marked above. I always use vege stock in place of water in these sorts of dishes, and I added a teaspoon of sugar to counteract the acidity of the tomatoes.

We'll definitely make this again!

Monday, November 16, 2009

Meatless Monday - Ratatouille with Corn Cakes

Today marks what will hopefully become a regular thing - a week's worth of meals already planned and shopped for! In the interest of our waistlines and budget we have decided to make 2 or 3 of those meals vegetarian. Tonight's dinner was this Ratatouille with Corn Cakes. So fresh and packed with flavour, I thought it was delicious! Hubby thought it needed beef. Oh well!

Ratatouille with Corn Cakes
p102 'Almost Vegetarian' by The Australian Woman's Weekly Cookbooks, 1993

2 tbs olive oil
1 medium brown onion, finely sliced
1 clove garlic, crushed (I used 3 cloves - can't have too much garlic!)
3 baby eggplants (180g) sliced thinly
2 medium zucchini, sliced thinly
1 red capsicum, chopped finely
1 green capsicum, chopped finely
150g button mushrooms, halved
2 x 410g tins chopped tomatoes
2 medium tomatoes, chopped finely
1/3 cup fresh basil leaves
1/4 cup parmasan cheese flakes

Heat oil in a large saucepan; cook onions and garlic, stirring, until onion is soft.
Add all other vegetables and cook until tender.
Add both tins of tomatoes and the fresh tomato. Bring to the boil. Reduce the heat and simmer, incovered, for about 20 minutes or until the vegetables are soft and the sauce is thickened slightly. Season to taste with salt and pepper (and sugar, 1-2 ts depending on the acidity of your tomatoes).
Serve ratatouille with corncakes, topped with basil and cheese.

Corncakes:
2/3 cup wholemeal plain flour
1/2 cup white plain flour
130g tin corn kernels, drained
2 x 130g tins creamed corn
2 eggs
3/4 cup (180ml) milk

Sift flours into medium bowl; add combined corn, creamed corn, eggs and milk. Whisk until comined; stand 30 minutes.
Pour 1/4 cup mixture into heated, greased frying pan. Cook until bubbles appear on surface and underneath is browned. Turn; brown other side. Repeat with remaining mixture.

Do you have a favourite vegetarian meal? I'm looking for inspiration so would love to hear your ideas!

Saturday, November 14, 2009

Daring Cooks November - Sushi

The November 2009 Daring Cooks challenge was brought to you by Audax of Audax Artifex and Rose of The Bite Me Kitchen. They chose sushi as the challenge.

Yay, sushi! While I'm not exactly a sushi connoisseur (I'm not a raw fish fan - it's a textural thing) I have made it a number of times at home. This meant I already had the rice, mats, vinegar etc and was ready to get started.

Our challenge this month had 4 elements - first the sushi rice itself, which we then made into 3 different end products. I followed the recipe to the letter and have to say my rice turned out better than it ever has before.

First up - Dragon Roll ...

My dragon roll filled with delicious terriyaki chicken and topped with sliced avocado.

And turned into a dragon. Grrrr!

Yes, I am aware my dragon looks like it was made by a 3 year old. Let's pretend it was!

Next, Spiral Sushi Roll ...

I think I rolled these the wrong way because they look like the regular sushi rolls I buy all the time. Very tasty though, filled with terriyaki chicken, avocado, cucumber, carrot, omelette and sesame seeds.

And last, bite sized Ngiri ...


I made two varieties of these, one with smoked salmon and the other with omelette and nori. Yum!

I won't post the recipes here as they are really long, but you can find a printable PDF version here.

Thanks for a wonderful challenge Audax and Rose!

Tuesday, October 20, 2009

Tuesdays with Dorie: Sweet Potato Biscuits

Erin of (one of my favourite blogs) Prudence Pennywise chose Dorie's Sweet Potato Biscuits this week and they definitely had me intrigued. Basically they are an American version of our Aussie classic, the pumpkin scone. Unfortunately I've never made a scone I've been totally happy with, and over the years I've tried dozens of different recipes!

My other concern was using fresh sweet potato when recipe specified canned. I know Dorie said just use 1 cup of fresh mash, but that didn't seem to equate to 2 x 15 ounce cans. And I was right, because these were dry.

The taste test ...

Golden, flaky and great flavour but like I said, DRY. I knew at the time the mix was too crumbly. It did cross my mind to add some extra moisture but I second guessed myself and we ended up with hockey pucks. Boo. No time for a redo this week but I would love to have another go sometime.

After last month I feel like I've conquered my fear of pastry, maybe now I will work on perfecting the scone!

And now for something totally off topic but my sweet Oscar is 6 months old today!

Happy half birthday baby!

Friday, December 26, 2008

Christmas Cooking

Merry Christmas! I hope everyone had a happy day yesterday. We had a lovely Christmas lunch with N's family/friends and as our only obligation was to bring a dessert it was also very relaxing! As usual there was far too much food despite a sincere effort to cut back this year.

On the menu there were 5 (!) types of meat - chicken, turkey, ham, beef and lamb, a potato bake and 3 types of salads, followed by plum pudding with custard, trifle and cheesecake. Yum! Not to mention the prawns, fruit, nuts, cheeses and other nibblies to start with (and can I just say that prawns and I do not mix well at the moment - the smell was nauseating and I made sure to sit upwind of them!)

On a better note we've had a tradition for the past 6 years of so of having a Christmas Eve dinner. Held at one of 3 homes, it is usually with the people we won't be able to spend Christmas Day with. This year was our turn to host and I'm just so thankful the weather cooperated. It was a lovely 27 degrees on Sunday which made the day in the kitchen much more pleasant considering I've reached the stage in my pregnancy where my back and feet are starting to hurt regularly!

Our Menu:

Entree: Fresh beetroot ravioli with walnuts and goat's cheese
Main: Roast turkey breast with cranberry and macadamia stuffing, greens and spicy plum sauce
Dessert: a Daring Baker's challenge to be posted in a few days!

Apologies for the terrible photos but I completely forgot to get out my camera until we were already sitting down at the table ... twice! So don't let the photos put you off, this was a truly fabulous meal!

Beetroot Ravioli with Walnuts and Goat's Cheese
Recipe from The Cook and the Chef

Yes this really is pasta not raw steak!
Pasta
250g 00 flour
1 egg
1 egg yolk
1 tablespoon olive oil
100g pureed cooked beetroot

Filling
150g goats cheese
50g ricotta
3 tablespoons parmesan, grated
4 cloves garlic, roasted (in foil and squeezed)
2 tablespoons chives, roughly chopped
2 tablespoons fresh parsley
1 tablespoon lemon thyme
salt and pepper to taste

To Serve
lemon zest
20ml walnut oil
50g butter
1 tablespoon chives and lemon thyme, finely chopped
2 tablespoons walnuts, toasted and chopped
cracked pepper and sea salt
parmesan shavings
parsley

Peel the beetroot and boil in a very little water until it is overcooked, then puree. This is one time when you want the beetroot to bleed.

Place the flour in a bowl; add the egg, oil and beetroot pulp. Using a pastry cutter or your hands bring the flour into the egg mixture and gradually combine it until you have a dough. Knead the dough on the work bench for a couple of minutes until it is firm and smooth. Cover with cling film and chill for at least 30 minutes.

Combine the filling ingredients in a food processor and blend until smooth. Season to taste.

Roll out the pasta, using dustings of flour to stop it sticking to itself.

Cut and fill the ravioli, pressing out the edges so that you don’t have double thickness of dough at the edge. Moisten the edge of the ravioli if you need to get a good seal.

Dust off any extra flour, and place in a saucepan of boiling salted water (with a dribble of oil on the surface) until they rise to the top. Drain and douse with evoo.

For the sauce, melt the butter and add the walnut oil and walnuts. Season with herbs and zest and salt and pepper.

Place the ravioli on a plate, drizzle the sauce over the top, and garnish with parsley and parmesan.

Serves 4 as a main (we made double to serve 6 people and still have a big ball of pasta dough in the freezer for another time)

Roast Turkey with Greens, Cranberry and Macadamia Stuffing and Spicy Plum Sauce

We were actually intending to have duck but balked at the price ($10 per breast!) so turkey it was. We choose a 2.6kg turkey breast on the bone, rubbed with Szechuan seasoning and roasted at 200 degrees for just under 2hrs and then rested under foil for 30 minutes. We also made sure to add some chicken stock to the roasting pan for extra moisture and a delicious 'gravy' to pour over the cut meat. The result was one of the juiciest, tastiest turkeys I can ever remember having. Even the leftovers were tender!

We baked the stuffing in a log separately to guarantee the turkey would be cooked through. This is the same stuffing I made for Thanksgiving and you can find the recipe here.

We also served blanched green beans and broccolini drizzled with the remnants of the pasta sauce and extra walnut oil.

The plum sauce was a brilliant find. It would go perfectly with duck (as it was intended to be) but it also elevated a simple roast turkey to something truly amazing.

Spicy Plum Sauce
From Taste.com.au

150ml red wine (we just used some of the plum juice)
2 tbs brandy
1 cinnamon stick
3 cloves
1 star anise
1 orange, juiced
1 tsp Dijon mustard
3 tbs redcurrant jelly
825g can plums, drained, pureed

Place the wine, brandy and spices in a medium saucepan. Bring to boil, then reduce heat to low and simmer for 10 minutes. Add orange juice, then return to boil. Reduce heat to low and simmer for 2-3 minutes. Stir in the mustard, redcurrant jelly and plum puree. Keep warm over low heat until ready to serve (making sure to remove the spices).

I had the best turkey sandwich EVER with these leftovers. Fan-friggin-tastic!!!

I'm already looking forward to next year :-)

Wednesday, September 17, 2008

Beef and Sweet Potato Samosas

It's been ages since we had Indian food. I'm always a little wary of trying new places because I have a major sensitivity to MSG and food dyes, and so many supposedly reputable restaurants cram their food full of artificial rubbish. It drives me crazy!

Ok, rant over.

Making your own Indian food can be a little time consuming but the results can be amazing. We have a Butter Chicken recipe which is out of this world good (I will definitely be posting about it soon!) that requires marinating overnight. This time around I was looking for something quicker but still with great flavours and that would be good for lunch the next day. These Beef and Sweet Potato Samosas fit the bill perfectly!

You can definitely play around with the type and quantity of spices here. I prefer warm, aromatic spices to anything that makes your mouth explode, so this recipe is tailored that way. It also makes a LOT of samosas, so they make wonderful party food.

Beef and Sweet Potato Samosas
A food.baby original

500g beef mince
1 large orange sweet potato, diced finely
1 large onion, diced finely
4 cloves garlic, chopped
1 thumb sized piece of fresh ginger, grated
1tbs mango chutney
2 ts ground coriander
2ts ground cumin
2 ts tumeric
4 ts garam masala
1/4 ts chilli powder
500 ml chicken stock
2 tbs plain flour
7 sheets puff pastry
1 egg, beaten
salt and pepper

Heat a large frypan over medium-high heat and add a tablespoon of ghee or vegetable oil. Once hot, add the onion and fry for a few minutes or until translucent. Add the garlic, ginger and the sweet potato and fry, stirring constantly for around 5 minutes until the sweet potato starts to soften slightly. Remove the mixture from the pan.

Add a little more oil if you need to, then add the beef mince and fry until cooked through, breaking up the lumps as you go. When it is about half cooked, add all the spices and continue to cook, stirring until the beef is done.

Return the vegetable mix to the pan and stir to combine. Sprinkle over the flour and stir well for a few minutes to cook out the raw flour. Pour over the chicken stock. This will deglaze the pan, picking up all the yummy spices and flavour stuck on the bottom. It will look like far too much liquid at this stage. Reduce the heat to low, stir in the chutney, cover and simmer for about 20 minutes.

If a lot of liquid remains, increase the heat and remove the lid. Cook stirring occasionally until the mixture is thick. This is basically like a pie filling and if it is runny your pastry will go soggy.

Once you are happy with the consistency, remove from the heat and allow to cool for at least 15 minutes.

To prepare the samosas, preheat the oven to 220 deg C. Place a sheet of puff pastry on a board and cut into 4 equal squares. Place about a tablespoon of filling into the centre of each square. It is always a bit of trial and error to see how much filling will fit. Using a pastry brush, brush beaten egg over the cut edges. Fold each square into a triangle, pressing down on the edges with a fork to seal in the filling. Place on a lightly greased baking tray. Brush the tops with beaten egg.

Bake for approx 20 minutes or until the pastry is puffed and golden brown.

This amount of filling will make about 30 samosas which is more than most people need. You can freeze the samosas uncooked. Just thaw in the fridge overnight before baking as usual.

Serve with your favourite sauces. We used spicy tomato and yoghurt & garlic. Yummy!

Wednesday, August 27, 2008

Chicken Pie

I love pie. There is something so homey, so comforting, so rustic about a pie. At least the way I make them anyway! They never taste the same twice but you can't go too far wrong whatever filling or flavours you decide upon. Buttery, flaky shortcrust pastry encasing a warm, savoury filling. Yum!

Basic Shortcrust Pastry
Recipe from Modern Classics No1 by Donna Hay, p155

2 cups plain flour
145g (5oz) cold butter
2-3 tbs ice cold water

Blitz the flour and butter together in a food processor until it resembles course breadcrumbs. With the mixer on low, drizzle in enough cold water to form a smooth dough.

Turn out onto a floured board and knead very lightly. Wrap in plastic wrap and refrigerate for 30 minutes. When ready to use, roll out until 3mm thick. This quantity will line up to a 25cm (10in) pie dish.

(I normally need 1 1/2 times this quantity for my pie dish)

Chicken Pie
A Food.Baby original

There really isn't a recipe as such for this. You choose whatever vegetables and herbs you like. The only thing to watch is that you cook the filling until it is thick enough and cool it slightly before using. Here is what I used for this particular pie:

750g chicken thigh fillets, cut into small chunks
6 large field mushrooms, diced
2 large carrots in small dice
1 onion, chopped finely
3 cloves of garlic
2 leeks, quartered and chopped finely
500ml chicken stock
1 tbs plain flour
1 bouqet garni
corn flour to thicken

Heat some oil in a heavy based pan over medium-high heat. Toss the chicken pieces with the flour and then cook until they are browned on all sides. Remove and place the pan back on the heat. Add a little more oil if needed and fry the onion, garlic, carrots and leeks until they are starting to soften.

Return the chicken to the pan with the vegetables. Add the bouquet garni and any other herbs you like. Pour in the stock. Bring to the boil then reduce heat to low and simmer for around 30 minutes.

After 30 minutes, add the chopped mushrooms and stir well. Simmer for another 15 minutes. Season with salt and pepper to taste. If the mixture is too liquid at this stage, add a few teaspoons of cornflour mixed with a small amount of water. When you are happy with the taste and consistency, remove from the heat and allow to cool slightly.

Preheat the oven to 200 deg C. Roll out 1/2 the pastry to line the base of your pie dish. Pour in the cooled filling then roll out the other half of the pastry to cover. Pinch the edges to seal and make a few slits in the middle to allow some steam to escape. Brush lightly with beaten egg.

Bake for approx 45 minutes or until the pie is puffed, bubbling and golden. Cool for 10 minutes before serving with a green salad or vegetables.

Serves 6.

Saturday, August 9, 2008

Fettuccine with Mushrooms and Camembert

I love cheese. In fact I can't think of anything that can't be improved by the addition of cheese in one form or another! This pasta dish is incredibly rich and flavoursome, and yes, filled with cheese. It was absolutely divine!

Fettuccine with Mushrooms and Camembert
A Food.Baby original

500g fettuccine (we used curly fettucini which I think captures the sauce better - and for some reason it tastes better too!)
500g mushrooms of any variety you like, chopped
1 red onion, sliced finely
2 cloves garlic, crushed
500ml vegetable stock
3 or 4 sprigs of fresh thyme
1 x 250g pack of camembert, as ripe as possible, chopped into small chunks
Olive oil

Cook the fettuccine according to packet instructions. Meanwhile, prepare the sauce.

Add a glug of olive oil to a saucepan over medium heat. Add the onions, garlic and thyme leaves and fry until fragrant and the onion is translucent. Add the mushrooms and toss to combine. Cook, stirring occasionally until the mushrooms collapse. Add the stock a little at a time. It will deglaze the pan and form the bulk of the sauce.

Reduce heat to medium-low and add the camembert. Stir until the camembert has melted. It will thicken the stock slightly.

Once the pasta is cooked, drain and return to the cooking pot. Add the liquid from the sauce mixture, either dishing it out with a large spoon or straining the mixture into the pot. Toss the pasta with the sauce and divide into serving bowls. Top each serve with a generous spoonful of the mushroom mix. Scatter with thyme leaves.

Serves 6.

Thursday, August 7, 2008

French Onion Soup


I'm becoming a soup-aholic! I could happily eat it every night of the week but I think the other members of this household might have a problem with that!

Apart from the fact that I love anything and everything French, to me this soup is pure comfort food. It's dark, rich and warming and served with cheese ... what could be better? :)

French Onion Soup
Recipe from Taste.com.au

80g butter
4 large brown onions, sliced crossways into rings (I used 5 onions)
2 garlic cloves, crushed
2 tsp plain flour (I used 3 tsp)
1.5L (6 cups) beef stock
125ml (1/2 cup) dry red wine (I left this out and used all beef stock)
1 bouquet garni sachet
Salt & freshly ground black pepper
1 x 30cm baguette (French stick), cut crossways into 12 slices (I used the remnants of a ciabatta from the freezer which toasted up beautifully)
55g (1 cup) finely shredded gruyere cheese

Heat the butter in a large saucepan over medium heat. Add the onions and garlic, and cook, stirring, for 10 minutes or until the onions are soft and light golden. Add the flour and cook, stirring, for 1 minute or until flour bubbles and comes away from the side of the pan. Add the stock, wine and bouquet garni and bring to the boil

Reduce heat to low and simmer, uncovered, stirring occasionally, for 30 minutes or until soup thickens slightly. Remove bouquet garni. Taste and season with salt and pepper.

Preheat grill on high. Place baguette slices on a baking tray. Place under preheated grill and cook for 2 minutes each side or until light golden. Remove from grill and sprinkle each slice evenly with the cheese. Place under grill and cook for a further 2 minutes or until the cheese melts.

To serve, ladle soup into serving bowls and top with the bread.

Serves 4-6.

Thursday, July 31, 2008

Kumara, Chilli and Coriander Soup

This is one recipe I should have blogged about immediately ... because now I've had it for 2 meals and i'm sick of it! It was delicious though and the colour is amazing. What's also amazing is that i've managed to get my husband to eat soup twice in a couple of weeks!

Kumara, Chilli and Coriander Soup
Recipe from Simple Meals by the Australian Women's Weekly Cookbooks, 2002, p12

100g fresh coriander, roots attached
1 tbs olive oil
1 onion, chopped roughly
2 cloves of garlic, minced
1 1/2 tbs sambal oelek (asian chilli paste)
1.2kg kumara, chopped roughly
1 litre chicken stock
2 cups water
2/3 cup coconut milk

Wash and dry the coriander. Finely chop enough of the roots to make 2 teaspoons and enough leaves to make a loosely packed 1/4 cup (this is what the recipe said, I just did the whole bunch because I love coriander!).

Heat the oil in a large pot then add the onion, garlic, coriander and sambal oelek. Cook for a few minutes until the onion softens.

Add the kumara and toss to combine with other ingredients. Cover with the stock and water and bring to the boil. Reduce heat and simmer, uncovered, for about 20 minutes or until the kumara is soft.

Using a stab mixer, blend the soup in the pot or transfer to a food processor in batches. Simmer again for a few minutes until the soup thickens slightly then add the coconut milk and stir through.

Divide into serving bowls and top with a drizzle of coconut milk and scattering of coriander leaves.

Serves 4-6.

You won't need bread with this soup as it is incredibly hearty and perfect for this time of year.

PS. Because I am a weather nut (sad but true) I can tell you that Brisbane had its coldest morning of the year today - just 3.3 deg C. Lovely!
Related Posts Plugin for WordPress, Blogger...