We've had one of those weeks around here. Those weeks where things are a bit crappy and the house is a mess and nothing gets done. I managed to hurt my back last weekend (standing still I might add) and literally couldn't leave the house for the ENTIRE WEEK. Things are finally starting to improve and get back to normal which means I can get back to normal baking and blogging.
Anyway, on this week's Baking with Julia recipe!
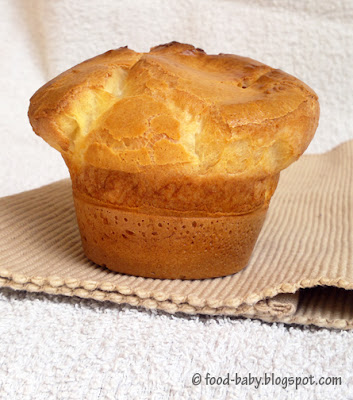
My first thought when I read this week's pick was 'what on earth is a popover?' Some research showed it seems to be a cross between a profiterole and a Yorkshire pudding. Very interesting!
I made these yesterday afternoon and was very happy that worked and puffed up like they were supposed to. Even after reading all the suggestions though I still wasn't really sure how to serve them. Or even what meal they are supposed to be. I ate one warm from the oven and enjoyed it, if only for the novelty of never having eaten one before.
Hubby came home, had one look and promptly declared they needed custard. Guess he thought they were like profiteroles too. So being the awesome man he is, he made his own chocolate custard and had one for dessert!
Sometime soon I'll have to work on a perfect chocolate custard recipe. Will keep you posted!
Our hosts this week are Paula from Vintage Kitchen Notes and Amy of Bake with Amy. They will have the recipe up today so make sure you check it out!
Tuesday, August 21, 2012
Thursday, August 9, 2012
No-Bake Chocolate Chip Cheesecake
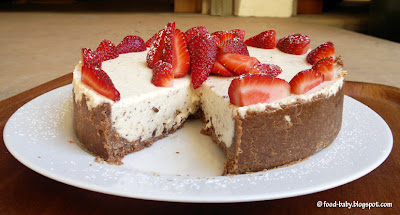
I've made a lot of cheesecakes over the years like these here, here and here. But I can't even remember the last time I made a no-bake one! So in honour of my dad coming to dinner I decided to make this no-bake Chocolate Chip Cheesecake.
The taste test ...
Wow, seriously good! The filling is smooth and light and the natural yoghurt gives it a lovely tangy creaminess. I actually chopped the chocolate rather than grated it so I had a few bigger chunks of chocolate that sank to the bottom. Not that there's anything wrong with that! Served with fresh strawberries this was the perfect make-ahead dessert and a great alternative when you don't have time for a baked cheesecake. Two thumbs up!!!
No-Bake Chocolate Chip Cheesecake
Recipe by me
250g chocolate chip biscuits
100g melted butter
250g cream cheese, at room temperature
1 x 400g tin condensed milk
300ml natural yoghurt
1 ts vanilla extract
100g dark chocolate, grated
3 ts gelatine
1/4 cup hot water
Line the base of an 8 inch springform pan with baking paper and set aside. Using a food processor, crush the biscuits into a fine crumb. Add the melted butter and blitz until well combined. Pour the crumbs into the prepare tin and smooth over the base and about halfway up the sides. Place in the fridge to set.
Sprinkle the gelatine over the hot water and set aside for a few minutes then stir to make sure it is completely disolved.
Wipe out the food processor bowl then add the cream cheese and whiz until smooth. Add the condensed milk, yoghurt and vanilla and mix well. Add the cooled gelatine mixture and whiz for 1 minute until thoroughly combined. Tip in the grated chocolate and blitz to mix through.
Pour over the prepared base then refrigerate until set, a few hours at least or overnight. Serve with sliced strawberries and a dusting of icing sugar. Serves 8-10.
Tuesday, August 7, 2012
Baking with Julia - Berry Galette
After making a delicious (but boring) apple pie last time, there was no way I was passing on berries again this week! I did have to resort to frozen berries but honestly they worked just fine.
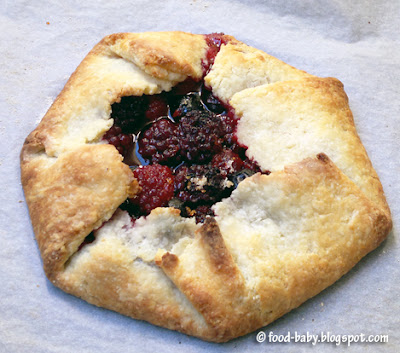
This is one of those cases where the end result is far greater than the sum of it's parts. The galette is a simple, buttery pastry folded around mixed berries. That's it.
I made only slight changes to the recipe, based on what I had in the pantry. That meant using semolina instead of cornmeal in the pastry. After reading the P & Q this week I decided not to add any water at
all to my pastry. I used 3 heaped tablespoons of natural yoghurt
(instead of sour cream) and the dough came together perfectly. I also added the zest of 1/2 an orange in with the berries and sugar which gave a lovely citrus perfume when it came out of the oven.
The resulting galette was insanely good and seemed far more special than just pastry wrapped around frozen berries!
I was surprised by how small the galette was, and I think next time I would use the full batch of pastry with double the fruit.
Our hosts this week are Lisa of Tomato Thymes in the Kitchen and Andrea of The Kitchen Lioness. They will post the recipe under today's date so make sure you check it out. Like Dorie says, this recipe is a keeper!
Saturday, August 4, 2012
Peanut Butter Cookies
In the midst of a flu-ridden and miserable week the urge for peanut butter cookies struck. These went from bowl to belly in 20 minutes flat...
Peanut Butter Cookies
Makes 24
1 cup natural peanut butter
1 cup brown sugar
1/2 cup rolled oats
1/2 cup wholemeal flour
1/2 ts salt
1 ts vanilla extract
1 egg
Preheat oven to 180 degrees celsius (160 degrees fan-forced). Line 2 trays with baking paper and set aside.
Combine dry ingredients in a large bowl then add the egg, vanilla and peanut butter. Mix well. Roll tablespoons of mixture into balls and place on the prepared trays. Flatten each ball slightly then bake for 10-12 minutes, rotating the trays halfway through.
Remove trays from the oven and allow to cool for at least 5 minutes before turning the cookies out onto a wire rack to cool completely. Devour.
Tuesday, July 31, 2012
TWD BWJ - Pear and Apple Pie
Oh how I envy you all in the midst of summer right now. Not because of the heat, I hate hot weather. Just because of all that glorious summer fruit! There were definitely no blueberries or nectarines to be had around here, fresh or frozen. So I chose to make the most of two fruits which I think are perfect in winter, pears and apples.
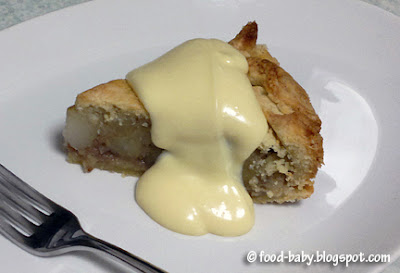
I upped the wintery-ness of my pie by adding the zest of a lemon, a splash of brandy and a generous pinch of allspice to the filling. Absolutely delicious and very warming!
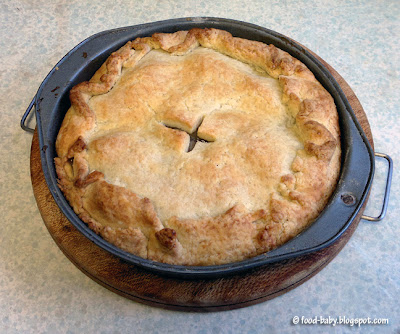
My pie was baked in an 8 inch cake pan and I used 4 pears and 3 large gala apples for the fruit. I also replaced the shortening in the pastry with coconut oil (which is solid at room temperature) which gave a lovely flaky result.
Served with a generous dollop of my best ever custard (which I posted a few weeks ago) this was the quintessential winter dessert.
Monday, July 30, 2012
Meatless Monday - Leek and Cheese Tart with Olive Oil Pastry
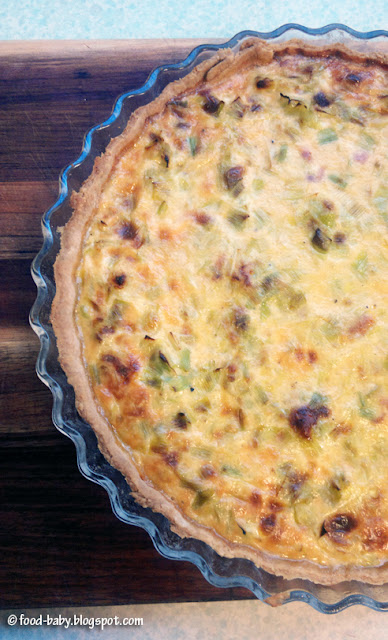
I live in a house full of boys and yet this tart still went down a treat! Perhaps it's because I didn't call it a quiche.
While the filling was smooth and creamy and packed with leek and cheese goodness, it was the pastry that was the real revelation. Having run out of butter (gasp!) I trawled the interwebs for a pastry recipe that used oil instead and came across this beauty. It was my favourite part of this tart and could become my go-to recipe for savoury pastry. Absolutely delicious!
While the filling was smooth and creamy and packed with leek and cheese goodness, it was the pastry that was the real revelation. Having run out of butter (gasp!) I trawled the interwebs for a pastry recipe that used oil instead and came across this beauty. It was my favourite part of this tart and could become my go-to recipe for savoury pastry. Absolutely delicious!
Leek and Cheese Tart
4 large leeks, washed and sliced thinly
1 tbs butter
1 tbs butter
2 cloves garlic, crushed
4 eggs
1 cup (250ml) full cream milk
125g strong cheddar cheese, grated
Olive Oil Pastry
125g plain flour
125g wholemeal flour
1 ts salt
60ml olive oil
100-120ml cold water
Lightly grease a 28cm tart dish (mine is pyrex). Preheat the oven to 200 degrees celsius (180 degrees fan-forced).
To make the pastry, place the flours and salt in a large bowl and whisk to combine. Pour in the oil and stir with a fork. Add the water and continue to stir with a fork until it is just absorbed then start to knead with your hand, until the dough forms a ball and comes away from the sides of the bowl.
Turn the dough out onto a floured surface and roll out to fit a 28-30cm tart pan. Transfer the dough to the pan, trim the edges and place in the fridge for 30 minutes (I actually forgot this step and had no problems).
While the pastry is chilling, make your filling. Melt the butter in a large saucepan over medium heat. Add the leeks and garlic and cook, stirring often for about 15 minutes or until the leeks are softened and creamy. Remove from the heat and allow to cool for 10 minutes or so. In a separate bowl whisk together the eggs and milk along with salt and pepper to taste.
Blind bake the pastry for 10 minutes (I line the pastry shell with baking paper then fill it with rice that I keep just for this purpose) then remove the rice and paper and bake for a further 10-15 minutes or until the edges are golden and the base is totally dry to the touch. Remove and allow to cool for 10 minutes.
To assemble the tart, fill the pastry shell with the cooked leek mixture, sprinkle over the cheese and then pour over the egg mixture. Bake for approximately 25 minutes. The filling should be just set and the edges of the pastry a deep golden brown. Cool for a few minutes before serving with a green salad.
This post is linked to Veggie Mama's Meatless Mondays:

Wednesday, July 25, 2012
Vanilla Mint Tea Cake
I am most definitely a tea girl. I've been through phases of enjoying coffee but I always come back to tea, mostly herbal and green teas lately.
Since T2 recently opened near us we went for a look and came up with some beauties including the Vanilla Mint Tea. It's a blend of, unsurprisingly, vanilla and spearmint and it sounded delicious! We bought quite a few varieties that day though and that one has been sitting in the pantry unopened. We may not feel like drinking it right now, but what could be better that incorporating actual tea into a teacake? So here is my Vanilla Mint Tea Cake ...

Vanilla Mint Tea Cake
Recipe by me
1/2 cup boiling water
2 tbs vanilla mint tea leaves
1 ts vanilla extract
185g butter, at room temperature
1 cup caster suagr
3 eggs
225g self-raising flour
1/4 cup milk
icing sugar, sifted, to serve
Preheat
oven to 170 degrees celsius (150 degrees fan-forced). Lightly grease a 22cm round cake pan and line the base with non-stick paper.
Place the water and tea in a mug and allow to infuse for 10 minutes then strain, discarding the leaves. Pour the milk into the tea and set aside until needed.
Place the butter, sugar and vanilla in the bowl of
an electric mixer and beat until pale and creamy. Add the eggs, one at a
time, beating well after each addition. Mix the flour and milk/tea alternately into the butter mixture, beating until just combined. Use a rubber spatula to gently bring in the last few bits of flour around the bowl.
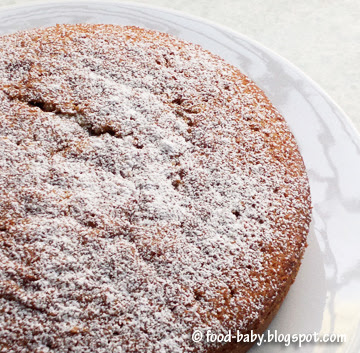
Spoon the mixture into the prepared tin and bake for approximately 45 minutes or until a skewer inserted into the centre comes out clean. Allow to cool in the tin for 5 minutes before turning out onto a wire rack. Once cool, dust with icing sugar and serve with your favourite cup of tea.
The taste test ...
Just wonderful! Both the peppermint and vanilla shine through perfectly in this moist buttery cake, without being overpowering. It doesn't need any adornment other than the dusting of icing sugar. But a dollop of double cream on the side would be lovely, as would a dark chocolate icing if you wanted to really dress it up. I will definitely be making this again.
Monday, July 23, 2012
Meatless Monday - Red Lentil Dhal
You really can't beat a Saturday night curry and this one was fantastic. Actually I'm loving all curries at the moment and could quite honestly eat them every night! Luckily my boys are all as keen as me and this one was
especially well received. My 3 year old gobbled his down in what seemed
like 5 minutes.
My 20 month old was not so keen but that's mainly because
he's developed a fear of his high chair and screams bloody murder every
time we try to put him in it. Mealtimes have not been pleasant for the
last few days and I'm dreading going out for dinner this week because of
it!
The recipe below is for a double batch because I wanted the leftovers for the following night and a serve for hubby's lunch during the week. You could of course halve it for a standard 4 serve meal.
Red Lentil Dhal
Adapted from Taste.com.au
serves 6-8
2 cups red lentils
6cm piece fresh ginger
4 cloves garlic
1 tin diced tomatoes
60g butter
4 bay leaves
1 ts cinnamon
4 ts turmeric
2 ts cumin
1 ts coriander
1 ts garam masala
1/2 ts chilli flakes
1-2 ts salt
4 tbs lemon juice
2 tbs fresh coriander leaves
plain yoghurt, rice or naan bread to serve
Rinse the lentils well under running water and discard any discoloured ones. Place the lentils, ginger, bay leaves and tomatoes in a large saucepan. Cover with 6 cups of water. Bring to the boil then reduce heat to medium and simmer for 10-15 minutes or until lentils are soft. Discard the bay leaves.
While the lentils are simmering, melt the butter in a frypan. Add the onion and fry for 3 minutes. Add the garlic, turmeric, cumin, coriander, cinnamon, garam masala and chilli and cook for another minute or so until the spices and fragrant. Add the lemon juice, mix well and then pour the mixture over the lentils. Increase the heat and boil for a few minutes or until the sauce has thickened, stirring often to prevent it sticking on the bottom. Remove from the heat and stir in the coriander.
Top with a dollop of plain yoghurt and serve with brown rice or naan bread.
Thursday, July 19, 2012
Slow Cooked Baked Beans
I'm loving my slow cooker at the moment. It's just so handy to get everything prepped in the morning so that come 5pm when the kids are ratty dinner's already made. And of course you get delicious cooking smells wafting through the house all day making it feel warm and cosy even when it's not.
The last time I made beans in the slow cooker we we having people over for brunch. I set them to go before I went to bed thinking how much time we would save in the morning if they were already done. What I didn't count on was being sick with gastro that night and honestly the smell of those beans while I was lying in bed trying not to throw up was almost enough to turn me off baked beans for life! Luckily I got over that.
The only problem this time was that some of the beans were still crunchy! After soaking overnight then 8 hours of cooking, how is that even possible? Anyway, next time I would soak and then par-cook the beans to guarantee tenderness. I have noted this in the recipe below.
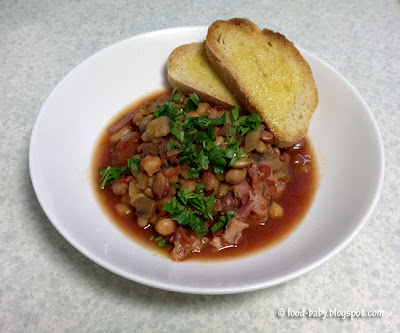
The verdict? Packed with flavour and absolutely delicious. The perfect winter dinner or anytime brunch. We will definitely be making these again!
Slow Cooker Baked Beans
1 ham hock
375g dried four bean mix (or just cannelini beans)
500g mushrooms
2 onions
2 cloves garlic, crushed
3 tbs worcestershire sauce
2 tbs brown sugar
2 tins tomatoes
The night before, place the dried beans in a large bowl and cover with cold water.
The next morning, drain the beans and rinse them well. Place them in a large saucepan and cover with water. Cover the pot and bring to the boil. Boil uncovered for 15-20 minutes, scooping off any scum that rises to the surface. Drain and set aside.
Finely dice the onions and chop the mushrooms into pieces roughly the same size as the beans. Place the onions, mushrooms and all remaining ingredients into the slow cooker along with 1 cup water. Stir to combine. Place the ham hock into the middle and squish it down so it's about half covered with the bean mix. Cover and turn the slow cooker on to auto. Leave for 8 hours.
Serve with toast and a little fresh parsley. Serves 8-10.
Tuesday, July 17, 2012
TWD BWJ - Semolina Bread
I really love making bread. I love the way the dough feels, the aroma when it bakes and of course nothing beats eating it warm from the oven. Making this bread was also a reminder that I need to read recipes properly because I didn't realise until I started that each step took 2 hours. Oops!
This bread was new to me because it contains semolina which I've never used before. The result was a slightly dense but incredibly flavourful loaf. I didn't love it straight from the oven and thought it was a little too salty. But it was wonderful toasted the next day and I think it would make fabulous garlic bread.
I have no idea if I slashed the top the way I was supposed to. Was it just me or were the directions a little confusing?
I have no idea if I slashed the top the way I was supposed to. Was it just me or were the directions a little confusing?
We ate most of the loaf toasted with some slow-cooked baked beans (recipe to come!) and it was the perfect accompaniment to soak up all the sauce.
Monday, July 16, 2012
Meatless Monday - Peanut Sesame Noodles
I just realised most of my vegetarian meals contain chickpeas. We go through a lot of chickpeas in this house! So it's definitely time to try something different.
I've always loved satay but hubby hasn't been keen. So when he mentioned he'd like to try one I jumped at the chance to try this recipe from Smitten Kitchen that I've had my eye on for ages!
The original recipe called for plain tofu but that gives me the heebies so I used a marinated Thai style tofu instead. Sweet chilli tofu nuggets would also be a great choice. The fresh vegetables were lovely and crunchy and honestly, I could have just eaten them with a bowl of the sauce to dip into and been a very happy girl.
Fresh, creamy, crunchy and absolutely delicious!!!
Peanut Sesame Noodles
Adapted from Smitten Kitchen
1/2 cup smooth peanut butter
1/4 cup soy sauce
1/3 cup boiling water
2 cloves garlic, crushed
1 tbs ginger, grated
1/2 ts chilli paste
2 ts honey
1 tbs sesame oil
1 green capsicum
1 medium carrot
1 cup firm tofu, plain or marinated
2 packs hokien noodles
3 tbs toasted sesame seeds
1 lime
Cook the noodles in salted boiling water for 2-3 minutes then drain, reserving about 1 cup of the cooking water. Return the noodles to the pot and add the sauce and chopped veges. Stir well to combine and add a little of the reserved cooking water if it looks a bit gluggy (I needed about 1/2 cup).
Serve topped with sesame seeds and a squeeze of lime.
Serves 4 as a main or 6-8 as an entree.
Subscribe to:
Posts (Atom)

