Tuesday, October 16, 2012

Baking with Julia - Bagels


Bagels © food-baby.blogspot.com All rights reserved

Bagels have been on my must-bake list for years so I was really happy they were picked for this week!

The recipe seemed long and a little daunting but there was nothing particularly complicated about it, just a lot of steps and long wait. After reading the P & Q I decided to split the batch and do each half a little differently.

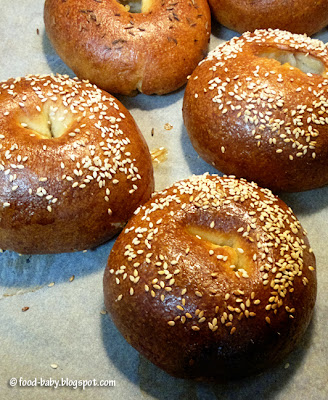
For my first batch I shaped the bagels after the first rise and then rested them in the fridge for 4 hours. The instructions for shaping the bagels were a little vague. I really didn't get the whole 'draw up and pinch the dough' thing (hope it wasn't just me) so I made up my own technique. Which could be why I ended up with this:

Bagels © food-baby.blogspot.com All rights reserved
Ahem.

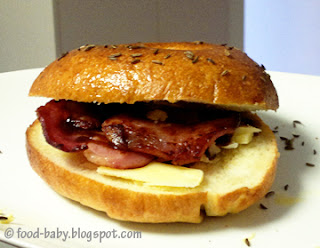
So they look more like rolls than bagels. The holes almost completely disappeared during baking (clearly they weren't big enough to start with) and the end result was a little doughy. I'm guessing because there was no air circulating through the middle. They tasted pretty good though and we had bacon and egg bagels for dinner. Yum!

Bacon and Egg Bagel © food-baby.blogspot.com All rights reserved

I made the second batch the day after, so the dough had a full 24 hours in the fridge before I shaped it. It seemed easier to shape this time and I made sure the holes were the right size before boiling them. Both times I used sesame seeds and caraway seeds on top which we loved. I dropped the oven temp by 10 degrees this time but they still got a little darker than I would have liked.

But look! I made bagels!

Bagel © food-baby.blogspot.com All rights reserved

My only negative is that I found these really salty. Like REALLY salty to the point of having to guzzle water for a few hours after eating. So if we make these again I would definitely want to reduce the salt. Anyone know if that amount of salt is important for the texture etc?

I'm also keen to try a sweet version with cinnamon and raisins and if any of this batch lasts long enough I will make bagel chips and update this post.

Our host this week is Heather of Heather's Bytes so make sure you check her blog the recipe and some great photos.

Monday, October 15, 2012

Cocoa, Cranberry and Almond Balls

Cocoa, Cranberry and Almond Balls © food-baby.blogspot.com All rights reserved
 
After completing my 3 day juice cleanse I was on the lookout for some snacks that were in line with a detox, that is, no wheat, dairy or refined sugar. What I found online was a veritable treasure trove of vegan treats. Call them truffles, bliss bombs or whatever you like, they taste amazing and are a brilliant portable snack.

This is my version simply based on what I happened to have in the pantry, but the possibilities are endless!

Cocoa, Cranberry and Almond Balls
Makes approx 20

2 cups raw almonds
1/2 cup dried cranberries
1 tbs cocoa
1 tbs rice malt syrup
1/2 cup dessicated coconut for rolling (optional)

Place the almonds in the bowl of your food processor and blitz until they form chunky crumbs. Add the cranberries, cocoa and rice malt syrup and process until you get a sticky and cohesive mix. You can made the mixture as smooth as you like but I prefer to see the ingredients in the finished product so didn't over-process them. Roll into balls, using coconut if you wish. Stored in an airtight container in the fridge they will keep for up to 2 weeks.

The taste test ...

Absolutely delicious! I'm already planning on making these, as well as a few other variations, at Christmas time. They make a great alternative to sugar and saturated fat filled chocolate truffles. Both the boys loved them too which makes for a happy mummy!

This post is linked to Veggie Mama's Meatless Mondays:

Saturday, October 13, 2012

Pumpkin Spice Waffles

Pumpkin Spice Waffles © food-baby.blogspot.com All rights reserved

Brinner (aka breakfast for dinner) has become a regular feature on our weekly meal plan. And why not?! This week I decided to make waffles, and having a lot of pumpkin to use up, went searching for pumpkin waffles. I think I've said it before but pumpkin based sweet dishes really aren't popular in Australia which is such a shame as they're so good!

I actually felt great about the boys having these for dinner. They're dairy free, low in sugar, use wholemeal flour, eggs for protein and of course pumpkin for veggies. Topped with a little crispy bacon and a generous slug of maple syrup they were the perfect dinner for all of us. You could of course leave off the bacon to make them vego.

Pumpkin Spice Waffles
Adapted from Food.com

1 cup plain flour
1 cup wholemeal flour
2 ts baking powder
1/2 ts bicarb soda
Pinch salt
2 tbs brown sugar
3 ts cinnamon
1 ts ginger
1/8 ts ground cloves
1/8 ts nutmeg
3 eggs
2 tbs melted butter (I used nuttelex)
1 1/2 cups milk (I used oat milk)
3/4 cup mashed pumpkin
Maple syrup to serve

Preheat waffle maker.

Combine the all the dry ingredients in a large bowl and whisk together. In a separate bowl whisk the eggs, milk, pumpkin and melted butter. Pour the wet ingredients over the dry and mix well to combine.

Place 1/3 cup mixture into the waffle maker at a time and cook until firm and crispy, about 2 1/2 minutes. Keep warm in a low oven until ready to serve.

Makes 8 waffles.

We will definitely be making these again!

Thursday, October 11, 2012

Slow Cooker Pulled Pork

Slow cooked pulled pork roll with coleslaw from www.mywholefoodfamily.com


It's funny how tastes change. Up until a couple of years ago I had a major sweet tooth and really wasn't a fan of chilli. Now though, give me spicy food any day, and I can take or leave dessert (although I always have room for ice cream!).

In fact I'm getting hungry just thinking about this amazing pulled pork! And on a rainy cool day like today I'm wishing this is what we were having for dinner tonight.

This  is such an easy and budget-friendly recipe. While the pork shoulder may cost a bit it will feed an army and I tend to have all the other ingredients in the pantry already. You can add as much or as little chilli powder as you like or use fresh red chillies if you have them.

The house will smell amazing during the day and the end result is the most succulent, flavourful, amazing piece of meat. I like it served on a roll with a really fresh and zingy coleslaw to balance out the richness of the meat. It will be messy but it's so worth it!

Slow-Cooker Pulled Pork

1 x 1.5kg pork shoulder, skin and excess fat removed
1 onion
6 cloves of garlic
2 ts - 2tbs chili powder
1 tbs paprika
2 ts pepper
1 ts cumin seeds
2 ts salt
1/4 cup coconut sugar
3 tbs Worcestershire sauce
2 tbs dijon mustard
3/4 cup white vinegar
1/3 cup homemade tomato ketchup
1 bay leaf

Combine all ingredients except the pork and bay leaf in the food processor and blitz until smooth and thoroughly combined.

Place the pork into your slow cooker, pour over the marinade mix and add the bay leaf. Cover and cook on low for 8 hours.

To serve - remove the pork from the slow cooker then pour the liquid into a saucepan. Bring the liquid to the boil then simmer for 10-15 minutes until it has reduced by at least half.

Using 2 forks, pull the pork into shreds then add the meat to the reduced sauce and stir to combine.

Serve on top of a hot buttered roll with plenty of zingy coleslaw. Devour.

Monday, October 8, 2012

Zingy Green Juice

Super Green Juice © food-baby.blogspot.com All rights reserved
After thinking about it for probably 6 months, I completed a 3 day juice cleanse last weekend and afterwards felt pretty damn good (longer post to come about the cleanse). In an attempt to keep that good feeling I have been detoxing my diet since then and just eating a bit lighter overall. Part of that process has been to keep up the juice.

I adore fresh juice and as we already had a juicer it's such an easy way for me to get a hit of nutrients in a tasty way. This green juice is really fresh and zingy and no one would ever know they were drinking 1/2 a cucumber and some lettuce leaves!

I watered some down and gave it to my boys who both loved it and wanted more!


Super Tasty Green Juice

3 large green apples
2 kiwi fruits
1/2 medium cucumber
6 large cos leaves
1 small lemon
2cm piece ginger

Juice all ingredients in your juicer. Serve immediately over ice. Serves 2.

Sunday, October 7, 2012

Easy Nutella Brownie Bites

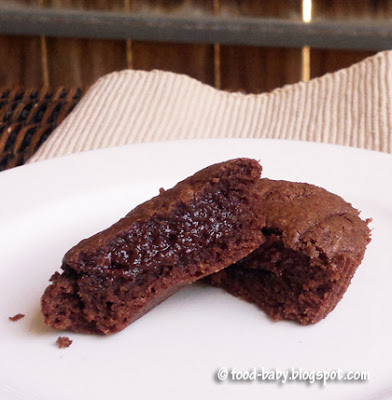
Nutella Brownie Bites © food-baby.blogspot.com All rights reserved
My husband (aka the chocolate fiend) loves nutella and will quite often be seen eating it out of the jar by the thick, fudgy spoonful. Having just bought a few jars on special I was determined to actually make something with it this time. And then I stumbled across these incredibly decadent but oh so easy brownie bites.

They were originally called 3 ingredient brownies with just nutella, flour and eggs, but I can't help tweaking so I added some salt and also vanilla extract to round out the flavour.

The verdict? 10/10. These would be up there with some of the best brownies I've made and for a lot less effort. I managed to freeze a few and after a quick zap in the microwave they were back to brownie perfection. They would be sensational smooshed up through vanilla ice cream as well. Yum!

Nutella Brownie Bites
Makes 12. Adapted from various sources including Laura's Sweet Spot

1 cup Nutella
1/2 heaped cup plain flour
2 eggs
1 ts vanilla extract
Pinch of salt

Preheat oven to 180 degrees celsius (160 degrees fan-forced). Line a muffin tray with paper liners and set aside.

In a large bowl mix together the nutella, eggs and vanilla until smooth. Sprinkle over the flour and salt and mix until just combined. Spoon evenly into the prepared tray and bake for 12 minutes.

Allow to cool to room temperature before removing from the tray and the paper cases. Just try to stop at one!
Oscar has definitely inherited his father's sweet tooth and couldn't wait for a taste.

Tuesday, October 2, 2012

Baking with Julia - Cranberry and Pumpkin Loaf


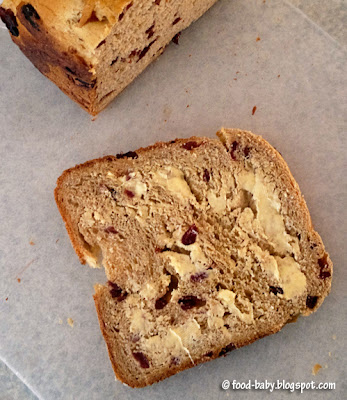
Pumpkin and Cranberry Loaf Breadmaker © food-baby.blogspot.com All rights reserved

Just wondering, is there anyone else out there who completely missed the mark with this recipe? I somehow had it into my head that this was a quick bread, more of a cake even. Imagine my surprise when I go to make it and not only is it a proper bread, it has to rest in the fridge overnight! Aaaah!

Now I could have just made it properly another day but I was psyched for pumpkin and cranberries and knew I wouldn't get another chance before posting day. I even had steamed pumpkin leftover from the night before ready and waiting to be mashed. (We can't buy canned pumpkin or pumpkin pie filling in Australia).

So instead I pulled out my trusty bread maker and made it in there. 

Granted it's not exactly the same as in the book, but the basic elements are all there - pumpkin, cranberries, spices. Yum! I didn't use any walnuts as I didn't have any on hand and I wanted to make it child friendly.
 
Pumpkin and Cranberry Loaf Breadmaker © food-baby.blogspot.com All rights reserved

Luckily my breadmaker cookbook had a recipe for pumpkin bread already so I just had to tweak it slightly. Let me tell you, the aroma wafting through the house as this was cooking was to die for! And it was ready in just 3 1/2 hours!

Pumpkin and Cranberry Bread in the Breadmaker

200ml water
1 tbs melted butter
1/2 cup mashed pumpkin
1 ts salt
1 tbs brown sugar
100g wholemeal flour
350g white bread flour
2 ts ground cinnamon
1/2 ts ground nutmeg
1 tbs milk powder
1/2 ts bread improver
1 1/4 ts instant dried yeast

1/2 cup dried cranberries

Add all ingredients except the cranberries to your breadmaker in the order listed above. Select the 750g loaf size, basic bread setting and medium crust. If you have a fruit and nut dispenser, add your cranberries in there and make sure you select 'Nuts - Yes' so they will be added automatically. Otherwise add in your cranberries after the first mix. Press start and wait just a couple of hours for your delicious bread to be ready!

The taste test ...

Pumpkin and Cranberry Loaf Breadmaker © food-baby.blogspot.com All rights reserved

Just gorgeous! It was amazing fresh out of the 'oven' but sliced up the next day and toasted it was possibly even better. There wasn't much pumpkin flavour but it did add a lovely colour and helped to keep the bread  moist. My boys loved it toasted for breakfast with a big glass of milk and my pumpkin-hating husband had a taste before he knew it contained pumpkin and declared it 'really good.' Success!!!

Our host this week is Rebecca at This Bountiful Backyard. Make sure you check her blog for the proper recipe or give mine a go if you're time-poor.

Wednesday, September 19, 2012

The HULK Green Smoothie

Hulk Green Smoothie © food-baby.blogspot.com All rights reserved
Why the Hulk? Because it's green of course!

I know I am a little late jumping on the green smoothie bandwagon but it wasn't from lack of interest, rather from lack of equipment. While I am the queen of kitchen gadgets one thing I don't have is a blender (well actually I do have one that fits on top of my 35 year old Kenwood Chef mixer but it's pretty much useless so it doesn't count).

I saw this gorgeous green smoothie on The Healthy Chef blog and was immediately inspired to try it. I loved the tip she had about replacing the fresh spinach leaves and ice with cubes of frozen spinach. Genius!

I first attempted to make it in my food processor. It blitzed all the ingredients quite well but I was still left with lots of large spinach flecks. I then tipped the mix into a jug and tried to blend it with my stab mixer. It frothed up a bit more but still left lots of green specks.

Despite the fact it looked more like a herb bechamel than a smoothie I drank it anyway. It was AWESOME.

My 3 year old who watched me make it also had a taste and then begged to lick the spoon, the glass and anything else this smoothie may have touched. It was that good.

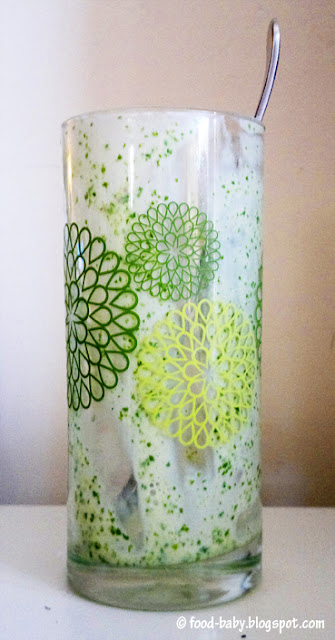
I took a pic of my now empty glass covered in spinach flecks just to have some sort of photo to accompany this recipe. Hopefully it doesn't put you off your breakfast.

Blender or no blender I will be making this again (and again, and again ...). Such a fantastic way to get in some extra greens and even better that it tastes so good. And no you can't taste the spinach at all!

Hulk Smoothie
Adapted from The Healthy Chef

As with most smoothie recipes this is very adaptable. You can use plain or flavoured yoghurt, any type of milk you like and any kind of sweetener. What you see here is what I used and really enjoyed but the possibilities are endless ...

1/2 cup almond milk
100g good vanilla yoghurt (I used Jalna)
1 ts rice malt syrup
1 ts white chia seeds
1 banana
3 cubes frozen spinnach
generous pinch of cinnamon

Combine all ingredients in a blender. Blend until smooth and serve immediately.
Serves 1.

Tuesday, September 18, 2012

Baking with Julia - Whole Wheat Bread

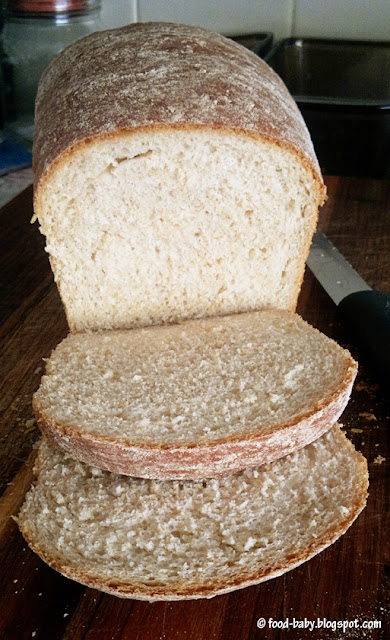
Whole Wheat Loaves © food-baby.blogspot.com All rights reserved
Umm not sure if anyone noticed but I completely forgot (and I mean completely) about the last Baking with Julia recipe. It was for an Upside-Down Nectarine Chiffon Cake and it sounded delectable. But I forgot. So it's now on my to-bake list and I will get to it eventually.

This week was another bread recipe which I was really happy about. Bread in general makes me happy! As with the White Loaves recipe from way back in February this was an easy to put together loaf which baked up perfectly.

I knew I wouldn't be using molasses or malt extract (I'm trying to avoid buying ingredients that won't get used regularly) but didn't worry because I always have treacle in the pantry. Except this time I didn't. Oops. So I subbed golden syrup for both the honey and the malt extract and got a gorgeously golden and slightly sweet loaf that we all loved.

As usual I snagged the crust while it was still warm and enjoyed it with a smearing of butter. You really can't beat homemade bread fresh from the oven!

I cut and froze most of the 2 loaves, using most of it for toast and it was fabulous.

This recipe is definitely a keeper!

Our hosts this week are Michele of Veggie Num Nums and Teresa of The Family That Bakes Together. They will post the recipe for this lovely loaf so make sure you check it out!

Monday, September 10, 2012

Oaty Pancakes with Strawberries

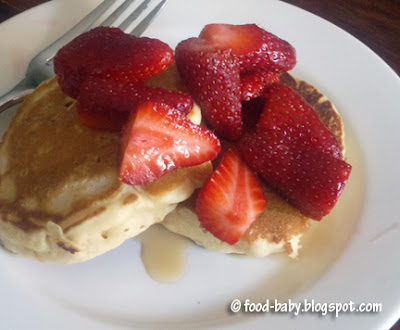
Oaty Pancakes with Strawberries © food-baby.blogspot.com All rights reserved
I am the early riser in the family. Morning is my favourite time of the day and my alarm goes off at 5.30am every day. When the mood strikes I get up and exercise, or I'll just have a cup of tea and enjoy some peace and quiet, mentally preparing myself for another busy day with my 2 little people.

After yet another long week of illness in the food.baby household a yummy Sunday breakfast was definitely in order so that's what I spent my early morning doing.

Usually after having a breakfast of pancakes made with white flour and loads of sugar I will crash a few hours later, starving and with a headache. Recently though I've been making simple changes to our diet, swapping white rice for brown, always buying wholemeal or multigrain bread, reduced fat cheese and the like. So my challenge was to make some pancakes that the kids would actually eat while still being pretty healthy.

Oats are my breakfast of choice most days so that's what I used here and I was really happy with how these turned out. The batch of 12 disappeared in record time and with the strawberries on top it was the perfect start to our Sunday!

Oaty Pancakes with Strawberries
Makes 12 pancakes, serves 4.

1 1/2 cups self-raising flour
1/2 cup rolled oats
1 tbs sugar
1 ts vanilla extract
2 eggs
1 cup almond milk (or whatever milk you like)
1 punnet of strawberries
1 tbs orange juice
1 tbs maple syrup

Wash, de-stem and halve the strawberries and place them in a bowl. Pour over the orange juice and maple syrup and toss well to combine. Leave to macerate while you make the pancakes.

In a large mixing bowl stir together the flour, oats and sugar. Add the eggs, milk and vanilla and mix until well combined.

Lightly grease a large fry pan with butter and cook pancakes over medium heat 4 at a time (or whatever will fit in your pan). You should get 12 pancakes from this mix. Cook on the first side until you see lots of bubbles start to form then slip over and cook until golden brown. Continue with the remaining batches.

Serve warm with a big spoonful of strawberries and syrup. Yum!


Thursday, September 6, 2012

Peanut Butter Ice Cream

Peanut Butter Ice Cream © food-baby.blogspot.com All rights reserved

I blogged a few days ago about the amazing Aztec "Hot" Chocolate Ice Cream I made for our Father's Day dinner. Well I also made a more kid-friendly ice cream. Both my boys love peanut butter so when I saw this recipe it was perfect. It's also such an easy recipe with no cooking involved at all that older kids would be able to make it themselves!

If you love peanut butter you will LOVE this ice cream. I served it with hundreds and thousands but I think having it in a sundae with hot chocolate fudge sauce and a scattering of roasted salted peanuts would be divine. Yum!

Peanut Butter Ice Cream
From The Perfect Scoop by David Lebovitz p50

180g smooth peanut butter
180g sugar
330ml full cream milk
330ml pure cream
Pinch of salt
1/2 ts vanilla extract

Puree all ingredients in a food processor until smooth. Chill thoroughly in the fridge then churn in your ice cream machine according to the manufacturer's instructions.

Makes approx 1 litre.
Related Posts Plugin for WordPress, Blogger...