Monday, October 28, 2013

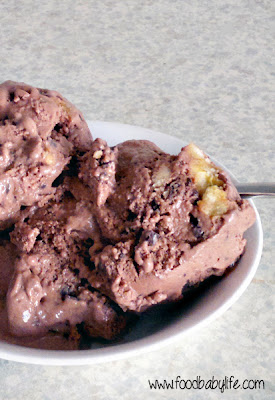
Chocolate Frozen Yoghurt with Caramelised Bananas (Secret Recipe Club)


Secret Recipe Club time! I really wasn't sure whether to participate this month or not as our baby's due date was 30th October. Luckily though I made a great call figuring he would be early and I was right! Our third gorgeous little boy arrived on Monday 21st October.

Noah Patrick, 3.85kg and 53cm long

I will be taking next month off so we can settle in without any pressure on me to cook but I will back with SRC in December/January. Meanwhile my hubby has really stepped up and made us some delicious meals including macaroni and cheese and a slow-roasted pork belly. Yum!

It feels like a lifetime ago when I made my pick for this month's SRC. I was assigned the Bewitching Kitchen by Sally and once again I was really spoilt for choice when it came to choosing a recipe. Sally is Brazilian and it was fascinating to read her story, explore her traditional Brazilian recipes and also read about her background in science (my husband is a microbiologist).

When it came to actually choosing a recipe though I couldn't go past ice cream, which has been my major vice this pregnancy. Interestingly enough as I write this after his birth my sweet tooth has virtually gone and I'm wanting smoked salmon, sushi and brie!

So for this month I chose Sally's Chocolate Frozen Yoghurt with Caramelized Bananas. This recipe is worth making just for sheer deliciousness but make sure you check out her post for a beautiful photo and story of her mother, the world's expert on caramelised bananas!

Oh and please excuse the terrible photo. It wasn't quite firm enough to scoop properly and it didn't last long enough for me to take another one!

Chocolate Frozen Yoghurt with Caramelised Bananas © www.foodbabylife.com

Chocolate Frozen Yoghurt with Caramelised Bananas
Recipe very slightly adapted from Bewitching Kitchen

40g butter
3 large ripe bananas, cut into thick slices
3 tbs brown sugar
2 tbs lemon juice
125ml plus 60mls full cream milk (divided)
2 1/2 tablespoons cocoa powder
2/3 cup sugar
Pinch of salt
1 ts vanilla extract
1 1/3 cups Greek yogurt
60g dark chocolate, finely chopped

Melt the butter in a non-stick pan over medium heat. Add the sliced bananas in a single layer and sprinkle over the brown sugar. Cook, turning once, until caramelised. This will take 5-8 minutes. Add the lemon juice and swirl the pan to completely dissolve the sugar.

Remove the pan from the heat. Scrape three-quarters of the bananas into a food processor, add the 60 mls of milk and process until smooth. Transfer to a small bowl and place in the freezer for 15 minutes or until completely chilled. Chop the remaining bananas and freeze until chilled.

In the same food processor bowl beat together the cocoa, sugar, salt, vanilla and the remaining 125 mls of milk. Add in the yogurt and then the banana puree and process until smooth.

Transfer the mixture to an ice cream maker and churn until nearly frozen. Mix in the chopped bananas and pieces of chocolate. Scrape the frozen yogurt into an airtight container, cover and freeze until firm, at least 2 hours.

Enjoy!


Secret Recipe Club

Sunday, October 27, 2013

It's a boy!

We are thrilled to announce the arrival of our third beautiful boy!

Introducing Noah Patrick, born 7.33pm on Monday 21st October, 3.85kg and 53cm long...

Tuesday, October 8, 2013

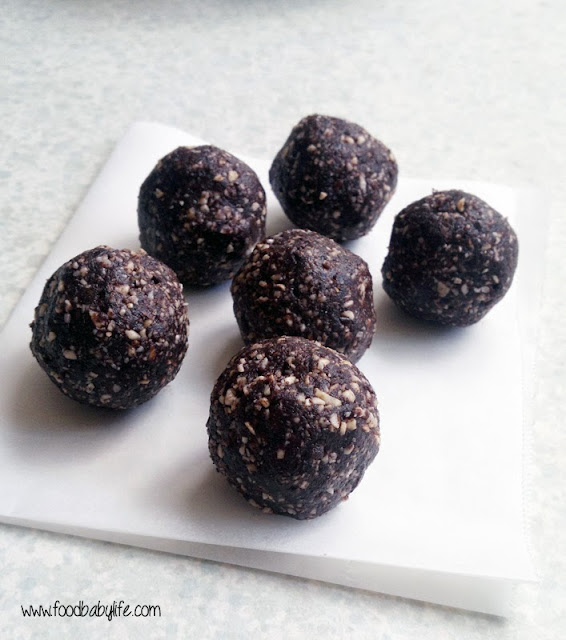
Date and Cashew Power Balls

Date and Cashew Balls © www.foodbabylife.com

It's baby month! Hard to believe but we are on the home stretch now with bub due in just a matter of weeks. So I thought I would dedicate this month to some recipes I've found that are perfect for pregnancy, labour and breastfeeding.

To kick things off, have you heard that eating dates during the last month or so of pregnancy can assist with labour? It's all come from a study in Jordan which you can find here but there seems to be lots of anecdotal evidence online as well.

Now since quitting (most) sugar, dates have been on my avoid list as they are incredibly high in fructose, the highest of any fruit in fact. According to the study you need to eat 6 dates per day to reap the rewards.That's a lot of dates and a LOT of sugar!

So I guess I am hedging my bets on this one. I can't commit to eating that many dates, and in fact if you have gestational diabetes I would steer clear of this completely, but I thought an occasional energy and protein packed snack wouldn't do any harm. I've been grabbing one from the freezer mid-afternoon to stave off the munchies and I'm sure they will be a great energy boost for labour and breastfeeding as well.

Date and Cashew Power Balls
Makes approx 30

2 cups raw cashews
2 cups dried dates
2 tbs raw cacao powder
2 tbs chocolate protein powder
1 ts vanilla extract
1/4 ts salt
2 tbs coconut oil

Place all ingredients except the coconut oil in the food processor and blitz until well combined and rubbly. Add the coconut oil one tablespoon at a time and process until the mixture comes together and clumps. You may find you need more or less coconut oil. Form dessertspoonfuls of mix into balls. Store in the fridge or freezer.

* This post is for your information only and does not represent medical advice!

Monday, September 30, 2013

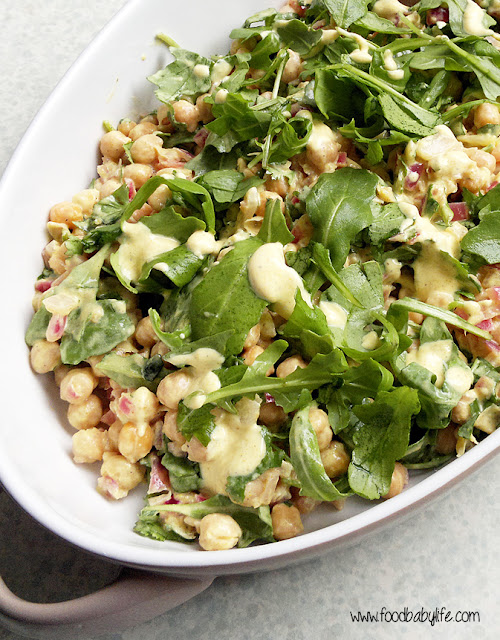
Chickpea Salad with Curried Yoghurt Dressing (Secret Recipe Club)

Pan-fried Chickpea Salad with Curried Yoghurt Dressing © www.foodbabylife.com


For this month's SRC I was delighted to be assigned The Wimpy Vegetarian blog by Susan. I've been on a real mission this year to increase the veggies in our diet and have been searching for more creative meatless recipes that will keep my husband and kids happy.

I can really relate to Susan who says that while meat and fish will never be totally gone from from her diet they are now no longer 'the main event.' A few years ago I could have quite easily gone vegetarian. I rarely ate red meat and only ate chicken or fish very occasionally. I don't think I would have missed it in the slightest. But pregnancy certainly fixed that, and I have been particularly carnivorous this time around! It will be interesting to see whether my old eating habits reassert themselves afterwards.

I was really spoilt for choice with Susan's blog and there were literally dozens of recipes, both sweet and savoury, that I would have liked to make. However as long-time readers will know we love chickpeas and curry around here so her Pan-fried Chickpea Salad with Curried Yoghurt was really calling my name!

Susan said she likes this at room temperature or slightly warm but I made this ahead of time and had it cold for dinner and again for lunch the next day and it was amazing. Such a fresh, zingy blend of flavours and so filling. I would happily eat this for lunch any day of the week!

I made only minor changes to the recipe, using all lime juice instead of lime and lemon and I left out both the harissa and olives simply because I didn't have any. I also doubled the recipe and that's what I have included below. We are coming into Summer here and I can see this being a regular feature on our menu, particularly for my lunches when I will be home with 3(!) kids and needing a hearty meal to get me through the day.

Pan-fried Chickpea Salad with Curried Yoghurt Dressing
Adapted from The Wimpy Vegetarian

Chickpea Salad

1 tablespoon olive oil
2 x 400g tins chickpeas, drained and rinsed
1/2 red onion, finely chopped
1/4 teaspoon each salt and pepper
Juice and zest of 1 lime
3 cups rocket/arugula

Curried Yogurt Dressing
1/2 cup plain yogurt
1 teaspoon curry powder
2 teaspoons freshly squeezed lime juice
1/2 bunch chopped coriander
Salt and pepper to taste

In a medium-sized pan over medium-high heat, heat up the olive oil. Add the onion and sauté until the onion starts to soften. Make sure the cooked chickpeas are dry, and add to the skillet along with the salt and pepper. If the chickpeas are wet, you can get some splatter with the hot oil.

Saute until the chickpeas begin to lightly brown and the onions are soft, stirring frequently – about 5-7 minutes. Stir through the lime juice and zest and remove from the heat. Immediately transfer the mixture to a bowl, and let cool to room temperature, or just a little warmer than room temp if that's how you intend to serve it.

While the chickpea mixture is cooling, make the Curried Yogurt Dressing by combining the yogurt, curry powder, lime juice, salt and pepper in a small bowl.

When the chickpea mixture has cooled, add about ¾ of the rocket and coriander and fold in half of the Curried Yogurt Dressing until the chickpeas are completely coated. Place remaining rocket and coriander over the top and drizzle with additional dressing as desired.

This salad can be served at cold, warm or at room temperature. Serves 4.


Secret Recipe Club

Monday, September 23, 2013

Banana Bread (Wheat, Dairy, Sugar and Nut Free)

Easiest Banana Bread (Wheat free, Dairy free, Sugar free, Nut free) © www.foodbabylife.com


I have been attempting to bake extra batches of things lately to stash in the freezer for after-baby. While I really should be focusing on dinners I can't seem to stop baking! I've had 2 very ripe bananas burning a hole in my fruit bowl (so to speak) so when I saw The Natural New Age Mum post a blog on not 1 or 2 but 8 different banana bread recipes, their fate was sealed!

The one I chose and adapted was from Mamacino, another favourite blogger of mine. While bananas are high in fructose I made it lower by using dextrose instead of regular sugar along with a few other little changes. It was absolutely delicious! Really moist and with a great banana flavour. The kids and I loved it and we still have over 1/2 the loaf in the freezer.

This one's a winner!

Easiest Banana Bread
(Wheat, Dairy, Sugar and Nut Free)
Adapted from Mamacino

1 cup white spelt flour
½ cup wholemeal spelt
2 tsp baking powder
1/3 cup coconut sugar
1 tsp ground cinnamon
3 eggs
1/2 cup coconut oil
2 mashed bananas
1 tsp vanilla extract

Preheat the oven to 160 degrees Celsius. Grease a loaf pan and line with baking paper.

Combine all the dry ingredients in a large bowl and make a well in the centre. In a separate bowl, whisk together the eggs, oil, bananas and vanilla. Pour the wet ingredients into the dry ingredients and mix until it is just combined. Pour the mixture into your prepared pan.

Bake for approximately 45-50 minutes or until the top springs back and a skewer comes out clean when you test it. Leave in the pan for five minutes and turn out to cool on a rack.

Lovely warm from the oven with a big smear of butter (if not dairy-free) or slice and freeze to make wonderful toast.

Tuesday, September 17, 2013

Profiteroles (Baking with Julia)

Profiteroles with Cinnamon Icecream and Chocolate Sauce © www.foodbabylife.com

I used to be obsessed with profiteroles and growing up I always wanted a croquembouche wedding cake. When it came to it we ended up having an awesome cupcake tower but I still love my profiteroles!

These were not my finest moment. In order to make them child and preggo friendly I left out the espresso and made regular profiteroles. I couldn't find a plain piping tip so had to use a star one and they came out a little odd looking (although they did puff up beautifully). I only used 1/2 ts cinnamon in my eggless ice cream and it had a really blah could-have-been-anything flavour, and then I decided to use a simple cocoa glaze rather than chocolate sauce and made it too thin.

BUT put those 3 less than perfect elements together and it was delicious. The fact that I immediately ate 2 with all the trimmings says they couldn't have been too bad!

To see what everyone else thought don't forget to check the LYL page!

Tuesday, September 3, 2013

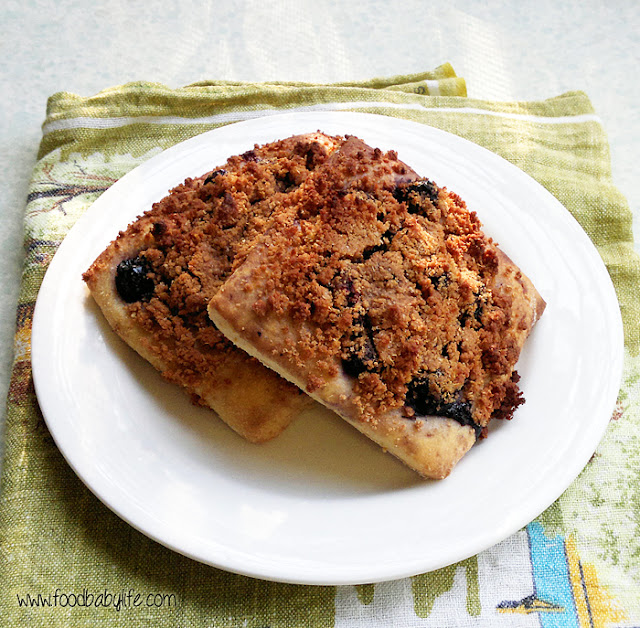
Sweet Berry Fougasse (Baking with Julia)

Sweet Berry Fougasse (Baking with Julia) © www.foodbabylife.com
Another choose your own adventure week at Baking with Julia, with a choice of Blueberry Muffins or Sweet Berry Fougasse. I was all set to make the muffins but then I actually read the other recipe and was intrigued.

So what is a fougasse? It turns out to be a sweet foccacia, this one topped with berries and a crumbly streusal topping. Sounds yummy right? I figured it would make a wonderful breakfast, so I made it for Fathers' Day on Sunday and it was a big hit.

I have made foccacia many times but had never rested the dough in the fridge for 24 hours first as per this recipe, so wasn't sure what to expect. I have to say I'm not sure it really made a big difference, apart from the yeasty smell of the fermentation turning my stomach a little (if you're not preggo maybe you wouldn't even notice that though!)

All 3 of my taste testers really enjoyed these warm from the oven, and after a quick microwave they were still really good the next day, although the streusel had lost some of its crispiness.

If you would like to bake your own Sweet Berry Fougasse (and you really should) you will find the recipe here.

Sunday, September 1, 2013

Happy Fathers' Day + No-Bake Chocolate Cheesecake

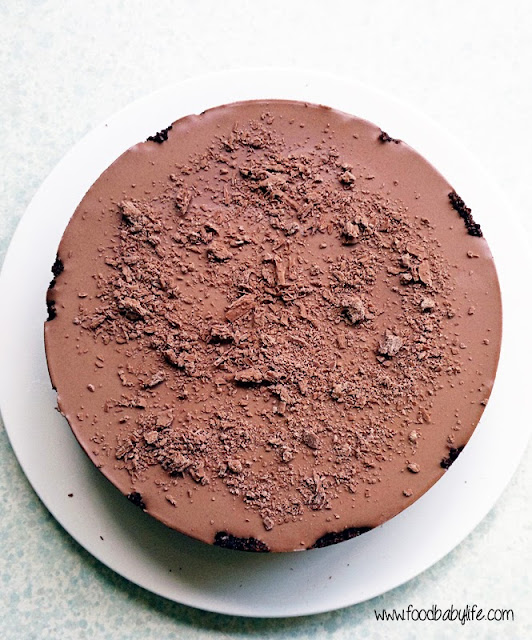
No Bake Chocolate Cheesecake © www.foodbabylife.com

Happy Fathers' Day to all the dads out there!

This year Fathers' Day has fallen a mere 2 days after my and my husband's birthdays (yes we have the same birthday!). I wanted to make sure we celebrated both occasions properly without going overboard so I decided we would skip a birthday cake this year and just go with something extra yummy for dessert for Fathers' Day.

This has worked out perfectly as we went out for dinner at a lovely Italian restaurant for our birthday and between dinner and dessert we definitely didn't need cake as well!

I have been tossing up dessert ideas for weeks now but when it came to the crunch it had to be chocolate. My husband is a die-hard chocaholic and I'm known as the cheesecake queen around here, so really what else would I make? Ha!

This is an easy no-bake cheesecake which has a lovely creamy texture and a deep chocolate flavour. It is fructose free (as I am attempting to do whenever I bake these days) but you could easily substitute in regular sweet biscuits for the base and normal sugar for the filling, but maybe just cut it back a little.

I made this the day before and allowed it to chill overnight which I think gives the best results, although it would be set in as as little as 4 hours if you were pushed for time.

Served with fresh strawberries it was the perfect finish to our Fathers' Day lunch of Beef and Guinness Pie with mushy peas. Yum!

No Bake Chocolate Cheesecake Slice © www.foodbabylife.com

No-Bake Chocolate Cheesecake
Recipe by me

For the base:
150g plain sweet biscuits (mine were sugar-free from Aldi)
50g almond meal or LSA
50g dessicated coconut
1/4 cup raw cacao
110g melted butter

For the filling:
500g cream cheese, at room temperature
2 cups cream
1 cup dextrose (or regular white sugar if preferred)
2 ts vanilla extract
150g dark chocolate, melted
4 ts gelatine
1/4 cup hot water

Extra chocolate to decorate, optional

Line the base of an 8 inch spring-form pan with baking paper and set aside. Using a food processor, crush the biscuits into a fine crumb. Add the other dry ingredients and pulse to mix. Add the melted butter and blitz until well combined. Pour the crumbs into the prepared tin and smooth over the base and about halfway up the sides. Place in the fridge to set.

Sprinkle the gelatine over the hot water and allow to bloom (it will become thick and lumpy). Microwave on high for about 20 seconds until it is fully dissolved then set aside to cool.

Wipe out the food processor bowl then add the cream cheese and whiz until smooth. Add the dextrose and process for another minute or so until it is dissolved. Scrape the sides then add the cream, vanilla and melted chocolate and process for another minute. Finally add the cooled gelatine mixture and whiz for 2 minutes until thoroughly combined.

Pour over the prepared base then refrigerate until set, a few hours at least or overnight. Decorate the top with extra grated chocolate and serve with sliced strawberries. Serves 8-10.

Monday, August 26, 2013

Chicken and Drop Dumplings (SRC)

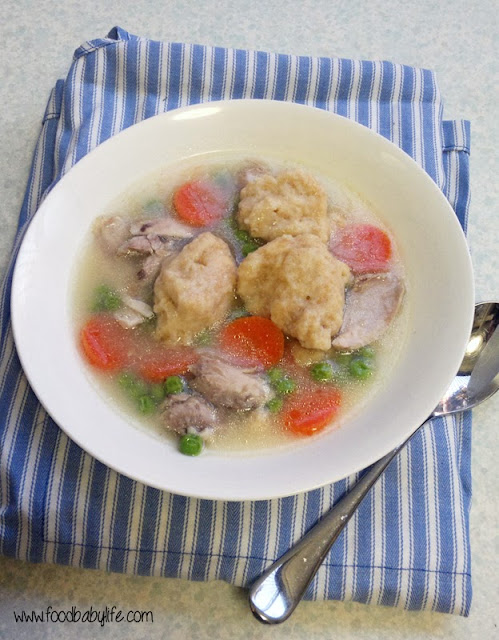
Chicken and Drop Dumplings © www.foodbabylife.com


Yay Secret Recipe Club time again! If you're new here, each month SRC members are assigned a blog at random where they get to choose a recipe to make, keep it a secret and then all post on the same day. This month I was excited to be given Angel's Homestead by April who happens to be the fearless leader of SRC!

I really enjoyed taking the time to read through April's blog which is full of simple, easy to make and delicious recipes. I love her philosophy of frugal and sustainable living and this is really reflected in the food she makes for her family.

I don't have time for complicated meals at the moment. Life with 2 little kids is busy and in a couple of months, will be getting a lot busier with the arrival of #3! We're due at the end of October so only about 9 weeks to go.

Anyway, on to this month's recipe! Chicken and Dumplings...

I've made dumplings quite a few times, usually with a slow cooked beef casserole. They are such a great alternative to rice or pasta and so easy to whip up. My husband in particular is a big fan and really enjoyed these ones.

We've been having unseasonably warm weather for August so I was lucky that the day I had set aside to make this for dinner was cold and windy and just perfect for a warming and hearty dish like this.

April has several chicken and dumplings recipes on her blog so I decided to choose the simplest one and make a couple of changes of my own.

First I never use stock cubes because I am yet to find a good one without MSG and other yucky ingredients. So to boost the chicken flavour I browned the meat first and added some vegies to the broth while the chicken cooked. I also added some carrots and peas to the final dish for colour and because I can't help myself! I also used wholemeal flour because that's what I bake with most often.

Chicken and Drop Dumplings
Adapted from Angel's Homestead

4 chicken marylands (leg & thigh quarters)
1 litre chicken stock
2 cups water
1 medium onion, quartered
2 cloves garlic, peeled but whole
1 carrot, roughly chopped
1 stick celery, roughly chopped
3 carrots, extra (sliced thinly)
1 cup frozen peas

For the dumplings:
2 cups wholemeal self-raising flour (or plain flour with 1 tbs baking powder sifted through)
1/2 tsp salt
50g butter
1 cup of milk

To make the broth, heat up a large pot over medium high heat and sear the chicken pieces, skin side down, until golden brown. Remove the pieces and any excess oil. Throw in the onion, garlic, carrot and celery and fry for a few minutes. Return the chicken to the pot and pour in the stock and water (the chicken should be completely covered). Reduce heat to medium, put the lid on and allow to simmer for around 40 minutes or until the chicken is cooked through and the meat is pulling away from the bones.

Remove the chicken pieces then strain the broth through a fine metal strainer, discarding the vegies.

Shred the chicken meat and return to the pot along with the sliced carrots, frozen peas and strained broth and place over medium-low heat. Check for seasoning and add salt if needed.

To make the dumplings, mix together the flour and salt in a large bowl and set aside. Place the milk and butter in a small saucepan over medium-low heat until the butter is melted. Once melted, pour the milk and butter over the flour and mix until just combined. Drop the dumplings into the pot, a tablespoon at a time until all the mixture is used. Cover and let simmer for about 15 minutes.

We all really enjoyed this, such a hearty and savoury meal for a cold day. Normally when I make chicken stock or soup I make it ahead of time so I can remove some of the fat. I didn't do that this time so there was quite a bit as you can see in the photo but I love that. It was a delicious dinner and one we'll be making again for sure.

Secret Recipe Club

Tuesday, August 20, 2013

Johnny Cake Cobbler (Baking with Julia) + some news!

Johnnycake Cobbler © www.foodbabylife.com

This week we had a choice of 2 recipes for Baking with Julia and I chose the Johnnycake Cobbler over the Raspberry-Fig Crostata, mainly because neither figs nor raspberries are in season here and even when they are, they're prohibitively expensive.

Unfortunately it wasn't quite the success I had hoped.

I used 8 smallish apples and 2 cups of thawed frozen blackberries for my full-size cobbler which I thought would be plenty but it seemed to shrink down to nothing. Or maybe it was just that there was at least twice as much topping as was needed. What I should have done is just turn it out on to a platter and call it an upside down cake!

What I liked - the combination of fruits, their jewel-toned colour and the texture of the cobbler thanks to the cornmeal.

What I didn't like - the quantity of topping, the saltiness and fact it took over 90 minutes to cook through!

I'm really not sure why it took so long to cook. Our oven has been even more unreliable than usual recently so it could be that, or it could be that I just stuffed up somewhere. This is actually a distinct possibility as we are expecting baby #3 and pregnancy brain has well and truly kicked in!

Not sure why I haven't shared the news before now but given I'm 30 weeks tomorrow it's about time. So in 10 weeks or less there will be a new baby in the food.baby family. We haven't found out the gender this time so we'll be getting an awesome surprise on this little one's birth-day.

Back to the cobbler, I served it with lashings of cream (probably unnecessary given the huge amount of cream in the cobbler itself) and my 3 taste-testers all enjoyed it, but the fact is there is still a large chunk in the fridge and no one asked for seconds which is pretty telling.

You'll find the recipe for the Johnnycake Cobbler on page 389 of Baking with Julia by Dorie Greenspan.


Tuesday, August 6, 2013

Eastern Mediterranean Pizzas (Baking with Julia)


So you know the saying 'if you don't have anything nice to say, then don't say anything at all'? Well that pretty much sums up my feelings about this week's pick, Eastern Mediterranean Pizzas. This will be a short post.

I thought I would love it but this was seriously one of the blandest things I have ever eaten. It's my own fault really, for not tasting and adjusting but I was in a hurry and thought I would just trust the recipe. Big mistake. It was bland to the point of being inedible, even topped with a dollop of greek yoghurt and a scattering of coriander. It also wasn't helped by the fact our lamb mince was incredibly greasy.

I can see the potential though, so if I were to attempt these again I would at least double the cinnamon and all-spice and also add some ground cumin and coriander and probably chilli flakes as well.

Hopefully others had more success!
Related Posts Plugin for WordPress, Blogger...