Tuesday, May 20, 2014

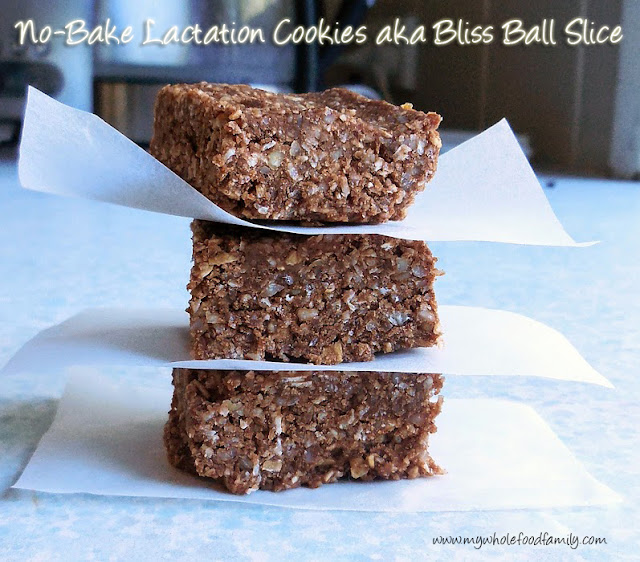
No Bake Lactation Cookies (Bliss Ball Slice)

no bake lactation cookies aka bliss ball slice from www.mywholefoodfamily.com

 If you have no interest in breastfeeding this may not be the post for you!

As any new parent will tell you, the first few months with a baby revolve around feeds, sleeps and nappy changes. While I have happily breastfed all 3 of my boys it has not always been easy. In fact at some points it has been excruciatingly painful and downright stressful.

With each baby though I have learnt new strategies and this time around one thing I committed to doing was increasing/maintaining my supply through my diet.

I found some really good recipes for lactation cookies online and made a couple of batches a few weeks before my due date to stash in the freezer. I snacked on a few in the days before Noah was born and took a bagful to the hospital with me as well.

I found the midwives to be really interested and supportive of the choices we made during labour (things like having a doula and choosing drug-free methods of pain relief) and they were keen to find out about what I was doing in the days after Noah was born as well. I snacked on my lactation cookies immediately after labour and at all hours of the day and night in those first few sleepless days and I can say with certainty that my milk came in almost a full day earlier than was expected or had experienced before. Was it the cookies? Who knows, but they certainly didn't do any harm!

My research showed that the key active ingredients in lactation cookies are oats, flaxseed and brewers yeast so every batch I made was based around those.

Some of the sites I found suggested that you could see better results if you just ate the dough rather than bake them. Even after pregnancy I am a little leery of raw eggs (even though that isn't too much of an issue here in Australia) so I always baked mine. That is until I came up with the idea to combine the active ingredients of a lactation cookie with the energy packed ingredients of a bliss ball!

I found it really easy to make up a big batch of my lactation bliss balls and store them in the freezer to grab as an easy snack during the day or a pick-me-up during Noah's nighttime feeds. Those bliss balls really got me through those first few exhausting months!

Lately I can't be bothered to roll the mixture into balls so I simply line a large baking dish with paper and press the mixture in well. Once it has chilled in the fridge I slice it into squares and throw in the freezer. Easy. Both my big boys love them as well so they sometimes get some of 'mummy's special slice' as a treat too.

No Bake Lactation Cookies (Bliss Ball Slice)
Recipe by me

2 cups traditional rolled oats
2 cups raw ABC nuts (almond, brazil and cashew nuts)
1 cup dessicated coconut
1/2 cup ground flaxseed
1/2 cup raw cacao
2 tbs brewers yeast
2 tbs coconut oil
1 tbs cinnamon
1/2 ts sea salt
1/2 cup rice malt syrup
1-2 tbs rice milk

Line a lamington tray with baking paper and set aside.

Place the oats and nuts into a food processor and blitz to a fine crumb. Add in remaining dry ingredients and process until well combined. Add the rice malt syrup and coconut oil and process until the mixture becomes sticky and starts to clump together. Only add the milk if needed, a little at a time.

(Make sure you taste the mixture at this stage. Brewers yeast has quite a strong flavour so you can add more syrup or other spices (ginger works well) or even some dried fruit. I find the cinnamon and rice malt syrup to be sweet enough for me and the salt creates a yummy and really balanced taste.)

Tip the mixture into the prepared tin and press down well before placing in the fridge to chill for 1 hour.

Remove from the fridge and tip the slice out onto a large cutting board. Using a large sharp knife slice into small squares (I get at least 40 from this amount). Place in an airtight container and store in the freezer.

I found snacking on a few of these every afternoon really helped to boost my supply for Noah's evening feeds, which was always when he was hungriest and wanted to cluster-feed. They also make a great breakfast on the run which is perfect if you have older children and can't sit down to eat properly in the mornings.

* This post does not constitute medical advice, it is for your information only. If you are having issues with breastfeeding please consult a GP, lactation consultant or child health nurse.

Sunday, May 18, 2014

Blueberry Muffins - Wheat, Dairy and Sugar Free

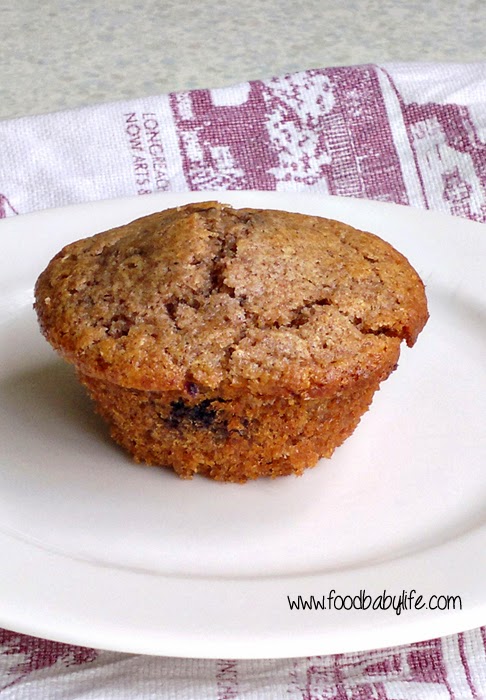
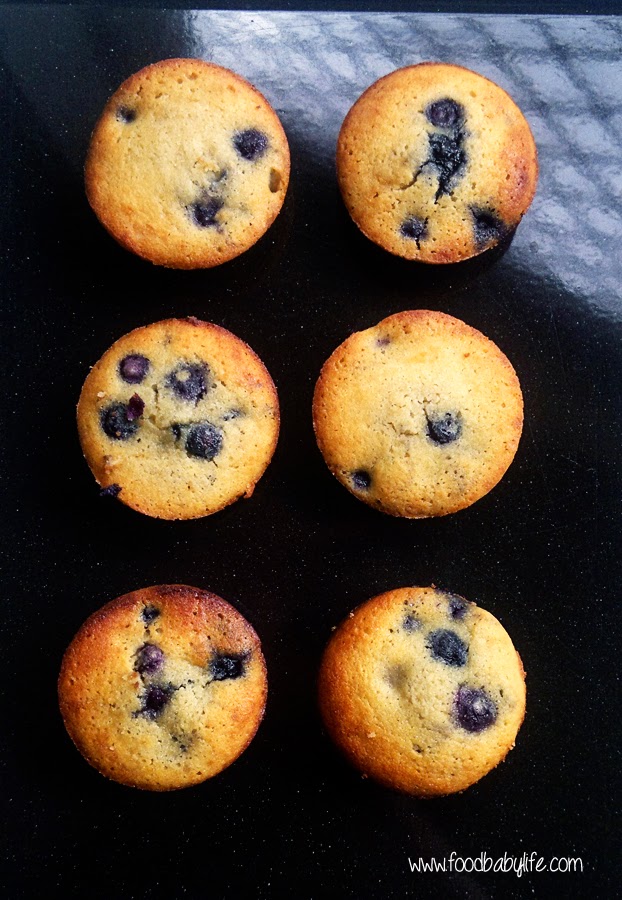
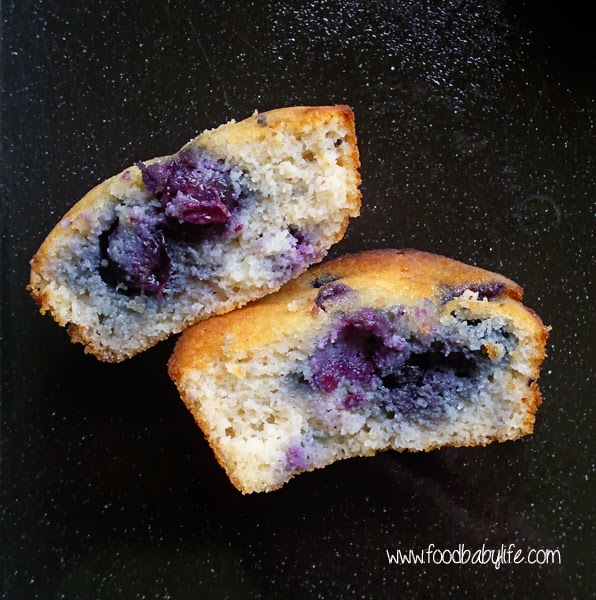
Blueberry Muffins Wheat free, Dairy Free, Sugar Free © www.foodbabylife.com
It's been a while since I posted anything in my Sunday Baking series but these fit the bill perfectly! I've been making tons of muffins lately as they are the perfect portable snack for my husband to take to work, for me to grab on the run and to give my kids for afternoon tea.

I think I have finally perfected a go-to muffin recipe and I have made endless variations of these recently and they are always delicious. You can make them with any fruit or spice you like and they thaw beautifully so they are great to bake and freeze ahead of time.

Enjoy!

Blueberry Muffins
Recipe by me

2 cups wholemeal spelt flour
3/4 cup dextrose
1 tbs baking powder
2 ts cinnamon
1 cup frozen blueberries
125ml coconut oil
3/4 cup non-dairy milk of your choice (slightly warmed so it doesn't solidify the coconut oil)
3 eggs (at room temperature)

Whisk together the dry ingredients in a large bowl then add the blueberries and toss to combine. In a separate bowl beat together the oil, eggs and milk and pour into the dry ingredients. Mix together with a large metal spoon until only just combined.

Spoon mixture into a well greased 12-cup muffin tray. Bake in a preheated 170 degree oven for approx 20-25 minutes or until the top springs back when touched.

Allow to cool in the tin for 5 minutes before carefully turning out onto a wire rack to cool completely.

Makes 12

Monday, April 28, 2014

San Francisco Garlic Fries (Secret Recipe Club)

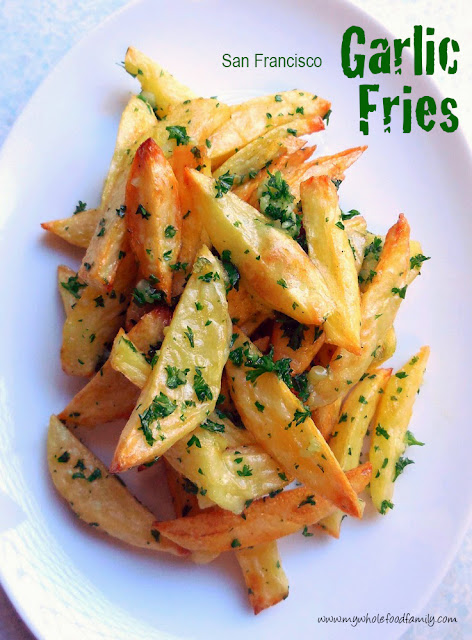
San Francisco Garlic Fries homemade by www.mywholefoodfamily.com

Another month has flown by and it's Secret Recipe Club time again!

This month I was assigned Melissa's blog Fried Ice and Donut Holes. I really love the story behind her blog's name that her Grandpa used to tell them all to behave or they'd be having fried ice and donut holes (aka nothing) for dinner.

Stories about grandpas are making me a little teary at the moment as we got some sad news yesterday that my Grandad passed away. He was 91, married for more than 60 years to my Grandma (who passed away a few years ago) and an all-round great character. Such a great sense of humour, easy way with people and so successful in everything he put his mind to. He will be missed.

Moving on to this month's recipe, I had a great time perusing Melissa's blog and found some real gems including her No-Bake Energy Bites and Buffalo Chicken Shepherd's Pie. But as soon as I saw the fries they were calling my name.

We're still on a bit of a health kick and tend not to buy takeaway anymore BUT that doesn't mean we can't make our own cheaper and healthier versions at home! And these San Francisco Garlic Fries fit the bill perfectly.

We ate these with some gorgeous pan-fried salmon, avocado and salad on Good Friday and it was an amazing meal. These are hands-down the best fries I've ever made. I kept some plain for Charlie (who's 3 and a very fussy eater) but Oscar loved them with garlic and parsley too.

These are a winner!

San Francisco Garlic Fries
Recipe from Fried Ice and Donut Holes

1 kg potatoes
3 tbs olive oil
4 cloves of garlic, minced
2 tbs fresh parsley, finely chopped
Salt and pepper

Preheat the oven to 230 degrees C / 450 degrees F. Grease 2 baking trays and set aside.

Slice the potatoes into chips and toss in a large bowl with 2 tablespoons of the oil then season them with salt and pepper. Spread the chips in single layers on the prepared baking trays and bake for 30 minutes, or until the fries are tender and lightly browned.

Increase the temperature to 260 / 500 degrees and continue cooking for another 5 minutes or so until the fries are dark brown around the edges.

Meanwhile, whisk the remaining  tablespoon of oil with the garlic and parsley in a large bowl. Add the hot fries and toss to coat. Season to taste with salt and pepper before serving. Try not to eat them all yourself!


Secret Recipe Club


Thursday, April 24, 2014

Almond and Chia Bliss Balls

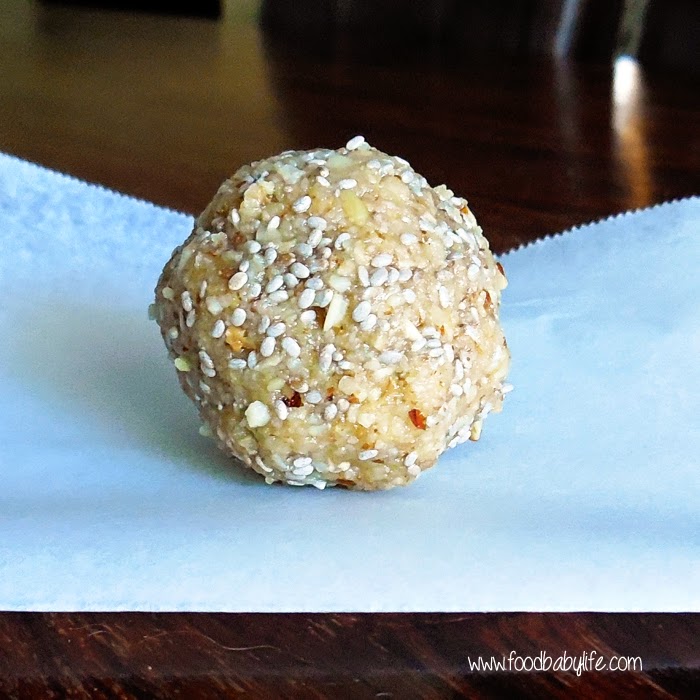
Almond and Chia Balls © www.foodbabylife.com

I have become a huge fan of bliss balls in recent months. I love that I can whip up something so tasty, filling and nutritious and just have it stashed in the freezer to grab whenever I want.

Life has become extra busy since Oscar started school and most days I don't have time to eat a proper breakfast before we leave. But there is always time to eat a bliss ball or 2 on the run which keeps me going until we get home and I can take a few minutes to sit down and eat properly. Not exactly ideal when you are breastfeeding but it's certainly better than nothing!

I have made literally dozens of types recently but this one was especially delicious and both the boys love them too.

Bliss ball recipes are very forgiving so if you don't have a particular ingredient you can easily substitute for something else eg, honey for the rice malt syrup, peanut butter for tahini etc.

Almond and Chia Balls
Recipe by me

200g toasted almonds
1/2 cup chia seeds
1 cup rolled oats
1 cup dessicated coconut
1/4 cup tahini
2 ts vanilla extract
1 heaped tbs coconut oil
2 tbs rice malt syrup
generous pinch sea salt

Place all the dry ingredients into the food processor and blitz to a fine crumb. Add the remaining ingredients and process until it comes together in a sticky ball. If the mixture is too dry you can add some extra syrup or a splash of rice milk. Roll tablespoons of mixture into balls and store in the fridge or freezer. Makes approx 20.

Sunday, April 20, 2014

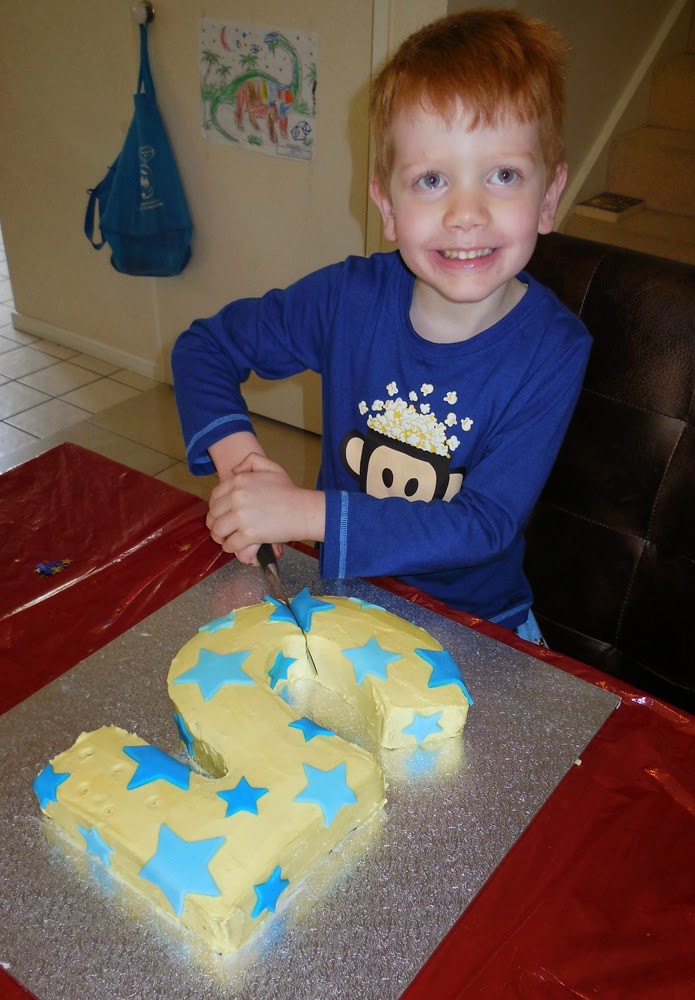
Oscar turns 5 and a delicious dairy free number 5 cake!

Number 5 cake dairy free chocolate cake © www.foodbabylife.com

This year Easter Sunday was extra special as it was also my Oscar's 5th birthday! Hard to believe how quickly that chubby little bundle from 5 years ago has turned into the handsome, chatty and all-around awesome 5 year old that he is today.

Oscar had his heart set on a big party this year but after we realised that his birthday fell not only in the school holidays but on Easter Sunday it seemed silly to arrange a party that a lot of our friends would not be able to come to. He will get his party next year but this year was all about family and we had a really lovely day.

One of our birthday traditions for the boys is that they get to choose what we have for lunch. Oscar, bless him, chose to have a simple BBQ lunch at home with sausages, marinated chicken, corn and lots of salad. Yep he really asked specifically for salad!

Our other tradition is that I will make whatever cake they choose from our collection of Woman's Weekly kids' cake books. After much deliberation over the past few months Oscar chose a classic number 5 cake and even wanted the same colours they had used.

I felt a little selfish but I didn't want to make a big cake that I couldn't eat so the cake had to be dairy-free. Well it took a LOT of research to find the perfect dairy-free chocolate cake that would be the right texture to carve into a number 5 shape and taste good and possibly be converted to sugar free as well. Whew.

I eventually found one on The Crafting Foodie and it turned out so well we will definitely be using it again in the future. The original recipe was for a 3 layer 9 inch cake but I converted it into a sheet cake and made it sugar free by using rice malt syrup instead of sugar. I also used decaf coffee so the kids weren't bouncing off the walls!

Dark, Rich, Moist Chocolate Cake - Dairy Free
Recipe slightly adapted from The Crafting Foodie

330g plain flour
1 x 500g jar rice malt syrup (1 1/2 cups)
135g cocoa powder
1 tbs bicarb soda
1 1/2 tsp baking powder
1 1/2 tsp salt
3 eggs, at room temperature
1 1/2 cups rice milk
1 1/2 tbs white vinegar
1 1/2 cups strong black coffee, hot
3/4 cup extra virgin olive oil
1 1/2 tbs vanilla extract

Preheat the oven to 180 degrees Celsius / 160 degrees fan-forced. Prepare a 23cm x 33cm baking pan by lining it with baking paper then greasing and flouring it.

Sift the flour, cocoa, bicarb soda, baking powder and salt into a large bowl or the bowl of a stand mixer.

Combine the syrup, rice milk, vinegar, coffee, oil and vanilla extract in a medium bowl. Beat in the eggs.

Pour the wet ingredients into the dry ingredients then mix on low speed until well combined. The batter will be very thin.

Pour the batter into the prepared tin and bake for approximately 50 minutes or until the cake springs back in the middle and skewer comes out cleanly.

Remove from the oven and cool on a wire rack for 20 minutes before inverting the pan to release the cake. Allow it to cool completely before icing.

I also did a lot of research on icing, trying to find something healthy that would also work to decorate the cake as I intended. Unfortunately I couldn't find anything quite right and so ended up with a traditional sugar-filled icing made with Nuttelex instead of butter to keep it dairy free. The search will continue for the next birthday cake.

Dairy-free Icing

185g nuttelex
360g icing mixture
1 tbs vanilla extract
food colouring

Place the nuttelex in a food processor or stand mixed and beat until smooth and creamy. Add remaining ingedients and process until smooth and well combined, and the icing is the right consistency to cover your cake. Add a little more icing mixture if it is too runny, or a little non-dairy milk (a few teaspoons at a time) if it is too thick.  This amount made enough to do a crumb coat and a top coat with only about 1/3 cup leftover.

For the stars I bought a pack of white icing and just tinted them to the colours I wanted.

Overall this was a really easy cake which made preparations for the day stress-free and Oscar loved it too which is the most important thing!

dairy free chocolate number 5 cake © www.foodbabylife.com

I'm actually going to reintroduce dairy in the next few weeks to see how Noah reacts (I've only cut it out while breastfeeding) but until then it's nice to know I can still made a great cake and not feel like I'm missing out.


Monday, March 31, 2014

Peanut Butter Granola (Secret Recipe Club)

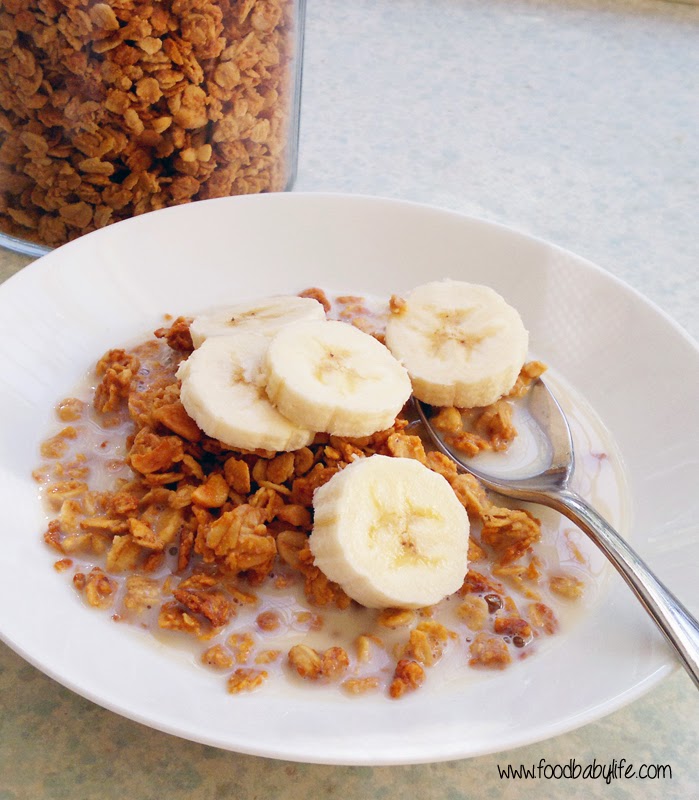
Peanut Butter Granola © www.foodbabylife.com

Secret Recipe Club time! This month I was assigned Curious Cuisiniere by cute couple Sarah and Tim! Their love of food really comes across on their blog and I had a great time exploring their site and bookmarking lots of recipes.

When I came time to choose I actually couldn't decide and ended up making two and funny thing is, both recipes contain peanut butter. Sarah mentions eating peanut butter straight from the jar and while I haven't done that (yet) I do love my peanut butter!

The first recipe I made was the African Sweet Potato Peanut Soup. Smooth soups always go down better at our place so I added extra stock and blended it. It was absolutely delicious and a real winner but unfortunately I didn't get a decent photo.

The second recipe I chose was the Peanut Butter Granola and it was awesome. I've been making homemade granola for ages and I've done chocolate, gluten free and ginger-spiced granolas among others, but it never occurred to me to use peanut butter.

I made a few minor changes to the recipe like swapping the honey for rice malt syrup to make it fructose free. I also left out the whole peanuts to make it child-friendly and then used crunchy peanut butter instead of smooth to give some extra crunchy texture.

3 of the 4 of us absolutely loved it but weirdly, my PB obsessed 3 year old didn't like it. Kids!

My only complaint is that it didn't make enough so next time I will definitely be making a double batch.

Great recipe, thanks Sarah and Tim!

Peanut Butter Granola
Adapted from Curious Cuisiniere

2 1/2 cups rolled oats
1/3 cup natural crunchy peanut butter
3 tbs rice malt syrup
2 tbs water
1/8 ts salt

Preheat the oven to 160 degrees C / 325 degrees F. Line a baking tray with baking paper and set aside.

Place the oats in a large bowl. Place the remaining ingredients in a small saucepan and stir over low heat until smooth and well combined. Pour over the oats and mix well. Tip the mixture into the prepared pan and press down (this will give you lovely clumpy granola which you can break up later).

Bake for 20 minutes then remove from the oven to break up the clumps. Bake for a further 20 minutes breaking up the clumps once during that time.

Remove from the oven and allow to cool completely before storing in an airtight container.


Secret Recipe Club


Saturday, March 29, 2014

Choc Banana Peanut Butter Smoothie

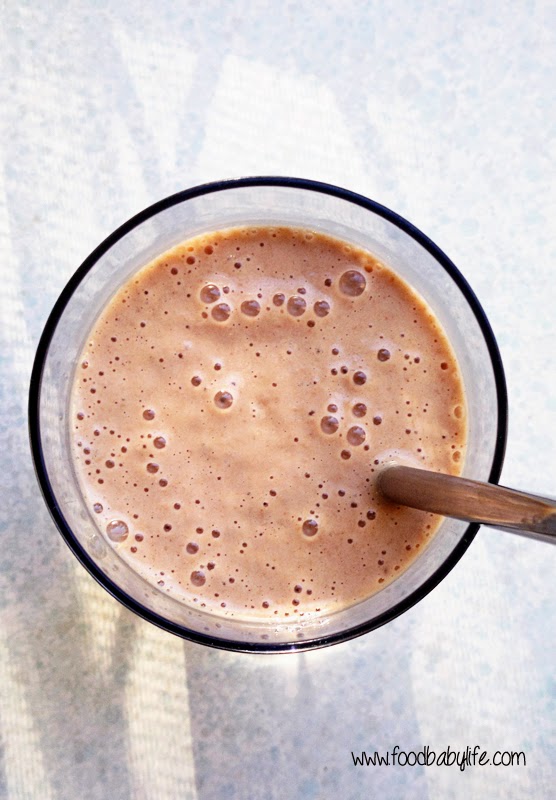
Choc Banana Peanut Butter Smoothie © www.foodbabylife.com


We love our breakfast smoothies around here. In fact if the boys are being a bit naughty at bedtime the thought of maybe not getting a smoothie the next morning is usually enough to settle them down!

As I am still off dairy I usually make a smoothie just for me while the boys will have the same as my husband. After trying lots of different milk alternatives I am thrilled to say that my tummy is loving rice milk. I really like the Vitasoy one that is enriched with chickpeas and very high in protein. It is quite sweet (although unsweetened) and a perfect base for a smoothie.

This smoothie is rich and sweet but packed with goodness and is a great start to the day. You won't be hungry for a while after drinking this for breakfast.

Have a great weekend!

Choc Banana Peanut Butter Smoothie
Recipe by me

1 cup rice milk

1 small banana
1 ts raw cacao
1/2 ts vanilla extract
1 tbs chia seeds
1 tbs smooth natural peanut butter
handful of ice

Place all ingredients in a blender and blend until smooth. Makes 1 (big) serve.

Tuesday, March 25, 2014

Breakfast Bars

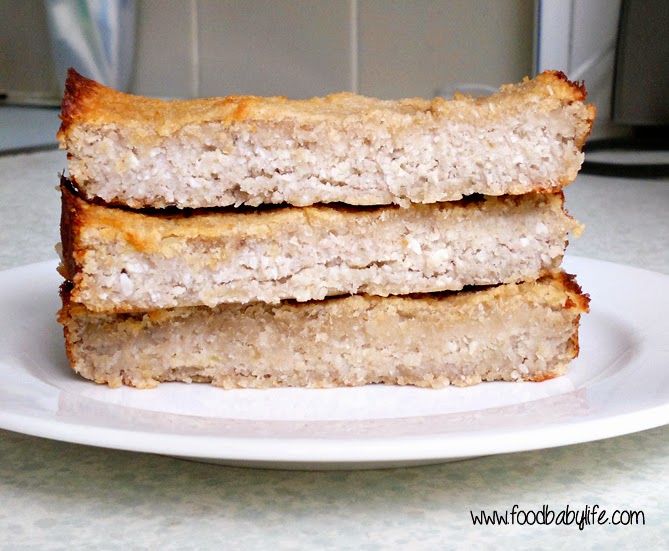
Breakfast Bars © www.foodbabylife.com

Lately it's been really hard to fill up my kids. At 3 and almost 5 these boys eat a LOT.  Even my 5 month old who has just started on solids has already eaten kilos of fruit and vegetable purees. Heaven help us when they're teenagers!!!

I spend a lot of time looking for new recipes for snacks and quick meals that will fill them up for longer. My main criteria are high protein, low/no sugar and wholegrain. I've been reading Bianca's Wholefood Simply blog for ages but last week I splurged and bought her gorgeous cookbook of the same name. It is a treasure trove of favourites from the blog and so beautifully photographed and put together. The boys spent a good half an hour last night before bed flicking through and deciding what they would like me to make.

For me these breakfast bars were an immediate winner in terms of both ingredients and being so easy to make. My boys loved them for afternoon tea with a glass of milk and it keeps them going until dinner.

Breakfast Bars
Very slightly adapted from Wholefood Simply

1 cup raw macadamias
1 cup dessicated coconut
2 ripe bananas, mashed
2 ts vanilla extract
pinch salt

Preheat oven to 180 degrees celsius. Line a loaf pan with baking paper and set aside.

If you have a high speed blender or food processor simply throw in all the ingredients and blitz until smooth. If you think your blender would struggle (like mine did), use it to process the nuts then simply mix with the remaining ingredients in a bowl.

Tip the mix into the prepared pan, smooth the top and bake for approx 25 minutes or until it is golden around the edges and skewer comes out clean.

Allow to cool on a wire rack then slice into bars and enjoy!

Saturday, March 22, 2014

Spelt Quick Bread

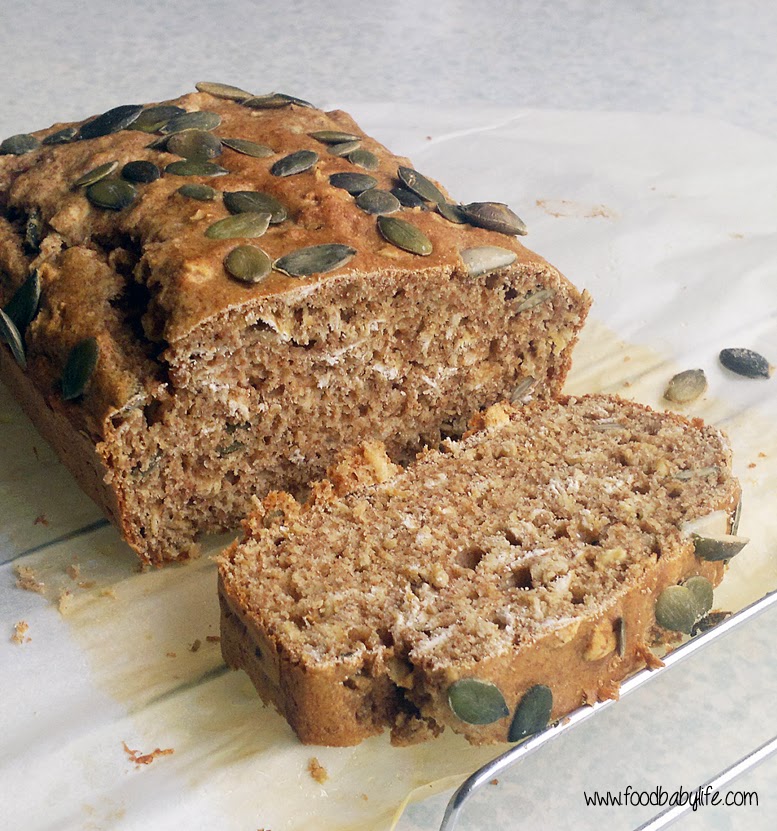
Spelt Quick Bread © www.foodbabylife.com


A quick post about a quick bread! Sorry, bad joke there. Anyway while it has been radio silence on the blog lately I have actually been cooking and baking a lot but never seeming to find the time to post. I do have a lot of things photographed that I will get to when I can.

This morning though I wanted to bake something healthy for a late breakfast and stumbled across this quick bread. Just a handful of basic ingredients, 5 minutes to mix and 30 minutes later I was enjoying a few slices topped with natural peanut butter and a drizzle of rice malt syrup. The perfect Saturday breakfast.

Spelt Quick Bread
Very slightly adapted from Anja's Food 4 Thought

1 1/2 cups wholemeal spelt flour
1/2 cup rolled oats
1 ts salt
1 ts bicarbonate of soda
1/4 cup pumpkin seeds, divided
1 cup rice milk
2 ts apple cider vinegar

Preheat the oven to 200 degrees celsius. Line a loaf pan with baking paper and set aside.

Place the vinegar in a 1 cup measure then fill with rice milk then allow to stand.

Add the dry ingredients (but only half the pumpkin seeds) to a large bowl and stir together. Pour in the rice milk and vinegar and mix well to combine. Pour the mixture into the prepared tin, sprinkle the remaining seeds over the top and bake for 25-30 minutes or until a skewer comes out clean.

Allow to cool for 5 minutes before turning out. Delicious served warm from the oven or you can slice, freeze and toast to enjoy another day.


Thursday, March 13, 2014

Mushroom Lasagne

Mushroom Lasagna © www.foodbabylife.com

I am a huge fan of lasagne! It's definitely my favourite pasta dish but for some reason we don't tend to make it very often. It just feels much more time consuming than good old spaghetti bolognaise which we eat pretty regularly.

I had my eye on this mushroom lasagne recipe from Delicious Everyday for ages. It was actually part of a series of Christmas posts from 2010 when the blog was called Le Delicieux, so that tells you just how long it's been hanging around!

I know the recipe looks long but I managed to get this in the oven within an hour, which seems amazingly fast considering I made the pasta from scratch! I was also pregnant at the time with 2 other kids to look after so was feeling very chuffed to make making something so fancy :)

And how did it taste? DIVINE. The earthiness of the mushrooms paired with the creamiest bechamel, tender bite of the pasta and the gorgeous salty parmesan on top ... it was just perfect. If I ever need to make something vegetarian for Christmas this will be ideal.

Mushroom Lasagne 
Very slightly adapted from Delicious Everyday 

Fresh Pasta
400g strong 00 flour
4 extra large eggs
1 tbs olive oil
1 ts salt

Place the flour and salt in a large bowl and whisk to combine. Make a well in the centre. In a small bowl whisk the eggs until the yolks are broken up, then pour into the well. Add the oil.

Using your fingertips, slowly start to mix the eggs and oil into the flour. Once combined, tip the dough out onto a floured board and knead for approximately 10 minutes, or until the dough is smooth and elastic. Cut into 4 pieces, wrap each in cling film and allow to rest for 30 minutes.

Meanwhile prepare your mushroom base and bechemel sauce.

Using your pasta machine, roll out each section of dough. I feed each piece through level 1 x 5 times, then once each on 2 -5. Lay out on a tea towel and cover until you are ready to use it.

Mushroom base
600g mixed mushrooms (portabella, swiss brown, button)
1 tablespoon of olive oil
3 cloves of garlic, minced
1 brown onion, diced
3 ts fresh thyme, chopped
2 ts salt
1/4 teaspoon of freshly ground pepper
2 tbs beef/vegetable stock or red wine

In a large frying pan over a medium heat, fry together the olive oil and onion for a few minutes until it starts to soften. Add the garlic and cook until the onion is translucent.

Add the mushrooms, thyme, salt and pepper and cook until the mushrooms are soft. Add the stock/wine and cook until all the liquid is absorbed.

Set aside and allow to cool completely.

Bechemel sauce
500ml full cream milk
1 bay leaf
1 large clove of garlic, crushed
3 ts butter
3 ts flour
1/4 ts salt
1/4 ts freshly cracked pepper
60g of freshly grated parmesan cheese

Pour the milk into saucepan, add the bay leaf and garlic and allow towarm gently over low heat for 10 minutes. Remove the bay leaf.

In a large saucepan over a medium heat melt the butter before whisking in the flour. Cook for a minute to remove the flour taste. Pour in the warmed milk and whisk constantly until all the butter and flour is incorporated. Switch to a spatula and cook until the sauce is your preferred thickness. Don’t stop stirring! Add the salt, pepper and parmesan and stir until well combined.

Lasagna assembly
Fresh lasagne sheets
60g parmesan cheese, grated

Preheat your oven to 180 degrees C / 160 degrees fan-forced.

Grease your lasagne dish with butter and line the base with a lasagna sheet. Cut them to fit if needed.

Cover with half the mushroom mixture and top the mushrooms with 1/3 of the bechemel sauce. Repeat ending with a final lasagne sheet topped with the remaining bechemel sauce. Sprinkle over the grated parmesan.

Bake for around 40 minutes or until the lasagne sheets are tender and the top is golden brown.

Monday, February 24, 2014

Coconut Flour Blueberry Muffins (Secret Recipe Club)

Coconut Flour Blueberry Muffins © www.foodbabylife.com

It's Secret Recipe Club time! Each month SRC members are assigned a blog to make a recipe from and then we all post on the same day. Who got who is a secret until reveal day, which happens to be today!

This month I was assigned Flying on Jess Fuel, which has to be one of the best blog names ever. Jess is a navy wife and her blog is a fabulous collection of recipes shared from all over the US. Let me tell you I was really spoilt for choice this month. There were SO many recipes I wanted to make!

Unfortunately I can't have any dairy while feeding my son as it upsets his little tummy, so that cut out a few awesome sounding recipes that I have bookmarked for later on - Jess's Taco Salad, Cheeseburger Pizza and White Chicken Lasagna to name a few.

While browsing through her breakfast recipes I came across Jess's Coconut Flour Cherry Muffins. We happened to have a huge bag of coconut flour in the pantry and as I am trying to bake with less wheat and dairy this looked perfect!

Coconut flour has become a really popular ingredient lately as it allows you to bake grain-free, perfect for anyone following a gluten free or paleo diet. It works very differently from other flours though so you can't just sub it one for one with other flours. For example, for every 1 cup of wheat flour you would use only 1/3 cup coconut flour and lots of extra liquid.

I wasn't lucky enough to have a glut of cherries like Jess had when she made these, but I did have a bag of frozen blueberries so I used those instead. The only other changes I made were to use rice malt syrup as the sweetener instead of sugar, and olive oil instead of butter.

So how did they taste? Delicious! Slightly denser than regular muffins but very moist and with a very subtle coconut flavour. Similar to a friand made with ground almonds. These were a hit with my taste-testers and I've already made a second batch using pineapple and they were just as good.

This one's a winner, thanks Jess! :)

Coconut Flour Blueberry Muffin © www.foodbabylife.com

 Coconut Flour Blueberry Muffins (Gluten and Dairy Free, Low Fructose)
Adapted from Jess's  Coconut Flour Cherry Muffins

6 eggs
1/3 cup olive oil
1/3 cup rice malt syrup
3/4 tsp vanilla or almond extract
1/2 cup coconut flour
1/4 tsp salt
1/2 tsp baking powder
1 cup blueberries (fresh or frozen)

Preheat oven to 190 degrees Celsius. Grease a muffin tray and set aside.

Add the dry ingredients to a large bowl and whisk to combine and remove any lumps. In a medium bowl, whisk together the eggs, oil, syrup and extract. Pour the wet ingredients into the dry and stir until smooth. Gently fold through the blueberries.

Divide the batter evenly between 12 muffin cups.

Bake 16-20 minutes, until the edges are just beginning to brown and the muffins spring back when touched gently in the middle. Remove from the oven and leave to cool in the tin before turning out on to a cooling rack.


Secret Recipe Club
Related Posts Plugin for WordPress, Blogger...