Monday, December 19, 2016
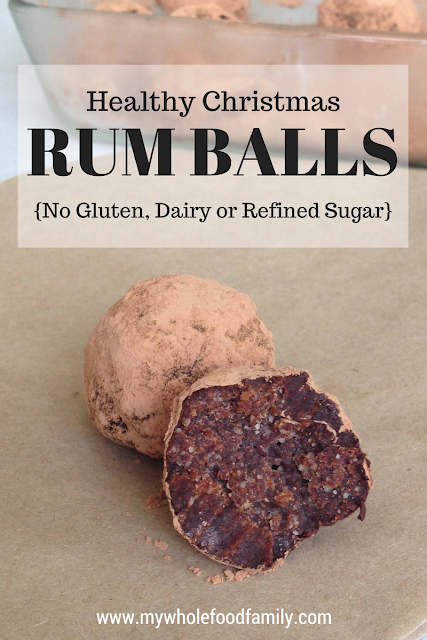
Healthy Christmas Rum Balls
Now I know I'm venturing into dangerous territory here.
It seems like everyone's mum or nanna makes rum balls at Christmas - and everyone thinks their version is the best!
Some have crumbled cake, some use crushed biscuits or weetbix, all have chocolate and of course, rum.
My previous favourite back in my BW days (Before Wholefoods) was this version I made with Madeira cake and condensed milk. So good but so bad!
I've tried a few different variations and this one is a definite winner.
It has the fewest ingredients and tastes out of this world!
They are rich, intensely chocolatey and have a lovely warmth from the rum. Just perfect.
So I started these a few days ahead of time by soaking the sultanas in the rum and leaving them to steep. As soon as the rum was gone and the sultanas were plump and juicy they were ready to use.
If you don't have time for that (or just don't want to), you can place the sultanas and rum in a small saucepan, bring to the boil and then simmer until all the liquid is absorbed.
Despite it being school holidays I have somehow managed to keep these hidden from the kids in the freezer. They are definitely adults only and if I'm honest, just to good to share!
Healthy Cacao Rum Balls
1/2 cup organic sultanas*
2-3 tbs rum
250g organic raw almonds (or almond meal)
2 heaped tbs raw cacao + 1/2 cup extra
2 tbs coconut oil
pinch salt
*See the post above for details on how to prepare the sultanas and rum - by either steeping or boiling. When you are ready, follow the instructions below to make the rum balls.
Place the almonds into your food processor and blend to a fine meal (Thermomix 10 secs / SP 9).
Add all remaining ingredients (except the extra cacao) and blitz until the mix is sticky and clumping together.
Place the extra 1/2 cup raw cacao into a bowl.
Roll spoonfuls of mixture into balls and then drop into the cacao. Toss until covered and place into a storage container.
Makes approximately 16 balls.
Store in the fridge or freezer.
Do you have a favourite treat that it just wouldn't be Christmas without? Tell me below!
Friday, December 9, 2016
Christmas Bliss Balls
4.57 am.
Why do I always wake up at 4.57am these days??
Today I got up straight away and crept downstairs to enjoy the extra quiet time by myself. And at the bottom of the stairs, I took a deep breath and smelt ... Christmas.
After going to the markets on the weekend our fruit bowls are full of mangoes, pineapples and peaches and the smell instantly transported to me my childhood Christmas holidays on the Gold Coast!
The power of smell is truly amazing don't you think?
I can't quite believe it but today is the last day of school for the boys. All the breakup parties, concerts and swimming carnivals are done and Christmas will be here before we know it.
This year I'm easing myself into some Christmas cooking with some simple and oh-so delicious bliss balls that have some of the best flavours of Christmas time.
These little beauties are free from gluten, dairy and refined sugar and taste fabulous. I defy you to taste one and not get a smile on your face!
They were also a great way to use some of the blackstrap molasses which I bought but then couldn't remember why!
I've just included the Thermomix ingredients here but of course a food processor or high powered blender will also do the job.
Super quick and no baking - the perfect Christmas treat!
Christmas Bliss Balls
3/4 cup rolled quinoa
3/4 cup organic sundried dates
1/2 cup raw almonds
A thumb-sized piece of ginger (grated)
1 tbs blackstrap molasses
zest of 1 orange
1/2 ts vanilla extract
1/2 ts cinnamon
14 ts salt
1/8 ts ground cloves
Place the quinoa flakes and almonds into the Thermomix and blitz for 8 seconds / SP 9.
Add all remaining ingredients and process for 30-40 seconds / SP 8, or until the mixture is sticky and holds together.
Roll spoonfuls into balls and store in the fridge.
Makes 16-18 balls.
Do you have a favourite food or smell that reminds you of Christmas?
Monday, November 28, 2016
Review: Reshape Your Body with Real Food Challenge
You know, as much as I tout the benefits of menu planning, the actual process of doing it bores me to tears.
It is one of my least favourite jobs!
So the past few weeks were an amazing breath of fresh air as I completed the 21 day Reshape Your Body with Real Food Challenge with naturopath Jessica Donovan from Energetic Mama.
I've written before that I've been feeling fat, frumpy and tired this past Winter. All of this has been due to some health issues I've been having and while I definitely wanted to lose weight, what I really wanted was more energy and to just feel a little better.
I've been on Jess's mailing list for years and wasn't actually going to do this challenge until the 11th hour when she sent an email detailing how her program can help women with thyroid problems, oestrogen dominance and adrenal fatigue.
Umm, that's the exact trifecta I'm dealing with. I signed up on the spot and couldn't wait to get stuck in!
There was a daily email for the 3 weeks covering the menu, shopping, meal prep, mindset, exercise and some naturopathic advice on the specific conditions so many of us are struggling with.
So 3 weeks later, was it worth it?
In a word, YES.
Within the first few days I could see where some bad habits had been sneaking in.
I could see just how often I was reaching for something sweet, that I wasn't having a substantial enough lunch and then snacking before dinner, and that I'd become too reliant on carb-heavy foods like potatoes and brown rice.
Pros:
1. It is run by a naturopath so you know the nutritional information is sound. Plus Jess is always available to answer any questions in the private Facebook group during the challenge which was great.
2. Jess specialises in treating mums and this program is designed for women with hormonal, adrenal and thyroid issues. Like I said, this is exactly what I need.
3. It got us out of a food rut. Despite eating well, lately we've been busier and tending to make the same things over and over again. The whole family appreciated some different things on the menu and they have been easily adaptable for our gluten and dairy free way of eating.
4. I loved not having to decide what was for breakfast, lunch and dinner each day. The menu and shopping list were provided and all I had to do was check the menu and cook. No thought involved!
5. The food was delicious, very fresh, great variety and easy to prepare. Some of the dinners have become new family favourites and I've made them several times since the challenge.
Cons:
1. The cost of the food. This was something I didn't even consider. We already a eat whole foods/no junk diet but we eat simply, and we buy and cook in bulk. Our food bill essentially doubled for the period of the challenge which was hard for us to absorb. But if you buy processed food and a lot of takeway chances are you would end up saving money.
2. The exercise program was way beyond me. If you already exercise no doubt you would be fine. But coming from a background of chronic fatigue syndrome and no regular exercise for years this was completely, and totally beyond my capabilities.
3. No ongoing access to the exercise videos. While all the menus, shopping lists and exercise planners are downloadable, the exercise videos are not, which is a shame because I would have liked to be able to work up to doing them and track my progress.
My results:
- 1.4 kg weight loss in 21 days
- No more bloating
- 3.5cm off my waist measurement so my jeans are comfy again, and
- I gained a new repertoire of fresh and delicious meals
They say it takes 21 days to form a new habit, and I have to say I have been sticking with this way of eating quite easily.
I'm now not only planning dinners, but breakfasts and lunches as well and finding I don't really need to snack at all. I'm also more tuned into my body and only eating when I'm hungry, rather than when I'm tired or bored. This is huge!
I think this has been the perfect way to get back into healthier eating, especially with Christmas coming.
I'm not sure when Jess will run the challenge again but you can go here to get on the waiting list for next year.
Thanks Jess! It was a great investment and I'm so happy I signed up.
* This is not a sponsored post. I paid for the challenge myself and was not compensated for this post. All opinions are my own. You should seek medical advice before embarking on a diet and exercise program.
Monday, November 21, 2016
Salted Peanut Butter Honey Cookies (SRC)
Well, this is it. The final ever reveal for the Secret Recipe Club!
My first post for SRC was back in February 2013 when I made a delicious Chicken Tikka Masala. We love Indian food but it was the first time I'd ever made that recipe myself. And it was amazing!
I've loved getting a peek inside other people's kitchens, trying out recipes that I would otherwise have never even heard of, let alone tried.
And I think that has been the beauty of SRC. We all come from different parts of the world, have different tastes, different families and yet, we have all been brought together by our love of food.
For this final month, I was assigned Savory Moments by Amy, a stay at home mum of twins from Western NY and passionate foodie, and I knew immediately I would find some great food.
Her blog's header reads that she is 'trying to learn skills that have been lost along the way by many people of my generation: cooking, baking, growing food, preserving, and appreciating a healthy, home-cooked meal.'
Yes!
This is exactly why I cook and blog too.
I think so many of us are time-poor and have been seduced by the ease of convenience foods, which in reality are chemical-laden, nutrient-deficient filler foods, setting us up for a lifetime of ill-health.
To grow your own food, even if it's just having a few pots of herbs on your windowsill, to buy what is seasonally available and then cook it from scratch is so rewarding and the best way of setting up a culture of good food in your family.
We are a predominantly gluten, dairy and refined sugar-free household these days, and I found loads of recipes on Amy's blog that fit the bill, or that could be easily adapted.
Some of my favourites were the Turmeric and Honey Roasted Chickpeas, Avocado Chocolate Pudding, Lemony Raw Kale Salad, Roasted Sweet Potatoes with Spinach and Cranberries and Bog salad with maple vinaigrette to name just a few.
When it came down to it though, I decided to make something just for my boys.
I've been in a bit of a baking rut recently, so wanted to try something new. So it had to be Amy's Salted Peanut Butter-Honey Cookies!
My only change to the recipe was to use buckwheat flour instead of the wholemeal, to make them gluten free.
I also made them smaller than stated, getting 20 cookies out of the batch instead of the 14-16 Amy suggested. I baked them for just 10 minutes but even that was too much, so if you make them small I would suggest just 8-9 minutes!
This is a great recipe to make with kids - just 5 ingredients, mix, roll and flatten with a fork. Mr 3 was my very willing helper with these and he was hovering close to taste the first one.
My boys absolutely loved these and the entire batch went in one afternoon tea. For the record I had just 2, and the other 18 were devoured by the 3 of them, along with a glass of cold milk each.
I think that makes them a winner!
Salted Peanut Butter-Honey Cookies
Adapted from Savoury Moments
3/4 cup buckwheat flour
1/2 cup natural peanut butter
1/2 cup raw honey
1/2 ts bicarb soda
1/4 ts sea salt, plus extra for sprinkling
Preheat oven to 180 degrees Celsius / 160 degrees fan-forced.
Line a tray with baking paper and set aside.
In a small bowl whisk together the flour, bicarb and salt.
In a large bowl beat together the peanut butter and honey until smooth.
Add the dry ingredients into the peanut butter mixture and stir until well combined.
Roll tablespoons of mixture into balls and place on the prepared trays. Gently press down with the tines of a fork to make a criss-cross pattern. Sprinkle with a little extra sea salt.
Bake for approximately 8-10 minutes, until they just begin to turn golden brown.
Makes 20 cookies.
Thank you Amy for a great recipe, we will definitely be making them again!
And thank you Sarah E for all your hard work in keeping SRC running for us these past few years. It's been great! :)
Tuesday, November 15, 2016
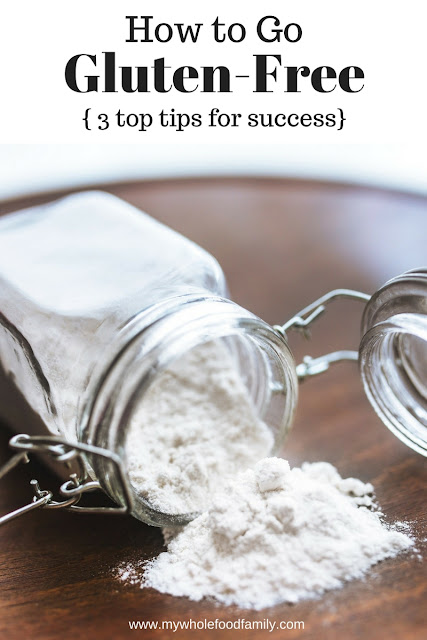
3 top tips for going gluten free (and my favourite gluten free flour recipe)
Let me say up front that I love bread. Like really LOVE it.
To me the aroma of freshly baked bread is one of the best smells in the world, so the thought of not being able to indulge in a piece, warm from the oven and smeared with butter was ... upsetting.
But after years of ill-health and lots of niggly issues that just wouldn't go away, it was time to bite the bullet and cut out gluten.
Now if you listen to mainstream media you will probably hear that going gluten-free is a fad, that there's no benefit in doing so and that it may even be harmful. I think that's rubbish personally, and naturopath Jules Galloway sums it up perfectly here.
So while I don't have coeliac disease, since going gluten free I have noticed:
- less brain fog
- more energy
- no more constant runny nose
- fewer headaches
- less bloating
Doesn't sound like a harmful fad to me!
I made the decision to go gluten-free back in July and haven't looked back.
As I was already eating a wholefoods type of diet I was expecting it to be relatively painless but I definitely got hit with withdrawal symptoms. It was fascinating to see just how much my body craved carbs and how often I would normally reach for 'a little something', a biscuit or piece of toast, something to keep me going until the next meal.
So based on my experience with going gluten free, here are my top 3 tips:
(And I just have to preface this by saying if you suspect you have coeliac disease, please seek medical advice before cutting out gluten. You need gluten in your system for the testing to be accurate so please see your doctor! For everybody else who suspects gluten may not be the best thing for you, read on).
1. Approach this as an experiment.
Going gluten free is entirely your choice, and for now, you are choosing not to eat gluten. Take each day as it comes and really listen to your body.
Keeping a journal is a great idea. Keep track of what you are eating and how you feel afterwards. For me, eating traditional wheat-based pancakes for breakfast practically sends me into a coma and makes me feel bloated and lethargic for the rest of the day. But I can eat gluten free pancakes and feel great. Seems obvious when you think about it!
2. Focus on foods that are naturally gluten-free.
We are really lucky these days to have access to gluten free products in the supermarket. You can buy gluten-free bread, pasta, crackers, cakes ... you name it. But gluten free bread is definitely not the same as wheat bread. It won't taste the same, look the same and may not work in the same way. I am yet to find a gluten-free bread that is good for sandwiches although most make great toast. Most brands are also full of additives and preservatives which is not what I want.
So instead of focusing on all the foods you can't eat (because let's face it, gluten is hiding almost everywhere), think about everything you CAN eat. Meat, fish, poultry, fruits, vegetables, nuts, seeds, dairy products ... all of these are naturally gluten free, nourishing and delicious.
3. Plan an alternative so you don't feel deprived
If the rest of your family is having pizza, one of 2 things will happen. You will either feel angry and deprived, or you'll give in and have some. So plan ahead. Make sure you have a gluten free base on hand ready to go, or a recipe to make your own. Make a batch of muffins or bliss balls and stash them in the freezer so you have a sweet treat to have while your coworkers are gobbling down birthday cake. Feeling deprived will make you miserable, even if you're feeling better in other ways.
Now I love baking and am pretty experienced, but even I have had some gluten-free disasters. I'm talking muffins like bricks, and pizza base so tough we couldn't even break it!
The Orgran brand plain and self-raising flours at the supermarket are great, but I've also come up with my own recipe that I keep on hand. And if that's too much, a simple 50:50 blend of buckwheat and rice flours also works well for most recipes like biscuits and muffins.
My favourite gluten-free flour mix
200g sorghum flour
200g buckwheat flour
200g white rice flour
100g brown rice flour
300g potato starch
1 tbs psyllium powder
Place all ingredients into a very large bowl and use a whisk to mix well together.
Store in an airtight container.
If I was to add a top tip #4 it would be to choose your start date carefully - don't make things harder on yourself by quitting gluten a week before your birthday or Christmas or some other normally gluten-free celebration.
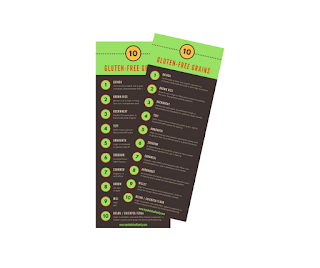
To help you on your gluten-free journey I've done up a handy printable showing 10 of my favourite gluten-free grains, their health benefits and how to use them. Just click on the image below to grab your copy now!
Have you gone gluten free? Did you notice any great improvements? How has it changed the way you cook and eat?
I would love to hear your thoughts.
Susan
Tuesday, November 8, 2016
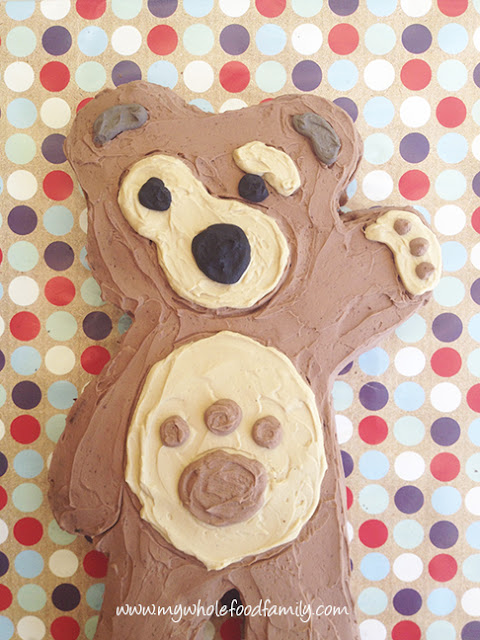
Little Charley Bear Cake
'Mummy, can I have a bear cake this year? Pleeeeeeese?'
It's s not just my kids who start planning their birthday cake months ahead of time, is it?
While the whining can be annoying, the benefit is I have months of time to think about how to make a bear cake!
Mr 5 received a Little Charley Bear for his first birthday and it has been his constant companion ever since. He's only spent one night apart from him, and that was when he accidentally left him at daycare and I didn't even know he'd taken him there. We survived the night. Just. But it's not an experience I would care to repeat.
So when he asked for a bear cake for his 6th birthday, I knew I would have to make it a Little Charley Bear cake. How could I not?
I always make my kids birthday cakes even though cake decorating is not my strength, and of course these days we avoid artificial colours and flavours like the plague which makes the more brightly coloured cakes a bit of a challenge.
Good thing bears are brown!
How to make a Little Charley Bear cake
First thing was to find an image I could use as a template. There are surprisingly few Little Charley Bear colouring pages online, which is basically what you are after. What I found was a still from a You Tube video called 'How to draw Little Charley Bear.' Perfect.
I saved the image, cropped off the bears on the sides and pasted it into PowerPoint.
My cake tin measured 33cm long so that was the maximum size for the image.
Enlarge the image to 33cm, then copy it onto 2 slides - one with the top half and one with the bottom half. Then print out both slides and tape them together to form one 33cm high image.
Lay a sheet of baking paper over the top and trace the outline and details with a sharpie.
Cut out the image.
Lay the template over your cake and using a sharp knife at 90 degrees, carefully cut around the edge, holding it with one hand to prevent it slipping.
Carefully slide your cake onto a prepared cake board and you are ready to decorate!
Wholefood Chocolate Sheet Cake
400g white spelt flour
100g raw cacao powder
2 tbs baking powder
250g unsalted butter, softened
1/4 ts fine sea salt
3 eggs, lightly beaten
500g rice malt syrup
250ml water
1 ts vanilla extract
Preheat oven to 170 degrees Celsius / 150 degrees fan-forced.
Grease a 23 x 33cm tin and line the base and sides with baking paper.
Place all ingredients into a large bowl and using electric beaters, beat together at low speed until combined, then on high speed for 2 minutes until smooth and glossy.
Pour the mixture into the prepared tin and bake for approx 50 minutes or until a skewer inserted into the middle comes out clean and the top springs back when lightly pressed.
Cool in the tin for 5 minutes before turning out onto a wire rack to cool completely. Cover with a tea towel to stop it drying out.
Cream Cheese Icing
500g cream cheese (in blocks)
250g butter
150g coconut sugar
2 ts vanilla extract
30g raw cacao
2 charcoal capsules
Beat together the cream cheese, butter, coconut sugar and vanilla together until smooth.
Remove about 1/4 of the icing and set aside in a small bowl. This is for all the light coloured parts on the tummy and eyebrow.
Remove 1 tablespoon of this icing and place into another small bowl, this will be for the brown inside the ears.
Add the cacao to the rest of the mixture and mix until smooth and completely combined.
Place 2 tablespoons of this mixture into a small bowl and add the contents of the charcoal capsules - mix until well combined. You should have a strong black icing.
Take a small amount of the black icing and add it to the tablespoon of light icing set aside - add little by little until you get a darkish grey-brown. This is for inside the ears.
To decorate
Prepare your template and cut out the cake as per instructions above.
Place the cake onto your prepared board. I use a large cake board covered with wrapping paper.
Cut strips of baking paper and slip them under the edges of the cake. This keeps the board clean while you ice the cake. Just pull them away when you are finished for nice crisp edges and a clean board!
Cover the whole cake, top and sides, with a thin coat of the chocolate icing. This is the crumb coat and it seals in all the crumbs and gives a better finish. Place the cake in the fridge for 20 minutes for the icing to firm up before moving on to the next step.
Now you need to cut out each element from the template.
Starting by cutting out the light colour tummy. Lay it on the iced cake and using a skewer trace around the edge. Fill in with light coloured icing. Repeat with the smaller pawprints on the tummy and fill in with chocolate icing.
Repeat for paw and ears, and use black icing for the nose and eyes.
Serve immediately or if you need to put the cake in the fridge, bring it out an hour beforehand to warm up.
Use a skewer to draw the outlines of his arms (don't be like me and forget to outline the outstretched arm!)
So there you go.
If I can make a Little Charley Bear cake, anyone can!
And free from refined sugar and artificial colours.
Happy Birthday Mr 6!
Monday, October 17, 2016
Sage and Apple Fritters (SRC)
There are some food combinations that just work - think peanut butter and chocolate, tomato and basil, lemon and blueberries to name just a few.
Well, you can now officially add sage, apple and maple syrup to that list.
Because WOW. So yummy!
This isn't my invention, though. Credit must go to Helen from Casa Costello, whose blog I was assigned for this month's Secret Recipe Club.
Helen had my blog back in May and made my Thumbprint cookies, and I remember then flicking through her recipes and looking forward to getting her blog sometime.
Helen is from the UK and mum to 3 girls. She is a self-described 'massive foodie' and has been working with food and cakes since she was since 16.
Speaking of cakes, Helen is also a fantastic cake decorator and shares lots of her creations on her #BakeoftheWeek challenge. My boys particularly liked this Police Car Cake. Gorgeous isn't it?
When it came to choosing a recipe I took ages to decide, but I knew I wanted something pretty simple and of course, it had to be gluten and dairy free (or easy to convert). I loved the sound of Helen's Walnut and honey granola and Scrambled eggs with style. And this Lemon Frangipane Pie looks fabulous.
In the end though these Apple fritters with sage were calling my name. I've never used sage in this way before. Typically I only use it in stuffing at Christmas time. Which probably explains why it was so hard to find at the shops right now, no one else uses it much either!
My husband eventually found a little pot of sage that Mr 7 immediately took outside and replanted into a bigger pot. It's still very young but we got enough off it for this recipe and 2 perfect little leaves for garnish.
I've always loved fritters, especially tuna and corn fritters, but the rest of family doesn't share my same level of enthusiasm.
That may have changed with this recipe!
Apple, sage and maple syrup are a match made in heaven.
I made only a few changes to the recipe to suit our way of eating - using gluten free flour, non-dairy milk and frying in coconut oil. I also reduced the sugar and am glad I did because between the apples and maple syrup I found them very sweet!
All 3 of my boys loved these and were literally licking their plates clean. Mr fussy-5 even ate an extra sage leaf (covered with maple syrup) and declared it 'really yummy.' So huge for him to eat something green voluntarily even if he did have to smother it in syrup!
These would be perfect for a weekend brunch and will definitely be on the menu at our place again.
Sage and Apple Fritters
Adapted from Apple fritters with and without sage
2 large red apples
125g gluten free plain flour
1 ts baking powder
1/2 ts salt
1/2 ts cinnamon
2 ts rapadura sugar (or sweetener of choice)
150ml rice milk
1 large egg
6 sage leaves
coconut oil for frying
In a medium bowl whisk together the flour, baking powder, salt, cinnamon and sugar.
Peel the apples and chop into very small pieces. Add them to the dry ingredients and toss to combine.
In a small jug beat together the milk and egg together then pour into the flour and apples and mix well. Finely chop the sage leaves and stir through.
Melt 2 tablespoons of coconut oil in a large heavy-based frypan over medium heat.
Dollop in spoonfuls of mixture and flatten out into pancake shapes.
Cook until gold brown then flip and cook on the other side until cooked through.
Remove and place on a rack while you cook the remaining fritters.
Serve with a drizzle of maple syrup.
Makes 10 fritters.
Thanks for a great recipe Helen! I will definitely be making these again.
Tuesday, October 11, 2016
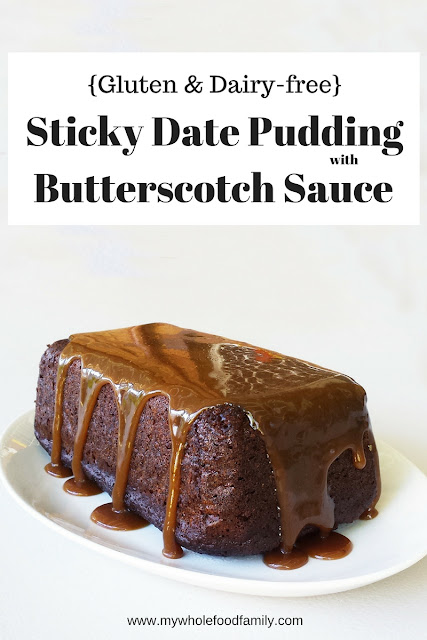
Sticky Date Pudding with Butterscotch Sauce (Gluten and Dairy Free)
I definitely have a tendency to procrastinate.
If it seems too hard or it will take too long, it slips right to the bottom of my to-do list (possibly never to be seen again!)
Anything I've read about procrastination says that you need to do the hard stuff first.
Basically, if there is anything you're avoiding, just get up and do it first thing - it will be over and done with and set you up to have a really productive day.
Take this post for example.
I made this Sticky Date Pudding for our Christmas in July party. Yep July. And it's now the middle of October.
I'm not sure why it's been so hard to post lately but today I am taking my own advice and I'm just gonna do it!
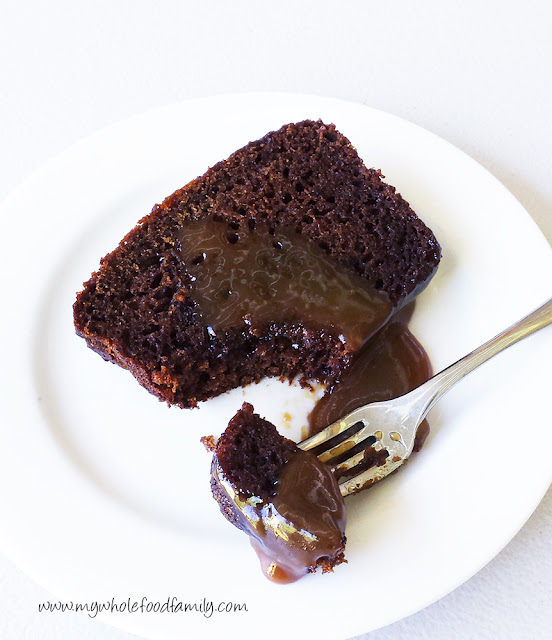
So, sticky date pudding. A bit of a classic and a little retro. But things are a classic for a reason and a dessert that tastes this good never really goes out of style.
Sweet, sticky, decadent, and packed with warming spices and a good splash of brandy. Perfect for cold weather (it was just a pity the cold snap had ended and it was 28 degrees that day in July!).
Often when you go gluten and dairy free you can feel like you're missing out. Ingredients can't always be substituted one-for-one and I can tell you, I've had some spectacular failures. Think pizza bases as hard as cement or muffins that taste like cardboard. It's so frustrating! Not to mention a big waste of ingredients and money.
This sticky date pudding is definitely special occasion fare - and for a special occasion you want something that works.
I actually made 2 different versions of sticky date pudding, baking one in the oven (this one pictured) and steaming one in a pudding bowl in the slow cooker. I wasn't sure which technique would work the best, but in the end, they both did!
So I will be keeping that in mind and I have a feeling the steamed version will make an appearance at our Christmas Eve dinner along with some cinnamon coconut ice cream. My mouth is watering already!
Ok yes, there is a LOT of sugar here, but for Christmas (or Christmas in July) I have no problem with it. In saying that though, I am planning on experimenting a bit more and seeing how it goes with most or even all of the sugar taken out and with just the dates for sweetness.
Gluten and Dairy Free Sticky Date Pudding
200g pitted dried dates
1/4 cup brandy
1 cup very hot water
2 ts bicarb soda
2/3 cup coconut sugar
60g coconut oil, melted
3 eggs
1 ts vanilla extract
170g gluten free flour
2 1/2 ts baking powder
1/4 ts salt
1 ts cinnamon
1/2 ts ground ginger
Preheat oven to 180 degrees Celsius or 160 degrees fan-forced.
Grease and line a loaf pan with baking paper and set aside (I used a pyrex loaf pan).
Roughly chop the dates and place in a heatproof bowl. Add the brandy and the hot water and leave to stand for 10 minutes or until the dates have softened. Once soft, mash the dates and water together and stir in the bicarb soda.
To this mixture, add the coconut oil, eggs and vanilla and mix together until very well combined.
In a large bowl, mix together the flour, sugar, baking powder, salt, cinnamon and ginger with a whisk.
Pour the date and egg mixture into the dry ingredients and mix until smooth.
Pour into the prepared pan and bake for 50 minutes or until the top springs back and a skewer inserted into the middle comes out clean.
Remove from the oven and leave to cool for 10 minutes before slicing and serving.
Suitable for freezing.
Serve with butterscotch sauce for an indulgent dessert.
This sauce was truly a revelation. I admit it's been many years since I had a real butterscotch sauce but this dairy free version was amazing. So rich and creamy. It would be perfect over coconut ice cream with a sprinkle of crushed nuts. Yum!
Dairy-free Butterscotch Sauce
1/2 cup coconut cream
1/2 cup coconut oil
1/2 cup coconut sugar
1/2 cup rice malt syrup
2 ts vanilla extract
1/4 ts sea salt
1/2 ts cream of tartar
Place all ingredients except cream of tartar into a medium pot and bring to the boil. Add the cream of tartar and stir until completely dissolved. Increase the heat to medium-high and boil for 5 minutes or until it reaches 110 degrees Celsius / 230 degrees F on a candy thermometer.
Pour immediately into a clear glass jar. Allow to cool to luke warm before serving (it is like molten lava once it is cooked so don't lick the spoon or stick your finger in for a taste - it will burn you!!!)
Pour over warm pudding just before serving.
Are you a procrastinator like me?
Monday, September 19, 2016
Coconut Flour Pancakes (SRC)
It's Secret Recipe Club time!
For those who don't know, each month SRC members are assigned a blog in secret from which to choose and prepare a recipe. Then we all post on the same day and have fun working out who had who!
This month I was assigned the blog Dessert Before Dinner by Stephanie. Stephanie recently moved to LA with her husband and cat and she loves making bread and ice cream. Just like me she used to make lots of desserts but after she got married she focussed more on main meals and 'real food.' Stephanie had my blog for SRC last month so it was fun to have a look around her site this month!
Here are just a few of her recipes that caught my eye:
Lemon Caper Quinoa Patties, Coconut Flour Pancakes, Apple Stuffed Pork Tenderloin, Coconut Milk Kanten, Coconut Flour Cake with Fudge Frosting, and Cinnamon Lime Panna Cotta just to name a few!
Given that I am off both gluten and dairy at the moment, and have a pantry full of coconut products, I had to go with Stephanie's coconut flour pancakes.
I make pancakes at least once a week for the kids, and sometimes for my lunch as a treat while I'm studying. I have made coconut flour pancakes before but this recipe was a little different, using dried coconut and some spices.
Stephanie says the recipe serves 2 for breakfast, but I got just 4 perfect little pancakes from the mixture which would be a hearty serve for 1 around here!
These were reminiscent of the oatmeal pancakes I've made for brunch previously, with the shredded coconut giving a similar chewy texture to the oats. So if you are newly off gluten and want something substantial for breakfast, these pancakes not only taste great they will keep you full until lunchtime.
Coconut Flour Pancakes
Recipe from: Dessert Before Dinner
2 eggs
2 tbs milk (almond or coconut would be good)
1 ts honey
2 tbs coconut flour
2 tbs shredded coconut
1/8 ts bicarb soda
1/8 ts cinnamon
1/8 ts nutmeg
Heat up a frypan over medium heat.
In a small bowl mix together the eggs, milk, honey, bicarb and spices. Add the coconut flour and shredded coconut and mix until just combined.
Grease the pan with a little coconut oil and dollop in 4 spoonfuls of mixture, flattening each out into a pancake.
Fry for 2-3 minutes on each side or until cooked through.
Serve with maple syrup and strawberries.
Thanks for a great recipe Stephanie!
Tuesday, September 13, 2016
What I learnt about self-care this Winter ...
So things have been a little quiet on the blog front this past month or so.
I haven't spoken about it much but my health hasn't been great this Winter - I've been really run down and catching every bug going around. When you add that onto looking after 3 kids and studying well, things have definitely gotten on top of me.
I may have mentioned before that I've also been having some thyroid problems. Now I never had even an inkling of a thyroid issue until after having baby number 3. Post-partum thyroiditis is apparently really common but it's been tricky for me to manage.
I've been absolutely freezing this Winter (feeling cold is one of the symptoms) and have piled on about 6kg which is incredibly frustrating as I'm eating well and haven't had to think about my weight at all for a couple of years.
Hypothyroidism (or underactive thyroid) which is what I have, can also greatly impact on mood and anxiety levels so on top of feeling cold and fat I've also been feeling pretty down. Sounds like fun hey?
After hibernating for a while, I decided I had to make some changes.
Clearly what I was doing wasn't working.
And isn't that the definition of insanity? Doing the same thing over and over again and expecting different results?
You may have heard the phrase 'self-care' bandied about a lot recently. For me it used to conjure up images of going to a spa for a massage or lighting candles. All good things but nothing I have the time for. Nothing that lights me up, so to speak.
A few months ago I stumbled across a book by Doreen Virtue called 'Don't Let Anything Dull Your Sparkle' and I read it, captivated. Because that is exactly what I have lost - sparkle. I have been feeling dulled down, tired, overwhelmed and uninspired. No wonder my health has been slowly going down the toilet.
Reading that book made me aware of all the drama I was allowing in my life. So getting rid of that was the first step I took.
1. Drama detox
Now anyone who knows me might be surprised that I consider myself addicted to drama. Outwardly I'm a pretty calm and quiet person. But my god, the drama that goes on in my head sometimes!
After taking a good hard look at just where my energy goes I could instantly see how much time and energy I was wasting on drama - the shows I watched on TV were full of crime, violence and stressful situations, reading the news online, getting caught up in the rush and busy-ness of life and allowing all of that to affect my mood and my sleep.
What I did - switched off the TV, removed all the programs I had set to record on the DVR, removed the bookmarks to news sites on my laptop, removed Facebook from my phone, found a classical music station on the car radio.
How I felt - removing all these stressful influences has had a major impact on my mood. I feel lighter and happier and, bonus, I have so much more time. Extra bonus the kids have been really enjoying listening to classical music!
2. Meditation
I've always been so resistant to meditation. But as they say, the things we resist the most, are usually the things we need the most. And so it was here too.
Meditation has been absolutely the greatest gift to myself these past few months. Setting aside just a little bit of time each day to relax, be still and clear my mind. Forget sitting cross-legged on the side of a mountain and chanting - meditation can be as simple as closing your eyes and focusing on your breath for a few seconds ... and instantly reaping the benefits.
My favourite tool for meditation is the Insight Timer app. It is completely free and gives you access to thousands of guided meditations. You can also meditate to music or just choose some background music and set the timer. Try a few and you will find the style that suits you best. I do a quick 5-minute meditation as soon as I wake up to set the tone for the day and then as soon as Mr 2 goes down for his nap in the middle of the day, I lie down too and take 20 minutes for myself. And no matter how tempting it is to rush around and get a few things done as soon as he goes to bed, I've learnt from experience that if I don't take the time straight away, it may not happen.
What I did - committed to least 5 minutes of meditation every day
How I felt - AMAZING. I now crave that peace and stillness and I can draw on those feelings when things get crazy. Which, with 3 young kids, is pretty often!
3. Diet
Ok so I can't talk about improving my health without talking about diet.
As you know I am all about whole foods so I didn't have to cut out any junk, I just had to become more mindful with my eating and do some experimenting.
Some big triggers for thyroid health seem to be gluten, dairy and sugar. Which makes sense as they are all inflammatory and can impact on gut health.
The dairy and sugar were easy (ish) to remove but after 6 weeks now without gluten, I can say with absolute certainty that it's helping. I actually felt positive changes within a few days - more energy, less brain fog, less bloating.
So while I don't have celiac (I've had both blood tests and a biopsy to rule it out) it seems my body simply works better without gluten. I will be writing a post about going gluten free soon so I won't go into too much detail here.
The other side to diet is mindfulness - actually listening to what your body needs and then thinking about what to eat.
What I did - eating 3 proper meals each day rather than grazing or finishing the kids leftovers. Increasing the amount of veggies, especially greens. Sticking to 2 pieces of fruit per day. Drinking lots of water and herbal tea throughout the day.
How I felt - unsurprisingly I am feeling a bit better!
4. Sleep
I am not someone who functions well without sleep. Luckily I was blessed with kids that are good sleepers (please don't hate me!) and we are well past the baby stage anyway.
I need 8 hours sleep every night without fail. The easiest way to work out the right bedtime is to simply count back 8 hours from when your alarm goes off. Mine goes off at 5.30am which means lights out at 9.30pm.
The next thing is to think about how you are spending that last hour before bed and avoiding screen time if you can.
My night time ritual always includes a cup of tea, washing my face and putting on some beautiful smelling moisturiser and reading in bed for about half an hour before I turn out the light. If I do all these things then it is much easier to fall asleep and I don't feel like a total zombie the next day.
What I did - committed to a night time ritual and a set bedtime.
How I felt - While I still have some days when I need a nap in the afternoon (fatigue goes hand in hand with a dodgy thyroid), getting enough sleep at night makes everything feel easier.
5. Personal growth
Removing some negative stressful influences in my life has freed up some time and some space - which I have filled with books, music and podcasts. I am completely addicted to podcasts!
My favourites at the moment are:
- Happy Mama with Amy Taylor-Kabbaz
- How She Really Does It with Koren Motekaitis
- Magic Lessons with Elizabeth Gilbert
What I did - filled my free time with positive, informative and uplifting books, music and podcasts.
How I felt - inspired to do more, learn more, create more and connect more
So after all that, what did I learn about self-care this Winter?
It's essential. It makes a massive difference. And there's no one right way to do it.
What does self-care mean to you?
~ Susan
Monday, August 15, 2016
Peanut Butter Loaf (SRC)
It's Secret Recipe Club time again! Is it just me or does it seem like each month is going by faster and faster these days? For those counting there are only 4 more SRC reveals until Christmas!!
Anyway, for those who are new here, every month SRC members are assigned a blog in secret to choose a recipe from, then we all post on the same day. Today is reveal day for group C.
This month I was assigned Our Eating Habits by Jamie - a Disney-obsessed, Christmas-loving mother of 3 from Calgary. Jamie actually had my blog last month so it was extra fun looking through hers this month. Jamie also homeschools her kids which I find so fascinating because that's pretty rare here in Australia. She has also posted loads of restaurant reviews which I had a look through even though I am on the other side of the world!
Jamie has so many recipes to choose from that she has divided her recipe index into 2 categories - cooking and baking. I started making a list of possible recipes but it got a little out of hand so I will share just a few that caught my eye.
Firstly, my kids would go crazy for Spaghetti Tacos, this Sweet Shepherd's Pie is a great twist on a classic, I'm always looking for interesting vegetable side dishes and the Broccoli with Asian Garlic Sauce and Cumin Honey Carrots sound delicious, and lastly Kung Pao Chicken which I've never seen on a menu here but it always seems to feature on American TV shows for some reason.
I moved over to the baking section and bookmarked these Molasses Muffins. Then I noticed Jamie has not one, but two recipes for peanut butter loaf - Amish Peanut Butter Loaf and Peanut Butter Loaf. I've never heard of this before but we love our peanut butter around here so I had to give it a try!
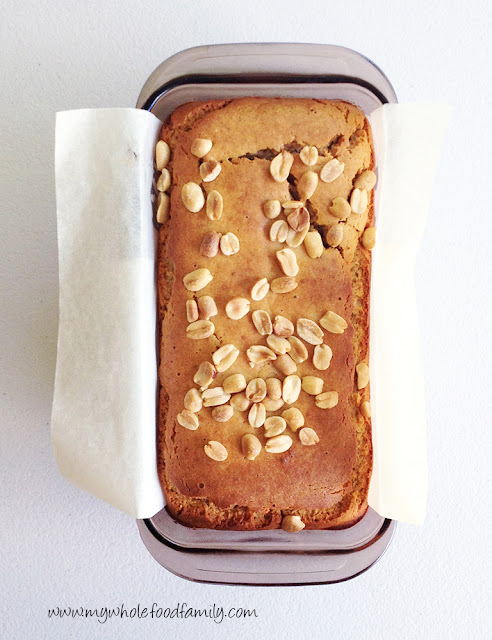
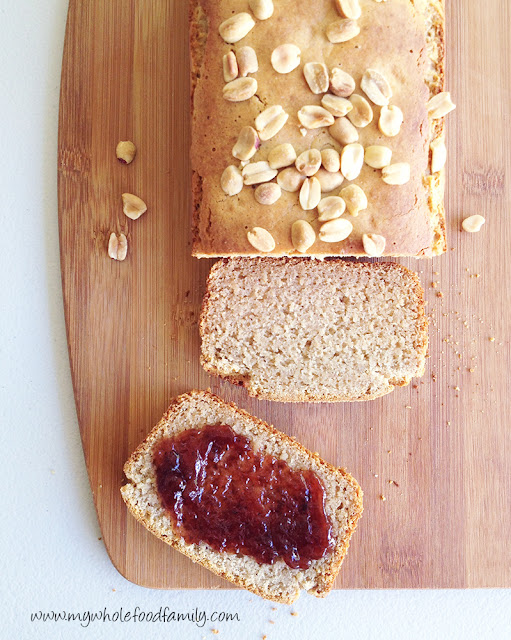
Basically this is exactly what it sounds like, a loaf cake made with peanut butter. If you love peanuts and peanut butter, this loaf is for you!
I'm still doing my gluten-free experiment so I made it gluten free and swapped out the sugar for rice malt syrup as well. I also added a scattering of peanuts over the the top for some extra crunch.
This was a huge hit with my boys! Seriously, my husband missed out completely because it was completely devoured for afternoon tea before he got home. I used my own blend of gluten free flour and it made a moist, chewy loaf with a crispy crust. So delicious! I was imagining it would be amazing toasted but it didn't last long enough for me to find out! Guess I will just have to make it again.
We usually buy freshly ground natural peanut butter but we only had peanuts in the pantry so I made my own peanut butter for this recipe. I used the Thermomix but any high powered blender or food processor will work. If you are using regular peanut butter you might want to adjust the amount of sugar or salt you use in the loaf.
Homemade Peanut Butter
160g roasted natural peanuts
15g coconut oil
Place the peanuts into the Thermomix bowl and chop 15 seconds / SP 8. Scrape down the sides, add the coconut oil and process for 6 seconds / SP 6. Makes exactly 2/3 cup needed for this recipe.
Peanut Butter Loaf - Gluten, Dairy and Fructose Free
Adapted from here and here
2/3 cup natural peanut butter
110g rice malt syrup
1 cup rice milk
2 cups gluten free plain flour
1 tbs gluten free baking powder
1/4 ts sea salt
Preheat the oven to 180 degrees Celsius / 350 degrees F. Grease and line a standard loaf pan with baking paper and set aside.
Beat together the peanut butter, syrup and milk until smooth. Add the remaining ingredients and fold through until well combined.
Pour into the prepared pan and bake for approximately 50 minutes, or until golden brown and a skewer inserted into the middle comes out clean.
Cool on a wire rack before serving sliced with strawberry jam.
Thank you for a great recipe, Jamie - this one is a keeper!
Subscribe to:
Posts (Atom)

