Wednesday, March 1, 2017
Sticky Slow-Cooked Pineapple Pulled Pork
I am a HUGE fan of slow-cooked meals.
Being able to get dinner prepped and out of the way in the morning is a brilliant time saver in our busy household, it doesn't heat up the kitchen like the oven does and bonus, slow-cooked meals taste amazing!
Our slow-cooker is used at least a few times a week, even in summer.
I do a batch of bone broth once a week, along with slow-roasted chicken, lamb chops and even stewed fruit.
This sticky pineapple pulled pork is the perfect slow-cooked meal for hot weather.
Pulled pork is wonderful on tortillas or baked potato/sweet potato with a zingy fresh coleslaw or with rice and steamed greens.
My version uses fresh pineapple to create a sticky but not overly sweet sauce that pairs beautifully with the pork.
For maximum flavour you can rub the pork with the honey and spices and leave in the fridge overnight to marinate. Honestly, I am not usually that organised and it's delicious even when freshly made in the morning.
We only have a pork a few times a year so it's a treat for us. Make sure you save the rind for crackling!
Sticky Slow-Cooked Pineapple Pulled Pork
1 x 2kg boneless pork shoulder
1 whole sweet pineapple
1 red onion
1 red chilli (uses as much or as little chilli as you like - 1 small chilli is good for my kids)
2 tbs sweet paprika
1 tbs honey
3 ts cumin
3 ts oregano
3 ts pink salt
2 ts onion powder
2 ts garlic powder
1/2 ts cinnamon
Peel and roughly chop the pineapple and onion, and place them into the Thermomix or food processor along with the chilli and puree until smooth. Pour the mixture into the slow cooker.
Remove the skin and fat from the pork using a very sharp knife, and either discard it or save for crackling.
Place the pork into a large baking dish.
Mix together the honey, spices and salt.
Rub the mixture over the pork until it is thoroughly coated.
Place the pork on top of the pineapple puree. Pop on the lid and cook on low for 8 hours.
Use 2 forks to pull the pork meat apart and mix through the sauce.
Do you have a slow cooker?
What was the last thing you made in it?
Tuesday, February 21, 2017
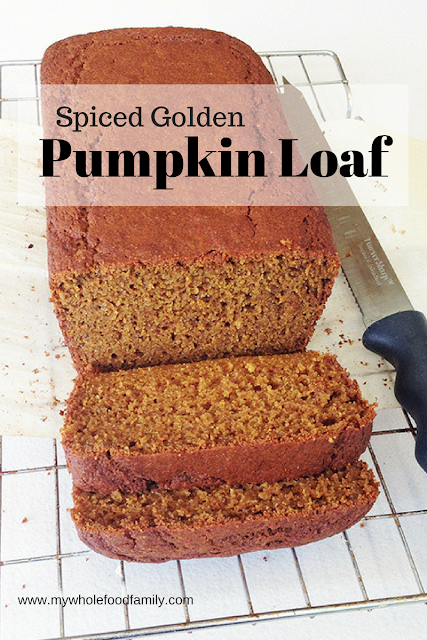
Pumpkin Loaf aka Spicy Golden Loaf
Having a child who is fussy about food is incredibly frustrating at the best of times.
And at the worst of times? It's a bit of a nightmare.
My now 6-year-old hasn't eaten a good dinner since before he was 2.
Let that fact sink in a little.
That's approximately 1500 nutritious dinners prepared lovingly by me that have NOT BEEN TOUCHED.
If we can get him to the table, he will eat plain pasta with extra virgin olive oil, homemade pizza (no sauce and topped only with cheese, olives and tinned pineapple) and takeaway fish and chips.
The list of foods he will eat is incredibly small and shrinking by the week.
We've done feeding therapy sessions with an occupational therapist and speech pathologist, and seen a GP, naturopath, dietician and psychologist.
So where does that leave us?
Well, it leaves us trying to pack in nutrition wherever and whenever we can.
At the moment breakfast is the only decent meal he will consume in a day.
It is usually a smoothie which I cram to the brim with good stuff like avocado, chia seeds, oats, yoghurt, protein powder, nut butters, berries, greens and more. Something like My Favourite Green Smoothie but with organic full cream milk.
Lunch usually comes home completely untouched so needless to say he is STARVING when he gets home.
So that leaves afternoon tea.
I try to make it a good one!
Hiding vegetables in cakes and muffins etc is not new, but it is definitely my favourite way to increase their nutrition. These have been some of favourites:
'Apple' Crumble Slice (without any apple!)
Chocolate Beetroot Cake
Pumpkin Fruit Cake
Chocolate and Zucchini Muffins
Sweet Potato Brownies
Pumpkin, zucchini, carrot, sweet potato and beetroot all work beautifully in baked goods. Add in a good unrefined sweetener and some sweet spices like cinnamon, nutmeg and vanilla and you have a delicious sweet treat that will fill them up and give them some much need veggies.
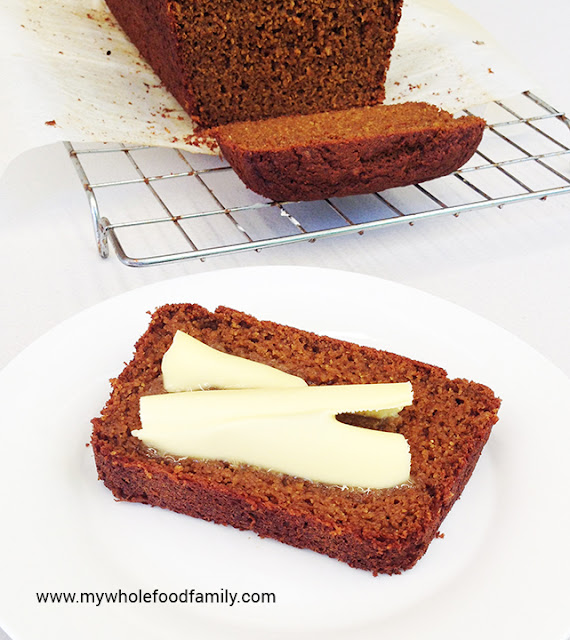
Today I had a lot of pumpkin to use up so I whipped up this pumpkin loaf cake which I am calling a 'Spicy Golden Loaf'. It is beautifully moist with lovely warm flavours of cinnamon, nutmeg, clove, ginger, orange and molasses.
A slice of this with a glass of milk will happily fill up even the fussiest tummy.
Spicy Golden Loaf
100g butter, at room temperature
100g coconut sugar
2 large eggs
1 ts vanilla extract
1 ts blackstrap molasses
zest of 1/2 orange
1 cup mashed pumpkin
1 2/3 cups wholemeal spelt flour
1 tbs baking powder
1/2 ts bicarb soda
1 ts cinnamon
1/2 ts nutmeg
1/2 ts ginger
1/4 ts cloves
Beat together the butter and coconut sugar until light and fluffy.
Add the eggs one at a time beating until smooth.
Add the pumpkin, vanilla, molasses and orange zest and mix until well combined.
Add the dry ingredients and fold through until just combined.
Pour mixture into prepared loaf pan and bake for 45-55 minutes, or until golden brown and the middle springs back when pressed gently.
Turn out onto a wire rack to cool. Delicious warm from the oven or at room temperature. Serve with butter.
Do you have a fussy eater?
What are your strategies? Let me know below!
Susan
Tuesday, February 14, 2017
Wild Orange Bliss Balls
So if you haven't already noticed, today is Valentine's Day. Happy Valentine's Day!
Do you do Valentine's Day?
We don't but it is definitely a good excuse to make something chocolatey for dessert!
I've actually been making these little bliss ball beauties for my doTERRA classes that I've been running at home and for friends.
They have been such a hit that I now make them for more special occasions too.
I've been loving experimenting with using different essential oils in cooking and baking.
Plus it's so handy to be able to add a drop or 2 of lemongrass, ginger or fennel, for example, to give a big boost of flavour when you might not have those ingredients handy.
The intense flavours of wild orange, lemon and peppermint oils pair so beautifully with raw desserts like slices and bliss balls.
I've made lemon balls and a chocolate-peppermint slice recently that were just divine so keep an eye out for those recipes soon.
Wild Orange Bliss Balls
1 cup raw cashews
1 cup dates
1/2 ts vanilla paste
Pinch salt
4 drops Wild Orange Oil (I use and recommend doTERRA essential oils, click here to find out why)
30g dark chocolate
Zest of 1/2 orange
Place the dates and cashews into the Thermomix or high-powered blend and process to a fine crumb. Add the vanilla, salt and orange oil and process until the mixture clumps together.
Roll spoonfuls into balls and place in the fridge.
Melt the chocolate ( I do it in a small glass bowl over a small pot of hot water simmering on the stove). Drizzle over the tops of each bliss ball and top with a sprinkle of fresh orange zest.
Makes approximately 10
Have you used essential oils in cooking before? Do you have a favourite oil or recipe you would like to share? Let me know below!
Susan
Tuesday, February 7, 2017
Gluten-free Corn Fritters
My grandmother was a great cook. Nothing especially fancy but the sort of homemade, stick to your ribs, oh-so-tasty fare that grandmothers are renowned for.
Her jam tarts in particular were spectacular!
But it was her corn fritters that seem to have stuck in my mind most clearly.
I had gone with her and friend for a week's stay on Tangalooma, a family-friendly resort on an island about an hour's boat trip away. We were in a downstairs garden apartment with a small kitchen where we could cook for ourselves and not have to eat out all the time.
I can so vividly remember coming in from the beach all wet and sandy to the smell of corn fritters frying and then burning my tongue eating them as soon as they came out of the pan.
There's just something about that combination of sweet and salty, crispy fried outside and soft fluffy middle that I can't resist!
These days no one in my family apppreciates a corn fritter quite as much as I do but they are a family favourite nonetheless.
You can think of these as a savoury pancake and top them any way you like.
I shared on Facebook during the week that I had leftover fritters topped with some smoked trout and sauerkraut (haha I just realised as I wrote it down that it rhymes!) for lunch the next day.
My kids also love them topped with crispy bacon and maple syrup. SO good!
Gluten-free Corn Fritters
2 cups gluten free plain flour
3 ts gluten free baking powder
1/2 ts salt
2 eggs
1 x 400g tin corn, drained
3/4 cup rice milk
Oil for shallow frying (Olive oil, coconut oil or ghee is great for these)
Place the flour, baking powder and salt into a large bowl and whisk together. Add the eggs, corn and milk and fold together with a spatula until well combined. (You may need slightly more or less milk than this, it seems to vary with every batch and probably depends also how well drained your corn is).
Preheat your frying pan over medium-high heat. Add enough oil to generously cover the base of the pan. When it starts to shimmer you are ready to fry.
Dollop spoonfuls of mixture into the pan and flatten out slightly. Fry for about 3 minutes then flip and fry on the other side until crisp, golden brown and cooked through.
Remove from the pan and place onto a wire rack over a baking tray. This ensures the fritters stay crisp on the bottom (nothing worse than a soggy bottom!)
Repeat with remaining mixture.
Makes approximately 16.
Are there any foods you feel really nostalgic about from your childhood?
Let me know below!
Susan
Tuesday, January 31, 2017
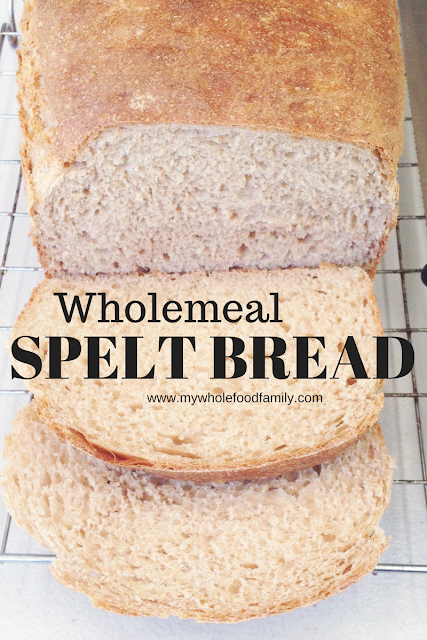
The BEST wholemeal spelt bread
Hello dear readers!
I've been taking some time away from the computer these past few weeks and am now refreshed and ready to jump back into things.
My big boys have just finished their first week back at school (in grades 1 and 3) and my priority at the moment is keeping their lunchboxes packed with nourishing and tasty food.
I don't know about your kids, but mine are always STARVING on the holidays and tend to graze a lot more. So it's always a bit of a shock to their systems to have nothing between breakfast and 11.10am when lunch starts!
I actually don't mind the boys having sandwiches for lunch as long as they are made with good quality bread and decent fillings.
For me, the ingredients on a loaf of bread should read flour, water, yeast and salt, with maybe some honey for sweetness and a high quality oil for a soft crumb.
If you haven't actually read the label on the bread you purchase you are probably in for a shock - most of them have numbers galore, vegetable oils, unpronounceable preservatives and additives to keep it fresh on the shelf for way longer than it should be.
I Quit Sugar did a post on the 5 healthiest breads at the supermarket but even those contained canola oil and a few other sneaky ingredients.
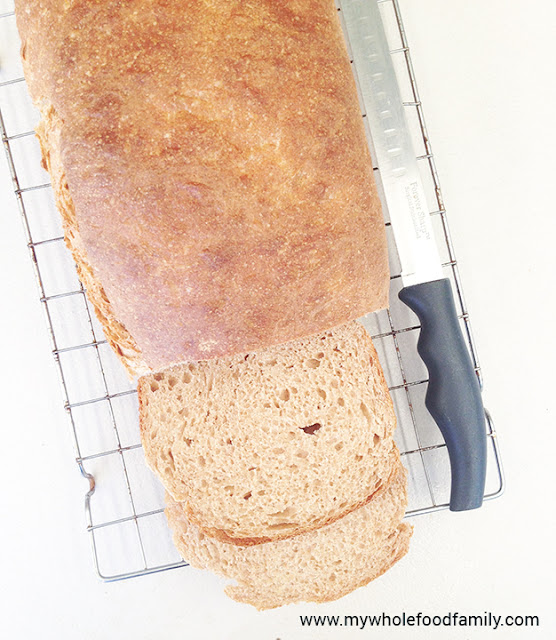
Baking your own is definitely the best option and my wholemeal spelt bread is the one I make for the kids that always gets eaten.
It's easy and pretty forgiving (my husband can make it on his own!) and it freezes well. I make a loaf most weekends, slicing and freezing it as soon as it has cooled.
If you have a Thermomix and haven't made your own bread yet, what are you waiting for?
The aroma of freshly baked bread is one the best smells in the world and the taste is better than anything you can buy. It's also far cheaper as a loaf of spelt bread will typically set you back at least $6.
I buy my spelt flour in bulk 12.5kg bags through my co-op and store it in the freezer.
The best wholemeal spelt bread that kids actually like
420g water
2 ts instant dried yeast
2 ts honey
600g wholemeal spelt flour
2 ts salt
2 ts apple cider vinegar
1 tbs extra virgin olive oil
Place the water, yeast and honey into the Thermomix and heat for 2 minutes / 37 degrees / SP 2.
Add the flour, salt, vinegar and oil and mix for 10 seconds / SP 3.
Lock lid and knead for 8 minutes.
Leave in the bowl for 20 minutes to rest.
Turn out onto an oiled surface, punch down and shape into an oblong.
Place dough into a large/jumbo/900g bread tin.
Cover and place in a warm, moist place to prove until it rises to the top of the tin (I do mine in the just emptied dishwasher!)
While the dough is proving, preheat your oven to 200 degrees Celsius / 180 degrees fan-forced.
Bake for approximately 30 minutes or until golden brown and sounds hollow when tapped underneath.
Remove from tin immediately and leave on a wire rack to cool.
Do you bake your own bread?
Susan
Thursday, January 5, 2017
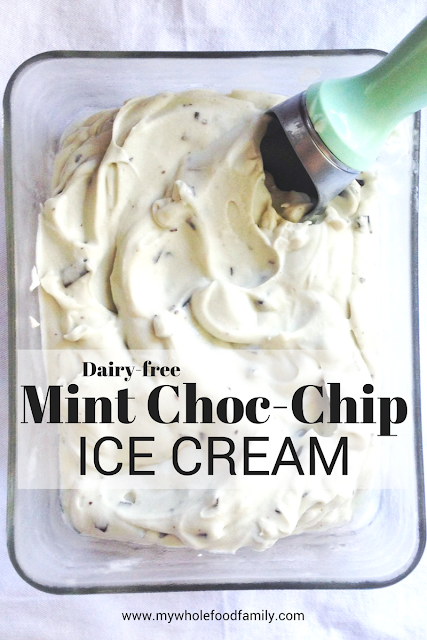
Happy New Year! (and some dairy-free mint choc chip ice cream)
Hooray it's 2017!
Can you feel it?
There's an excitement in the air - like the coming year is a blank slate just waiting to be filled with all sorts of awesomeness. Like this awesome mint-choc-chip ice cream! But more on that in a moment.
While I am not really into setting resolutions, at the beginning of a new year I think a certain amount of reflection is good.
Some people set goals, some choose a guiding word, some cross their fingers and hope for the best.
Me? I've found 3 little questions to be really helpful:
1. What do you want more of?
2. What do you want less of?
3. What do you want to introduce?
If you sit with each of those questions for a few moments the answers do make themselves known.
For me personally, I want more fun activities with my kids, more focus on my relationship with my husband, more meditation (I've committed to a 365 meditation challenge this year), more personal development, more reading of fiction, more gluten and dairy free cooking because this way of eating is serving me well, and more mindfulness and gratitude
I want less fear, stress and worry about things that I can't change, less self-recrimination, less feeling that I have to do it all.
I want to introduce - more movement, more date nights, a dedicated self-care ritual, to incorporate essential oils more into our daily lives, more fermented foods and a real focus on gut health for myself and Mr 6 especially.
I also want to eat more ice cream - if it tastes as good as this one does!
I've used a tin of coconut condensed milk here but if you have a Thermomix you can of course make your own with whatever sweetener you choose. I usually would but being time-poor on New Year's Eve and also wanting a very white base I chose to buy some. Totally up to you!
Dairy-free Mint-Choc-Chip Ice Cream
3 cans Ayam coconut cream (chilled in fridge upside down for 24 hours before you begin!)
1 can coconut condensed milk (also chilled in the fridge for 24 hours)
5 drops peppermint essential oil*
100g Lindt 85% cocoa chocolate, chopped into small chunks
Insert the butterfly into the thermomix bowl.
Take your already chilled cans of coconut cream, open them carefully and place only the thick creamy parts into the thermomix. Depending how you stored your can in the fridge you may be able to scoop off the cream leaving some watery milk in the tin, or you could pour off the milk leaving the cream behind. Just don't use the milk for this ice cream or it won't work!
Beat the cream for 30 secs / SP 4.
Add the (already chilled) condensed coconut milk and peppermint oil and whip for another 30 secs / SP 4.
Add the chopped chocolate and mix on reverse / SP 2 for 10 seconds.
Pour into a freezer safe container and chill until firm. Or serve immediately for a (very) soft-serve style ice cream.
My kids went nuts for this on New Year's Eve and there were arguments over who got to lick the bowl and spatula!
If you don't have a Thermomix then a good food processor or blender will work well too!
*Not all essential oils are safe for ingestion. Click here for more information on the brand I use and love!
Peppermint is one of my all-time favourite essential oils and to help you experiment with it I've done up a handy printable with some of the best uses for this wonder oil. Just click on the image below to grab your copy!
Do you use essential oils at home? What are your favourites? xx
Friday, December 23, 2016
Christmas Menu 2016
Well, we're really on the countdown to Christmas now!
This year I have made a concerted effort to get organised early for Christmas.
We bought a few presents during the year and then I made sure I had all the kids presents bought and wrapped before school finished. Go me!
I've had lists upon lists of gifts, shopping and food prepared so that this week has just been crossing things off. I've even got a timeline prepared for all the Christmas Eve cooking to make sure everything gets done.
This year we are hosting both Christmas Eve and Christmas Day. Normally we wouldn't do both but that's just how it's worked out.
This is the 4th year now that I've posted our Christmas menu and it's so helpful to be able to look back at previous years and see what worked and what didn't, and importantly what we can cut back on.
Our Christmas food this year is quite traditional - all our favourite things, homemade of course, and with lots leftover so I don't need to cook for a few days.
It's going to be great.
Christmas Eve Dinner
Honey, mustard and ginger glazed ham
Pigs in blankets (by special request from the kids who saw Jamie Oliver make some on one of his Christmas cooking shows)
Duck fat roast potatoes
Roast carrots
Steamed greens with almonds
Tapioca Christmas pudding (GF, DF)
Coconut vanilla bean custard
Christmas Breakfast
Scrambled eggs with leftover ham and garlic spinach
Spiced fig gingerbread
Christmas Lunch
Nibbles - nuts, pate, GF crackers, Christmas bliss balls
BBQ side of salmon
Prawn and chorizo salad
Mango and avocado salad
Mango and raspberry trifle (similar to this one I made last year but with a few changes to make it both GF and DF)
So that's it!
I wish all of you a very happy and safe Christmas 2016.
What's on your Christmas menu this year? Do you do a hot or cold Christmas lunch? Tell me below
Monday, December 19, 2016
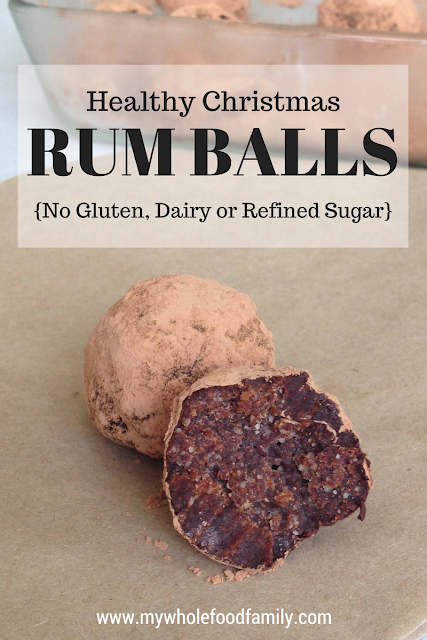
Healthy Christmas Rum Balls
Now I know I'm venturing into dangerous territory here.
It seems like everyone's mum or nanna makes rum balls at Christmas - and everyone thinks their version is the best!
Some have crumbled cake, some use crushed biscuits or weetbix, all have chocolate and of course, rum.
My previous favourite back in my BW days (Before Wholefoods) was this version I made with Madeira cake and condensed milk. So good but so bad!
I've tried a few different variations and this one is a definite winner.
It has the fewest ingredients and tastes out of this world!
They are rich, intensely chocolatey and have a lovely warmth from the rum. Just perfect.
So I started these a few days ahead of time by soaking the sultanas in the rum and leaving them to steep. As soon as the rum was gone and the sultanas were plump and juicy they were ready to use.
If you don't have time for that (or just don't want to), you can place the sultanas and rum in a small saucepan, bring to the boil and then simmer until all the liquid is absorbed.
Despite it being school holidays I have somehow managed to keep these hidden from the kids in the freezer. They are definitely adults only and if I'm honest, just to good to share!
Healthy Cacao Rum Balls
1/2 cup organic sultanas*
2-3 tbs rum
250g organic raw almonds (or almond meal)
2 heaped tbs raw cacao + 1/2 cup extra
2 tbs coconut oil
pinch salt
*See the post above for details on how to prepare the sultanas and rum - by either steeping or boiling. When you are ready, follow the instructions below to make the rum balls.
Place the almonds into your food processor and blend to a fine meal (Thermomix 10 secs / SP 9).
Add all remaining ingredients (except the extra cacao) and blitz until the mix is sticky and clumping together.
Place the extra 1/2 cup raw cacao into a bowl.
Roll spoonfuls of mixture into balls and then drop into the cacao. Toss until covered and place into a storage container.
Makes approximately 16 balls.
Store in the fridge or freezer.
Do you have a favourite treat that it just wouldn't be Christmas without? Tell me below!
Friday, December 9, 2016
Christmas Bliss Balls
4.57 am.
Why do I always wake up at 4.57am these days??
Today I got up straight away and crept downstairs to enjoy the extra quiet time by myself. And at the bottom of the stairs, I took a deep breath and smelt ... Christmas.
After going to the markets on the weekend our fruit bowls are full of mangoes, pineapples and peaches and the smell instantly transported to me my childhood Christmas holidays on the Gold Coast!
The power of smell is truly amazing don't you think?
I can't quite believe it but today is the last day of school for the boys. All the breakup parties, concerts and swimming carnivals are done and Christmas will be here before we know it.
This year I'm easing myself into some Christmas cooking with some simple and oh-so delicious bliss balls that have some of the best flavours of Christmas time.
These little beauties are free from gluten, dairy and refined sugar and taste fabulous. I defy you to taste one and not get a smile on your face!
They were also a great way to use some of the blackstrap molasses which I bought but then couldn't remember why!
I've just included the Thermomix ingredients here but of course a food processor or high powered blender will also do the job.
Super quick and no baking - the perfect Christmas treat!
Christmas Bliss Balls
3/4 cup rolled quinoa
3/4 cup organic sundried dates
1/2 cup raw almonds
A thumb-sized piece of ginger (grated)
1 tbs blackstrap molasses
zest of 1 orange
1/2 ts vanilla extract
1/2 ts cinnamon
14 ts salt
1/8 ts ground cloves
Place the quinoa flakes and almonds into the Thermomix and blitz for 8 seconds / SP 9.
Add all remaining ingredients and process for 30-40 seconds / SP 8, or until the mixture is sticky and holds together.
Roll spoonfuls into balls and store in the fridge.
Makes 16-18 balls.
Do you have a favourite food or smell that reminds you of Christmas?
Monday, November 28, 2016
Review: Reshape Your Body with Real Food Challenge
You know, as much as I tout the benefits of menu planning, the actual process of doing it bores me to tears.
It is one of my least favourite jobs!
So the past few weeks were an amazing breath of fresh air as I completed the 21 day Reshape Your Body with Real Food Challenge with naturopath Jessica Donovan from Energetic Mama.
I've written before that I've been feeling fat, frumpy and tired this past Winter. All of this has been due to some health issues I've been having and while I definitely wanted to lose weight, what I really wanted was more energy and to just feel a little better.
I've been on Jess's mailing list for years and wasn't actually going to do this challenge until the 11th hour when she sent an email detailing how her program can help women with thyroid problems, oestrogen dominance and adrenal fatigue.
Umm, that's the exact trifecta I'm dealing with. I signed up on the spot and couldn't wait to get stuck in!
There was a daily email for the 3 weeks covering the menu, shopping, meal prep, mindset, exercise and some naturopathic advice on the specific conditions so many of us are struggling with.
So 3 weeks later, was it worth it?
In a word, YES.
Within the first few days I could see where some bad habits had been sneaking in.
I could see just how often I was reaching for something sweet, that I wasn't having a substantial enough lunch and then snacking before dinner, and that I'd become too reliant on carb-heavy foods like potatoes and brown rice.
Pros:
1. It is run by a naturopath so you know the nutritional information is sound. Plus Jess is always available to answer any questions in the private Facebook group during the challenge which was great.
2. Jess specialises in treating mums and this program is designed for women with hormonal, adrenal and thyroid issues. Like I said, this is exactly what I need.
3. It got us out of a food rut. Despite eating well, lately we've been busier and tending to make the same things over and over again. The whole family appreciated some different things on the menu and they have been easily adaptable for our gluten and dairy free way of eating.
4. I loved not having to decide what was for breakfast, lunch and dinner each day. The menu and shopping list were provided and all I had to do was check the menu and cook. No thought involved!
5. The food was delicious, very fresh, great variety and easy to prepare. Some of the dinners have become new family favourites and I've made them several times since the challenge.
Cons:
1. The cost of the food. This was something I didn't even consider. We already a eat whole foods/no junk diet but we eat simply, and we buy and cook in bulk. Our food bill essentially doubled for the period of the challenge which was hard for us to absorb. But if you buy processed food and a lot of takeway chances are you would end up saving money.
2. The exercise program was way beyond me. If you already exercise no doubt you would be fine. But coming from a background of chronic fatigue syndrome and no regular exercise for years this was completely, and totally beyond my capabilities.
3. No ongoing access to the exercise videos. While all the menus, shopping lists and exercise planners are downloadable, the exercise videos are not, which is a shame because I would have liked to be able to work up to doing them and track my progress.
My results:
- 1.4 kg weight loss in 21 days
- No more bloating
- 3.5cm off my waist measurement so my jeans are comfy again, and
- I gained a new repertoire of fresh and delicious meals
They say it takes 21 days to form a new habit, and I have to say I have been sticking with this way of eating quite easily.
I'm now not only planning dinners, but breakfasts and lunches as well and finding I don't really need to snack at all. I'm also more tuned into my body and only eating when I'm hungry, rather than when I'm tired or bored. This is huge!
I think this has been the perfect way to get back into healthier eating, especially with Christmas coming.
I'm not sure when Jess will run the challenge again but you can go here to get on the waiting list for next year.
Thanks Jess! It was a great investment and I'm so happy I signed up.
* This is not a sponsored post. I paid for the challenge myself and was not compensated for this post. All opinions are my own. You should seek medical advice before embarking on a diet and exercise program.
Monday, November 21, 2016
Salted Peanut Butter Honey Cookies (SRC)
Well, this is it. The final ever reveal for the Secret Recipe Club!
My first post for SRC was back in February 2013 when I made a delicious Chicken Tikka Masala. We love Indian food but it was the first time I'd ever made that recipe myself. And it was amazing!
I've loved getting a peek inside other people's kitchens, trying out recipes that I would otherwise have never even heard of, let alone tried.
And I think that has been the beauty of SRC. We all come from different parts of the world, have different tastes, different families and yet, we have all been brought together by our love of food.
For this final month, I was assigned Savory Moments by Amy, a stay at home mum of twins from Western NY and passionate foodie, and I knew immediately I would find some great food.
Her blog's header reads that she is 'trying to learn skills that have been lost along the way by many people of my generation: cooking, baking, growing food, preserving, and appreciating a healthy, home-cooked meal.'
Yes!
This is exactly why I cook and blog too.
I think so many of us are time-poor and have been seduced by the ease of convenience foods, which in reality are chemical-laden, nutrient-deficient filler foods, setting us up for a lifetime of ill-health.
To grow your own food, even if it's just having a few pots of herbs on your windowsill, to buy what is seasonally available and then cook it from scratch is so rewarding and the best way of setting up a culture of good food in your family.
We are a predominantly gluten, dairy and refined sugar-free household these days, and I found loads of recipes on Amy's blog that fit the bill, or that could be easily adapted.
Some of my favourites were the Turmeric and Honey Roasted Chickpeas, Avocado Chocolate Pudding, Lemony Raw Kale Salad, Roasted Sweet Potatoes with Spinach and Cranberries and Bog salad with maple vinaigrette to name just a few.
When it came down to it though, I decided to make something just for my boys.
I've been in a bit of a baking rut recently, so wanted to try something new. So it had to be Amy's Salted Peanut Butter-Honey Cookies!
My only change to the recipe was to use buckwheat flour instead of the wholemeal, to make them gluten free.
I also made them smaller than stated, getting 20 cookies out of the batch instead of the 14-16 Amy suggested. I baked them for just 10 minutes but even that was too much, so if you make them small I would suggest just 8-9 minutes!
This is a great recipe to make with kids - just 5 ingredients, mix, roll and flatten with a fork. Mr 3 was my very willing helper with these and he was hovering close to taste the first one.
My boys absolutely loved these and the entire batch went in one afternoon tea. For the record I had just 2, and the other 18 were devoured by the 3 of them, along with a glass of cold milk each.
I think that makes them a winner!
Salted Peanut Butter-Honey Cookies
Adapted from Savoury Moments
3/4 cup buckwheat flour
1/2 cup natural peanut butter
1/2 cup raw honey
1/2 ts bicarb soda
1/4 ts sea salt, plus extra for sprinkling
Preheat oven to 180 degrees Celsius / 160 degrees fan-forced.
Line a tray with baking paper and set aside.
In a small bowl whisk together the flour, bicarb and salt.
In a large bowl beat together the peanut butter and honey until smooth.
Add the dry ingredients into the peanut butter mixture and stir until well combined.
Roll tablespoons of mixture into balls and place on the prepared trays. Gently press down with the tines of a fork to make a criss-cross pattern. Sprinkle with a little extra sea salt.
Bake for approximately 8-10 minutes, until they just begin to turn golden brown.
Makes 20 cookies.
Thank you Amy for a great recipe, we will definitely be making them again!
And thank you Sarah E for all your hard work in keeping SRC running for us these past few years. It's been great! :)
Subscribe to:
Posts (Atom)


