Tuesday, July 17, 2018
Lemon, Ginger and Turmeric Gummies
My kids adore gummies and with the weather so cold at the moment it is definitely time for a new batch to help us ward off all those bugs doing the rounds.
I usually make gummies using juice as a base but I didn't want the sugar this time so I've replaced it with coconut water and xylitol for a little sweetness instead.
This makes a big batch but it still never lasts very long around here!
LEMON, GINGER & TURMERIC GUMMIES
1.5 cups water
1.5 cups coconut water
1/4 cup xylitol
juice of 1 large lemon
1/2 ts organic turmeric powder
5 drops lemon essential oil*
2 drops ginger essential oil*
6 tbs gelatin (I like Great Lakes or Changing Habits)
In a small bowl mix together the xylitol, lemon juice, turmeric powder and essential oils.
Bring the water and coconut water to the simmer over medium heat. Add the xylitol mixture and stir well to combine.
Sprinkle the gelatin over the top and use a whisk to stir until it has dissolved. Pour through a sieve into a heatproof dish and leave to set in the fridge. Slice into squares to serve.
Gelatin is fantastic for gut health, helping to heal and seal the gut and in turn support your immune system.
It's also packed with protein and makes a great snack for hungry kids.
Enjoy! xx
*I only use and recommend doTERRA essential oils. Click here for a quick guide to essential oils, doTERRA and how you can get your own (no matter where you are in the world!)
Tuesday, June 26, 2018
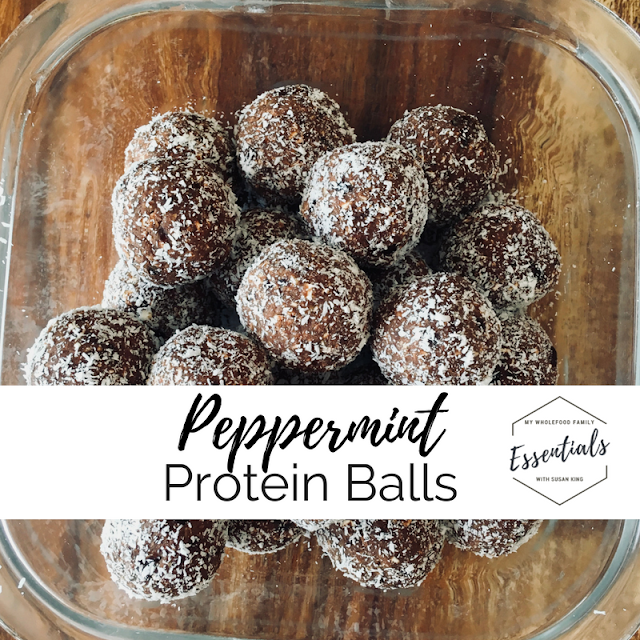
Peppermint Protein Balls
Do you need nut-free snacks for school or kindy? But still want something that will fill them up? We do. And it means we need to get creative because at home we use nuts and nut butter in practically everything!
These bliss balls are packed with fibre and protein and my 4yo LOVES them. They are the perfect high energy snack for a big kindy kid. Just don't mention the chickpeas!
PEPPERMINT PROTEIN BALLS
1 tin chickpeas, drained and rinsed well
1 cup rolled oats
1 cup dates
2 heaped tbs raw cacao
1 ts vanilla extract
5 drops Peppermint essential oil*
-
Desiccated coconut (to roll the balls in)
Add all ingredient to your food processor or Thermomix and blitz until the mixture clumps together (about 10 secs / SP 8).
Roll spoonfuls into balls and roll in desiccated coconut.
Store in the fridge or freezer.
Makes approx 18 depending on how big you make them.
Mine tend to get bigger as I go along because I get sick of rolling them! 😂
Make sure you like and share this recipe if it would be helpful for others and don't forget to let me what your little ones think when you make them! xx
*I only use and recommend doTERRA essential oils. Click here for a quick guide to essential oils, doTERRA and how you can get your own (no matter where you are in the world!)
Friday, June 22, 2018
Nourishing Chai Hot Chocolate with Essential Oils
Yesterday was the Winter Solstice which means we're now calling in longer days and more sunshine.
Until that happens though, one good thing about this cold weather is that it's always time for hot chocolate around here!
This is a really hearty and nourishing version and my kids and I love it!
The addition of the gelatin makes it a bit foamy, almost like there are melted marshmallows in it!
Plus how cool is it that the same combination of essential oils in this recipe also makes a brilliant chai diffuser blend #versatile
CHAI HOT CHOCOLATE
1 litre Coco Quench
2 heaped tbs raw cacao
2 heaped tbs xylitol (or honey, maple syrup etc)
2 tbs grass-fed gelatin
2 ts vanilla extract
pinch salt
1 tbs butter or ghee (optional)
-
1 drop Wild Orange*
1 drop Cardamom*
1 drop Cinnamon*
1 drop Ginger*
1 drop Black Pepper*
Place all ingredients except the oils in a pan over medium heat and whisk until warm and well combined OR place in Thermomix and cook 5 mins / 70 degrees / SP4.
Add the oils and mix again for a few seconds at SP 9 before serving.
Serves 4-5
So who wants hot chocolate now?
This hot chocolate is like a big warm hug to me, so when you make it please let me know what you think! xx
*I only use and recommend doTERRA essential oils. Click here for a quick guide to essential oils, doTERRA and how you can get your own (no matter where you are in the world!)
Saturday, June 2, 2018
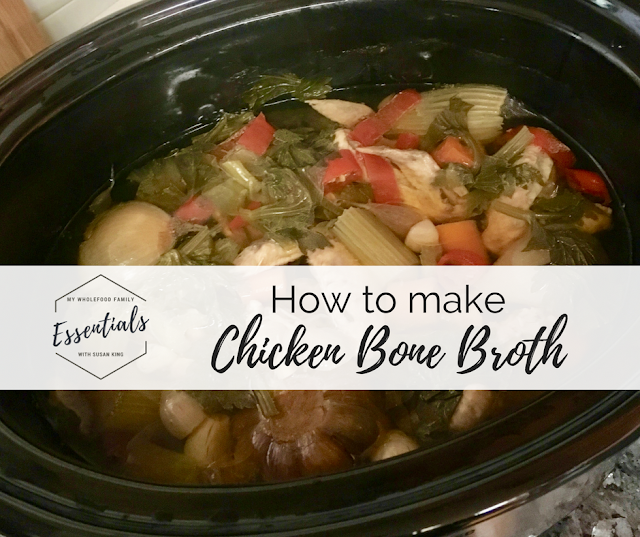
Chicken Bone Broth
I absolutely LOVE that the importance of gut health is becoming so widely accepted and promoted in mainstream health and media circles. Why?
Because the health of our gut affects everything from our immune system to our skin and even our mental health!
Bone broth is a staple at our place all year round, but especially over Winter.
It is liquid gold, like chicken soup on steroids and it's not only incredibly good for you but absolutely delicious.
It may take 24 hours to make but I promise you, it's worth the wait
I do a big batch in the slow cooker once a fortnight and then use it as the base for all my soups, casseroles and to poach my eggs in each morning #bestbreakfastever
I actually love the taste of it so if I'm not cooking with it, I might just have a small mug of broth each day, seasoned with a little sea salt.
Thyme, Rosemary and Black Pepper oils are my favourites to use in chicken broth but things like Basil, Oregano or Marjoram are wonderful too. Use your imagination, you really can't go wrong!
24 hr SLOW COOKED BONE BROTH
1 doz/1kg organic chicken wings*
2.5 litres filtered water
1/4 cup apple cider vinegar
-
1 brown onion, quartered
1 head of garlic, halved horizontally
2 stalks of celery, roughly chopped
2 carrots, roughly chopped
2 medium red chillies
-
2 drops each Rosemary, Thyme and Black Pepper essential oils (optional but awesome)
Place the chicken wings into the slow cooker, add the vinegar and cover with water. Leave to sit for 1hr.
After an hour, add the vegetables and turn the heat onto low. Cook for 24hrs.
Turn the heat off and leave to stand for 1 hr.
Use a slotted spoon to scoop out the chicken and vegetables and then strain the broth into a large glass jug.
Add the oils and stir to combine.
Place in the fridge overnight and it should turn to jelly! Or at least get a bit of a wobble. Remove the layer of fat on top if there is one but save it to cook with. Veggies fried up in a little chicken fat is AMAZING.
Pour (or spoon, depending on how thick the broth is) into small glass jars and store in the fridge for a day or so, or in the freezer for a couple of months.
* please only use organic chicken to make broth! The slow cooking extracts all the nutrients and collagen from the bones, but if you're using conventional chicken it will also extract any nasties.
If you want to eat the chicken, you need to remove the meat from the bones as soon as it's cooked, then return the bones to the pot for the remainder of the cooking time. Otherwise, after 24hrs it will be completely dry and tasteless. Trust me.
I hope this has inspired you to give making your own broth a go. It really is easy and the health benefits are incredible!
Susan xx
Sunday, May 27, 2018
Wild Orange Chickpea Blondies
I was searching for the perfect guilt-free treat for Mother's Day and came up with these!
If you're a fan of the combo of chocolate and orange you will love them. And even better, they're free from gluten, dairy, nuts and refined sugar!
I've since made another 2 batches of these and both times left the chocolate off the top.
This makes them less rich and the ideal treat for my kids' lunchboxes.
They have no idea it's healthy and the chickpeas give them a hit of protein as well.
Wild Orange Chickpea Blondies
1 can chickpeas, drained and rinsed
2 large eggs
1/2 cup rice malt syrup
1/3 cup coconut oil
1/4 cup gluten-free plain flour
1/2 ts gluten-free baking powder
pinch salt
10 drops Wild Orange essential oil
50g dark chocolate, roughly chopped (I used Green & Blacks organic 70%)
Preheat oven to 180 degrees C. Line an 8-inch square baking pan with paper and set aside.
In a food processor or Thermomix, beat together the chickpeas, eggs, syrup and coconut oil until smooth (30 seconds / SP 7). Add remaining ingredients (except for chocolate) and mix until just combined (10 seconds / SP 4). Scrape down the bowl as needed.
Pour batter into prepared tin. Sprinkle over chopped chocolate and bake for 25 minutes or until a toothpick comes out clean.
Cool in the tin before slicing into 16 pieces.
Leave the chocolate off and they make the perfect lunchbox treat too.
Enjoy!
Susan x
Monday, April 2, 2018
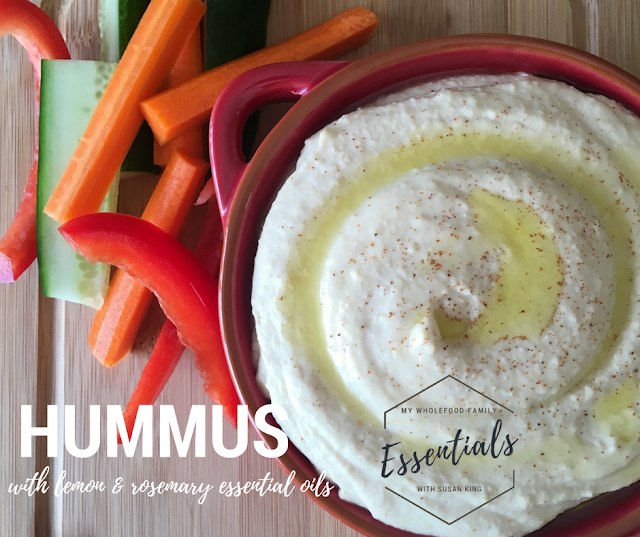
Lemon Rosemary Hummus
Happy Easter everyone!
Was there a chocolate explosion at your place? I didn't have too much chocolate but with a little too much sugar overall I was so thankful for the DigestZen tummy tamer blend.
In the lead up to the Easter weekend, I tried to cram in as many veggies as possible. I'm not going to stop the kids eating chocolate but we've still got to get the good stuff in too right?
In the lead up to the Easter weekend, I tried to cram in as many veggies as possible. I'm not going to stop the kids eating chocolate but we've still got to get the good stuff in too right?
Anything with a dip is a winner with my kids and this lemon and rosemary hummus is so good it entices them to eat some veggies too.
You can definitely make this without a Thermomix and it's up to you whether you fry off the garlic first or just throw everything into the food processor and blitz until smooth. Either way, it's delicious!
Lemon and Rosemary Hummus
2 garlic cloves
2 tbs extra virgin olive oil
1 tin organic chickpeas, drained and rinsed
2 tbs tahini
Juice 1/2 lemon
2 tbs water
1/2 ts salt
2 drops Lemon essential oil
1 drop Rosemary essential oil
Thermomix instructions: chop the garlic 5 scs / SP 5. Scrape down the sides, add the oil and cook for 5 mins / 100 deg / SP 1 / MC off.
Add all remaining ingredients and process until smooth, about 1 minute / SP 9, scraping down the sides as needed.
Pour into serving bowl, add a drizzle of extra virgin olive oil and a dash of paprika or sumac.
I often serve this hummus with crackers and veggie sticks at my essential oil workshops, along with the bliss balls as I know not everyone has a sweet tooth.
Enjoy! xx
Monday, March 26, 2018
Choc-Hazelnut Ice Cream Sandwiches
If you've been reading for a while (thank you) you will know that when I started this blog back in 2008 I jumped almost immediately into a blogging group called Tuesdays with Dorie. There were hundreds of members around the world and together we baked and blogged our way through Dorie Greenspan's Baking: From My Home to Yours. It was amazing! But looking back I'm also amazed just how much sugar we were consuming on a weekly basis through those recipes (eeek!).
Things have changed a lot, both from my own health challenges and of course now having 3 children we want to feed them healthy, nourishing food.
Now I only bake for special occasions and I always offer to bring dessert when we go out BUT I still choose recipes free from gluten, dairy and refined sugar.
We had my mother-in-law over for her birthday dinner and after much deliberation I chose to make these ice cream sandwiches for dessert.
Messy, sticky, sweet and SOOO good. I just may have snagged the last one for breakfast the next day :) #cooksprivilege
Choc-Hazelnut Ice Cream Sandwiches
GF, DF
Cookies:
150g hazelnut meal
3 tbs coconut oil
2 tbs xylitol
pinch salt
1 ts vanilla extract
1 large egg, beaten
To serve:
100g dairy free dark chocolate (I like Green & Blacks 70%)
3 drops Wild Orange essential oil
Ice cream (I used Weiss Simply Coconut which is dairy-free)
Preheat over to 180 degrees C and line 2 trays with baking paper.
In a medium bowl mix together all cookie ingredients until well combined.
Roll spoonfuls of mixture into balls and place on prepared tray, flattening each with your hand and smoothing the edges to they are all round and roughly the same size. I got 14 from this batch, so 7 ice cream sandwiches. Feel free to make them bigger or smaller but keep in mind the cookies are very filling!
Bake for 8-10 minutes or until very lightly golden brown around the edges. I swapped the trays halfway through.
Allow to cool completely.
Melt the dark chocolate, add the orange essential oil and mix well to combine, then dip each cookie in halfway. Place back on the baking tray and leave to set.
To serve, place a scoop of dairy-free ice cream in between 2 cookies and enjoy! Be ready to lick your fingers as they are pretty messy.
What's your favourite dessert? xx
Friday, March 16, 2018
Ginger Oat Slice
I've come home from doTERRA's Australia/NZ Convention in Sydney this past weekend with a full heart, a mind bursting with possibilities and ... a chopping board!
There was a lot of merchandise on offer but as a foodie, I couldn't pass this up, especially as it's the perfect prop for all my oil-infused treats.
This was a super easy slice I made for the kids' afternoon tea yesterday. Basic pantry ingredients with a gorgeous ginger flavour from the ginger essential oil. I love using my oils like this - no need to worry about that bottle of ginger powder in the pantry that's long expired, or the fresh piece of ginger going soft in the fridge. #cookingwithoils
If you'd like to learn more about using essential oils in your food make sure you download the free cheat at the bottom of this post!
Ginger Oat Slice
100g melted butter
100g dried dates
1 cup rolled oats
1 cup desiccated coconut
1ts vanilla extract
Pinch salt
3 drops Ginger essential oil
Place all ingredients in the Thermomix or food processor and blitz until well combined. TMX - melt butter with dates 5 mins / 100 deg / SP 1. Add remaining ingredients and mix 10 secs / SP 8.
Press into a lined 8inch square brownie pan and place in the fridge to set. Slice into squares.
My kids LOVED this but full disclosure, I haven’t tasted it because of the gluten! (insert sad face here).
I will have to whip up a dairy and gluten free version for myself because this smelled amazing and was devoured in about 5 minutes.
Happy cooking!
Susan xx
Friday, February 2, 2018
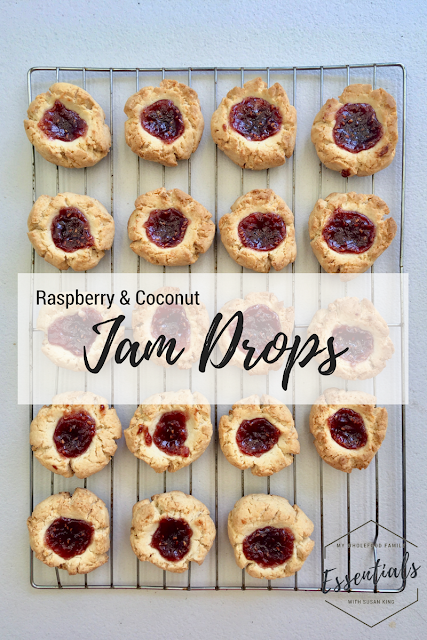
Jam Drops (free from Gluten, Dairy, Nuts and Refined Sugar)
Do you have a picky eater?
I feel your pain.
My picky eater has recently gone from picky to downright ridiculous and we are left with very few foods that he finds acceptable.
He's started rejecting a few favourite recipes that I have healthified so for these, I kept it really simple.
A 'white' dough with homemade raspberry jam (that I blitzed the chia seeds for by the way so they wouldn't get spotted and rejected). The things we do!
These freeze beautifully and being nut-free they are perfect for school lunches or a quick after-school treat.
I hope your kids enjoy them as much as mine!
Jam Drops
Free from gluten, dairy, nuts and refined sugar
2 cups gluten-free flour (I used Orgran brand)
1/2 cup desiccated coconut
1 ts gluten-free baking powder
pinch salt
1/3 cup rice malt syrup
1/3 cup + 1 tbs coconut oil
1 ts vanilla paste
1 egg
Jam to top (I adapted my strawberry chia jam recipe found here - note that I blitzed 1/2 cup chia seeds in the Thermomix first to make a powder and used some of that to make the jam)
Preheat oven to 180 degrees C. Line 2 baking trays with baking paper and set aside.
In a medium bowl, stir together the flour, coconut, baking powder and salt. Add all remaining ingredients (except jam) and mix until well combined. You should have a stiff dough that can be easily rolled into balls.
Roll spoonfuls of mixture into balls and place on the prepared tray (I got 20 from this batch). Use your thumb or the end of a wooden spoon to make an indent for the jam.
Place a small amount of jam on each biscuit, 1/2 ts or so.
Bake for 15 minutes or until golden brown. I rotated the trays halfway through.
All to cool on the tray for 5 minutes before placing on a wire rack to cool completely.
Makes approx 20
Jam drops are such a nostalgic treat for me. And these ones even more so because they remind of an Iced Vovo which I loved as a child! What's your favourite childhood bikkie? xx
Tuesday, January 23, 2018
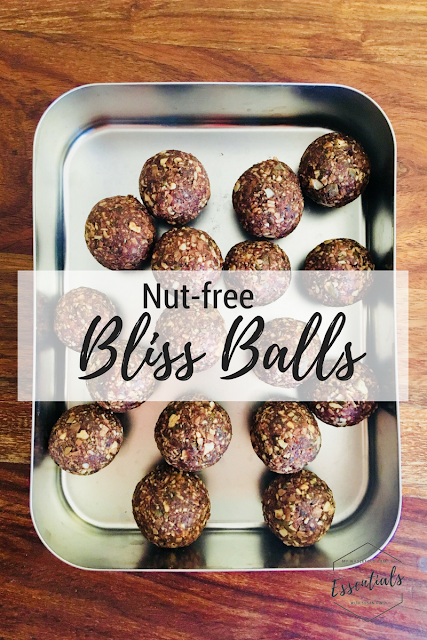
Nut-free Bliss Balls
So I was feeling really organised - I'd chosen a handful of favourite recipes to prep and freeze for school lunches and was all set to start. Then I remembered that my youngest is starting kindy and all the food we provide has to be nut-free. *face palm*
At least I remembered now and not on the first day!
So back to square one with the recipes.
I whipped up these nut-free bliss balls to go in the freezer and will add 1 to his lunchbox every day. I got 16 out of this batch so they should last us about 6 weeks as long as sneaky fingers don't sneak them out of the freezer!
If your child will notice and freak out about the visible green from the pepitas, by all means, roll the bliss balls in coconut to cover them up. Mine don't care luckily as I had run out of desiccated coconut!
With the dates, these are definitely not a low-sugar option but they tick lots of other boxes and will be a great high energy snack for my very active 4-year-old.
Enjoy!
Nut-free Bliss Balls
1 cup shredded coconut
1/2 cup sunflower seeds
1/2 cup pepitas
1 cup dried dates (soaked in boiling water for 5 mins and drained)
1 heaped tbs raw cacao
1 ts vanilla extract
pinch salt
5 drops Wild Orange essential oil (optional - I only use and recommend doTERRA)
2/3 cup desiccated coconut (optional - extra to roll the balls in)
Place the dates in a small heat-proof bowl, cover with boiling water and leave to soften for 5 minutes. Drain and place into your food processor or Thermomix bowl.
Add all remaining ingredients and process until the mixture is sticky and clumps together (TMX SP 5 / 30 secs).
Roll mixture into balls and if desired, into desiccated coconut.
Store in fridge or freezer.
Makes approx 16
What are your favourite nut-free school snacks? Please share some recipes below as I need a refresher!
Susan xx
Wednesday, January 3, 2018
Raspberry Jelly Ice Blocks
Summer has well and truly arrived here in Brisbane. It's steamy and sticky, the kind of weather where you're still sweating when you step out of a cold shower!
All that really means though is it's DEFINITELY ice block weather.
I've been making batch after batch of ice blocks and icy poles for the kids these holidays, nothing particularly fancy. Often just whatever fruit we haved whizzed up or even just fruit juice with coconut water.
We have a gorgeous set of stainless steel ice block moulds and a couple of sets of silicone icy pole moulds. These are much better options than plastic, even if they say BPA free.
These jelly ice blocks were an experiment, hoping they would fill the kids up a little with the addition of protein-rich gelatin plus, being jelly, they don't drip so much! A big plus when they start melting the instant they come out of the freezer.
I love the combo of raspberry and orange but you could use whatever fruit and juice you have. I added a couple of drops of Wild Orange essential oil to pump up the flavour, but that's totally optional (delicious though!).
The first batch I made I didn't bother straining the mixture but the kids definitely preferred it strained and seed-free.
If you make them let me know what you think!
-----------------------------------------------
Raspberry Jelly Ice Blocks
1 cup fresh orange juice
2 cups frozen raspberries, thawed
1-2 tbs sweetener of choice (I use rice malt syrup)
2 ts good quality gelatin (I use Changing Habits or Great Lakes)
2-3 drops Wild Orange essential oil
Place the juice, raspberries and sweetener into your food processor or Thermomix and blitz for about 10 seconds until well combined.
Pour into a saucepan and set over low heat. Once just warm (not hot), sprinkle over the gelatin and leave for 1 minute. Using a whisk, whisk the jelly mixture until smooth.
Strain into a pouring jug, then pour into your ice block moulds.
Place into the freezer to set.
Enjoy!
Susan xx
Subscribe to:
Posts (Atom)


